
- Flashing related commands
- Restart to Recovery mode
- Restart from Recovery to Android
- Restart to Fastboot mode
- Update the system via sideload
- More adb shell commands
- View process
- View real-time resource usage
- View process UID
- Other
- Управление файлами
- Скопируйте файлы с устройства на компьютер
- Копировать файлы с компьютера на устройство
- ADB Architecture
- Соответствующие команды для перепрошивки
- Перезапустите в режиме восстановления
- Перезапуск с восстановления на Android
- Перезапустите в режиме быстрой загрузки
- Обновите систему через боковую загрузку
- Basic usage
- Command syntax
- Specify the target device for the command
- start stop
- View adb version
- Run adbd as root
- Specify the network port of adb server
- Device connection management
- Query connected devices/emulators
- USB connection
- Wireless connection (USB cable required)
- Wireless connection (no need to use USB cable)
- View log
- Android log
- Kernel log
- Посмотреть журнал
- Журнал Android
- Фильтровать журналы по уровню
- Фильтровать журналы по тегу и уровню
- Формат журнала
- Очистить журнал
- Журнал ядра
- What is ADB
- Application Management
- View application list
- All applications
- system applications
- third-party usage
- Install APK
- Adb install internal principle introduction
- Uninstall the app
- Clear application data and cache
- View foreground activity
- View running Services
- View application details
- File Management
- Copy the files in the device to the computer
- Copy files from computer to device
- Аналоговая кнопка / вход
- Кнопка питания
- меню
- ДОМАШНИЙ ключ
- ключ возврата
- контроль громкости
- Медиа контроль
- Включить / выключить экран
- Слайд, чтобы разблокировать
- Введите текст
- Interact with the application
- Activating Activity
- Transfer Service
- Send broadcast
- Forcibly stop the application
- Disable apps and start
- Revoke the permissions of the application
- Изменить настройки
- разрешение
- Плотность экрана
- Область отображения
- Отключить режим отладки по USB
- Разрешить / запретить доступ к API не SDK
- Отобразить и скрыть строку состояния и панель навигации
- Simulation key/input
- Power button
- menu
- HOME key
- return key
- volume control
- Media Control
- Turn on/off the screen
- Slide to unlock
- Enter text
- Взаимодействовать с приложением
- Запустите приложение / вызовите Активность
- Трансфер Сервис
- Стоп Сервис
- Отправить трансляцию
- Принудительно остановить приложение
- Затянуть память
- Связанные команды
- Useful functions
- Screenshots
- Record screen
- Remount.
- View connected WiFi passwords
- Set the system date and time
- restart cellphone
- Check if the device is rooted
- Use Monkey for stress testing
- Turn on/off WiFi
- Turn on/off data traffic
- Security related
- Enable SELinux
- Disable SELinux
- Enable dm_verity
- Disable dm_verity
- Спасибо
- Вспомогательная функция
- Скриншоты
- Экран записи
- Перемонтировать системный раздел как доступный для записи
- Просмотр подключенных паролей WiFi
- Установить системную дату и время
- перезапустить мобильный телефон
- Проверьте, рутировано ли устройство
- Используйте Monkey для стресс-тестирования
- Включить / выключить WiFi
- Сборник команд АБР
Flashing related commands
Restart to Recovery mode
adb reboot recovery
Restart from Recovery to Android
adb reboot
Restart to Fastboot mode
adb reboot bootloader
Update the system via sideload
If we download the system update package corresponding to the Android device to the computer, we can also complete the update through adb.
Take the update in Recovery mode as an example:
Restart to Recovery mode.
adb reboot recovery
Operate on the Recovery interface of the device to enter Apply update-Apply from ADB.
*Note: Different Recovery menus may be different from this. Some first-level menus have Apply update from ADB. *
*Upload and update the system via adb. *
adb sideload <path-to-update.zip>
More adb shell commands
The Android system is based on the Linux kernel, so many commands in Linux have the same or similar implementations in Android and can be called in adb shell. The adb shell command has been used in the previous part of this document.
View process
adb shell ps
USER PID PPID VSIZE RSS WCHAN PC NAME
root 1 0 8904 788 ffffffff 00000000 S /init
root 2 0 0 0 ffffffff 00000000 S kthreadd
...
u0_a71 7779 5926 1538748 48896 ffffffff 00000000 S com.sohu.inputmethod.sogou:classic
u0_a58 7963 5926 1561916 59568 ffffffff 00000000 S org.mazhuang.boottimemeasure
...
shell 8750 217 10640 740 00000000 b6f28340 R ps
Meaning of each column:
View real-time resource usage
adb shell top
User 0%, System 6%, IOW 0%, IRQ 0%
User 3 + Nice 0 + Sys 21 + Idle 280 + IOW 0 + IRQ 0 + SIRQ 3 = 307 PID PR CPU% S #THR VSS RSS PCY UID Name 8763 0 3% R 1 10640K 1064K fg shell top 131 0 3% S 1 0K 0K fg root dhd_dpc 6144 0 0% S 115 1682004K 115916K fg system system_server 132 0 0% S 1 0K 0K fg root dhd_rxf 1731 0 0% S 6 20288K 788K fg root /system/bin/mpdecision 217 0 0% S 6 18008K 356K fg shell /sbin/adbd ... 7779 2 0% S 19 1538748K 48896K bg u0_a71 com.sohu.inputmethod.sogou:classic 7963 0 0% S 18 1561916K 59568K fg u0_a58 org.mazhuang.boottimemeasure ...
Meaning of each column:
Usage: top [-m max_procs] [-n iterations] [-d delay] [-s sort_column] [-t] [-h] -m num shows how many processes at most -n num exit after refreshing how many times -d num refresh interval (unit: second, default value 5) -s col Sort by a column (available col values: cpu, vss, rss, thr) -t display thread information -h show help document
View process UID
There are two options:
adb shell dumpsys package <packagename> | grep userId=
$ adb shell dumpsys package org.mazhuang.guanggoo | grep userId= userId=10394
$ adb shell
gemini:/ $ ps | grep org.mazhuang.guanggoo
u0_a394 28635 770 1795812 78736 SyS_epoll_ 0000000000 S org.mazhuang.guanggoo
gemini:/$ cat /proc/28635/status | grep Uid
Uid: 10394 10394 10394 10394
gemini:/$
Other
Управление файлами
Скопируйте файлы с устройства на компьютер
adb pull <путь к файлу в устройстве> [каталог на компьютере]среди них Справочник на компьютере Параметр может быть опущен, а значение по умолчанию копируется в текущий каталог.
adb pull /sdcard/sr.mp4 ~/tmp/* Советы: * Путь к файлу на устройстве может потребоваться разрешение root для доступа, если ваше устройство было рутировано, вы можете использовать его в первую очередьadb shell с участием su После того, как команда получает привилегии root в оболочке adb, сначалаcp /path/on/device /sdcard/filename Скопируйте файл на SDCard, затемadb pull /sdcard/filename /path/on/pc。
Копировать файлы с компьютера на устройство
adb push <путь к файлу на компьютере> <каталог на устройстве>adb push ~/sr.mp4 /sdcard/* Советы: * Путь к файлу на устройстве может быть не записан напрямую с обычными разрешениями. Если ваше устройство было рутировано, вы можете сначалаadb push /path/on/pc /sdcard/filenameА потомadb shell с участием su После получения root-прав в оболочке adb,cp /sdcard/filename /path/on/device。
ADB Architecture
In order to facilitate understanding, we start with three instructions, we often use adb start-server, adb devices, adb kill-server.
Then we often see this output interface:
C:\Users\dell>adb devices
List of devices attached
* daemon not running. starting it now at tcp:5037 *
* daemon started successfully *
So there are three questions here, why is the server, the server corresponds to the server or the server? If the mobile phone is the client, does the server refer to the service opened on the computer. And what is this daemon?
ADB is a C/S architecture application, composed of three parts:
- Adb client running on the PC side:
The command line program «adb» is used to run adb commands from a shell or script. First, the «adb» program tries to locate the ADB server on the host. If the ADB server cannot be found, the «adb» program automatically starts an ADB server. Next, when the adbd of the device and the adb server on the pc side establish a connection, the adb client can send a service request to the ADB servcer; - Adb server running on the PC side:
ADB Server is a background process running on the host. Its function is to detect the connection and removal of the USB port sensing device, and the start or stop of the emulator instance. ADB Server also needs to send the request of the adb client to the corresponding adbd via usb or tcp; - The resident process adb demon (adbd) running on the device side:
The program «adbd» runs as a background process in the Android device or emulator system. Its function is to connect to the ADB server and provide some services for the client running on the host;
Соответствующие команды для перепрошивки
Перезапустите в режиме восстановления
adb reboot recoveryПерезапуск с восстановления на Android
adb rebootПерезапустите в режиме быстрой загрузки
adb reboot bootloaderОбновите систему через боковую загрузку
Если мы загрузим на компьютер пакет обновления системы, соответствующий устройству Android, мы также сможем завершить обновление через adb.
Возьмем обновление в режиме восстановления в качестве примера:
Перезапустите в режиме восстановления.
adb reboot recoveryРаботайте и входите в интерфейс Recovery устройства
Apply update—Apply from ADB。Примечание. Различные меню восстановления могут отличаться от этого, некоторые из них являются меню первого уровня.
Apply update from ADB。Загрузите и обновите систему через adb.
adb sideload <path-to-update.zip>
Basic usage
What can adb do? The answer is that all operations that can be performed on mobile phones can be implemented with adb. That is to say, if you play 6, your touch screen is completely broken, and the display is completely broken, just give you a motherboard, and you can still complete the actions you want to do. Of course, this is not recommended in general scenarios, efficiency is the priority.
Command syntax
Specify the target device for the command
If there are multiple devices/emulators connected, you need to specify the target device for the command.
When multiple devices/emulators are connected, the -s parameter is commonly used. The serialNumber can be obtained through the adb devices command. Such as:
$ adb devices
List of devices attached
cf264b8f device
emulator-5554 device
10.129.164.6:5555 device
Cf264b8f, emulator-5554 and 10.129.164.6:5555 in the output are serialNumber.
For example, you want to specify the device cf264b8f to run the adb command to obtain the screen resolution:
adb -s cf264b8f shell wm size
Another example is to install an application on the device 10.129.164.6:5555 (the format of serialNumber in this form is :, which is generally a wirelessly connected device or a third-party Android emulator such as Genymotion):
adb -s 10.129.164.6:5555 install test.apk
start stop
Start the adb server command:
adb start-server
(Generally, there is no need to manually execute this command. If you find that the adb server is not started when running the adb command, it will be automatically activated.)
Stop the adb server command:
adb kill-server
View adb version
adb version
Android Debug Bridge version 1.0.36
Revision 8f855a3d9b35-android
Run adbd as root
The operating principle of adb is that the adb server on the PC side establishes a connection with the daemon adbd on the mobile phone side, and then the adb client on the PC side forwards the command through the adb server, and adbd parses and runs after receiving the command.
So if adbd is executed with normal permissions, some commands that require root permissions to execute cannot be directly executed with adb xxx. At this time, you can execute commands after adb shell and then su, or you can let adbd execute with root privileges, which can execute high-privileged commands at will.
adb root
restarting adbd as root
Now run adb shell again and see if the command line prompt becomes #?
Some mobile phones cannot be executed with root privileges through the adb root command after rooting. For example, some Samsung models will prompt adbd cannot run as root in production builds. You can install adbd Insecure first, and then adb root Try it.
Correspondingly, if you want to restore adbd to non-root privileges, you can use the adb unroot command.
Specify the network port of adb server
adb -P <port> start-server
The default port is 5037.
Device connection management
Query connected devices/emulators
adb devices
List of devices attached
cf264b8f device
emulator-5554 device
10.129.164.6:5555 device
offline —— Indicates that the device is not successfully connected or has no response.
device-The device is connected. Note that this state does not indicate that the Android system has been fully started and operable. The device instance can be connected to adb during the device startup process, but the system will be in an operable state after startup.
no device —— No device/emulator connection.
The above output shows that three devices/emulators are currently connected, and cf264b8f, emulator-5554 and 10.129.164.6:5555 are their SNs respectively. It can be seen from the name emulator-5554 that it is an Android emulator, and 10.129.164.6:5555, which is the serialNumber of the form :, is generally a wirelessly connected device or a third-party Android emulator such as Genymotion.
Common abnormal output:
No device/emulator is successfully connected.
List of devices attached
The device/emulator is not connected to adb or not responding.
List of devices attached
cf264b8f offline
USB connection
To use adb normally through USB connection, you need to ensure several points:
The hardware status is normal.
Including the Android device is in the normal boot state, the USB cable and various interfaces are intact.
Developer options and USB debugging mode for Android devices are turned on.
You can go to «Settings»-«Developer Options»-«Android Debugging» to view.
If you can’t find the developer option in the settings, you need to use an easter egg to show it: click the «version number» 7 times in «Settings»-«About Phone».
The device drive status is normal.
It seems that you don’t need to worry about this under Linux and Mac OS X. Under Windows, you may encounter a situation where you need to install a driver. To confirm this, you can right-click «Computer»-«Properties» and go to the «Device Manager» to view related devices Whether there is a yellow exclamation mark or question mark, if not, it means the drive status is good. Otherwise, you can download a mobile assistant program to install the driver first.
Confirm the status after connecting the computer and the device via the USB cable.
adb devices
If you can see
xxxxxx device
The connection is successful.
Wireless connection (USB cable required)
In addition to connecting the device and the computer via USB to use adb, you can also use a wireless connection-although there are steps to use USB during the connection process, your device can get rid of the limitation of the USB cable within a certain range after the connection is successful. !
Steps:
Connect the Android device and the computer to run adb to the same local area network, for example to the same WiFi.
Connect the device to the computer via a USB cable.
Make sure that the connection is successful (you can run adb devices to see if the device can be listed).
Let the device monitor TCP/IP connections on port 5555:
adb tcpip 5555
Disconnect the USB connection.
Find the IP address of the device.
Generally, it can be found in «Settings»-«About Phone»-«Status Information»-«IP Address», or you can use the adb command to view it using the method in the section View Device Information-IP Address below.
Connect the device by IP address.
adb connect <device-ip-address>
Here is the device IP address found in the previous step.
Confirm the connection status.
adb devices
If you can see
<device-ip-address>:5555 device
The connection is successful.
If you can’t connect, please confirm that the Android device and the computer are connected to the same WiFi, and then execute the step of adb connect <device-ip-address> again;
If it still does not work, restart adb via adb kill-server and try again from the beginning.
Disconnect wireless connection
command:
adb disconnect <device-ip-address>
Wireless connection (no need to use USB cable)
Note: root permission is required.
The previous section «Wireless connection (requires USB cable)» is the method introduced in the official document, which requires the help of USB data cable to achieve wireless connection.
Since we want to achieve wireless connection, can all steps be wireless? The answer is yes.
Install a terminal emulator on the Android device.
Devices that have already been installed can skip this step. The download address of the terminal emulator I use is: Terminal Emulator for Android Downloads
Connect the Android device and the computer to run adb to the same local area network, for example to the same WiFi.
Open the terminal emulator on the Android device and run the commands in sequence:
su
setprop service.adb.tcp.port 5555
Find the IP address of the Android device.
Generally, it can be found in «Settings»-«About Phone»-«Status Information»-«IP Address», or you can use the adb command to view it using the method in the section View Device Information-IP Address below.
Connect the Android device via adb and IP address on the computer.
adb connect <device-ip-address>
Here is the device IP address found in the previous step.
If you can see the output connected to :5555, it means the connection is successful.
Section Note 1:
Some devices, such as Xiaomi 5S + MIUI 8.0 + Android 6.0.1 MXB48T, may need to restart the adbd service before step 5, and run on the device’s terminal emulator:
restart adbd
stop adbd
start adbd
View log
The Android system log is divided into two parts, the underlying Linux kernel log is output to /proc/kmsg, and the Android log is output to /dev/log.
Android log
[adb] logcat [<option>] ... [<filter-spec>] ...
Filter logs by level
-V —— Verbose (lowest, most output)
-D —— Debug I —— Info
-W —— Warning
-E —— Error
-F—— Fatal
-S —— Silent (the highest, nothing is output)
Filtering logs by a certain level will output logs of that level and above.
For example, the command:
adb logcat *:W
Warning, Error, Fatal and Silent logs will be output.
(Note: Under macOS, you need to add double quotation marks to :W so that * as the tag parameter, such as adb logcat «:W», otherwise an error will be reported no matches found: *:W.)
Filter logs by tag and level
For example, the command:
adb logcat ActivityManager:I MyApp:D *:S
You can use the adb logcat -v <format> option to specify the log output format.
The default format. The format is:
D/HeadsetStateMachine( 1785): Disconnected process message: 10, size: 0
The format is:
D( 1785) Disconnected process message: 10, size: 0 (HeadsetStateMachine)
The format is:
D/HeadsetStateMachine: Disconnected process message: 10, size: 0
To
-raw
The format is:
Disconnected process message: 10, size: 0
The format is:
08-28 22:39:39.974 D/HeadsetStateMachine( 1785): Disconnected process message: 10, size: 0
The format is:
08-28 22:39:39.974 1785 1832 D HeadsetStateMachine: Disconnected process message: 10, size: 0
The format is:
The specified format can be used simultaneously with the above filtering. such as:
adb logcat -v long ActivityManager:I *:S
adb logcat -c
Kernel log
adb shell dmesg
<6>[14201.684016] PM: noirq resume of devices complete after 0.982 msecs
<6>[14201.685525] PM: early resume of devices complete after 0.838 msecs
<6>[14201.753642] PM: resume of devices complete after 68.106 msecs
<4>[14201.755954] Restarting tasks ... done.
<6>[14201.771229] PM: suspend exit 2016-08-28 13:31:32.679217193 UTC
<6>[14201.872373] PM: suspend entry 2016-08-28 13:31:32.780363596 UTC
<6>[14201.872498] PM: Syncing filesystems ... done.
Through the kernel log we can do some things, such as measuring the kernel startup time, find the time before the Freeing init memory line in the kernel log after the system is started.
Посмотреть журнал
Системный журнал Android делится на две части: основной журнал ядра Linux выводится в / proc / kmsg, а журнал Android выводится в / dev / log.
Журнал Android
[adb] logcat [<option>] ... [<filter-spec>] ...Обычные использования перечислены ниже:
Фильтровать журналы по уровню
Журналы Android делятся на следующий приоритет (приоритет):
- V —— подробный (самый низкий, самый большой выход)
- D —— Debug
- I —— Info
- W —— Warning
- E —— Error
- F —— Fatal
- S —— Тихая (самая высокая, ничего не выводится)
Фильтрация журналов по определенному уровню будет выводить журналы этого уровня и выше.
adb logcat *:WБудут выведены журналы «Предупреждение», «Ошибка», «Фатальный» и «Тихий».
(Примечание: Надо давать под macOS*:W В этом случае* В качестве параметра тега добавьте двойные кавычки, такие какadb logcat "*:W", Иначе будет сообщено об ошибкеno matches found: *:W。)
Фильтровать журналы по тегу и уровню
adb logcat ActivityManager:I MyApp:D *:SОбозначает выходной тегActivityManager Журнал выше уровня Info, выходной тегMyApp Журналы отладки или более высокого уровня, а также журналы тихого уровня других тегов (т. Е. Экранируют журналы других тегов).
Формат журнала
Можешь использовать adb logcat -v <format> Опция указывает формат вывода журнала.
Поддержка журнала заключается в следующем<format>:
Формат по умолчанию. Формат такой:
<priority>/<tag>(<pid>): <message>D/HeadsetStateMachine( 1785): Disconnected process message: 10, size: 0<priority>(<pid>) <message>D( 1785) Disconnected process message: 10, size: 0 (HeadsetStateMachine)<priority>/<tag>: <message>D/HeadsetStateMachine: Disconnected process message: 10, size: 0<message>Disconnected process message: 10, size: 0<datetime> <priority>/<tag>(<pid>): <message>08-28 22:39:39.974 D/HeadsetStateMachine( 1785): Disconnected process message: 10, size: 0<datetime> <pid> <tid> <priority> <tag>: <message>08-28 22:39:39.974 1785 1832 D HeadsetStateMachine: Disconnected process message: 10, size: 0[ <datetime> <pid>:<tid> <priority>/<tag> ] <message>[ 08-28 22:39:39.974 1785: 1832 D/HeadsetStateMachine ] Disconnected process message: 10, size: 0
Указанный формат может использоваться одновременно с вышеуказанной фильтрацией. Такие как:
adb logcat -v long ActivityManager:I *:SОчистить журнал
adb logcat -cЖурнал ядра
adb shell dmesg<6>[14201.684016] PM: noirq resume of devices complete after 0.982 msecs
<6>[14201.685525] PM: early resume of devices complete after 0.838 msecs
<6>[14201.753642] PM: resume of devices complete after 68.106 msecs
<4>[14201.755954] Restarting tasks ... done.
<6>[14201.771229] PM: suspend exit 2016-08-28 13:31:32.679217193 UTC
<6>[14201.872373] PM: suspend entry 2016-08-28 13:31:32.780363596 UTC
<6>[14201.872498] PM: Syncing filesystems ... done.Через журнал ядра мы можем сделать некоторые вещи, такие как измерение времени запуска ядра, и найти его в журнале ядра после запуска системы.Freeing init memory Время до этой строки.
What is ADB
The full name of Adb is Android Debug Bridge: Android Debug Bridge. The picture below shows the official introduction of Adb by Android:
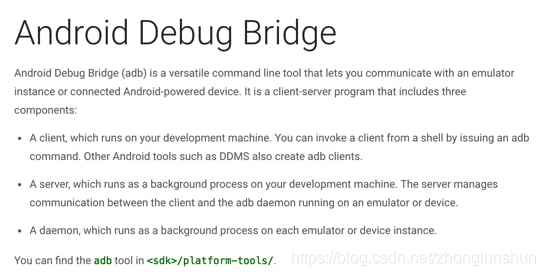
It can be seen that the original intention of Android is to use a tool such as adb to assist developers in debugging apk faster and better in the process of developing android applications, so adb has the ability to install and uninstall apk, copy and push files, view device hardware information, and view Functions such as applications occupying resources and executing shell commands on the device;
We can find the adb tool in the platform-tools directory of the android sdk installation directory;
The permission mechanism of the existing Android system is becoming more and more perfect. Many operations that hope to bypass the permission management mechanism are no longer available, but Adb can achieve it. In fact, Adb has a lot of authority to some extent, even on the latest version of the Android system. Because Adb is designed to facilitate debugging by developers, it is necessary to expose some interfaces outside of permissions. So many companies can use this feature to bypass the permission mechanism to do some operations on non-Root non-customized machines (the specific usage is mentioned below), of course, there are also various ways, such as connecting via mobile phone OTG, which will not be repeated here.
Application Management
View application list
The basic command format for viewing the application list is
adb shell pm list packages [-f] [-d] [-e] [-s] [-3] [-i] [-u] [--user USER_ID] [FILTER]
All applications
adb shell pm list packages
package:com.android.smoketest
package:com.example.android.livecubes
package:com.android.providers.telephony
package:com.google.android.googlequicksearchbox
package:com.android.providers.calendar
package:com.android.providers.media
package:com.android.protips
package:com.android.documentsui
package:com.android.gallery
package:com.android.externalstorage
...
// other packages here
...
system applications
adb shell pm list packages -s
third-party usage
adb shell pm list packages -3
Applications whose package name contains a certain string
For example, to view the list of applications whose package name contains the string mazhuang, command:
adb shell pm list packages mazhuang
Of course, you can also use grep to filter:
adb shell pm list packages | grep mazhuang
Install APK
adb install [-lrtsdg] <path_to_apk>
[100%] /data/local/tmp/1.apk
pkg: /data/local/tmp/1.apk
Success
The above is the output of the latest version of adb of v1.0.36, which will show the progress percentage of pushing the apk file to the phone.
Using the old version of adb, the output is like this:
12040 KB/s (22205609 bytes in 1.801s) pkg: /data/local/tmp/SogouInput_android_v8.3_sweb.apk
Success
And if the status is Failure, the installation failed, for example:
[100%] /data/local/tmp/map-20160831.apk pkg: /data/local/tmp/map-20160831.apk
Failure [INSTALL_FAILED_ALREADY_EXISTS]
when parsing APK file
Adb install internal principle introduction
adb install is actually completed in three steps:
- Push the apk file to /data/local/tmp.
- Call pm install to install.
- Delete the corresponding apk file under /data/local/tmp.
Uninstall the app
adb uninstall [-k] <packagename>
<packagename> represents the package name of the application, and the -k parameter is optional, meaning that the application is uninstalled but the data and cache directory are retained.
Command example:
adb uninstall com.qihoo360.mobilesafe
Means to uninstall 360 Mobile Guard.
Clear application data and cache
adb shell pm clear <packagename>
<packagename> represents the application name package. The effect of this command is equivalent to clicking «Clear Cache» and «Clear Data» on the application information interface in the settings.
adb shell pm clear com.qihoo360.mobilesafe
Means to clear the data and cache of 360 Mobile Guard.
View foreground activity
adb shell dumpsys activity activities | grep mFocusedActivity
mFocusedActivity: ActivityRecord{8079d7e u0 com.cyanogenmod.trebuchet/com.android.launcher3.Launcher t42}
Among them, com.cyanogenmod.trebuchet/com.android.launcher3.Launcher is the Activity currently in the foreground.
View running Services
adb shell dumpsys activity services [<packagename>]
The <packagename> parameter is not necessary. Specifying <packagename> means viewing the Services related to a certain package name, and not specifying it means viewing all Services.
<packagename> does not have to give a complete package name. For example, if you run adb shell dumpsys activity services org.mazhuang, then the package name org.mazhuang.demo1, org.mazhuang.demo2, org.mazhuang123 and other related Services will be listed come out.
View application details
adb shell dumpsys package <packagename>
<packagename> represents the application package name.
Activity Resolver Table: Non-Data Actions: android.intent.action.MAIN: 5b4cba8 org.mazhuang.guanggoo/.SplashActivity filter 5ec9dcc Action: "android.intent.action.MAIN" Category: "android.intent.category.LAUNCHER" AutoVerify=false
Registered ContentProviders: org.mazhuang.guanggoo/com.tencent.bugly.beta.utils.BuglyFileProvider: Provider{7a3c394 org.mazhuang.guanggoo/com.tencent.bugly.beta.utils.BuglyFileProvider}
ContentProvider Authorities: [org.mazhuang.guanggoo.fileProvider]: Provider{7a3c394 org.mazhuang.guanggoo/com.tencent.bugly.beta.utils.BuglyFileProvider} applicationInfo=ApplicationInfo{7754242 org.mazhuang.guanggoo}
Key Set Manager: [org.mazhuang.guanggoo] Signing KeySets: 501
Packages: Package [org.mazhuang.guanggoo] (c1d7f): userId=10394 pkg=Package{55f714c org.mazhuang.guanggoo} codePath=/data/app/org.mazhuang.guanggoo-2 resourcePath=/data/app/org.mazhuang.guanggoo-2 legacyNativeLibraryDir=/data/app/org.mazhuang.guanggoo-2/lib primaryCpuAbi=null secondaryCpuAbi=null versionCode=74 minSdk=15 targetSdk=25 versionName=1.1.74 splits=[base] apkSigningVersion=2 applicationInfo=ApplicationInfo{7754242 org.mazhuang.guanggoo} flags=[ HAS_CODE ALLOW_CLEAR_USER_DATA ALLOW_BACKUP] privateFlags=[ RESIZEABLE_ACTIVITIES] dataDir=/data/user/0/org.mazhuang.guanggoo supportsScreens=[small, medium, large, xlarge, resizeable, anyDensity] timeStamp=2017-10-22 23:50:53 firstInstallTime=2017-10-22 23:50:25 lastUpdateTime=2017-10-22 23:50:55 installerPackageName=com.miui.packageinstaller signatures=PackageSignatures{af09595 [53c7caa2]} installPermissionsFixed=true installStatus=1 pkgFlags=[ HAS_CODE ALLOW_CLEAR_USER_DATA ALLOW_BACKUP] requested permissions: android.permission.READ_PHONE_STATE android.permission.INTERNET android.permission.ACCESS_NETWORK_STATE android.permission.ACCESS_WIFI_STATE android.permission.READ_LOGS android.permission.WRITE_EXTERNAL_STORAGE android.permission.READ_EXTERNAL_STORAGE install permissions: android.permission.INTERNET: granted=true android.permission.ACCESS_NETWORK_STATE: granted=true android.permission.ACCESS_WIFI_STATE: granted=true User 0: ceDataInode=1155675 installed=true hidden=false suspended=false stopped=true notLaunched=false enabled=0 gids=[3003] runtime permissions: android.permission.READ_EXTERNAL_STORAGE: granted=true android.permission.READ_PHONE_STATE: granted=true android.permission.WRITE_EXTERNAL_STORAGE: granted=true User 999: ceDataInode=0 installed=false hidden=false suspended=false stopped=true notLaunched=true enabled=0 gids=[3003] runtime permissions:
Dexopt state: [org.mazhuang.guanggoo] Instruction Set: arm64 path: /data/app/org.mazhuang.guanggoo-2/base.apk status: /data/app/org.mazhuang.guanggoo-2/oat/arm64/base.odex [compilation_filter=speed-profile, status=kOatUpToDa te]
File Management
Copy the files in the device to the computer
adb pull <file path in device> [directory on computer]
Among them, the directory parameter on the computer can be omitted, and the default is copied to the current directory.
adb pull /sdcard/sr.mp4 ~/tmp/
*Tips: *The file path on the device may require root privileges to access. If your device has been rooted, you can use the adb shell and su commands to obtain root privileges in the adb shell, then cp /path/on/device /sdcard/filename Copy the file to sdcard, then adb pull /sdcard/filename /path/on/pc.
Copy files from computer to device
adb push <file path on computer> <directory in device>
adb push ~/sr.mp4 /sdcard/
*Tips: *The file path on the device may not be directly written by ordinary permissions. If your device has been rooted, you can first adb push /path/on/pc /sdcard/filename, and then adb shell and su in adb shell After obtaining root permissions, cp /sdcard/filename /path/on/device.
Аналоговая кнопка / вход
Вadb shell Существует очень полезная команда под названиемinput, С помощью которого вы можете делать некоторые интересные вещи.
input Полная справочная информация о команде выглядит следующим образом:
Usage: input [<source>] <command> [<arg>...]
The sources are: mouse keyboard joystick touchnavigation touchpad trackball stylus dpad gesture touchscreen gamepad
The commands and default sources are: text <string> (Default: touchscreen) keyevent [--longpress] <key code number or name> ... (Default: keyboard) tap <x> <y> (Default: touchscreen) swipe <x1> <y1> <x2> <y2> [duration(ms)] (Default: touchscreen) press (Default: trackball) roll <dx> <dy> (Default: trackball)
Такие как использованиеadb shell input keyevent <keycode> Команды, разные коды клавиш могут выполнять разные функции, см. Полный список кодов клавишKeyEventВот выдержки, которые я нахожу интересными:
Нижеinput Некоторые примеры использования команд.
Кнопка питания
adb shell input keyevent 26Эффект эквивалентен нажатию кнопки питания.
меню
adb shell input keyevent 82ДОМАШНИЙ ключ
adb shell input keyevent 3ключ возврата
adb shell input keyevent 4контроль громкости
adb shell input keyevent 24adb shell input keyevent 25adb shell input keyevent 164Медиа контроль
воспроизведение / пауза:
adb shell input keyevent 85adb shell input keyevent 86Воспроизвести следующую песню:
adb shell input keyevent 87Воспроизвести предыдущую песню:
adb shell input keyevent 88adb shell input keyevent 126adb shell input keyevent 127Включить / выключить экран
Вы можете включать и выключать экран с помощью аналоговой кнопки питания, описанной выше, но если вы явно хотите включить или выключить экран, вы можете использовать следующий метод.
adb shell input keyevent 224adb shell input keyevent 223Слайд, чтобы разблокировать
Если экран блокировки не имеет пароля и разблокирован жестами, то вы можете использоватьinput swipe Отпирать.
Команда (параметры основаны на модели Nexus 5, например, проведите пальцем вверх, чтобы разблокировать):
adb shell input swipe 300 1000 300 500параметр300 1000 300 500 СоответственноНачальная точка x координата Начальная точка y координата Конечная точка x координата Конечная точка y координата。
Введите текст
Когда фокус находится на текстовом поле, вы можете передатьinput Команда для ввода текста.
adb shell input text helloпрямо сейчас hello Появилось в текстовом поле.
Interact with the application
<INTENT> The parameters are very flexible, and correspond to the Intent in the code when writing Android programs.
<INTENT> can also carry data, just like Bundle when writing code:
Activating Activity
adb shell am start [options] <INTENT>
adb shell am start -n com.tencent.mm/.ui.LauncherUI
Indicates that the main interface of WeChat is activated.
adb shell am start -n org.mazhuang.boottimemeasure/.MainActivity --es "toast" "hello, world"
It means to call up org.mazhuang.boottimemeasure/.MainActivity and pass it the string data key-value pair toast-hello, world.
Transfer Service
adb shell am startservice [options] <INTENT>
adb shell am startservice -n com.tencent.mm/.plugin.accountsync.model.AccountAuthenticatorService
Indicates that a certain service of WeChat has been activated.
Send broadcast
adb shell am broadcast [options] <INTENT>
It can be broadcast to all components or only to specified components.
For example, to broadcast BOOT_COMPLETED to all components:
adb shell am broadcast -a android.intent.action.BOOT_COMPLETED
For another example, only broadcast BOOT_COMPLETED to org.mazhuang.boottimemeasure/.BootCompletedReceiver:
adb shell am broadcast -a android.intent.action.BOOT_COMPLETED -n org.mazhuang.boottimemeasure/.BootCompletedReceiver
(The above broadcasts can all be triggered by adb)
Forcibly stop the application
adb shell am force-stop <packagename>
adb shell am force-stop com.qihoo360.mobilesafe
Means to stop all the processes and services of 360 Security Guard.
Disable apps and start
Revoke the permissions of the application
- Grant permissions to the app. Only optional permissions declared by the application can be granted
For example: adb -d shell pm grant packageName android.permission.BATTERY_STATS
- Cancel app authorization
Disclaimer: The above order is an unconventional order. I am not responsible for any damage to your equipment, forcible stop, etc. You are performing this operation on your device, and you are responsible for it.
Изменить настройки
Примечание: После изменения настроек, запуск команды восстановления может показать, что это все еще не нормально, вы можете запуститьadb reboot Перезагрузите устройство или перезагрузите его вручную.
Принцип изменения настроек в основном заключается в изменении значений настроек, хранящихся в /data/data/com.android.providers.settings/databases/settings.db, с помощью команды настроек.
разрешение
adb shell wm size 480x1024Средства для изменения разрешения до 480px * 1024px.
Восстановить исходное разрешение команды:
adb shell wm size resetПлотность экрана
adb shell wm density 160Средства для изменения плотности экрана до 160 точек на дюйм.
Восстановите исходную команду плотности экрана:
adb shell wm density resetОбласть отображения
adb shell wm overscan 0,0,0,200Четыре числа соответственно представляют поля полей с левого, верхнего, правого и нижнего краев. Приведенная выше команда означает, что нижняя часть экрана остается пустой на 200 пикселей.
Восстановите исходную команду области отображения:
adb shell wm overscan resetОтключить режим отладки по USB
adb shell settings put global adb_enabled 0Он не может быть восстановлен командой, в конце концов, если отладка по USB отключена, adb не может подключиться к устройству Android.
Перейдите на устройство, чтобы вручную восстановить его: «Настройки» — «Параметры разработчика» — «Отладка Android».
Разрешить / запретить доступ к API не SDK
Разрешить доступ к не-SDK API:
adb shell settings put global hidden_api_policy_pre_p_apps 1
adb shell settings put global hidden_api_policy_p_apps 1
Запретить доступ к не-SDK API:
adb shell settings delete global hidden_api_policy_pre_p_apps
adb shell settings delete global hidden_api_policy_p_apps
Для устройства нет необходимости получать права root.
Значение числа в конце команды:
Отобразить и скрыть строку состояния и панель навигации
Соответствующие настройки, упомянутые в этом разделе, соответствуют «Расширенному рабочему столу» в Cyanogenmod.
adb shell settings put global policy_control <key-values><key-values> Он может состоять из следующих ключей и их соответствующих значений, формат<key1>=<value1>:<key2>=<value2>。
Значения, соответствующие этим ключам, можно объединить запятыми следующим образом:
adb shell settings put global policy_control immersive.full=*Указывает, что строка состояния и панель навигации скрыты одновременно во всех интерфейсах.
adb shell settings put global policy_control immersive.status=com.package1,com.package2:immersive.navigation=apps,-com.package3Указывает, что имя пакета установленоcom.package1 с участием com.package2 Скрыть строку состояния в приложении, кроме названия пакетаcom.package3 Скрыть панель навигации во всех приложениях.
Simulation key/input
Usage: input [<source>] <command> [<arg>...]
The sources are: mouse keyboard joystick touchnavigation touchpad trackball stylus dpad gesture touchscreen gamepad
The commands and default sources are: text <string> (Default: touchscreen) keyevent [--longpress] <key code number or name> ... (Default: keyboard) tap <x> <y> (Default: touchscreen) swipe <x1> <y1> <x2> <y2> [duration(ms)] (Default: touchscreen) press (Default: trackball) roll <dx> <dy> (Default: trackball)
For example, to simulate a click: //Click the position of the coordinate point x=50 y=250 on the screen.
adb shell input tap 50 250
Power button
db shell input keyevent 26
The effect is equivalent to pressing the power button.
menu
adb shell input keyevent 82
HOME key
adb shell input keyevent 3
return key
adb shell input keyevent 4
volume control
adb shell input keyevent 24
lower the volume:
adb shell input keyevent 25
adb shell input keyevent 164
Media Control
play / Pause:
adb shell input keyevent 85
adb shell input keyevent 86
Play the next song:
adb shell input keyevent 87
Play the previous song:
adb shell input keyevent 88
adb shell input keyevent 126
adb shell input keyevent 127
Turn on/off the screen
Light up the screen:
adb shell input keyevent 224
Turn off the screen:
adb shell input keyevent 223
Slide to unlock
If the lock screen does not have a password and is unlocked by swiping gestures, you can unlock it by input swipe.
Command (parameters are based on model Nexus 5, for example, swipe up gesture to unlock):
adb shell input swipe 300 1000 300 500
The parameters 300 1000 300 500 respectively represent the start point x coordinate, the start point y coordinate, the end point x coordinate, and the end point y coordinate.
Enter text
When the focus is on a text box, you can use the input command to enter text.
adb shell input text hello
Now hello appears in the text box.
Взаимодействовать с приложением
В основном использоватьam <command> Команда, обычно используемая<command> следующим образом:
<INTENT> Параметры очень гибкие и соответствуют намерениям в коде при написании программы для Android.
Параметры, используемые для определения объекта намерения, следующие:
<INTENT> Он также может переносить данные, как Bundle при написании кода:
Запустите приложение / вызовите Активность
adb shell am start [options] <INTENT>adb shell am start -n com.tencent.mm/.ui.LauncherUIУказывает, что основной интерфейс WeChat активирован.
adb shell am start -n org.mazhuang.boottimemeasure/.MainActivity --es "toast" "hello, world"Перевод средствorg.mazhuang.boottimemeasure/.MainActivity И передать ему строку ключ-значение данных парыtoast - hello, world。
Трансфер Сервис
adb shell am startservice [options] <INTENT>adb shell am startservice -n com.tencent.mm/.plugin.accountsync.model.AccountAuthenticatorServiceУказывает, что определенная служба WeChat была активирована.
Другой типичный случай использования: если виртуальная кнопка должна отображаться на устройстве, но не отображаться, вы можете попробовать это:
adb shell am startservice -n com.android.systemui/.SystemUIServiceСтоп Сервис
adb shell am stopservice [options] <INTENT>Отправить трансляцию
adb shell am broadcast [options] <INTENT>Он может быть передан всем компонентам или только указанным компонентам.
Например, транслировать на все компонентыBOOT_COMPLETED:
adb shell am broadcast -a android.intent.action.BOOT_COMPLETEDЕще один пример, только дляorg.mazhuang.boottimemeasure/.BootCompletedReceiver BroadcastBOOT_COMPLETED:
adb shell am broadcast -a android.intent.action.BOOT_COMPLETED -n org.mazhuang.boottimemeasure/.BootCompletedReceiverЭтот тип использования очень практичен при тестировании. Например, сложно создать вещательную сцену. Вы можете подумать об отправке трансляций таким образом.
Он может отправлять предварительно определенные трансляции и пользовательские трансляции. Следующее является частью системы предопределенной широковещательной и обычной синхронизации запуска:
(Все вышеперечисленные трансляции могут быть запущены с помощью ADB)
Принудительно остановить приложение
adb shell am force-stop <packagename>adb shell am force-stop com.qihoo360.mobilesafeСредства для остановки всех процессов и сервисов 360 Security Guard.
Затянуть память
adb shell am send-trim-memory <pid> <level>pid: идентификатор процесса
level:
HIDDEN、RUNNING_MODERATE、BACKGROUND、
RUNNING_LOW、MODERATE、RUNNING_CRITICAL、COMPLETE
adb shell am send-trim-memory 12345 RUNNING_LOWЭто означает, что нужно выполнить команду сжатия памяти с уровнем = RUNNING_LOW для процесса с pid = 12345.
Связанные команды
- aapt
- dumsys
- uiautomator
Useful functions
Screenshots
Save screenshot to computer:
adb exec-out screencap -p> sc.png
First save the screenshot to the device:
adb shell screencap -p /sdcard/sc.png
Then export the png file to the computer:
adb pull /sdcard/sc.png
Actually, if the specified file name ends with .png, you can omit the -p parameter; otherwise, you need to use the -p parameter. If you do not specify the file name, the content of the screenshot file will be directly output to stdout.
Another way to take a screenshot of a one-line command and save it to the computer:
Linux and Windows
adb shell screencap -p | sed "s/\r$//"> sc.png
Mac OS X
adb shell screencap -p | gsed "s/\r$//"> sc.png
This method needs to use the gnu sed command, which is available directly under Linux, and under the bin folder of the Git installation directory under Windows. If you really cannot find the command, you can download sed for Windows and add the folder where sed.exe is located to the PATH environment variable.
However, using the sed command that comes with the system under Mac will report an error:
sed: RE error: illegal byte sequence
Need to install gnu-sed, and then use the gsed command:
brew install gnu-sed
Record screen
The recorded screen is saved to /sdcard in mp4 format:
adb shell screenrecord /sdcard/filename.mp4
Press Ctrl-C when you need to stop, the default recording time and maximum recording time are both 180 seconds.
If you need to export to a computer:
adb pull /sdcard/filename.mp4
Remount the system partition as writable
*Note: root permission is required. *
The /system partition is mounted as read-only by default, but some operations such as adding commands to the Android system, deleting its own applications, etc. require writing to /system, so you need to remount it as read-write.
adb shell
su
View the current partition mounting status.
mount
rootfs / rootfs ro, relatime 0 0
tmpfs /dev tmpfs rw,seclabel,nosuid,relatime,mode=755 0 0
devpts /dev/pts devpts rw,seclabel,relatime,mode=600 0 0
proc /proc proc rw,relatime 0 0
sysfs /sys sysfs rw,seclabel,relatime 0 0
selinuxfs /sys/fs/selinux selinuxfs rw,relatime 0 0
debugfs /sys/kernel/debug debugfs rw,relatime 0 0
none /var tmpfs rw,seclabel,relatime,mode=770,gid=1000 0 0
none /acct cgroup rw,relatime,cpuacct 0 0
none /sys/fs/cgroup tmpfs rw,seclabel,relatime,mode=750,gid=1000 0 0
none /sys/fs/cgroup/memory cgroup rw,relatime,memory 0 0
tmpfs /mnt/asec tmpfs rw,seclabel,relatime,mode=755,gid=1000 0 0
tmpfs /mnt/obb tmpfs rw,seclabel,relatime,mode=755,gid=1000 0 0
none /dev/memcg cgroup rw,relatime,memory 0 0
none /dev/cpuctl cgroup rw,relatime,cpu 0 0
none /sys/fs/cgroup tmpfs rw,seclabel,relatime,mode=750,gid=1000 0 0
none /sys/fs/cgroup/memory cgroup rw,relatime,memory 0 0
none /sys/fs/cgroup/freezer cgroup rw,relatime,freezer 0 0
/dev/block/platform/msm_sdcc.1/by-name/system /system ext4 ro,seclabel,relatime,data=ordered 0 0
/dev/block/platform/msm_sdcc.1/by-name/userdata /data ext4 rw,seclabel,nosuid,nodev,relatime,noauto_da_alloc,data=ordered 0 0
/dev/block/platform/msm_sdcc.1/by-name/cache /cache ext4 rw,seclabel,nosuid,nodev,relatime,data=ordered 0 0
/dev/block/platform/msm_sdcc.1/by-name/persist /persist ext4 rw,seclabel,nosuid,nodev,relatime,data=ordered 0 0
/dev/block/platform/msm_sdcc.1/by-name/modem /firmware vfat ro,context=u:object_r:firmware_file:s0,relatime,uid=1000,gid=1000,fmask=0337,dmask=0227,codepage =cp437,iocharset=iso8859-1,shortname=lower,errors=remount-ro 0 0
/dev/fuse /mnt/shell/emulated fuse rw,nosuid,nodev,relatime,user_id=1023,group_id=1023,default_permissions,allow_other 0 0
/dev/fuse /mnt/shell/emulated/0 fuse rw,nosuid,nodev,relatime,user_id=1023,group_id=1023,default_permissions,allow_other 0 0
Find the line with /system that we are concerned about:
/dev/block/platform/msm_sdcc.1/by-name/system /system ext4 ro,seclabel,relatime,data=ordered 0 0
Remount.
mount -o remount,rw -t yaffs2 /dev/block/platform/msm_sdcc.1/by-name/system /system
If the output does not prompt an error, the operation is successful, and you can do whatever you want with the files under /system.
View connected WiFi passwords
*Note: root permission is required. *
adb shell
su
cat /data/misc/wifi/*.conf
network={
ssid="TP-LINK_9DFC"
scan_ssid=1
psk="123456789"
key_mgmt=WPA-PSK
group=CCMP TKIP
auth_alg=OPEN
sim_num=1
priority=13893
}
network={
ssid="TP-LINK_F11E"
psk="987654321"
key_mgmt=WPA-PSK
sim_num=1
priority=17293
}
ssid is the name we see in the WLAN settings, psk is the password, and key_mgmt is the security encryption method.
Set the system date and time
*Note: root permission is required. *
adb shell
su
date -s 20160823.131500
Means to change the system date and time to 13:15:00 on August 23, 2016.
restart cellphone
adb reboot
Check if the device is rooted
adb shell
su
At this time, the command line prompt is $, which means that there is no root authority, and # means that it is rooted.
Use Monkey for stress testing
adb shell monkey -p <packagename> -v 500
It means to send 500 pseudo-random events to the application specified by <packagename>.
For detailed usage of Monkey, refer to the official documentation.
Turn on/off WiFi
Note: root permission is required.
Turn on WiFi:
adb root
adb shell svc wifi enable
Turn off WiFi:
adb root
adb shell svc wifi disable
Set wifi priority, use wifi first when there is network and wifi
If the execution is successful, the output will be empty; if the command is executed without root permission, the execution will fail and the output will be Killed.
Turn on/off data traffic
This command can close the data connection, that is, the Internet traffic. Everyone knows that there are many switches to control the Internet, but most of them are realized by adding a suffix to the access point on the apn, but this command will not change any settings of the apn. The bottom layer closes the data connection. It should be the most thorough, and does not affect the apn settings. What is the difference between this and apndroid? When apndroid closes the Internet data, the downloading connection may not be forcibly closed (this is also mentioned in apndroid’s own instructions). For example, if you are downloading a 10M movie, if you download 1M, the download will not sound. Use apndroid to close the connection, maybe the download will continue, not immediately. But with this command, it clicked away without mercy.
This is to open the Internet data connection, which is the opposite of the previous command.
This command is to control the data connection prior to wifi. We all know that under normal circumstances, when there is wifi, the data network connection will not be used. But this command is the opposite. If there is a data network, use data network traffic first, and use wifi when there is no data network.
Security related
Enable SELinux
Disable SELinux
Enable dm_verity
Disable dm_verity
Спасибо
Спасибо друзьям за ваш самоотверженный обмен и дополнения (в произвольном порядке).
Вспомогательная функция
Скриншоты
Сохраните скриншот на компьютер:
adb exec-out screencap -p > sc.pngЕсли версия ADB старше, она не может быть использованаexec-out Команда, рекомендуется обновить версию ADB в это время. Если вы не можете обновить, вы можете использовать следующие проблемные методы:
Сначала сохраните скриншот на устройство:
adb shell screencap -p /sdcard/sc.pngЗатем экспортируйте файл png на компьютер:
adb pull /sdcard/sc.pngможешь использовать adb shell screencap -h Посмотретьscreencap В справочной информации команды ниже приведены два значимых параметра и их значения:
Если указанное имя файла.png Вы можете опустить параметр -p в конце, иначе вам нужно использовать параметр -p. Если вы не укажете имя файла, содержимое файла снимка экрана будет напрямую выводиться на стандартный вывод.
Еще один способ сделать снимок экрана однострочной команды и сохранить ее на компьютере:
Linux и Windows
adb shell screencap -p | sed "s/\r$//" > sc.pngMac OS X
adb shell screencap -p | gsed "s/\r$//" > sc.pngОднако использование команды sed, которая поставляется с системой под Mac, выдаст сообщение об ошибке:
sed: RE error: illegal byte sequenceНужно установить gnu-sed, а затем использовать команду gsed:
brew install gnu-sedЭкран записи
Записанный экран сохраняется в / sdcard в формате mp4:
adb shell screenrecord /sdcard/filename.mp4Нажмите, когда вам нужно остановитьсяCtrl-C, Время записи по умолчанию и максимальное время записи составляют 180 секунд.
Если вам нужно экспортировать на компьютер:
adb pull /sdcard/filename.mp4можешь использовать adb shell screenrecord --help Посмотретьscreenrecord Справочная информация о команде, ниже приведены общие параметры и их значения:
Перемонтировать системный раздел как доступный для записи
Примечание: разрешение root требуется.
По умолчанию раздел / system монтируется как доступный только для чтения, но некоторые операции, такие как добавление команд в систему Android, удаление собственных приложений и т. Д., Требуют записи в / system, поэтому вам необходимо перемонтировать его как чтение-запись.
Войдите в оболочку и переключитесь на полномочия пользователя root.
adb shell
su
Просмотр текущего статуса подключения раздела.
mountrootfs / rootfs ro,relatime 0 0 tmpfs /dev tmpfs rw,seclabel,nosuid,relatime,mode=755 0 0 devpts /dev/pts devpts rw,seclabel,relatime,mode=600 0 0 proc /proc proc rw,relatime 0 0 sysfs /sys sysfs rw,seclabel,relatime 0 0 selinuxfs /sys/fs/selinux selinuxfs rw,relatime 0 0 debugfs /sys/kernel/debug debugfs rw,relatime 0 0 none /var tmpfs rw,seclabel,relatime,mode=770,gid=1000 0 0 none /acct cgroup rw,relatime,cpuacct 0 0 none /sys/fs/cgroup tmpfs rw,seclabel,relatime,mode=750,gid=1000 0 0 none /sys/fs/cgroup/memory cgroup rw,relatime,memory 0 0 tmpfs /mnt/asec tmpfs rw,seclabel,relatime,mode=755,gid=1000 0 0 tmpfs /mnt/obb tmpfs rw,seclabel,relatime,mode=755,gid=1000 0 0 none /dev/memcg cgroup rw,relatime,memory 0 0 none /dev/cpuctl cgroup rw,relatime,cpu 0 0 none /sys/fs/cgroup tmpfs rw,seclabel,relatime,mode=750,gid=1000 0 0 none /sys/fs/cgroup/memory cgroup rw,relatime,memory 0 0 none /sys/fs/cgroup/freezer cgroup rw,relatime,freezer 0 0 /dev/block/platform/msm_sdcc.1/by-name/system /system ext4 ro,seclabel,relatime,data=ordered 0 0 /dev/block/platform/msm_sdcc.1/by-name/userdata /data ext4 rw,seclabel,nosuid,nodev,relatime,noauto_da_alloc,data=ordered 0 0 /dev/block/platform/msm_sdcc.1/by-name/cache /cache ext4 rw,seclabel,nosuid,nodev,relatime,data=ordered 0 0 /dev/block/platform/msm_sdcc.1/by-name/persist /persist ext4 rw,seclabel,nosuid,nodev,relatime,data=ordered 0 0 /dev/block/platform/msm_sdcc.1/by-name/modem /firmware vfat ro,context=u:object_r:firmware_file:s0,relatime,uid=1000,gid=1000,fmask=0337,dmask=0227,codepage=cp437,iocharset=iso8859-1,shortname=lower,errors=remount-ro 0 0 /dev/fuse /mnt/shell/emulated fuse rw,nosuid,nodev,relatime,user_id=1023,group_id=1023,default_permissions,allow_other 0 0 /dev/fuse /mnt/shell/emulated/0 fuse rw,nosuid,nodev,relatime,user_id=1023,group_id=1023,default_permissions,allow_other 0 0Найдите строку с / system, которая нас интересует:
/dev/block/platform/msm_sdcc.1/by-name/system /system ext4 ro,seclabel,relatime,data=ordered 0 0mount -o remount,rw -t yaffs2 /dev/block/platform/msm_sdcc.1/by-name/system /system
Если вывод не выдает ошибку, операция прошла успешно, и вы можете делать все что угодно с файлами в / system.
Просмотр подключенных паролей WiFi
Примечание: разрешение root требуется.
adb shell
su
cat /data/misc/wifi/*.conf
network={ ssid="TP-LINK_9DFC" scan_ssid=1 psk="123456789" key_mgmt=WPA-PSK group=CCMP TKIP auth_alg=OPEN sim_num=1 priority=13893
}
network={ ssid="TP-LINK_F11E" psk="987654321" key_mgmt=WPA-PSK sim_num=1 priority=17293
}ssid Это имя мы видим в настройках Wi-Fi,psk Это пароль,key_mgmt Это безопасный метод шифрования.
Установить системную дату и время
Примечание: разрешение root требуется.
adb shell
su
date -s 20160823.131500
Указывает на изменение системной даты и времени на 13:15:00 23 августа 2016 г.
перезапустить мобильный телефон
adb rebootПроверьте, рутировано ли устройство
adb shell
su
Приглашение командной строки$ Означает, что нет корневого авторитета, да# Это означает, что это укоренено.
Используйте Monkey для стресс-тестирования
Обезьяна может генерировать псевдослучайные пользовательские события для имитации щелчков, касаний, жестов и других операций, а также может выполнять случайные стресс-тесты на разрабатываемых программах.
adb shell monkey -p <packagename> -v 500Указывает на<packagename> Указанное приложение отправляет 500 псевдослучайных событий.
Подробное описание использования MonkeyОфициальный документ。
Включить / выключить WiFi
Примечание: разрешение root требуется.
Иногда необходимо контролировать состояние WiFi устройства, что можно сделать с помощью следующих команд.
adb root
adb shell svc wifi enable
adb root
adb shell svc wifi disableЕсли выполнение выполнено успешно, выходные данные пусты, если команда выполняется без привилегий root, выполнение завершится неудачно, и выводKilled。
Сборник команд АБР
Перепечатано вЭто GitHub репозиторий 。
Примечание: Поддержка некоторых команд может быть связана с версией системы Android и реализацией пользовательского ПЗУ.
")


")