
I’ve tried many tools to preform root operation like iRoot but none of them does the job. Kingo Root however does the job but as I mentioned the phone reverts back to unrooted state after being rooted.
Please keep in mind there are many factors as to why a device is or is not unlockable. Carrier exclusive models are almost never unlockable
So my question is that:
Can I somehow unlock my phone’s bootloader or root it?
My actual concern is about rooting it so if it can be done somehow without unlocking the bootloader, I’ll be more than happy. I included bootloader unlocking as a part of my question just because I cannot see any way without doing so.
Unlocked bootloader: Even though it is possible in some cases to obtain root access without an unlocked bootloader, unlocking the bootloader is required to permanently root a device. This is because your carrier can simply unroot your device with an OTA update. Typically devices sold by most carriers under a contract will have a locked bootloader, preventing you from installing other roms (another version of android such as CyanogenMod) or tampering with your device in any way. Obtaining bootloader access on these devices is generally obtained by using an exploit, so if you plan to root your device do not allow any more OTA updates from your carrier until you check the xda forums for what options you have for your device.
For generalized, yet more detailed information, start by checking out this excellent answer.
If you decide to root your device, start by reading — How do I root my Android device?
Also have a look at — I’ve rooted my phone. Now what?
However, make sure you always check the xda-developers forums for updated information on what rooting procedures currently work for your device before attempting any rooting procedure, as these things change all the time.
You can’t access unique and exciting custom ROMs unless you know how to unlock bootloader on any Android phone. Here’s an easy tutorial to open those settings.
Whether you want to utilize the exciting privileges of rooting or merely want to add extra customization features, you need to be aware of the proper method to unlock bootloader on any Android phone. Because without this, you can’t move forward.
Even though you heard that techie stuff for the first time, worry not, you can unleash your phone’s true abilities. With that said, let’s grasp a bit of info on the bootloader.
- What is Bootloader?
- Advantage of Unlock bootloader
- Disadvantage of Unlock bootloader
- How to Unlock Bootloader on any Android Phone
- Method #1 – Unlock Bootloader All Phones
- Step 1: Unlocking developer mode
- Step 2: Attach your phone and PC
- Step 3: Insert ADB/ Fastboot commands
- Step 4: Finally, unlock the bootloader
- Method #2 – Unlock Bootloader Samsung phones
- Step 1: Open developer settings
- Step 2: Simply unlock the bootloader
- Method #3 – Unlock Bootloader Xiaomi phones
- Step 1: Unlock Developer settings
- Step 2: Log in to Mi account
- Step 3: Join the devices
- Frequently Asked Questions (FAQs)
- Last thoughts:
- Why do the White House and the Library of Congress get to decide how consumers use their gadgets in the first place?
- What is jailbreaking?
- How do I jailbreak an iPhone?
- Can you jailbreak an Android phone?
- Can you jailbreak other kinds of phones?
- What is rooting?
- Is rooting phones legal?
- What is unlocking a phone?
- How can I unlock a phone?
- Is it legal to unlock my phone?
- Root Access Is Dangerous
- See more
- What is rooting?
- Why would you root?
- Why wouldn’t you root?
- How to prepare your Android device for rooting
- Preparing for rooting
- Installing the Android SDK Platform Tools
- Installing device drivers
- Unlock your bootloader
- How to root your Android device with multiple programs
- Rooting with Root Master
- Rooting with Framaroot
- Rooting your Android device with Firmware.mobi
- Rooting your Android device with BaiduRoot
- Rooting with One Click Root
- How to use Kingo Android Root
- Resources you will need after you root and how to unroot
- Download Root Checker
- Install a root management app
- How to unroot your Android device
- Unroot with Universal Unroot
- Unroot by flashing stock firmware
- Unroot with file explorer
- Unroot with OTA update
- Editors’ Recommendations
- Comparing PC OS With Smartphone OS
- What’s Jailbreaking?
- Rooting In Android
- What Is Bootloader Unlocking?
- What’s Is Unlocking A Phone?
- The Overall Difference Between Jailbreaking, Rooting And Unlocking
- Summary
What is Bootloader?
The bootloader of the bootstrap command software is operating system software that is responsible to kick start the overall system processes in the RAM section. The boot program starts working with several processes when you press the power button.
Consequently, the system process checks the entire system behind the booting logo, and everything completely in only a few seconds. Besides, it’s stored primary system data that helps us to factory reset the phone or simply boot it into the safe.
Now that you have understood the basics about the bootloader and it’s working, let’s move forward to why you need to unlock the bootloader in the first place!
The reason can differ from person to person, but in most cases, if you want to root any Android phone or flash the latest Android version over your phone, the first thing you need to perform is to unlock bootloader on any Android phone.
But it doesn’t mean that unlocking those attributes would come without impacts. So, it’s necessary to understand the pros and cons before leading to unlock bootloader on any Android phone.
Advantage of Unlock bootloader
First and foremost, you can easily root your device if you have unlocked the bootloader settings. Besides this, you can also add different custom ROMs and other software.
To flash those characteristics, you will need a custom TWRP recovery that can only be installed once you have opened the bootloader features of your phone not long ago.
Moreover, you can apply impressive features such as overclocking and underclocking to get more performance for advanced-level gaming sessions and better battery life.
You can take advanced complete backup that can attain after root your smartphone without a PC and changing the overall settings and Android interface layout traits.
Disadvantage of Unlock bootloader
The locked bootloader offers better security protection and armed firewall settings, but once you have unlocked those doors, you have to compromise with security.
Your device won’t be eligible for the future Android update. In case the device is stuck in the bootloop, you will get a hard time repairing it from the authentic service center.
How to Unlock Bootloader on any Android Phone
Disclaimer: Droidmeguide is not accountable for specific damage that happens to the reader’s device. Make sure to take a Backup Android Phone to avoid any further risks.
Method #1 – Unlock Bootloader All Phones
Step 1: Unlocking developer mode
- First and foremost, you have open the Settings App.
- Inside the Settings menu, click on the About Phone section.
- Next, you have to tap on the Build Number several times.
- A pop-up message will appear saying, you are now a developer.
- following this, you can enter the Developer mode menu.
- Enable both the OEM unlocking and USB debugging options.
Step 2: Attach your phone and PC
- Ensure you have downloaded and installed USB drivers/ ADB tools.
- Press “cmd” in the search bar of Windows to open a command prompt.
- Interlink your phone using the original data cable to the computer.
- Make sure have got USB debugging alert and click on OK.
Step 3: Insert ADB/ Fastboot commands
- Inside the command prompt, enter “adb devices” to check phone connectivity.
- If you see a combination of numbers and alphabets, you are ready for next step.
- Now, you have to boot into the bootloader. Enter “adb reboot bootloader”
- Following this, you can enter the fastboot command. Use “fastboot devices”
- Unlock the OEM feature by applying “fastboot OEM unlock” command.
- Lastly, you can utilize “fastboot flashing unlock” to finish the process.
Step 4: Finally, unlock the bootloader
- Inside the phone’s screen, you have options to unlock the bootloader or not.
- Navigate via the Volume keys to apply to require step and press Power button.
- You have to pick the option that says Yes, unlock the bootloader.
- After this, the phone will take some time to complete the reset.
- Now, you have successfully unlocked the bootloader on your phone.
Method #2 – Unlock Bootloader Samsung phones
Step 1: Open developer settings
- Like usual, go to Settings → About Phone → Tap on build number.
- Click on the build number a few times to open developer mode.
- Now, navigate to Additional Settings and then Developer Settings.
- Following this, enable USB debugging and OEM unlocking toggle.
- Lastly, you have to Turn off your device by pressing the Power key.
Step 2: Simply unlock the bootloader
- Press and hold the Volume Up + Down key, until the fastboot logo appears.
- Next, you have to connect your Samsung device to your PC through a USB cable.
- A warning message will appear on the screen, then long press Volume Up key.
- On the next screen, you have to press Volume Up key to unlock the bootloader.
With this method, you can successfully unlock bootloader on any Samsung phone.
Method #3 – Unlock Bootloader Xiaomi phones
Step 1: Unlock Developer settings
- Go to the Settings App and enter the About Phone section.
- Tap on MIUI version a few times, till you’re developer didn’t appear.
- Navigate to the Additional settings and press on Developer Mode.
- Allow OEM unlocking, USB debugging, and Install Via USB toggles.
Step 2: Log in to Mi account
- First of all, turn off the Wifi, the enable Mobile data and location options.
- Now, log in to your Mi account and allow the Find my device toggle.
- Again, navigate to developer mode to enter in Mi unlock status.
- Tap on the Agree button and click on Add account and device.
- Once, you have successfully added the account, turn off your device
- Press Volume Down + Power button to enter into fastboot mode.
Step 3: Join the devices
- Download and extract the Mi Unlock Tool inside your computer.
- Following this, connect your Xiaomi phone to a PC using a USB cable.
- Open the Mi unlock tool, there you will see your device is connected.
- If not, try to reconnect once again and click on the Unlock button.
- With this, you will unlock the Xiaomi phone’s bootloader precisely.
Frequently Asked Questions (FAQs)
Q- How unlock bootloader without PC?
Ans. First of all, you will need two phones to unlock the bootloader without a PC. With this, you also need to download & install a third-party ADB command tool apk.
Q- Is bootloader unlock good?
Q- Unlock bootloader will erase data?
Ans. Yes, if you are unlocking the bootloader your data can wipe out from the internal storage. Therefore, we recommend you take a backup before starting the process.
Q- How to avoid bootloop problem on Android?
Ans. To avoid the bootloop issues, you can start with soft resetting the phone. Or you can factory reset/hard reset will do the work too. Lastly, by using TWRP recovery.
Q- Can I root my phone without unlocking the bootloader?
Ans. No, you can root your phone without unlocking the bootloader because you won’t be able to boot the device. So make sure to unlock it first before rooting.
Last thoughts:
I hope that you grasp the information about how to unlock bootloader on any Android phone, while I have also covered different methods for Samsung and Xiaomi phones.
If you encounter any problem during the unlock process or facing a bootloop issue on your phone, let us know in the comment section to solve your trouble ASAP!

Thanks to We the People, a government website that makes petitioning the White House easy and straightforward, concerned American citizens have gotten responses to everything from gun violence to the feasibility of building a Death Star. One petition in March 2013 implored President Barack Obama to legalize the unlocking of smartphones — a move that would allow consumers to transfer phone service from one wireless provider to another.
In practical terms, does this mean that you’ll be able to break free of Apple’s carefully curated App Store? Not necessarily. That’s «jailbreaking,» which is different from unlocking. And then there’s «rooting,» which applies only to Android phones.
MORE: 10 Pros and Cons of Jailbreaking Your iPhone or iPad
Don’t ask about tablets; that gets even more perplexing.
If you’re confused, you’re not alone. This primer provides a breakdown of what you can and can’t do with your phone, at least until the White House says otherwise.
Why do the White House and the Library of Congress get to decide how consumers use their gadgets in the first place?
What is jailbreaking?
Jailbreaking is the most narrowly defined procedure of the three, but arguably the most useful — if you have an Apple device, anyway.
While Apple sometimes limits «mature» or controversial content, content for jailbroken phones faces no such restrictions.
How do I jailbreak an iPhone?
Can you jailbreak an Android phone?
Can you jailbreak other kinds of phones?
What is rooting?
Is rooting phones legal?
Like jailbreaking iPhones, rooting Android phones is also exempted from the DMCA. However, both jailbreaking and rooting may void a phone’s warranty. If you want to «unroot» an Android phone or undo a jailbreak on an iPhone before returning the device, it’s only a little more difficult than rooting or jailbreaking the phone in the first place.
What is unlocking a phone?
How can I unlock a phone?
Is it legal to unlock my phone?
If the president gets his way, however, the Library of Congress may be forced to change its tune. «The White House agrees with the 114,000+ of you who believe that consumers should be able to unlock their cell phones without risking criminal or other penalties,» wrote R. David Edelman, a White House senior adviser for Internet, innovation and policy, in a reply to the petition. For now, the Library of Congress seems willing to work with the president.
In other words, hang on to your preferred phone, but don’t unlock it just yet.

MORE: Reduce or Avoid International Roaming Charges
Root access of your Android device gives you the ability to flash ROMs. One of the most popular ROMs was created by a team called the CyanogenMod, and their current rom is CM7, which is built on Android 2.3 Gingerbread. What this means is that if you have a phone that has an unlocked bootloader and root access, you can flash the CM7 ROM to your phone with a couple more steps. This also means that you can get access to most of the features in the latest version of Android that is commercially available, without having to wait for your manufacturer or carrier to give you an official update.
Root Access Is Dangerous
While it’s nice to run the latest version of anything and get upgrades and more, root access is actually dangerous. Going back to the Windows example, Windows is pretty fail-safe; if you screw it up too badly you can restore your computer and reformat your hard drive in addition to re-installing Windows.
With an Android phone, in most cases, it’s not that easy. If you screw something up, you can end up in a bootloop where your phone doesn’t do anything but cycle through a startup screen. Worse, you can end up with a bricked phone, one that won’t turn on no matter what. In both of these cases, though, it’s very important to note that “rooting” your phone voids the warranty.
All in all, rooting, modding, and access to unlocked bootloaders is stuff for someone with technical expertise almost on a par with a hacker. Sure, if you have a second phone and want to fool around a bit, it could be fun and does offer extra features, but with the wide variety of Android devices out there, there is probably a stock feature set that you enjoy.
Those who are into modifying and “hacking” their phones like it when a manufacturer makes it easy to get into the bootloader to get that root access. It was widely rumored that HTC was going to lock the bootloaders on future phones. This wouldn’t mean no more access to root; it would just be much harder to hack the handsets.
Prior to the original release of Android in 2008 and the announcement about Android in 2007, a consortium of carriers, manufacturers, and other ecosystem partners—including Google—formed the Open Handset Alliance to promote this open-source sharing model. Several Android enthusiasts and developers feel that, with locked bootloaders, the manufacturers are actually going against both open source and the Open Handset Alliance.
HTC recently succumbed to the pressure of the Android developer community, which for developers is a good thing. Having unlocked bootloaders makes it easier for them to develop and create, and no one wants to stifle creativity. On the other hand, neither Chou nor anyone else at HTC mentioned the degree to which their bootloaders would be unlocked and when this unlocking would occur.
Now, as it was revealed at Google I/O and repeated again and again—most recently at D9—Android is activating 400,000 devices per day. Does this bootloader thing really matter to you?
— Written by The Droid Guy
Android rooting is the ideal way to get more control over your smartphone, opening up a world of unknown possibilities, but it’s important to approach it with caution. Rooting isn’t without its risks — and if something goes wrong, it can void your warranty, leave you with a broken smartphone or tablet, or worse.
Before proceeding, it is important to understand that rooting is not always a straightforward process, and you may encounter hiccups along the way. If you decide that you absolutely need to root your Android device, continue below, but know that it isn’t for the faint of heart or technology-inexperienced.
This guide on how to root Android phones will walk you through the steps to root your device. While we can root some phones in minutes, others are going to take a little more research. But one thing is clear: rooting your phone is one of the best ways to tap into your Android device’s true potential.
See more
What is rooting?
Rooting an Android phone or tablet is akin to jailbreaking an iPhone — basically, it allows you to dive deeper into a phone’s sub-system. After rooting, you can access the entire operating system to customize just about anything on your Android device, and you can get around any restrictions that your manufacturer or carrier may have applied.
Rooting is best undertaken with caution. You must back up your phone’s software before installing — or “flash,” in rooting terms — a custom ROM (a modified version of Android).
Why would you root?
One of the biggest incentives to root your Android phone is so you can strip away bloatware that’s impossible to uninstall otherwise (although you can sometimes disable it — check out our guide on disabling bloatware). On some devices, rooting will enable previously disabled settings, like wireless tethering. Additional benefits include the ability to install specialized tools and flash custom ROMs, each of which can add extra features and improve your phone or tablet’s performance.
Why wouldn’t you root?
There are essentially four potential cons to rooting your Android.
- Voiding your warranty: Some manufacturers or carriers will void your warranty if you root your device, so it is worth keeping in mind that you can always unroot. If you need to send the device back for repair, simply flash the software backup you made, and it’ll be good as new.
- Bricking your phone: If something goes wrong during the rooting process, you risk bricking — i.e., corrupting — your device. The easiest way to prevent that from happening is to follow the instructions carefully. Ensure the guide you are following is up to date and that the custom ROM you flash is specifically for your phone. If you do your research, you won’t have to worry about bricking your smartphone.
- Security risks: Rooting introduces some security risks. Depending on what services or apps you use on your device, it could create a security vulnerability. And certain malware takes advantage of rooted status to steal data, install additional malware, or target other devices with harmful web traffic.
- Disabled apps: Some security-conscious apps and services do not work on rooted devices — financial platforms like Google Pay and Barclays Mobile Banking do not support them. Apps that serve copyrighted TV shows and movies, like Sky Go and Virgin TV Anywhere, will not start on rooted devices, either — and neither will Netflix.
How to prepare your Android device for rooting
One of the easiest ways to root an Android device is by using an app, and several rooting apps have garnered attention over the years — Framaroot, Firmware.mobi, Kingo Root, BaiduRoot, One Click Root, SuperSU, and Root Master are among the most reliable. These services will usually root your device in the time you take to brush your teeth. But some of them only support devices running older versions of Android, so you may need to do some shopping around to find one that works for your device. If you’re looking to root an even older device, you may need to check Firmware.mobi.
It used to be that rooting Android versions from Android 7.0 Nougat upwards was more difficult. The verified boot service will check the device’s cryptographic integrity to detect if your device’s system files are compromised, inhibiting legitimate rooting apps. Thankfully, rooting apps have caught up with the curve, and rooting newer Android versions is much easier than it used to be.
If your phone isn’t compatible with a one-click rooting app, you must spend a little time researching alternatives on Android forums. The best place to start is XDA Developers Forum — look for a thread about your phone or tablet, and you’re likely to find a method.
Preparing for rooting
Back up everything you cannot live without before you start. You should also always back up your phone’s current ROM before you flash a new one. You will also want to ensure that your device has a full charge before you begin.
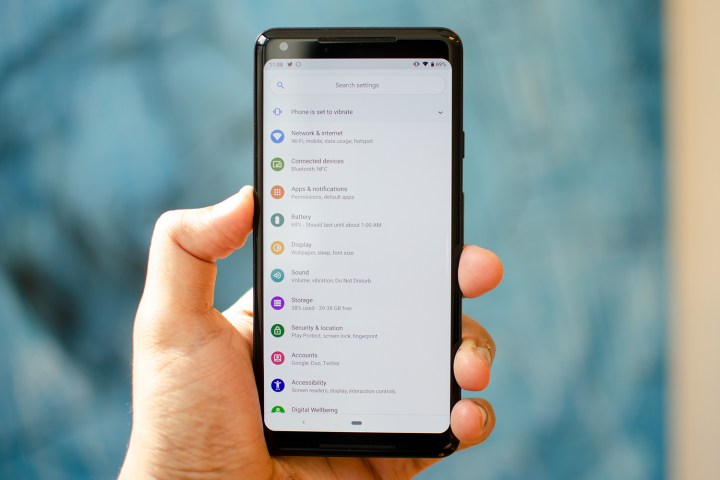
- Tap on About Phone and find the Build Number. The exact path depends on your phone, but it’ll usually be found with other software information.
- Tap on the Build Number seven times, and the Developer Options will appear on the Settings main page. You may need to confirm your security passcode to enable this.
- Tap on the Back key to see your new developer options.
- Tap Developer Options.
- Check to enable USB Debugging.
- Check to enable OEM Unlocking.
Installing the Android SDK Platform Tools
Rooting used to involve downloading Google’s entire Android development kit. Thankfully, that’s not the case anymore, and all you need is the Android SDK Platform Tools.
Download and install the Android SDK Platform Tools from Google’s developer site. There are choices for Windows, Mac, and Linux. These instructions are for Windows machines. Extract the zipped files. When asked what directory to install the software to, we recommend setting it to C:android-sdk. If you choose a different location, make sure you remember it.
Installing device drivers
To ensure your computer can properly communicate with your smartphone or tablet, you will need to install the appropriate USB driver.
Devices from some manufacturers come with the drivers included in the phone’s software, so all you need to do to install the appropriate USB driver is attach your phone to your PC by USB cable. OnePlus is an example of this, but it’s worth connecting your phone first to see whether USB drivers will automatically install.
Otherwise, here is a list of drivers from the most popular manufacturers:
- Alcatel
- Coolpad
- Google/Nexus/Pixel
- Lenovo/Motorola
- Sony
- Xiaomi
Unlock your bootloader
Before you get started, you need to unlock your device’s bootloader. The bootloader, simply put, is the program that loads the device’s operating system. It determines which applications run during your phone or tablet’s startup process.
Some manufacturers require you to get a key to unlock the bootloader. Motorola, HTC, LG, and Sony provide step-by-step instructions on how to do so, but a word of warning: They require you to register for a developer account.
Once you have taken those steps, you can embark on the unlocking process. You will need to put your device in fastboot mode. It’s different for every phone, but on most devices, rebooting the device and holding down the Power and Volume Down buttons for 10 seconds does the trick (HTC phones require that you hit the Volume Down key and press the Power button to select it).
Once you have booted into fastboot, head to the folder you previously unzipped your Android SDK files to. Then, open your computer’s command prompt by holding down Shift + Right Click and choosing Open a Command Prompt Here. If your device requires a code, you will get a long string of characters. Paste it into the box on your device manufacturer’s website, submit the form, and await an email with a key, a file, and further instructions.
Unlock your device’s bootloader by connecting it to your computer and placing it in fastboot mode again. Pull up the command prompt by typing cmd into your Start menu.
For Google Nexus and Pixel devices, the commands are easy:
- Nexus phones: Type “fastboot oem unlock” (without quotes) and hit Enter.
- Pixel phones: Type “fastboot flashing unlock” (without quotes) and hit Enter.
It’s the same for Samsung devices:
- Samsung phones: Type “fastboot flashing unlock” (without quotes) and hit Enter.
Motorola’s command is a little different:
- Type “oem unlock UNIQUE_KEY” (without quotes), replacing “UNIQUE KEY” with the code you received
So is HTC’s:
- Type “unlocktoken Unlock_code.bin” (without quotes), replacing “Unlock_code.bin” with the file you received.
Confirm the unlock, and you’re one step closer to rooting your Android device.
Some manufacturers and carriers don’t sanction bootloader unlocking, but that doesn’t mean it can’t be done. Try searching the XDA Developers forum for workarounds and unofficial solutions.
How to root your Android device with multiple programs
There are a lot of different ways to root your phone or tablet. Here are a few of our favorites.
Rooting with Root Master

- Download and install the APK. You may need to tap the Unknown Sources button in your Android Security settings to complete the installation.
- Launch the app, then tap Start.
- The app will let you know if your device is compatible. If it isn’t, you must try one of the other apps on our list.
- If you can root your device, proceed to the next step, and the app will begin rooting. This may take some time, and it’s a good idea to try not to use your phone for anything else while it’s running.
- Once you see the Success screen, restart your device, and you’re done!
- Once it’s finished, you can download and run Magisk to manage your root access.
Rooting with Framaroot

Framaroot is a newer one-click rooting service, and it aims to make the process of rooting easy for everyone with a simple one-click “root” button. However, you might have to jump through a couple of hoops to get it started.
- Download the APK.
- Install it — you may need to tap the Unknown Sources button in your Android Security settings to complete the installation.
- Open the app, and tap Root.
- If it can root your device, you can root your device.
- You then must download and run Magisk to manage your root access.
Then that’s it — you’re ready!
Rooting your Android device with Firmware.mobi

Firmware.mobi, an unlocking utility by developer Chainfire, isn’t the easiest way to root your Android smartphone, but it is one of the most stable. It works on over 300 devices and provides step-by-step instructions that make the rooting process as seamless as it could be.
You will need to download the ZIP file intended for your device.
- Extract the folder.
- Navigate to it and find the root-windows.bat file. Double-click it.
- Wait for the script to execute, and press any key.
- When the process is complete, your phone will automatically reboot, and it will root you.
Rooting your Android device with BaiduRoot
BaiduRoot, a software utility by Beijing-based Baidu Inc., supports over 6,000 Android devices. Still, since those only include devices running Android 2.2 up to Android 4.4, it’s going to have limited use for most. However, if you’ve got an ancient phone lying around, this is a great tool for rooting and repurposing that. It’s coded in Chinese, but a crafty translator has released an English version.
BaiduRoot is one of the more straightforward rooting applications. Once you’ve downloaded it on your computer, it’s a step-by-step affair.
First, you must unzip the file. Find Baidu_Root.RAR and extract its contents (if you’re using Windows, you might need a third-party application like 7-Zip).
Next, attach the device you want to root to your computer via USB and transfer the files. Once that’s done, unplug your phone.
- On your smartphone or tablet, head to Settings > Security (or Lock Screen and Security).
- Toggle Unknown Sources, and press OK on the pop-up.
- Find the folder containing the BaiduRoot app and tap the APK file. Follow the instructions to complete the installation.
Now, switch to BaiduRoot:
- Open BaiduRoot and accept the license agreement.
- Tap the Root button in the center of the screen.
- After a few seconds, you’ll get a message showing that the device successfully rooted.
Here’s a video showing the installation process.
Rooting with One Click Root

The One Click Root procedure is simple:
- Check that your device is supported by the Root Availability Tool.
- Download the Windows/Mac One Click Root program.
- Connect your device via USB cable.
- Enable USB debugging on your device.
- Run One Click Root and let the software handle the tricky bit.
How to use Kingo Android Root

Kingo Root can install on a Windows-based computer or directly to the device you want to root. First, check to see if your device is compatible with Kingo by checking the official list. Then, grab the Kingo Android Root for Windows program, and install it. Alternatively, download the Kingo Android Root APK to your device, check the Unknown Sources box (see above), and install it.
If you’ve opted to use the Windows client, ensure to enable USB Debugging mode on your phone.
From there, usage is pretty simple:
- Launch Kingo Root on your computer and connect your device via USB.
- Kingo Root should detect your device automatically and prompt you to root it. Click Root, and then hang tight — Kingo will only take a few minutes to grant root privileges.
- Install the Kingo Root APK.
- Open the Kingo Root app.
- If your device is compatible, you will see a One Click Root button. Tap it and be patient — it can take a while.
- If the root is successful, you will see a large checkmark.
Resources you will need after you root and how to unroot
Arguably no other mobile operating system parallels the diversity of Android OS. For this reason, there is no universal way to root your device. If the above options fail, do not fret. There is likely a guide on how to root your specific device available somewhere online — a few reliable resources include XDA Developers’ forum and the Android Forums.
Download Root Checker
Install a root management app
Rooting will make your phone more vulnerable to security threats. Installing a root management app will give you more peace of mind. Normally, every app that requires rooted privileges will ask for your approval. This is where root management apps, such as Magisk Manager, come in. Magisk Manager is open-source software that allows you to manage your phone’s root permissions, granting or denying individual apps’ permission.
How to unroot your Android device
For all the benefits you can gain from rooting, you can go back to the way things were. Whichever method you attempt, always make sure you back up your data before changing your phone.
Unroot with Universal Unroot
You can easily unroot your phone with Universal Unroot. It removes root privileges in most Android devices, but it’s not perfect. Most Samsung devices are not compatible, and LG devices will be unrooted but still show as rooted after the app has worked its magic. It used to be a dollar, but it’s now free since the developers are no longer updating it. But if you’ve got an older device that’s supported, it’s a good way to be sure.
Unroot by flashing stock firmware
One of the most thorough ways to remove root access is by flashing your device with factory firmware. This method will completely wipe your phone or tablet clean of any root traces, but a word of warning: It’s not for the faint of heart.
First, download the factory image for your device to your computer. Once again, XDA is a great resource.
Next, unzip the file. You will see another zipped file — unzip that one, too. The unzipped folder should contain a bootloader image, radio, various scripts, and one more zipped file. Again, unzip that.
The next step involves installing ADB and Fastboot on your computer.
Download and install the Android SDK Platform Tools from Google’s developer site. There are choices for Windows, Mac, and Linux. These instructions are for Windows machines. Extract the zipped files. When asked what directory to install the software to, we recommend setting it to C:android-sdk. If you choose a different location, make sure you remember it.
- Tap on About Phone and find the Build Number.
- Tap on the Build Number seven times, and the Developer Options will appear on the Settings main page.
- Tap on the Back key to see the Developer Options.
- Tap on Developer Options.
- Check to enable OEM Unlocking.
Switch back to your computer. Copy boot.img in the folder you unzipped and place it in your ADB folder, C:android-sdk.
Connect your phone to your computer via USB. Open your computer’s command prompt by holding down Shift + Right Click and choosing Open a Command Prompt Here. Then, enter these commands:
- adb reboot bootloader
- fastboot flash boot boot.img
- fastboot reboot
Unroot with file explorer
- Find your device’s main drive under /.
- Go to System > Bin, then tap and hold on busybox and su and delete them.
- Now go to System > Xbin, then tap and hold on busybox and su and delete them.
- Finally, go to System > App and delete supeuser.apk.
- Restart the device, and you should be unrooted.
Unroot with OTA update
Sometimes just installing an OTA update will break root. Look for a software update under Settings > About Device. Just be careful — it might prove impossible to recover from. In that case, you may need to flash the original firmware first.
Editors’ Recommendations
We are living in a new tech generation wherein everyone is an expert and what to enhance the performance and functionalities of their gadgets and smartphones. Jailbreaking, rooting, and unlocking are the three common and popular approaches among techy individuals. However, still, they just know what jailbreaking, rooting, and unlocking can do, but they don’t understand why these are different and the core meaning. So, here is everything explained for everyone interested in going a bit deep.

So, let’s start knowing all the basic and advanced facts about jailbreaking, rooting, and unlocking. It will help you get the best idea and make a better decision on whether you should opt for these approaches for your device or not.
Comparing PC OS With Smartphone OS

What’s Jailbreaking?

However, there is a condition, and that’s the app must be compiled for ARM. So, you won’t be able to run any Windows desktop program that you already have. However, open-source apps are open to tweaking and can be recompiled for the Win Desktop on ARM.
Rooting In Android

First of all, please note that rooting is nothing but a method to get root access. Rooting is meant mainly for Android devices. However, one can also perform rooting on Linux-based devices like Nokia’s old Symbian operating system.
For example, an app with root access permission can uninstall system apps, install low-level binaries, revive installed app permissions on Android, and do several other Pro level things. In other words, you can do almost anything you want on the Linux system; root access gives you the ability to do the same on your Android phone.
Furthermore, an important thing to note here is rooting will take you around the security architecture of Android and that can potentially lead to problems. So, it’s always advised to proceed only if you understand things.
What Is Bootloader Unlocking?
However, please note that not all phone comes with an unlocked bootloader and there are those that come with the locked bootloader. A phone with a locked bootloader means the device won’t boot any other version than the version approved manufacturer itself. So, unlocking the bootloader is the only way to install or flash custom ROM to your Android device, that’s an alternate version of the same operating system with advancement.
unlocking a bootloader can theoretically permit you to install other non-android operating systems too. For example, you’re free to install Ubuntu on your phone, or Windows OS on any Galaxy or Nexus phone when you have an unlocked bootloader on your phone. Plus, you can also install the Ubuntu desktop version on your Nexus 7 or above phones.
However, please note that it is necessary that whatever OS you’re going to install should be compatible with your device. Also, these operations systems are not stable and can be used for development testing purposes while working on them.
What’s Is Unlocking A Phone?

The phone, subsidized with a contract, is locked to a particular carrier. The phone’s program or software is designed to work only with the one target carrier network you’re in a contract with.
Furthermore, if you will insert any other carrier sim in that phone, you will see a message. The message says your phone is locked, and you can’t use any other carrier network to use the service.
Therefore, unlocking a smartphone or cell phone simply means tweaking it to use it with other sim carriers, either to use the different carrier on trips or to switch from one to another service provider.
To unlock the phone, you need an unlock code to remove the lock or restrictions the network service provider applies to your phone. Most Carrier unlocks the contact phone when the contract ends, while there is no lock on the phone without any carrier contract. Also, there are ways to unlock phones without letting know the carrier or its permission.
The Overall Difference Between Jailbreaking, Rooting And Unlocking
In the end, it’s all about doing the same thing on different platforms with different approaches. All these three, which are jailbreaking, rooting, and unlocking exist to help you remove the manufacturer’s restrictions easily to use your phone at its best.
However, the methods are applicable to different devices, like jailbreaking and rooting, which generally target iOS and Android in general. Moreover, the purpose of all these approaches is the same, and that’s to skip and bypass the core restrictions and limitations.
So, that’s what actually creates a difference between jailbreaking, rooting, and unlocking.
Furthermore, we don’t recommend any of you at all to jailbreak or root your phone. Rooting and jailbreaking your phone is completely your decision. In fact, we suggest you stick to and use the original version of the OS flashed on your phone. And, don’t prefer jailbreaking, rooting it. It will help you not get into the complexities and use the device simply with limited but legal and secure features.
Summary
So, that’s all about the differences between jailbreaking, rooting, and unlocking a phone or operating system. Also, we hope by now you know what they are, why they are, and related facts too. Moreover, let us know whether you’re going to jailbreak, root, and unlock your phone anytime soon or not? If yes, we will create a guide for you to help you.
So, that’s all for now, and thanks for reading this post here at
")


")