


- Intro
- Set Root password
- Configure SSH config to permit root login
- Ubuntu/Debian
- CentOS/RHEL/Fedora
- Final thoughts
- Multiple Index Directives
- Root inside Location Block
- The set-up
- Use for 
- Config Changes Not Reflected
- Using the Default Document Root
- Check (If) File Exists
- Helper scripts (optional)
- container
- db
- composer
- php-artisan
- phpunit
- Using 
- This Guide Says
- Root Directory and Index Files
- Front Controller Pattern Web Apps
- Rewrite Missing 
- Up and Running
- Proxy Everything
- FastCGI Path in Script Filename
- Taxing Rewrites
- Docker-compose. yml
- Server Name (If)
- Webserver image for Laravel
- TL;DR
- Using SSLv3 with HTTPS
- Not Using Standard Document Root Locations
- My Issue Isn’t Listed
- Passing Uncontrolled Requests to PHP
- VirtualBox
- Optimizing Performance for Serving Content
- Enabling sendfile
- Enabling tcp_nopush
- Enabling tcp_nodelay
- Optimizing the Backlog Queue
- Displaying the Listen Queue
- Tuning the Operating System
- Tuning NGINX
- Using the directive with 
- Contents
- Trying Several Options
- Chmod 777
- Incorrect context
- Using a Hostname to Resolve Addresses
Intro
$ git clone git@git.repo.url/laravel-project
$ cd laravel-project
$ docker-compose upand be able to start with composer, php artisan, and write some code.
Configure NGINX and NGINX Plus to serve static content, with type-specific root directories, checks for file existence, and performance optimizations.
This section describes how to configure NGINX and NGINX Plus to serve static content, how to define which paths are searched to find requested files, how to set up index files, and how to tune NGINX and NGINX Plus, as well as the kernel, for optimal performance.

To let this tutorial work better, please consider the below Prerequisites:
Set Root password
sudo passwd rootyou succeed to change the root password, now you need to change some configuration on for the permit root login.
Configure SSH config to permit root login
nano /etc/ssh/sshd_config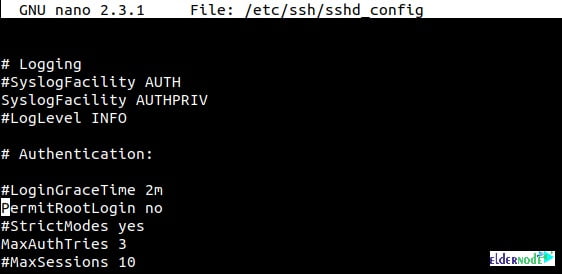
As you see, the is set to No. It means that the root login via SSH has been disabled. So, to enable root login change the to . Find PermitRootLogin and delete No or without-password and type .
PermitRootLogin without-passwordPermitRootLogin yesAfter edit the SSH config file, press and button twice for save and exit.
Restart SSH service for loading new configuration on SSH_config file.
sudo systemctl restart sshdsudo service sshd restartApache web server is probably the most used web server across platforms including different Linux distributions and Windows. The web server is used to deliver web content and can serve many queries at once.
In this short tutorial, you are going to learn how to modify the root directory for Apache web server. For the purpose of this tutorial, we will use Ubuntu/Debian and RHEL/CentOS/Fedora based installations of the web server.
However the paths and directives are practically the same for other distributions as well, so you will be able to apply the learned in different OSes as well.
To make the necessary changes you need to modify the DocumentRoot directive of the web server. This is the directory from which Apache will read the contents that the visitor will access over browser. Or in other words, this is the directory that forms the tree of directories that will be accessible over web.
The default DocumentRoot for Apache is:
/var/www/html
or
/var/www/
These paths are described in the Apache’s configuration file.
Ubuntu/Debian
/etc/apache2/sites-enabled/000-default
/etc/apache/apache2.conf
CentOS/RHEL/Fedora
/etc/httpd/conf/httpd.conf
To change the document root for your Apache web server simply open the corresponding file with your favourite text editor and search for DocumentRoot.
#
# DocumentRoot: The directory out of which you will serve your
# documents. By default, all requests are taken from this directory, but
# symbolic links and aliases may be used to point to other locations.
#DocumentRoot "/var/www/html"
After that change the path to the new target directory and make sure that Apache is able to read/write in that directory. Once you have modified the DocumentRoot, save the file and restart apache with:
# systemctl restart apache [For SystemD]
# service httpd restart [For SysVinit]
Final thoughts
The change of default document root is an easy task that can be completed in a couple of minutes. When making such changes is important to make sure that you do not make any typos and make sure to always restart Apache after making changes to its configuration file.
I’ve only recently started using WebPack. (with Typescript, which I’ve been using for a long time, and Preact since recently.)
I’m really happy with it so far — it’s working great, both during development, and when building the production assets.
My question here is actually simple: how is a webpack project rooted? It doesn’t seem to automatically root itself neither from the locations of the package.json or webpack.config.json files, and I can’t find an option to root it.
root/ package.json styleguide/ webpack.config.js styleguide.tsx tsconfig.jsonI have other sub-projects besides styleguide in this project — that one happens to use webpack, others use e.g. tsc or node-sass etc., is why it’s structured like this.
My webpack configuration looks like this:
const path = require("path");
const webpack = require("webpack");
module.exports = { entry: { "styleguide-deps": ["prismjs", "preact", "js-beautify"], "styleguide": "./styleguide.tsx" }, output: { filename: "[name].js", path: path.join(__dirname, "/../assets/demo/"), libraryTarget: "amd" }, plugins: [ new webpack.optimize.CommonsChunkPlugin({ name: "styleguide-deps", minChunks: Infinity, }) ], // Enable sourcemaps for debugging webpack's output. devtool: "source-map", resolve: { // Add '.ts' and '.tsx' as resolvable extensions. extensions: [".ts", ".tsx", ".js", ".json"] }, module: { rules: [ // All files with a '.ts' or '.tsx' extension will be handled by 'awesome-typescript-loader'. { test: /\.tsx?$/, loader: "awesome-typescript-loader" }, // All output '.js' files will have any sourcemaps re-processed by 'source-map-loader'. { enforce: "pre", test: /\.js$/, loader: "source-map-loader" } ] }, // Don't bundle these modules, but request them at runtime (client-side, via require.js) externals: { "kodus": "kodus" }
}; "scripts": { "build-styleguide-ts": "cd styleguide && webpack", },And the question I’m asking is, why do I have to cd into styleguide to run webpack?
I’ve tried e.g. webpack --config styleguide/webpack.config.json from the project root, and I can’t get it to work.
I can use absolute paths in most places, but not for entry.styleguide, and it seems ./ works relative to the current directory, rather than to the project root.
My objection is that no script should ever rely on the current directory, as that’s just global state, and I generally use absolute paths everywhere, but that hasn’t worked for me with webpack.
How can I remove the dependency on the current directory?
Multiple Index Directives
Root inside Location Block
The set-up
To demo an existing laravel app, I will be using a blank laravel app cloned from https://github.com/laravel/laravel.git
$ git clone https://github.com/laravel/laravel.git
$ cd laravel
$ git checkout -b dev-env
$ cp .env.example .envHere’s how I will structure my docker environment files:
app |__bootstrap |__config |__database |__public |__resources |__routes |__run (+) |__.gitkeep (+) |__storage |__tests .dockerignore (+) .editorconfig .env .env.example .gitattributes .gitignore artisan CHANGELOG.md composer.json docker-compose.yml (+) Dockerfile (+) package.json phpunit.xml readme.md server.php webpack.mix.jsThe idea is we’ll be builiding the image as well as running docker-compose commands from the main application folder, while run folder contains necessary config and local database for development. With docker volumes, we’ll be able to keep the source, the vendor dependencies and local development database in our host, while all the runtime (apache, php) are kept and manged by the container.
In this article I’ll explain to the best of my knowledge what each part of the set-up does. TL;DR as well as github link to list all the changes at the bottom if you just need a working version.
Use for 
Use instead of .
If you use the directive with , will return the wrong path.
====
====
And if you use , you should set index using directive, will not work.
Config Changes Not Reflected
- In Firefox press Ctrl+Shift+Delete, check Cache, click Clear Now. In
any other browser, just ask your favorite search engine. Do this after every
change (unless you know it’s not needed) and you’ll save yourself a lot of
headaches. - Use curl.
Using the Default Document Root
NGINX packages that exist in Ubuntu, Debian, or other operating systems, as an
easy-to-install package will often provide a ‘default’ configuration file as
an example of configuration methods, and will often include a document root to
hold a basic HTML file.
You should not use the default document root for any site-critical files. There
is no expectation that the default document root will be left untouched by the
system and there is an extremely high possibility that your site-critical data
may be lost upon updates and upgrades to the NGINX packages for your operating
system.
Check (If) File Exists
Using to ensure a file exists is horrible. It’s mean. If you have any recent
version of NGINX you should look at which just made life much easier.
What we changed is that we try to see if exists without requiring .
Using means that you can test a sequence. If doesn’t exist, try
, if that doesn’t exist try a fallback location.
In this case, if the file exists, serve it. If not, check if that directory
exists. If not, then proceed to serve which you make sure exists.
It’s loaded – but oh-so-simple! This is another instance where you can completely
eliminate If.
Helper scripts (optional)
From time to time, I want to be able to quickly run CLI commands (composer, artisan, etc.) without having to type docker exec everytime. So here are some bash scripts I made wrapping around docker exec:
container
docker laravel-app bash $ ./container
devuser@8cf37a093502:/var/www/html$
db
docker mysql-db bash Running ./db will connect to your database container’s daemon using mysql client.
$ ./db
mysql>
composer
docker laravel-app bash Run any composer command, example:
$ ./composer dump-autoload
Generating optimized autoload files> Illuminate\Foundation\ComposerScripts::postAutoloadDump
> @php artisan package:discover --ansi
Discovered Package: beyondcode/laravel-dump-server
Discovered Package: fideloper/proxy
Discovered Package: laravel/tinker
Discovered Package: nesbot/carbon
Discovered Package: nunomaduro/collision
Package manifest generated successfully.
Generated optimized autoload files containing 3527 classes
php-artisan
docker laravel-app bash Run php artisan commands, example:
$ ./php-artisan make:controller BlogPostController --resource
php artisan make:controller BlogPostController --resource
Controller created successfully.
phpunit
docker laravel-app bash Run ./vendor/bin/phpunit to execute tests, example:
$ ./phpunit --group=failing
vendor/bin/phpunit --group=failing
PHPUnit 7.5.8 by Sebastian Bergmann and contributors.
Time: 34 ms, Memory: 6.00 MB
No tests executed!Using 
There is a little page about using statements. It’s called IfIsEvil and you
really should check it out. Let’s take a look at a few uses of that are bad.
This Guide Says
The most frequent issue we see happens when someone attempts to just copy and
paste a configuration snippet from some other guide. Not all guides out there
are wrong, but a scary number of them are.
Root Directory and Index Files
 { ; { } { } ~ { ; }
}
If a request ends with a slash, NGINX treats it as a request for a directory and tries to find an index file in the directory. The index directive defines the index file’s name (the default value is index.html). To continue with the example, if the request URI is /images/some/path/, NGINX delivers the file /www/data/images/some/path/index.html if it exists. If it does not, NGINX returns HTTP code 404 (Not Found) by default. To configure NGINX to return an automatically generated directory listing instead, include the on parameter to the autoindex directive:
 { ;
}
You can list more than one filename in the index directive. NGINX searches for files in the specified order and returns the first one it finds.
 { $geo.html ;
}
The $geo variable used here is a custom variable set through the geo directive. The value of the variable depends on the client’s IP address.
 { ; ;
} ~ { localhost:; }
Here, if the URI in a request is /path/, and /data/path/index.html does not exist but /data/path/index.php does, the internal redirect to /path/index.php is mapped to the second location. As a result, the request is proxied.
Front Controller Pattern Web Apps
“Front Controller Pattern” designs are popular and are used on the many of the most
popular PHP software packages; But a lot of examples are more complex than they need
to be. For Drupal, Joomla, etc., just use this:
Note — the parameter names are different based on the package you’re using. For
example:
- “q” is the parameter used by Drupal, Joomla, WordPress
- “page” is used by CMS Made Simple
Some software don’t even need the query string and can read from REQUEST_URI.
For example, WordPress supports this:
If you don’t care about checking for the existence of directories, you can skip
it by removing .
Of course, your mileage may vary and you may require something more complex based on
your needs, but for basic sites, these will work perfectly. You should always
start simple and build from there.
Rewrite Missing 
Very simply, rewrites are relative unless you tell NGINX that they’re not.
Making a rewrite absolute is simple. Add a scheme.
In the above you will see that all we did was add to the
rewrite. It’s simple, easy, and effective.
Up and Running
Now let’s build the environment, and get it up running. We’ll also be installing composer dependencies as well as some artisan command.
$ docker-compose build && docker-compose up -d && docker-compose logs -f
Creating network "backend-network" with the default driver
Creating mysql-db ... done
Creating laravel-app ... done
Attaching to laravel-app, mysql-db
...Once all the containers are up and running, we can check them by docker ps:
CONTAINER ID IMAGE COMMAND CREATED STATUS PORTS NAMES
c1ae3002d260 laravel_laravel-app "docker-php-entrypoi…" 4 minutes ago Up 4 minutes 0.0.0.0:8000->80/tcp laravel-app
6f6546224051 mysql:5.7 "docker-entrypoint.s…" 4 minutes ago Up 4 minutes 3306/tcp mysql-dbComposer and artisan:
$ docker exec -it laravel-app bash -c "sudo -u devuser /bin/bash"devuser@c1ae3002d260:/var/www/html$ composer install
...
Generating optimized autoload files
> Illuminate\Foundation\ComposerScripts::postAutoloadDump
> @php artisan package:discover --ansi
Discovered Package: beyondcode/laravel-dump-server
Discovered Package: fideloper/proxy
Discovered Package: laravel/tinker
Discovered Package: nesbot/carbon
Discovered Package: nunomaduro/collision
Package manifest generated successfully.devuser@c1ae3002d260:/var/www/html$ php artisan key:generate
Application key set successfully.devuser@c1ae3002d260:/var/www/html$ php artisan migrate
Migrating: 2014_10_12_000000_create_users_table
Migrated: 2014_10_12_000000_create_users_table
Migrating: 2014_10_12_100000_create_password_resets_table
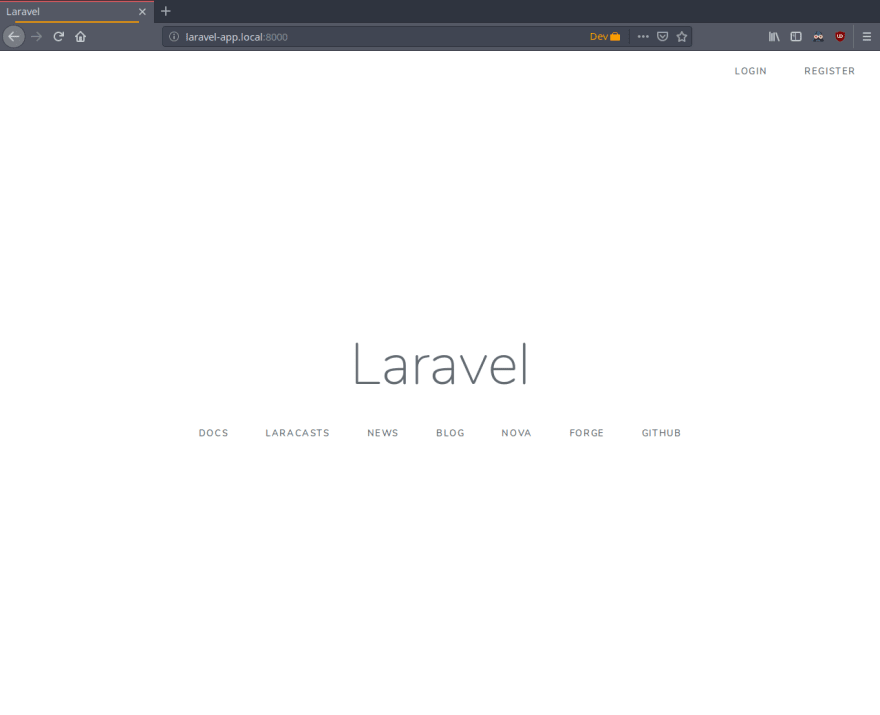
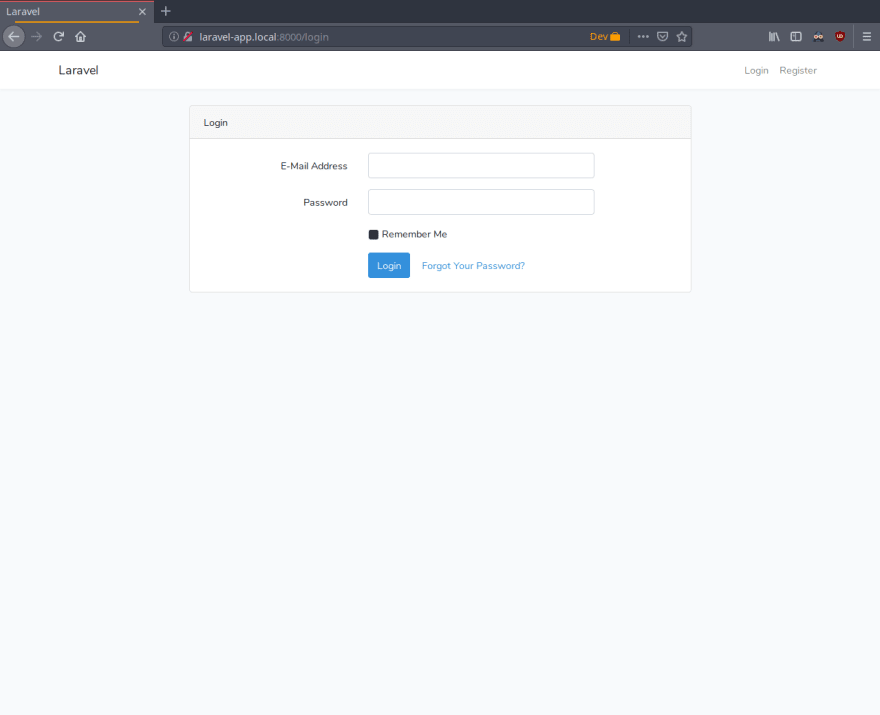
Migrated: 2014_10_12_100000_create_password_resets_tabledevuser@c1ae3002d260:/var/www/html$ php artisan make:auth
Authentication scaffolding generated successfully.127.0.0.1 laravel-app.localWe’re all set!
Proxy Everything
Yucky. In this instance, you pass EVERYTHING to PHP. Why? Apache might do this,
but you don’t need to. The try_files directive exists for an amazing reason:
It tries files in a specific order. NGINX can first try to serve the static
content, and if it can’t, it moves on. This means PHP doesn’t get involved at
all. MUCH faster. Especially if you’re serving a 1MB image over PHP a few
thousand times versus serving it directly. Let’s take a look at how to do that.
Easy, right? Check if the requested URI exists and can be served by NGINX. If not,
check if it is a directory that can be served. If not, then pass it to your proxy.
Only when NGINX can’t serve that requested URI directly, your proxy overhead will
get involved.
Consider how many of your requests are for static content (images, css,
javascript, etc.). That’s probably a lot of overhead you just saved.
FastCGI Path in Script Filename
Taxing Rewrites
Don’t feel bad here, it’s easy to get confused with regular expressions. In
fact, it’s so easy to do that we should make an effort to keep them neat and
clean. Quite simply, don’t add cruft.
$
Look at the above. Then back here. Then up, and back here. OK. The first rewrite
captures the full URI minus the first slash. By using the built-in variable
we can effectively avoid doing any capturing or matching at all.
Docker-compose. yml
Webserver is set. Now we just need to bring a database container in using a docker-compose config
A few things to go through here. First of all for the laravel container:
-
build:contextrefers to theDockerfilethat we just written, kept in the same directory asdocker-compose.yml. -
argsis for theuidI mentioned above. We’ll writeUIDvalue in the app.envfile to letdocker-composepick it up.
...
MIX_PUSHER_APP_KEY="${PUSHER_APP_KEY}"
MIX_PUSHER_APP_CLUSTER="${PUSHER_APP_CLUSTER}"
UID=1000-
APACHE_RUN_USERandAPACHE_RUN_GROUPENV variables comes withphp-apache. By doing this, files generated by the webserver will also have consistent ownership. -
volumesdirective tellsdockerto mount the host’s app source code into/var/www/html— which is consistent withapacheconfiguration. This enables any change from host files be reflected in the container. Commands such ascomposer requirewill addvendorto host, so we won’t need to install dependencies everytime container is brought down and up again. - If you are building container for CI / remote VM envrionment however, you’ll need to add the source files into the container pre-build. For example:
/var/www/html composer php artisan key:generate-
portsis optional, leave out if you’re fine with running it under port 80. Alternatively, it can be configurable using.envsimilar to build args:
HOST_PORT=8080-
networkswithaliasesis also optional. By default,docker-composecreate adefaultnetwork prefixed with the parent folder name to connect all the services specified indocker-compose.yml. However if you have a development of more than 1docker-compose, specifyingnetworksname like this allow you to join it from the otherdocker-compose.ymlfiles.another-apphere will be able to reachlaravel-appand vice versa, using the specifiedaliases.
Now moving onto mysql:
-
mysql:5.7is very configurable and just works well out-of-the-box. So we won’t need to extend it. - Simply pick up the
.envset in laravel app to set username and password for the db user:
- Also make sure
.env DB_HOSTset to what mysql-db service name, or its aliases:
.env
DB_HOST=mysql-db- Ideally you want to keep database changes in the repository, using a series of migrations and seeders. However if you want to start the mysql container with an existing SQL dump, simply mount the SQL file:
- Using
volumes, we’re keeping the database locally underrun/var, since any data written bymysqldis inside the container’s/var/lib/mysql. We just need to ignore the local database in both.gitignoreand.dockerignore(for build context):
/node_modules
/public/hot
/public/storage
/storage/*.key
/vendor
.env
.phpunit.result.cache
Homestead.json
Homestead.yaml
npm-debug.log
yarn-error.log
run/varrun/varServer Name (If)
$
There are actually three problems here. The first being the . That’s what we
care about now. Why is this bad? Did you read If is Evil? When NGINX receives a
request — no matter what is the subdomain being requested, be it www.example.com or
just the plain example.com — this directive is always evaluated. Since
you’re requesting NGINX to check for the Host header for every request,
it’s extremely inefficient. You should avoid it. Instead use two
directives like the example below.
Besides making the configuration file easier to read. This approach decreases
NGINX processing requirements. We got rid of the spurious . We’re also using
which doesn’t hardcode the URI scheme you’re using, be it http or
https.
Webserver image for Laravel
php-apache:7.2 image from the php dockerhub has out-of-the-box configurable and functional Apache webserver running mod_php, which is a great place to start with. We’ll need a couple of extensions and some access control configuration to make development easier (optional). Here is the Dockerfile:
apt-get update# 1. development packagesapt-get git zip curl unzip libicu-dev libbz2-dev libpng-dev libjpeg-dev libmcrypt-dev libreadline-dev libfreetype6-dev g++# 2. apache configs + document root /etc/apache2/sites-available/.conf /etc/apache2/apache2.conf /etc/apache2/conf-available/.conf# 3. mod_rewrite for URL rewrite and mod_headers for .htaccess extra headers like Access-Control-Allow-Origin-a2enmod rewrite headers# 4. start with base php config, then add extensions
docker-php-ext-install bz2 intl iconv bcmath opcache calendar mbstring pdo_mysql zip# 5. composer --from=composer:latest /usr/bin/composer /usr/bin/composer# so when we execute CLI commands, all the host file's ownership remains intact# otherwise command from inside container will create root-owned files and directoriesuseradd www-data,root /home/devuser devuser /home/devuser/.composer devuser:devuser /home/devuserStarting with the webserver itself, php-apache image by default set document root to /var/www/html. However since laravel index.php is inside /var/www/html/public, we need to edit the apache config as well as sites-available. We’ll also enable mod_rewrite for url matching and mod_headers for configuring webserver headers.
/etc/apache2/sites-available/.conf /etc/apache2/apache2.conf /etc/apache2/conf-available/.confMoving onto php configuration, we start by using the provded php.ini, then add a couple of extensions via docker-php-ext-install. The order of doing these tasks are not important (php.ini won’t be overwritten) since the configs that loads each extensions are kept in separate files.
For composer, what we’re doing here is fetching the composer binary located at /usr/bin/composer from the composer:latest docker image. Obviously you can specify any other version you want in the tag, instead of latest. This is part of docker’s multi-stage build feature.
--from=composer:latest /usr/bin/composer /usr/bin/composeruseradd www-data,root /home/devuser devuser /home/devuser/.composer devuser:devuser /home/devuserTL;DR
Dockerfile consists of basic apache document root config, mod_rewrite and mod_header, composer and sync container’s uid with host uid.
docker-compose.yml boots up php-apache (mount app files) and mysql (mount db files), using networks to interconnect.
Use the environment:
$ docker-compose build && docker-compose up -d && docker-compose logs -f
$ ./composer install
$ ./php-artisan key:generateUsing SSLv3 with HTTPS
Due to the POODLE vulnerability in SSLv3, it is advised to not use SSLv3 in your
SSL-enabled sites. You can very easily disable SSLv3 with this line and provide
only the TLS protocols instead:
Not Using Standard Document Root Locations
Some directories in any file system should never be used for hosting data from.
These include and . You should never use these as your
document root.
Doing this leaves you open to a request outside of your expected area returning
private data.
NEVER DO THIS!!! (yes, we have seen this)
My Issue Isn’t Listed
You don’t see something in here related to your specific issue. Maybe we didn’t
point you here because of the exact issue you’re experiencing. Don’t skim this
page and assume you were sent here for no reason. You were sent here because
something you did wrong is listed here.
Passing Uncontrolled Requests to PHP
Many example NGINX configurations for PHP on the web advocate passing every URI
ending in to the PHP interpreter. Note that this presents a serious
security issue on most PHP setups as it may allow arbitrary code execution by
third parties.
The problem section usually looks like this:
$
Here, every request ending in will be passed to the FastCGI backend. The
issue with this is that the default PHP configuration tries to guess which file
you want to execute if the full path does not lead to an actual file on the
filesystem.
For instance, if a request is made for /forum/avatar/1232.jpg/file.php which
does not exist but if /forum/avatar/1232.jpg does, the PHP interpreter will
process /forum/avatar/1232.jpg instead. If this contains embedded PHP code,
this code will be executed accordingly.
Options for avoiding this are:
- Set
in. This causes the PHP interpreter to only
try the literal path given and to stop processing if the file is not found. - Ensure that NGINX only passes specific PHP files for execution:
$
- Specifically disable the execution of PHP files in any directory containing
user uploads:
- Use the
directive to filter out the problem condition:
$
- Use a nested location to filter out the problem condition:
$
VirtualBox
If this does not work, and you’re running NGINX on a virtual machine in
VirtualBox, it may be sendfile() that is causing the trouble. Simply comment out
the sendfile directive or set it to “off”. The directive is most likely found in
your nginx.conf file.:
Optimizing Performance for Serving Content
Loading speed is a crucial factor of serving any content. Making minor optimizations to your NGINX configuration may boost the productivity and help reach optimal performance.
Enabling sendfile
By default, NGINX handles file transmission itself and copies the file into the buffer before sending it. Enabling the sendfile directive eliminates the step of copying the data into the buffer and enables direct copying data from one file descriptor to another. Alternatively, to prevent one fast connection from entirely occupying the worker process, you can use the sendfile_max_chunk directive to limit the amount of data transferred in a single sendfile() call (in this example, to 1 MB):
{ ; ; }Enabling tcp_nopush
Use the tcp_nopush directive together with the sendfile on;directive. This enables NGINX to send HTTP response headers in one packet right after the chunk of data has been obtained by sendfile().
{ ; ; }Enabling tcp_nodelay
The tcp_nodelay directive allows override of Nagle’s algorithm, originally designed to solve problems with small packets in slow networks. The algorithm consolidates a number of small packets into a larger one and sends the packet with a 200 ms delay. Nowadays, when serving large static files, the data can be sent immediately regardless of the packet size. The delay also affects online applications (ssh, online games, online trading, and so on). By default, the tcp_nodelay directive is set to on which means that the Nagle’s algorithm is disabled. Use this directive only for keepalive connections:
{ ; ; }Optimizing the Backlog Queue
One of the important factors is how fast NGINX can handle incoming connections. The general rule is when a connection is established, it is put into the “listen” queue of a listen socket. Under normal load, either the queue is small or there is no queue at all. But under high load, the queue can grow dramatically, resulting in uneven performance, dropped connections, and increased latency.
Displaying the Listen Queue
To display the current listen queue, run this command:
netstat -LanCurrent listen queue sizes (qlen/incqlen/maxqlen)
Listen Local Address
0/0/128 *.12345
10/0/128 *.80
0/0/128 *.8080Current listen queue sizes (qlen/incqlen/maxqlen)
Listen Local Address
0/0/128 *.12345
192/0/128 *.80
0/0/128 *.8080Tuning the Operating System
Increase the value of the net.core.somaxconn kernel parameter from its default value (128) to a value high enough for a large burst of traffic. In this example, it’s increased to 4096.
For FreeBSD, run the command:
sudo sysctl kern.ipc.somaxconn=4096Run the command:
sudo sysctl -w net.core.somaxconn=4096net.core.somaxconn = 4096
Tuning NGINX
If you set the somaxconn kernel parameter to a value greater than 512, change the backlog parameter to the NGINX listen directive to match:
{ ; }Using the directive with 
The symptoms of this are difficult to diagnose: typically, it will appear that
you’ve done everything right and yet you get mysterious 404 errors. Why? well,
turning on debug-level error logging reveals that is appending
onto the path already set with . This is due to a bug in NGINX,
but don’t worry—the workaround is simple! As long as your line is
something like , you can simply delete the
line with no significant adverse effect. Here is an example where you cannot use
.
The one caveat is that this workaround prevents you from using to avoid
PATH_INFO attacks. See Passing Uncontrolled Requests to PHP above for alternative ways
to mitigate these attacks.
Contents
- Contents
- Intro
- The set-up
- Webserver image for Laravel
docker-compose.yml- Up and Running
- Helper scripts (optional)
- TL;DR
Trying Several Options
 { ; { $uri ; }
}
The file is specified in the form of the URI, which is processed using the root or alias directives set in the context of the current location or virtual server. In this case, if the file corresponding to the original URI doesn’t exist, NGINX makes an internal redirect to the URI specified by the last parameter, returning /www/data/images/default.gif.
 { $uri $uri/ $uri.html =;
}
In the next example, if neither the original URI nor the URI with the appended trailing slash resolve into an existing file or directory, the request is redirected to the named location which passes it to a proxied server.
 { $uri $uri/ ;
} { ;
}
Chmod 777
NEVER use . It might be one nifty number, but even in testing it’s a sign of
having no clue what you’re doing. Look at the permissions in the whole path and
think through what’s going on.
To easily display all the permissions on a path, you can use:
Incorrect context
The return directive applies only inside the topmost context it’s defined in. In this example:
Using a Hostname to Resolve Addresses
You should never use a hostname in a listen directive. While this may work, it
will come with a large number of issues. One such issue being that the hostname
may not resolve at boot time or during a service restart. This can cause NGINX
to be unable to bind to the desired TCP socket which will prevent NGINX from
starting at all.
A safer practice is to know the IP address that needs to be bound to and use
that address instead of the hostname. This prevents NGINX from needing to look
up the address and removes dependencies on external and internal resolvers.
")


")