

В Ubuntu-системе, да и в принципе, в любой другой Linux-системе, обязательно есть один привилегированный пользователь — root.
sudo — утилита, которая дает привилегии root для выполнения административных операций.
Простым языком команда sudo позволяет пользователям Ubuntu выполнять команды от имени суперпользователя root, либо других пользователей.
sudo adduser *имя_пользователя*
При создании пользователя будет предложено ввести пароль и другие необязательные данные (Имя, Номер комнаты, Телефон и тд), указываем их по своему желанию.

More specifically the
/etc/apt/folder. I need to delete some files and replace
/etc/apt/sources.listwith a newer version.
asked Apr 21, 2012 at 18:23

Andy Castille
3 gold badges20 silver badges28 bronze badges
gksu nautilus /etc/apt/cd /etc/apt; sudo -i
124 gold badges465 silver badges653 bronze badges
answered Apr 21, 2012 at 18:25

Ubuntu 16.04 and above
sudo apt-get install nautilus-adminnautilus -q
answered Oct 13, 2016 at 5:20

1 silver badge5 bronze badges
sudo add-apt-repository ppa:noobslab/apps
sudo apt-get update
sudo apt-get install open-as-administrator
After installation type this command to restart Nautilus:

sudo apt-get install -y nautilus-adminnautilus -q
answered Jan 27, 2014 at 9:48

34 gold badges117 silver badges131 bronze badges
Nah ! do a simple thing first. Create a custom file manager. Its easy.
Here how you can do it:
ROOT-пользователь — это пользователь с правами администратора, созданный по умолчанию в Linux-системе (Ubuntu). Root аналог администратору в ОС Windows, который имеет доступ ко всему в системе.
Этот способ предполагает вход в систему Ubuntu под пользователем с sudo правами, а команда «su» разрешена как часть «sudo» привилегий.
sudo su

Глядя на скриншот выше, можно заметить смену пользователя на «root», таким образом, мы вошли в Ubuntu под root, используя свой пароль.
Теперь мы можем сменить пароль root-пользователя, для этого необходимо использовать следующую команду:
passwd
После ввода команды указываем новый пароль в запросе «New password» и повторяем новый пароль после запроса «Retype new password».
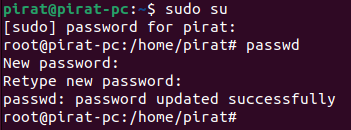
Пароль для root будет установлен при первом использовании команды или изменит его на новый пароль при дальнейших использованиях команды «passwd».
А работает ли новый пароль? Давайте это выясним, нажимаем сочетание клавиш «Ctrl+D», чтобы окончить текущий ввод данных в терминале, либо запускаем новый терминал и вводим новую команду:
su
Данной командой мы войдем в систему как root, после чего вводим новый пароль, который мы только что установили для root.
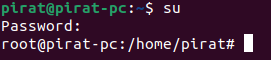
Таким образом мы успешно изменили пароль от root.
I want to login as root, but when I enter
sudo -sand enter password, this message is shown: «you are not in sudoers file», and when I enter
suand enter password, this is shown: «authentication failure».
My os has one account only. about past1 hours ago I log on as root and do some commands , when I logout , I can’t login another time!
124 gold badges465 silver badges653 bronze badges
asked Dec 30, 2011 at 18:38

answered Dec 30, 2011 at 19:03

1 gold badge16 silver badges24 bronze badges
Be aware that the root account is not active by default.
You will need to do:
sudo passwd rootsu root
102 gold badges136 silver badges162 bronze badges
answered Jun 28, 2013 at 23:22

5 silver badges2 bronze badges
The https://help.ubuntu.com/community/RootSudo suggests:
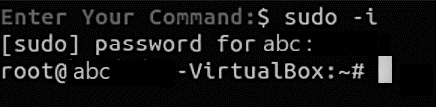
sudo -i

56 gold badges215 silver badges327 bronze badges
answered Dec 30, 2011 at 19:00

1 gold badge38 silver badges43 bronze badges
adduser username sudothis will add you to the sudoers group! Then type exit and boot normally. when you enter your account, type:
sudo passwd rootThen enter your password and type the new root password
After that you can type su and enter the ‘root’ password.
If you don’t want to change the root password then you can use:
sudo -ito start a root shell, using your own password.
56 gold badges215 silver badges327 bronze badges
answered Mar 5, 2014 at 14:53
12 gold badges30 silver badges43 bronze badges
Let’s start with a bit of theory, to give you the context, and then I’ll show you how to enable root if you really want it, either in a terminal or even for SSH usage.
- Is there a root user on Ubuntu Server?
- Why is the root user disabled on Ubuntu?
- Sudo: a better way to run root commands
- What is the root password on Ubuntu Server?
- Enable root login on Ubuntu Server
- Additional Resources
- 1: How to enable Ubuntu root Login Temporarily?
- 2: How to enable root user in ubuntu via Graphical User Interface?
- 3: How to enable ubuntu root in Command-line?
- Conclusion
- Adding a Superuser on Ubuntu and Debian
- 1. The Command-Line Approach
- 2. Using the Graphical Interface
- Warning
- Тестирование пользователя Sudo
- First open gedit and paste all these
- Добавляем пользователя в группу Sudo
- Adding a sudo Account in CentOS
- Сбрасываем пароль от root через GRUB
- Creating a New Superuser on Arch Linux
- Enabling
- How to Add a Superuser in Fedora
- Alternatives to root login
- Graphical version needs setting up 1st
Is there a root user on Ubuntu Server?
The “root” still exists on Ubuntu Server and most Linux distributions, but can’t be used by default. The account is disabled for security reasons.
Why is the root user disabled on Ubuntu?
Get My Cheat Sheet!
Grab your free PDF file with all the commands you need to know on Linux!

Sudo: a better way to run root commands

You can basically do everything with sudo, so, in theory, there is no need to use “root” anymore.
What is the root password on Ubuntu Server?
Get My Cheat Sheet!
Grab your free PDF file with all the commands you need to know on Linux!
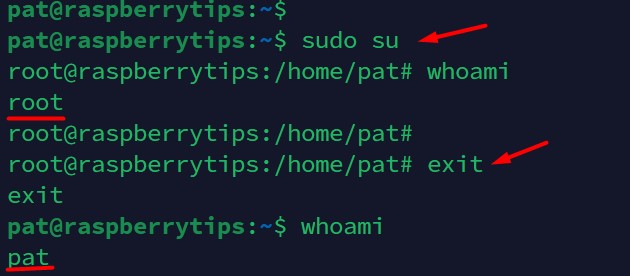
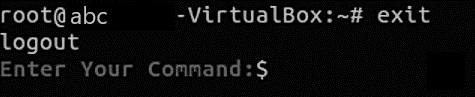
Use the exit command to get back to your normal privileges.exit
I have explained that using “sudo” should be sufficient in most cases and that you can even temporarily switch to the root prompt in a terminal by using “sudo su”. You shouldn’t need anything more, but let’s discuss how to enable root if you really want to do this (not recommended).
Enable root login on Ubuntu Server
Before using the “root” account directly on Ubuntu Server, a password should be set via the command:sudo passwd
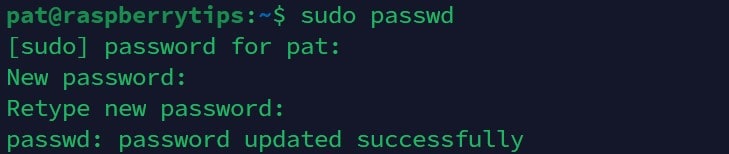
As explained previously, having root enabled on your system is a major security issue, so at least try to use a strong password for it. Length is key, using a password generator like this one can help you to get something long enough but easy to remember.
Get My Cheat Sheet!
Grab your free PDF file with all the commands you need to know on Linux!
If you are looking for exclusive tutorials, I post a new course each month, available for premium members only. Join the community to get access to all of them right now!
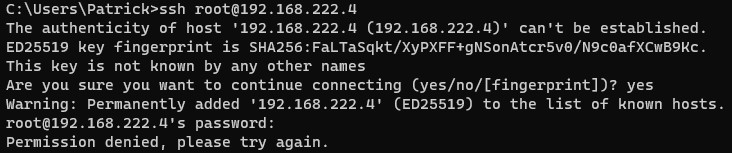
Here is how to allow logging in as root via SSH:

Get My Cheat Sheet!
Grab your free PDF file with all the commands you need to know on Linux!
Additional Resources
Lost with the command line?
You don’t need to learn and remember everything, just download my cheat sheet where I explain the most important commands on Linux, with a brief explanation and some examples.
Download my free PDF cheat sheet.

![How to Enable Root Account in Ubuntu? [Ubuntu Root Login]](https://monovm.com/wp-content/uploads/2021/05/cover849-main.webp)
List of content you will read in this article:
If you are a newbie, you may be scratching your head about how to enable your root account in Ubuntu! Well, for several security purposes, the ubuntu root login account is kept disabled. Before we begin, here is some preface.
When you install Ubuntu, a root account is created. The issue here is that you do not have the provision to set the password for the account.
sudo grep root /etc/passwd

The x in the output signifies that the account’s password is empty.
sudo grep root /etc/shadow

- Temporary Method
- Command-Line and Graphical User Interface Method
- Command-Line Method
1: How to enable Ubuntu root Login Temporarily?
2: How to enable root user in ubuntu via Graphical User Interface?
Type root in the first textbox.
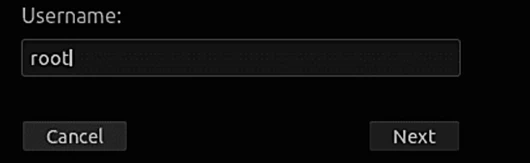
Type your root account password.
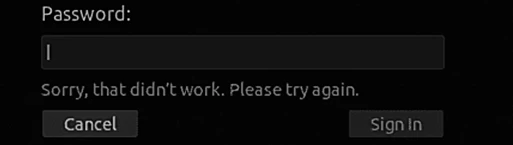
As soon as you type the password, you encounter an error message. The reason is that a security layer in the graphical interface stops any login until and unless several other configuration files are configured.
sudo cp /etc/gdm3/custom.conf /etc/gdm3/custom.conf_backup
sudo cp /etc/pam.d/gdm-password /etc/pam.d/gdm-password_backup

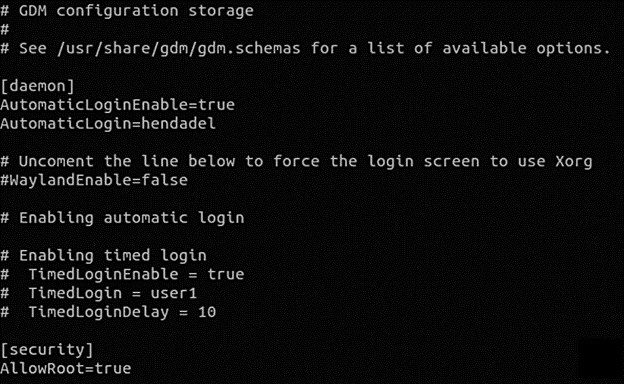
Now, simply, open the “/etc/gdm3/custom.conf” configuration file
sudo vi /etc/gdm3/custom.conf

Press save and exit.
Now, open “/etc/pam.d/gdm-password” which is a configuration file.


Just save and hit exit on the ‘gdm’ configuration file.
sudo reboot -f
As you have rebooted your system, login into the root account now.
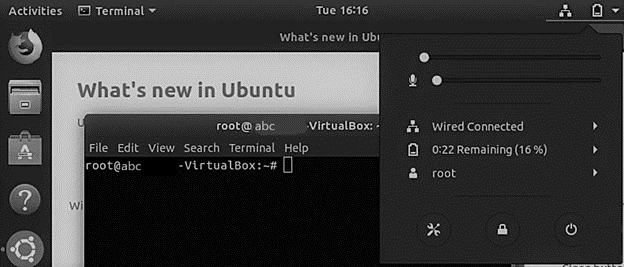
You can log in to the root account easily.
sudo passwd -dl root

Reverse whatever changes you made in the two configuration files earlier.
Delete “AllowRoot=true” from the “/etc/gdm3/custom.conf” configuration file as shown below.
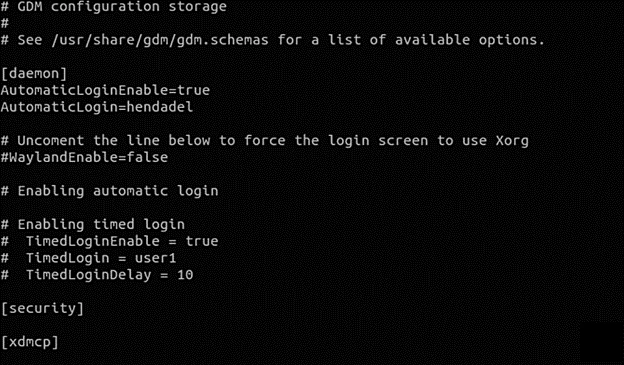
Next, delete the ‘#’ from “/etc/pam.d/gdm-password”.

And you are done!
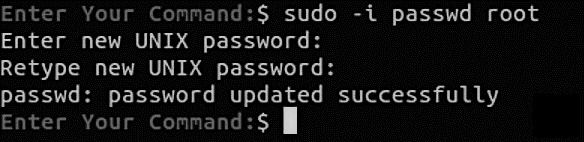
3: How to enable ubuntu root in Command-line?
Using the command-line method, you can easily enable or disable the root account through the command line. Here, you cannot log in through a graphical interface.
sudo -i passwd root
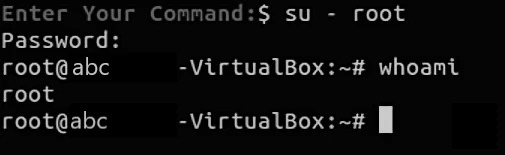
su – root
sudo passwd -dl root

To be sure, switch to the root account and see if the process is successful.
su - root
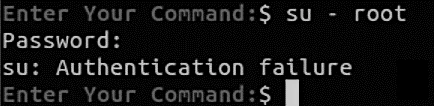
If you see the same message as the above image, then yes, you have successfully disabled the account, as now you can see that the authentication has failed.
Conclusion
We hope that the article solved your queries and provided you with a better understanding of the topic. If you have any questions or suggestions, please leave them in the comment section below.
People are also reading:
Adding a Superuser on Ubuntu and Debian
1. The Command-Line Approach
sudo adduser username 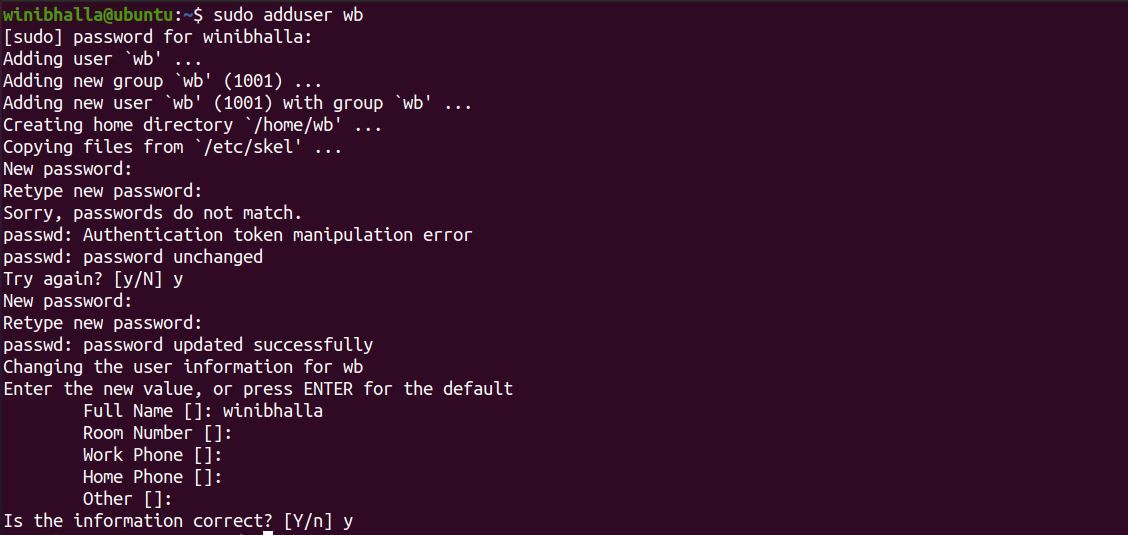
sudo usermod -aG sudo username groups username sudo adduser username sudo The verification process remains the same as before.
2. Using the Graphical Interface
- Go to the Applications menu and click on the Users option. You will see a list of users including the newly created user(s).

- Click on the Unlock option, followed by the root password. You can switch to another user account by simply clicking it.
-1.jpg)
- As soon as you select it, you will see an option to convert the newly created user account into an administrator account. Toggle the button next to the Administrator label, and the account will get added as a sudo account.
Warning
While it’s possible to do, it is not recommended.
Тестирование пользователя Sudo
su - *имя_пользователя*

Данное уведомление в терминале будет означает, что пользователь находится в группе sudo.
Теперь можно запустить команду с sudo для нового пользователя и проверить, сработает ли она. Давайте создадим каталог «papka» внутри папки «/etc» (только root-пользователь имеет право вносить изменения в данной папке, поэтому потребуется sudo доступ). Итак, вводим команду на создание нового каталога:
sudo mkdir /etc/papka
При запросе пароля, вводим его. Проверяем созданную папку командой «ls».

Либо переходим в «etc» через проводник Ubuntu.

Отлично! Как мы видим через «ls» или проводник, каталог «papka» успешно создан в «etc».
First open gedit and paste all these
[Desktop Entry]
Name=Nautilus
Comment=Browse the filesystem with administrator rights
Exec=gksudo nautilus
Icon=file-manager
Terminal=false
Type=Application
Categories=Application;System;
Now save the file as Nautilus.desktop on your desktop.
(desktop is the file extension).
/home/your user name/.local/share/applicationsand cut/paste Nautilus.desktop file into there.
Now open dash and search for «Nautilus». It will open up the default file manager with root permission. Now you can navigate to any directory and delete anything you want.
answered Apr 21, 2012 at 18:45

In a Terminal you can use:
sudo -e /etc/apt/sources.listNote: If you prefer to use Graphical Software you should use gksudo in Gnome:
gksudo gedit /etc/apt/sources.listor kdesudo in KDE:
kdesudo kate /etc/apt/sources.list
53 gold badges469 silver badges719 bronze badges
answered Apr 21, 2012 at 18:28

2 gold badges22 silver badges46 bronze badges
Добавляем пользователя в группу Sudo
Следующим шагом является добавление созданного пользователя в группу sudo, которая выдаст пользователю все привилегии sudo:
sudo adduser *имя_пользователя* sudo
При успешном добавлении в группу Sudo получим уведомление в терминале Ubuntu: «Добавление пользователя *имя* в группу sudo. Готово.».

Отлично! Пользователь добавлен в группу sudo, теперь проверим, есть ли у него привилегии sudo.
Adding a sudo Account in CentOS
Considering CentOS’s popularity, it would be a shame to miss out on the process of adding a sudo account in this distro. The process for adding a sudo account in CentOS is quite similar to the process specified above for Arch Linux, but with a few basic changes.
su useradd -G wheel username passwd username su username
sudo whoami .jpg)
Сбрасываем пароль от root через GRUB
Существует еще один способ для изменения пароля от root или любого другого пользователя при загрузке Ubuntu.
Сначала перезагружаем наш ПК. Если меню GRUB не появляется автоматически, то удерживаем клавишу «Shift» во время загрузки. Это принудительно откроет меню GRUB.
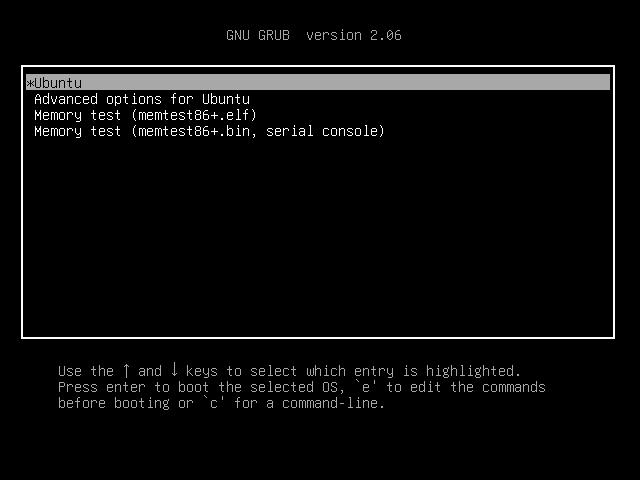
Затем выбираем пункт «Ubuntu» в меню и нажмите клавишу «E», чтобы начать редактирование конфигурации загрузки.
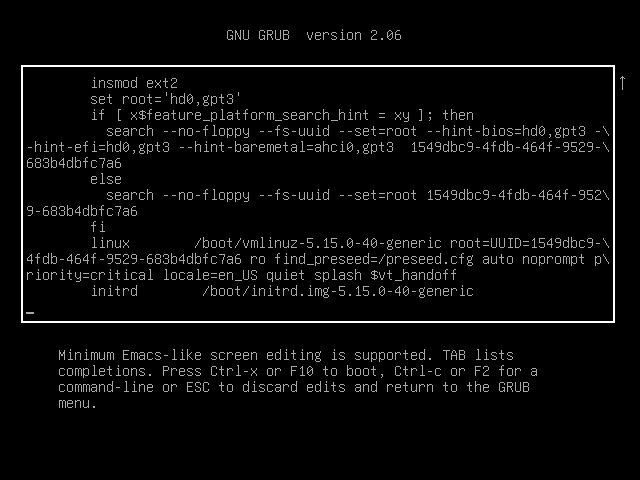
Далее необходимо внести изменения в строку, заменяем значение:
quiet splash $vt_handoff
rw init=/bin/bash
Результат отображен на скриншоте ниже:
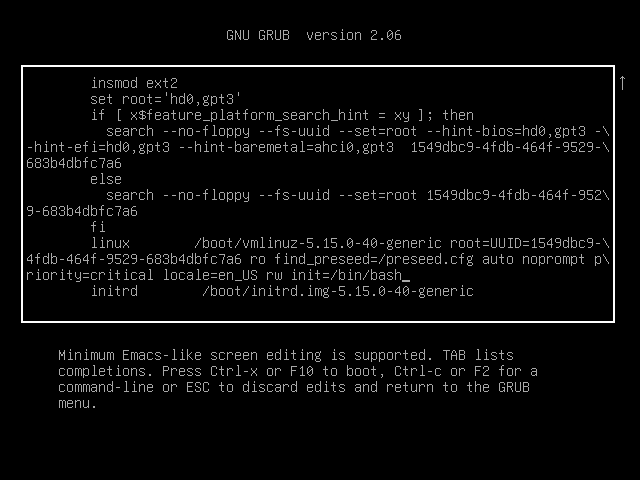
Изменения заключаются в том, чтобы из GUI перейти в оболочку Bash для внесения изменений — смена пароля. Нажимаем клавишу «F10», чтобы загрузиться с новой конфигурацией.
Загрузка с измененной конфигурацией сработает только один раз и сброситься при повторной загрузке.
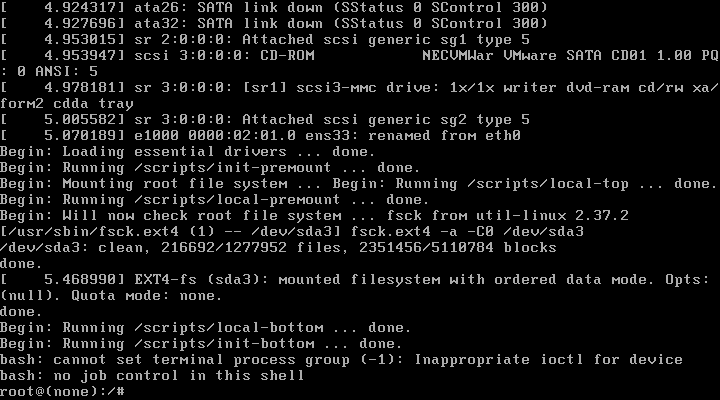
Мы вошли в систему как root-пользователь в командной строке. Теперь используем команду для сброса пароля:
passwd
Указываем и повторяем новый пароль.

Затем перезагружаем систему в обычном режиме (без GRUB) и входим как root уже с новым паролем.
Creating a New Superuser on Arch Linux
su pacman -Sy sudo useradd --create-home username passwd username usermod --append --groups wheel username visudo #%wheel ALL=(ALL) ALL .JPG)
Remove the # symbol preceding the %wheel line and save the changes. Press Ctrl + O on the keyboard to save the file.
su username whoami sudo whoami Enabling
To actually enable root logins first you have to set a password for the root account and then unlock the locked root account. If you don’t set a password for the root account the passwd command will return
passwd: unlocking the password would result in a passwordless account. So, first execute in a terminal
sudo passwd rootyou will be prompted for a new Unix password. Write it twice (second for confirmation).
sudo passwd -u root to unlock the account. This should return
passwd: password expiry information changedHow to Add a Superuser in Fedora
adduser username passwd username usermod -aG wheel username 
visudo ## Uncomment to allow members of group wheel to execute any command
%wheel ALL=(ALL) ALL .jpg)
Alternatives to root login
If you want to work on a root console you can also use sudo -i.
Only do this if you know what you are doing. More information on why to stay with sudo here
Graphical version needs setting up 1st
pkexec gnome-terminal will open a terminal with a root prompt.
passwd root will allow you to create a password for root.
")


")