

You need to root your phone if you want to run a specific app that requires root access. Apps that require root aren’t hard to find, they’re available in Google Play, but they won’t work until you gain root access. Some apps have features that only work on a rooted device, like iSumsoft Windows password refixer for Android.
Could the rights be changed so that the root will have less permissions than the owner?
Shure, it is easy , Just change the passwd file so that root’s uid is not zero. On the other hand don’t do that it is bad idea.
You are not the first person to ask this question, and some of those people came up with the idea of capabilities, but we’ll get to that in a bit, first let start with understanding the permission system works.
The other way to restrict root is with something like selinux, but that is another ball of wax.
$ sudo useradd -ou 0 -g 0 john
$ sudo passwd john
- Grant Root Privileges To Existent User
- Add User To Root Group
- Delete User With Root Privileges
- Got Root on Your Device?
- Reader Interactions
- Part 1. Managing Root Permissions With the SuperSU App
- Step 1. Download SuperSU
- Step 2. Manage Root Permissions
- Part 2. Root Android with Android Data Recovery
- Step 1. Connect Device to PC
- Step 2. Check Android Status
- Case 1: Android Phone is Rooted
- Case 2: Phone is Unrooted
- How to Use SuperSU Root to Root Android Phone
- What is Rooting
- How to Unroot Android with SuperSU/Uninstall SuperSU
- Related Articles
- How To Grant Root Access To Apps
- Managing Root Permissions With the SuperSU App
Grant Root Privileges To Existent User
$ grep john /etc/passwd
john:x:1001:1001::/home/alice:/bin/sh
For this, it is required to edit the file /etc/passwd and just change UID and GID to 0:
$ grep john /etc/passwd
john:x:0:0::/home/john:/bin/sh
Add User To Root Group
$ sudo usermod -a -G root john
Delete User With Root Privileges
$ sudo userdel john
userdel: user john is currently used by process 1
To delete him, firstly open the /etc/passwd file and change his UID.
For example, change the line:
john:x:0:0::/home/john:/bin/sh
to something like:
john:x:1111:0::/home/john:/bin/sh
$ sudo userdel john
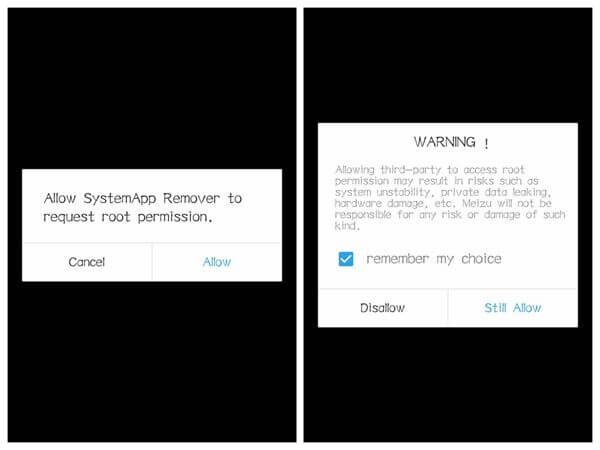
When you open a root app on your Android, taking Samsung Galaxy S7 Edge as an example, the app may require permission for rooting. And you should receive a note as the below screenshot, which reads, «Allow *** to request root permission». Then you need to tap the «Allow» button and «Still Allow».
People Also Read:
● How to Root Android Device with Kingo Root?
● How to Restore Data from a Rooted Android Phone?
Read before Rooting: Note that before granting root access and rooting your Android, it is significant to backup your Android data. This step is simple but quite important. Never skip it! Because some apps can cause a system crash.
The best and the easiest way to root your Android is to let professionals do it. If you’re looking to get a premium root access, look no further than Unlock Partner. They have an expert team of technicians who are available 24/7 to help you get the root access on your phone, safe and sound.
You are here: Home / Android / How To Give Root Access To Your Apps In Your Android Device
In our previous articles we have written the benefits of rooting your device and also more specifically on how to root your android device. We also mentioned one of the benefits of rooting yourd device is that you are able to install root only apps from the play store which allows you to have greater control over your phone. This control comes from the apps accessing your core system files. To allow the apps to access and modify your system files you need to give the apps special root access without which they won’t be able to function properly. 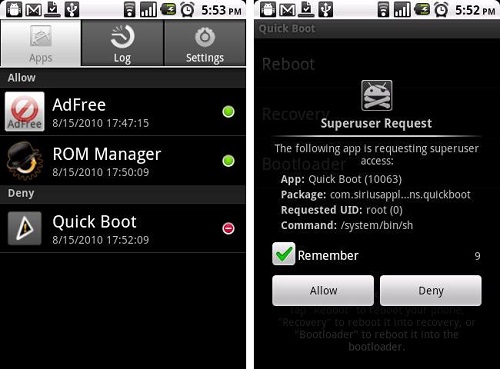 So we have prepared a simple guide that will allow you to give the apps root access to your phone. Don’t worry every time an app requests root access to your phone you will be prompted and this will protect you from running any malicious apps that might damage your phone.
You configure sudo by editing /etc/sudoers with the special visudo editor. As you might guess, visudo is a version of vi made for use with this file. It checks for parsing errors in your edits, so you should definitely use this, rather than your regular editor (even if you normally work with vi). You may want to return to the vi section of Chapter 5 to review some of the commands if you are not familiar with this editor.
Run su to log in as Root before running visudo. To begin, run visudo with no arguments; that is:
The default /etc/sudoers file appears in the shell, looking something like this:
# sudoers file.
# This file MUST be edited with the ‘visudo’ command as root.
# See the sudoers man page for the details on how to write a sudoers file.
This document was created by an unregistered ChmMagic, please go to http://www.bisenter.com to register it. Thanks #
# Host alias specification
# Cmnd alias specification
# Defaults specification
# You should not use sudo as root in an SELinux environment
# Uncomment to allow people in group wheel to run all commands
# Same thing without a password
# %wheel ALL=(ALL) NOPASSWD: ALL
Before editing sudoers, you may want to review the man pages for both sudoers and visudo (sudo itself has a man page as well) for instructions on how to use these files.
To grant the Writers group this same permission without having to enter a password, add this line: writers ALL=/sbin/yast2 NOPASSWD: ALL
Once configured, sudo is very easy to use. Anyone in the Writers group should now be able to type this command to run YaST:
Continue reading here: Enter exit
Was this article helpful?
Just my 2 cents on the subject. I was having the exact same issue with trying to connect from MySQL Workbench. I’m running a bitnami-mysql virtual machine to set up a local sandbox for development.
Bitnami’s tutorial said to run the ‘Grant All Privileges’ command:
/opt/bitnami/mysql/bin/mysql -u root -p -e "grant all privileges on *.* to 'root'@'%' identified by 'PASSWORD' with grant option";This was clearly not working, I finally got it to work using Mike Lischke’s answer.
- Dropping the user.
- Create the user again.
- Make sure you have the correct binding on your MySQL config file.
In my case I’ve commented the line out since it’s just for a sandbox environment.
From Mysql Console:
select user, host from mysql.user;drop user '{{ username }}'@'%';CREATE USER '{{ username }}'@'%' IDENTIFIED BY '{{ password }}';
GRANT ALL PRIVILEGES ON *.* TO '{{ username }}'@'%' WITH GRANT OPTION;Run this command:
FLUSH PRIVILEGES;3. Make sure you have the correct binding on your MySQL config file.
bind-address=127.0.0.1and comment it using a ‘#’:
#bind-address=127.0.0.1For production environments you might want to use limit the network access (additional notes at the end).
Then restart your MySQL service.
Hope this helps someone having the same issue!
MySQL Config File The file could have different locations depending on your
Linux distribution and installation. On my system it was located at
'/etc/my.cnf'. Here are other suggested locations:
- /etc/mysql/mysql.conf.d
- /etc/mysql/my.cnf
You can also search for the config locations as shown in this website:
How to find locations of MySQL config files.
The command you may be thinking of is pm grant PACKAGE PERMISSION, which can be sent to an adb-connected device using adb shell pm grant PACKAGE PERMISSION.
However, only optional permissions can be granted or revoked this way. If you try to grant a permission not requested in the app’s manifest, you’ll get Operation not allowed: java.lang.SecurityException: Package PACKAGE has not requested permission PERMISSION. Likewise, if you try to revoke a permission not deemed optional, you’ll get Operation not allowed: java.lang.SecurityException: Can't change PERMISSION. It is required by the application. Even for a rooted device or emulator.
Now, as far as what is deemed ‘optional’, as well as getting a list of such permissions, that’s a little unclear. However, based on some experimentation, I believe these include at least the set of permissions assigned to permission group android.permission-group.DEVELOPMENT_TOOLS. You can see which these are on a running device using pm list permissions -g. On my API 19 emulator, as well as a Nexus 7 running AOSP 4.4.4, these are:
group:android.permission-group.DEVELOPMENT_TOOLS permission:android.permission.ACCESS_ALL_EXTERNAL_STORAGE permission:android.permission.SIGNAL_PERSISTENT_PROCESSES permission:android.permission.READ_LOGS permission:android.permission.SET_ALWAYS_FINISH permission:android.permission.WRITE_SECURE_SETTINGS permission:android.permission.SET_PROCESS_LIMIT permission:android.permission.CHANGE_CONFIGURATION permission:android.permission.DUMP permission:android.permission.SET_DEBUG_APIf (and only if) these are declared in the manifest, then you can grant/revoke them using the above command. Note that they are not granted automatically on installation; you must issue the pm grant command. I was able to observe and confirm this by using the Settings app and seeing the reported permissions change as I granted and revoked them.
There may be other permissions that behave like this, but I haven’t found them. Normal permissions like android.permission.INTERNET cannot be granted or revoked in this manner.
Addendum: Per additional question in comment section regarding pm set-permission-enforced PERMISSION: As far as I know, the only permission which currently supports this is android.permission.READ_EXTERNAL_STORAGE. I’m basing this statement on my reading of the source code, which is also consistent with my experiences using the command. The purpose of the selective enforcement setting on this permission is to allow testing of apps under pre- and post-API 19 conditions as described here.

Rooting in Android is the key to all kinds of system tweaking or optimization and visual customization. You need to have proper root access to be able to install root apps from the Play Store. In most cases rooting an Android device simply means losing the manufacturer’s warranty. However, people still root their device because they find the benefits of having root access irresistible.
The method of rooting devices from different OEMs differ in some way or other. It can be achieved using an automated script or an easy-root toolkit, by flashing a pre-rooted ROM, or by installing a flashable root package via stock or custom recovery. I have no idea what method you used to acquire root access on your phone or tablet, but if you have been facing issues with root privileges on your device, the tips provided on this page might be of some help to you.
Have you been facing “Root Access Possibly Lost” issue while trying to back up, restore a flash a ROM in CWM or TWRP recovery? Do you see “Root access missing” message on your rooted device when you open an app that requires root? Try one of the solutions suggested below to fix missing or lost root access issue on rooted Android devices
- First off, make sure that your device has been rooted properly. To verify root access on your device, try this free app: [googleplay url=”https://play.google.com/store/apps/details?id=com.joeykrim.rootcheck”] Make sure that you see the following message in Root Checker.

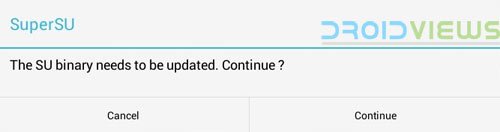
- If you’re facing missing root issue just after rooting your device, open SuperSU and update SU binary if the app prompts you to do so.
- In case root permission issue is related to a specific app and it works fine with other apps, you might have accidentally denied root permission to that app. To fix it, go to device Settings> Applications> All> SuperSU and tap it. Then clear app data. Now open the app in question and grant root permission when prompted.
- Open SuperSU from your device’s app drawer, go to app Settings and try disabling and enabling it. Then reboot the device and try using root apps. If the lost root problem is not fixed yet, try the solution given below.
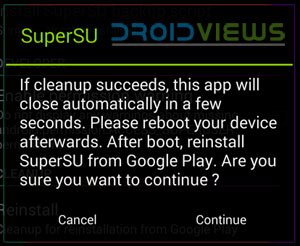
- Open SuperSU> Settings and tap the Reinstall option and select Continue.
- If your device doesn’t have a custom recovery like CWM or TWRP installed on it, you can try this solution.
- Download the latest version of Chainfire’s SuperSU flashable ZIP file: UPDATE-SuperSU-vx.xx.zip
- Unzip the file and open the extracted folder.
- Go to a folder called common and open it.

- Copy Superuser.apk to your device and install it. Then try using a root app to check if the problem has been solved.
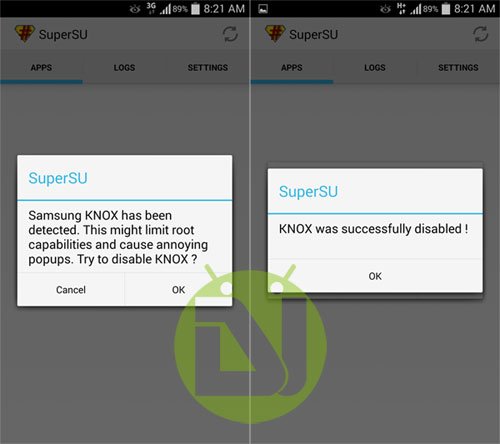
- If you have a Samsung Galaxy device with KNOX on it, and you are getting issues with root access, the above solution might be helpful to you too. After installing Superuser.apk, open the app. When you see the following message, select OK: “Samsung Knox has been detected. This might limit root capabilities and cause annoying popups. Try to disable KNOX.”
- If your device has CWM or TWRP, download the latest SuperSU APK. Copy the zip to your device and flash it using Install option (in TWRP), or install zip from sdcard option (in CWM).
If none of the above tips could help your problem with root privileges and did not fix missing or lost root access issue on your Android device, find a proper root exploit for your device and root it again.
If the methods described in this tutorial did not work for you, please head over to our new guide for fixing the lost root issue on Android devices.
Got Root on Your Device?
Find Best Apps for Rooted Android Devices
<!—
—>
Reader Interactions
Part 1. Managing Root Permissions With the SuperSU App
Step 1. Download SuperSU
First of all, you need an app that manages root permissions of your apps. Download and install SuperSu on your Samsung Galaxy S7 Edge. Then reboot your device. You should see the SuperSU icon.
Step 2. Manage Root Permissions
With SuperSU app on your Android, whenever an app is intended to request root permissions, it has to ask SuperSU on your phone.

Part 2. Root Android with Android Data Recovery
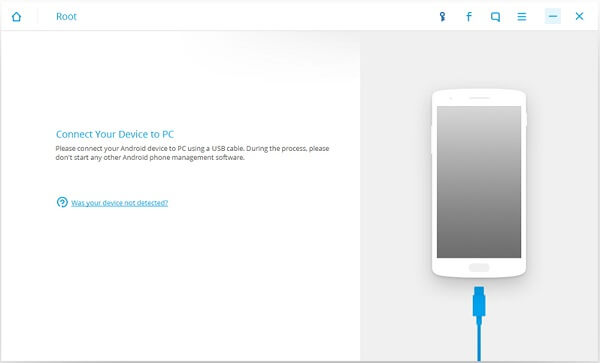
Step 1. Connect Device to PC
To start with, download and open Android Data Recovery on your computer. At the left pane, select and click «More Tools» > «Android Root». When in the «Android Root» page, you will be prompted to connect your Android device to the computer. Take use of your cable to help the connection. During the process, do not start any other Android phone management software. Then USB debugging is required.
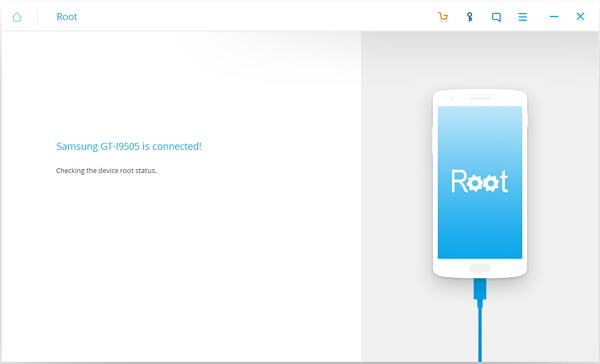
Step 2. Check Android Status
When your phone is recognized, you will have a note, which reads like «Samsung Galaxy S7 Edge is connected». Then Android Data Recovery will check the root status of your device. The result will be shown in the interface. There will be two cases:
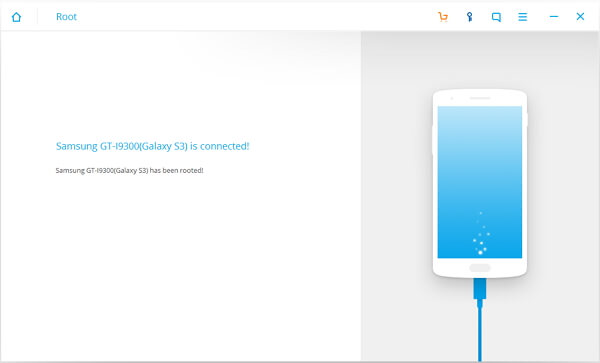
Case 1: Android Phone is Rooted
Should your Android phone bee rooted, you will have an interface with a note saying something like «Samsung Galaxy S7 has been rooted». You don’t need to root your phone one more time.
Case 2: Phone is Unrooted
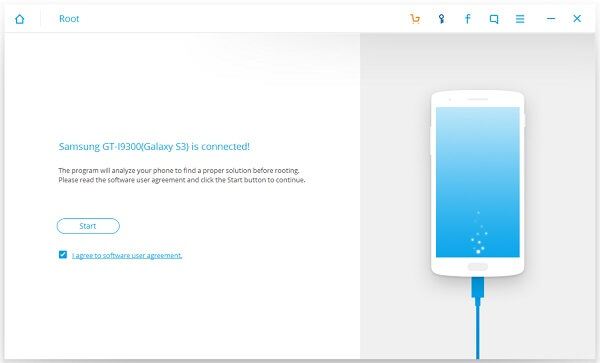
If your phone has not been rooted, you will have the interface as below. The program will detect your phone to find a proper solution before rooting. Please read the software terms and agreements and click the Start button to continue.
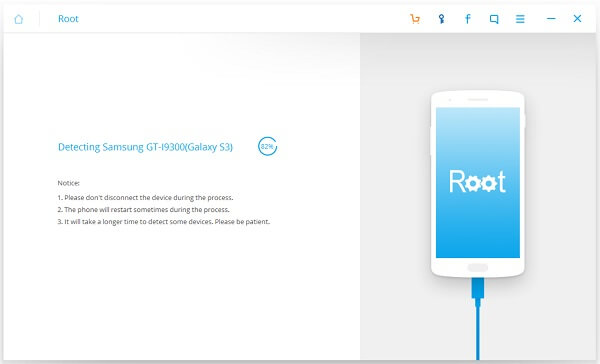
Next, the software will check if your phone is supported or not. Here are some notices you need to pay attention to:
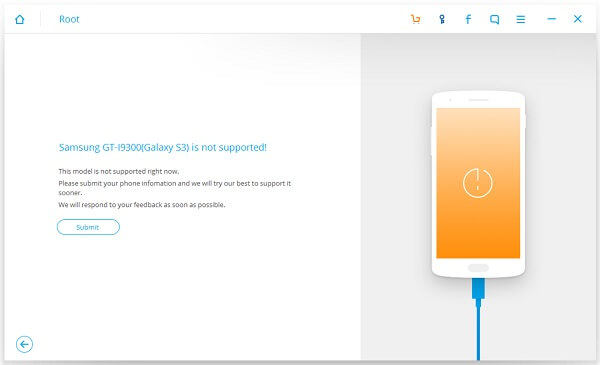
If your Android is unsupported, you will have an interface as below. You can submit your phone information if you need to root it urgently. The developer will respond to your feedback as soon as possible.
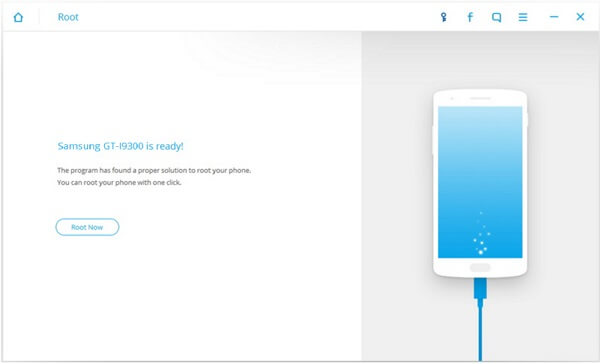
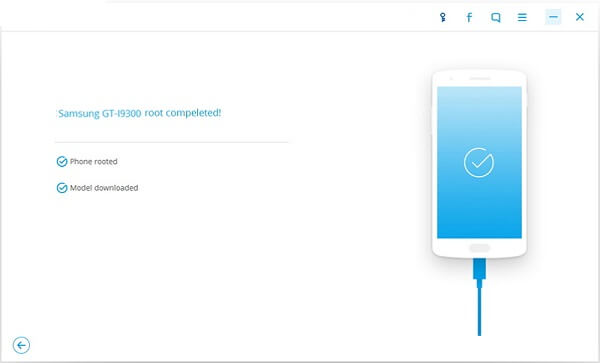
If your device is supported, you can check the «Root Now» button to start the rooting process. When the operation is completed, you will be prompted «Model downloaded» and «Phone Rooted».
If you ever want to unroot your device, turn on the SuperSU app > go to its Settings screen > tap the «Full unroot» option. Then your phone will be unrooted. This is definitely the easiest way to unroot your phone.
That’s all. Questions and feedbacks are welcomed. Just leave your message.
How to Use SuperSU Root to Root Android Phone
SuperSU is available in the Google Play Store, but that version doesn’t actually give you root access. In fact, you need root access to use it in the first place. Thankfully, SuperSU is also available as a .zip file that we can «flash» with TWRP.
Note: Make sure it is fully charged so that it cannot be switched off while being rooted. Backup your Android before proceeding. Since there are risks that it will brick your phone if the rooting doesn’t go well, it’s important to back up your phone data before rooting. So if anything goes wrong, you don’t end up to losing all precious data on the phone.
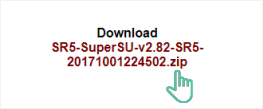
Step 1: Go to SuperSU Root site and download the SuperSU zip file. If you download it on your computer, you need to transfer it to your device.
Step 2: Get the device in the TWRP recovery environment. To do:
Hold down specific buttons on your device. This buttons you have to hold down vary from one device to another. for example, you may have to hold the Power and Volume Down buttons simultaneously, then use the volume keys to boot Recovery Mode. For your specific device, find the proper button combination by searching for «TWRP (Device Model name)» in Google.
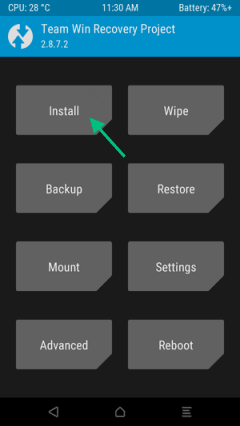
On the TWRP recovery screen, tap «Install» to begin the process.
Step 3: Scroll down and navigate to the SuperSU ZIP file you downloaded. Select it and then Swipe to confirm flash.

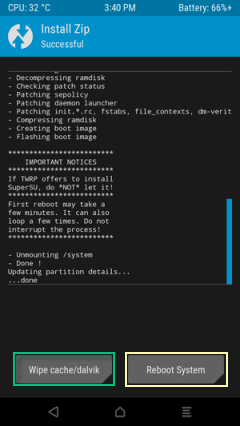
Step 4: Wait for it flashing. Tap Wipe cache/Dalvik when SuperSU is installed. When that finished, select the Reboot System to continue your operation.
What is Rooting
Common Android rooting ways including: Using the built-in one-click root process, Meizu and XiaoMi phone have Root Permission option, which can be enabled in Settings. You can root android with One-click tool, like Kingoroot. TWRP recovery method, which is the most widely supported method for rooting your device.
How to Unroot Android with SuperSU/Uninstall SuperSU
Step 1: Open SuperSU app.
Step 2: Go to the Settings tab.
Step 3: Scroll down below to the Cleanup section.
Step 4: Tap on Full Unroot to uninstall SuperSU and unroot your phone.
Step 5: Confirm by pressing Continue.
Step 6: Reboot your phone.
Related Articles
How To Grant Root Access To Apps
- Most of the time when you have rooted your device The Superuser app is automatically installed along with the busy box app. But sometimes the Superuser app is not installed in your phone. So in such times you can visit the play store to download and install the latest version of the Superuser app.
- After you have installed this app when you launch it you will notice the first screen where all the apps that have requested root access to your phone are listed.
- If you swipe to the right you can notice the activity log of all the rooted apps on your phone.
- Now you can download the app that requires root to function. For the sake of this guide we have downloaded the titanium backup app that needs root permission to work and allows you to make backup of the all apps that are installed on your phone.
- After you have downloaded Titanium backup after you launch it you will notice a dialogue box pop ups requesting you to allow the app to have root access to your phone. You can click on remember box so that you don’t get the notification every time you launch this app.
- If it’s an app that you don’t need then you can deny the permission. The app will exit and will not function properly in your phone until you grant the permission.
- Once the permission is granted to the app you can use it like every other app.
- You can also have a look at all the apps in your phone that have been granted root access by going into Superuser app.
- Superuser app also allows you to change permission of an app and you can even turn off the root access of a particular app from within superuser.
(Visited 20,352 times, 2,440 visits today)
Managing Root Permissions With the SuperSU App
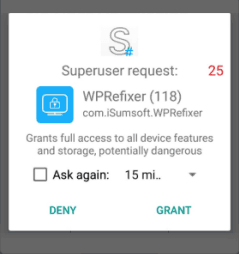
When you reboot your phone, you should see the new SuperSU icon in your app drawer. SuperSU controls which other apps on your phone get root permissions. Whenever an app wants to request root permissions, it has to ask your SuperSU app, which will show a request prompt asking for root access. If you click Grant and you get a success message, you have successfully achieved root on your phone.
")


")