


TWRP 3.4.0-0 has been released officially. This latest update of the recovery adds better support for legacy devices running Android 10, System-as-Root, a new template for TWRP Installer ZIP files, allows flashing of OZIP firmware on Relme/Oppo devices, and also fixes the dreaded sensors bug caused by TWRP.
Now you have rooted your android device with SuperSU, and you are all set to use the root apps on your device. You can also tweak your device with the mods like ViPER4Android, Xposed Framework, and lot more.
Now explore more possibilities and customize your Android with the third-party apps/mods. If you have any further questions regarding the procedure, feel free to ask us by commenting below.

The most popular and best known root manager is SuperSu which was developed and maintained by a developer named ChainfireXDA till September 2017. SuperSu is updated for every new versions of Android as well as for bug fixes. There are some other root managers like Magisk manager which is also available for download.
Here, in this article we will be providing you steps on how to root any smartphone or tablet using SuperSU including download links for the necessary files.
There are many methods to root any Android phone, but they do not provide an effective and safe environment. To get rid of those problems, Magisk is a powerful way to root your phone effectively and safely. This new method works systemless that’s why we call it the “systemless” root method.
We have provided the direct download link of Magisk and also shown you the complete installation procedure. Once you start using Magisk you will get to know more about it. There is one more thing that has been talked about less in this article Magisk modules.
It is basically a flashable zip file that can be installed directly from the Magisk App, or you can flash it using TWRP Recovery. If you like customizing your Android device like a pro geek, then this feature is convenient for you. You explore hundreds of modules from the modules repository.
Do you want to root your Android phone safely? If yes then you are in the right place, in this article I will introduce to you Magisk Zip and Magisk App. In the recent major update, Magisk and Magisk Manager are now merged into the same package.
Now the questions that come to your mind are what is Magisk and how it’s better than other rooting methods? So, in this article, you will get to know everything about Magisk.
Through this article, you will not only learn about Magisk, but I will provide you with the direct download link to the Latest Magisk Zip and Magisk App.
We will learn about Magisk in a step-by-step manner. And I will highly suggest you read this article till the end so that you don’t miss out on any information related to Magisk.
So, without wasting any more time, let’s quickly jump to our topic.
This post has not been updated recently
Table of Contents
- Guide to Root Android using SuperSU ZIP and TWRP Recovery
- Download SuperSU ZIP
- Download SuperSU APK
- How to Uninstall SuperSU?
- The SuperSu App
- Things to note before downloading any version of SuperSu
- SuperSU apk Root files Download links
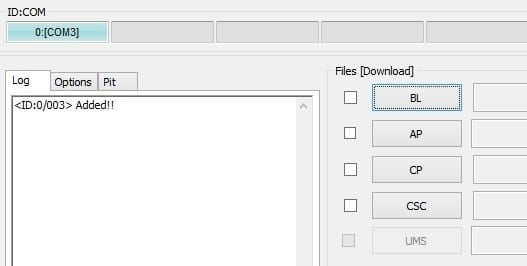
- How to root a Samsung device using the ODIN method and Install this SuperSu. zip?
- Installing the SuperSU. apk file
- Как установить Magisk на Android
- Перепрошив Zip установщика Magisk с помощью TWRP Recovery
- Путем прошивки пропатченного загрузочного образа Magisk с помощью Fastboot
- Как полностью удалить Magisk и рутировать Android-устройство?
- Root Android-устройство без ПК
- Через TWRP
- Через Magisk
- ПРОБЛЕМА 3. Приложения для получения root-доступа в один клик
- Получите root права на любое устройство Android без ПК
- Преимущества этого метода для рутирования вашего устройства Android без ПК
- Настройте эмулятор
- ШАГ 3. Получите root права на Android-устройство без ПК с помощью эмулятора.
- Проверка со снимком экрана
- Заключение
- Asus
- What’s new in TWRP 3
- Major Changes & Features
- What about support for devices running Android 10?
- How to Install TWRP 3. 4 Recovery?
- Benefits of Rooting your Android device
- Why do you need to Root Android phones and tablets?
- Running Custom ROMs
- Remove the Bloatware
- Real Backups
- What is Magisk App?
- How to Root Android phone using SuperSU ZIP
- How to Update to TWRP 3. 4 from an Existing Version of TWRP?
- Features of Magisk App
- Magisk Hide (Removed)
- What is Magisk?
- How to root any Android smartphone using SuperSu Zip
- Steps to Uninstall SuperSU on Android Device
- Download Magisk App (Magisk Manager) For Android 2023
- How to Root the Android devices using SuperSU ZIP?
Guide to Root Android using SuperSU ZIP and TWRP Recovery
Before you head over to the instructions and install SuperSU Zip, let us take a look at a few benefits of using it as your go-to root solution.
Download SuperSU ZIP
Chainfire provides the root packages via two different channels – SR (Service Release)/BETA and Stable versions. For your convenience, we have provided official links for both. It is always advised to use the latest BETA version since it accommodates the most recent changes and support for newer Android versions like Android Oreo 8.0 and 8.1.
The download links from the official website are down. XDA Recognized Contributor Ibuprophen has uploaded all the releases to AndroidFileHost. All the credit goes to him.
Download SuperSU APK
These steps will not only root your device but will also install the official companion app. So once your phone boots, you can start using root-enabled apps and you shall be prompted to allow/deny root permissions. You can easily update the official app directly from the Play Store. But if you would like to manually install the latest version, then you can download the APK from above and sideload it on your Android device.
How to Uninstall SuperSU?
Now that you have succeeded to root Android using SuperSU, you are all set to use root apps. You can also go ahead and tweak your device with mods like ViPER4Android, Xposed Framework, and more. There’s a lot more you can do now, so explore the possibilities and customize your Android with third-party apps/mods. This is not the only method, you can alternatively root Android devices using Magisk.
So you have just been able to download SuperSU zip and root your Android phone. If you have any questions regarding the procedure, let us know by commenting below.
SuperSu CF-Auto-Root is the app you use to manage root permissions of your mobile after a successful rooting process. Mostly, for Samsung mobile devices, once you root them and install TWRP recovery, you can equally add SuperSu right away. There are two unique types of this app available: the SuperSu.zip file and SuperSU.apk. The apk version, like you, may know what you’ll install directly on an Android device; Android OS supports apk files.
Also, as I said earlier, you can install this app to a Samsung or any other mobile device via TWRP. For installing SuperSU via TWRP, you will need the .zip file. When you get the .zip type/version of this app, then you’ll extract its contents on a computer and save it to a particular folder. Furthermore, after rooting a smartphone, you can install any app. However, the app must be a .apk. Otherwise, it will not accept to install on your Android device.

The SuperSu App
Meet the #1 mobile app on any rooted Samsung Galaxy device or other smartphones. The app works to allow you to manage root permissions on your smartphone. This means that if your device is not rooted, it is very likely that this app won’t be relevant, so ignore it.
On the other hand, if your device is rooted, you need this excellent app. We will show you where to download the zip and apk versions of the root permissions app.
Things to note before downloading any version of SuperSu
This app works on all Android devices, but the device must be rooted in the app’s full functionality.
Here are the .zip files of this app.
Note: you cannot install these versions directly on a mobile device. First, you must download them on a computer, extract the files, and then flash them to the desired device. Below are the unique download links to this app’s zip versions.
SuperSU apk Root files Download links
Of course, you will find a lot of apps on the Google Play store with the name – SuperSU, trust me, over 80% of those apps are fake. Here, we will provide you with various links to download any of the SuperSu apk versions you like.
How to root a Samsung device using the ODIN method and Install this SuperSu. zip?
Installing the SuperSU. apk file
Below is how to install this app on your smartphone directly. This process/step does not require a computer. It should be something you already know even;

Selva Ganesh is the Chief Editor of this Blog. He is a Computer Science Engineer, An experienced Android Developer, Professional Blogger with 8+ years in the field. He completed courses about Google News Initiative. He runs Android Infotech which offers Problem Solving Articles around the globe.
В этом подробном руководстве мы покажем вам, как установить универсальный бессистемный интерфейс Magisk для рутирования устройств Android. Есть два разных метода его установки — во-первых, путем прошивки последней zip-версии установщика Magisk с помощью восстановления TWRP, или два, путем прошивки загруженного образа Magisk с исправлением.
Инструкции для обоих методов приведены ниже в виде пошаговых инструкций. Для вашего удобства мы также перечислили шаги по полному удалению / удалению Magisk для отмены рутирования, если вы почувствуете в этом необходимость.
Сообщество разработчиков Android наполнено изобилием инструментов для модификации (обычно известных как «моды»), которые позволяют настраивать программное обеспечение на устройствах Android. Многие из них приобрели огромную популярность благодаря своей способности эффективно и легко изменять программное обеспечение телефона.
Эти моды могут помочь вам нарисовать различные функции на вашем телефоне Android, которые OEM обычно не позволяет вам. Сегодня мы рассмотрим один из таких модов / настроек, который широко используется в последние несколько лет.
Мы здесь ради Magisk , идеального интерфейса для бессистемной модификации программного обеспечения на устройствах Android. Поэтому, если вы планируете рутировать свой телефон или добавить к нему сторонние функции, вам следует рассмотреть возможность его использования.
Magisk является очень мощным инструментом , который позволяет пользователям не только корню их Android устройства легко , но и применить изменения к программному обеспечению бессистемных-л. Он разработан XDA Recognized Developer topjohnwu и также считается истинным преемником SuperSU , предлагая еще больше функций и способов эффективного рутирования устройств под управлением последней версии Android.
В 2016 году Magisk появился как инструмент для модификации программного обеспечения на устройствах Android с использованием «модулей», как и Xposed Framework , но более эффективным образом.
Что ж, в отличие от Xposed, Magisk позволяет пользователям настраивать программное обеспечение без фактического изменения раздела / system. Это означает, что пользователи по-прежнему могут проходить тесты Google SafetyNet и использовать приложения, которые могут на него полагаться.
В дальнейшем он получил несколько новых функций, таких как MagiskSU , часть самого инструмента для эффективного рутирования устройств Android. На данный момент вы можете установить Magisk для получения root-прав на любом устройстве Android под управлением Android 10, Pie, Oreo, Nougat, Marshmallow и Lollipop.
« Magisk Hide » — еще одна примечательная функция, которая позволяет пользователям скрывать root от приложений, которые могут не работать при обнаружении Root, таких как Google Pay, Pokemon Go, банковские приложения и т. д.
Ниже приведен список основных функций, которые предлагает Magisk:
Итак, если вы вообще заинтересованы в изменении программного обеспечения вашего устройства Android, вы должны попробовать Magisk.
Как установить Magisk на Android
Как мы уже упоминали в начале, есть два разных способа установить Magisk на Android. Первый способ — это прошить последний ZIP- файл установщика Magisk с помощью TWRP, что является самым простым.
Но если TWRP-восстановление еще не доступно для вашего устройства или вы просто хотите получить root-права, вы можете использовать второй метод. Он включает в себя исправление стандартного загрузочного образа (ядра) с помощью Magisk, а затем мигание исправленного загрузочного образа Magisk на ваш телефон Android через fastboot.
Это также рекомендуемый метод, поскольку он позволит вам легко устанавливать обновления OTA на ваш рутированный телефон Android.
Мы пошагово рассмотрели инструкции для обоих методов ниже.
Перепрошив Zip установщика Magisk с помощью TWRP Recovery
Помимо рутирования, Magisk также одновременно исправляет / отключает любые функции безопасности на уровне ядра (например, DM-verity ), которые могут помешать загрузке вашего телефона в случае изменения программного обеспечения.
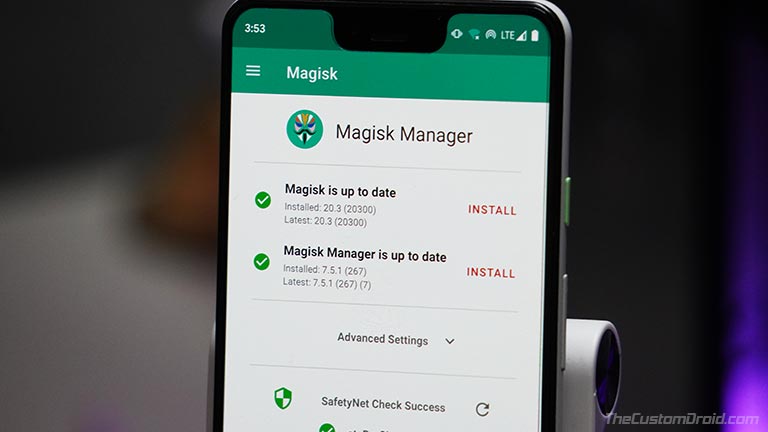
После того, как ваш телефон Android загрузится, вы увидите последнюю версию приложения Magisk Manager в панели приложений. Просто запустите его, чтобы убедиться, что Magisk установлен.
Путем прошивки пропатченного загрузочного образа Magisk с помощью Fastboot
Если ваше устройство не поддерживает восстановление TWRP или вы не хотите его устанавливать по какой-либо причине, выполните следующие действия, чтобы установить Magisk, запрограммировав загрузочный образ Magisk с исправлением. Этот метод также позволяет легко получать обновления OTA на рутированном устройстве Android.
Когда ваш телефон загрузится, откройте Magisk Manager, чтобы проверить установку. В дальнейшем вы можете загрузить различные модули из официального репозитория или отсюда . Официальная документация является хорошим способом , чтобы начать с основами , а также знать , что Magisk способен.
Как полностью удалить Magisk и рутировать Android-устройство?
Теперь, если вы хотите удалить Magisk по какой-либо причине, приведенные ниже шаги помогут вам в этом. Самый прямой способ сделать это — через само приложение Magisk Manager. Перед удалением Magisk обязательно отключите и удалите все модули. Как только вы это сделаете, следуйте приведенным ниже инструкциям.
После загрузки телефона вы также можете безопасно удалить / удалить приложение Magisk Manager.
Альтернативой описанному выше методу является прошивка zip-архива Magisk Uninstaller с помощью TWRP Recovery или просто восстановление стандартного загрузочного образа, если вы использовали метод 2.
Magisk дает вам возможность выполнять различные задачи для настройки программного обеспечения. Для начала вы можете использовать любое приложение с поддержкой root на своем телефоне. «Magisk Hide» позволяет скрыть root от таких приложений, как Pokemon Go и т. д. Вы также можете установить модули для добавления сторонних функций в программное обеспечение. Возможности безграничны, так что не прекращайте изучать.
Итак, это было наше руководство о том, как установить Magisk на Android и получить root- доступ . Если у вас есть вопросы, просьба оставлять их в комментариях.
В этом уроке мы покажем вам, как получить root права на любое устройство Android без ПК. Начнем с того, что этот метод не требует разблокированного загрузчика. Мало того, мы также не будем использовать TWRP Recovery или даже Magisk (ни ZIP-файл Magisk Installer, ни APK-файл Magisk Manager). В результате мы также не стали бы использовать технику пропатченного boot.img. Мы бы не использовали ни одно из этих опасных корневых приложений одним щелчком мыши. Так как же все-таки это будет достигнуто? Пожалуйста, ознакомьтесь с этим подробным руководством, и вы обязательно будете впечатлены конечным результатом. Мы также приложили скриншоты, чтобы развеять все ваши сомнения.
Будучи техническим блоггером, это один из наиболее часто задаваемых вопросов: «Можно ли получить root права на ваше устройство Android без использования ПК?». Что ж, ни для кого не секрет, что с экосистемой с открытым исходным кодом, такой как Android, вы можете опробовать множество настроек и настроек. Для некоторых они ограничены опробованием пакетов значков модов, тем, программ запуска и различных стилей. Но других, особенно технарей, больше волнует настройка ОС устройства. Для этого они начинают свое путешествие с разблокировки загрузчика устройства.
Это просто открывает шлюзы для множества настроек. Например, теперь вы можете заменить стандартное рекавери устройства на собственное, такое как TWRP. Это, в свою очередь, имеет довольно важные параметры, такие как возможность прошивать моды, ZIP-файлы, файлы IMG и т. Д. Кроме того, вы также можете сделать резервную копию Nandroid, стереть разделы устройства, среди прочего. Затем некоторые пользователи также пробуют настраивать ОС Android в виде пользовательских ПЗУ. Но что представляет наибольший интерес для технарей, так это возможность получить административные привилегии.
Это, в свою очередь, возможно путем рутирования их устройства через Magisk или даже SuperSU на старых устройствах. Как только это будет сделано, вы можете прошивать модули Magisk, устанавливать темы Substratum или прошивать различные фреймворки Xposed. В том же духе вы можете внести изменения в системный раздел или настроить файл поддержки сборки. Что ж, возможности безграничны. Но это в конечном итоге приводит нас к очень важному вопросу: можем ли мы получить root права на Android-устройство без использования ПК? Что ж, оказывается, вы можете, с довольно удобной и скрытой настройкой. Вот как.
Root Android-устройство без ПК
В общих чертах, вы можете получить root права на свое Android-устройство с помощью TWRP или без TWRP. В первом методе вам нужно будет прошить ZIP-файл Magisk Installer. Второй метод требует исправления стандартного файла boot.img, а затем его прошивки с помощью команд fastboot. Итак, вот что происходит в обоих этих методах:
Через TWRP
Это требует установки TWRP Recovery на вашем устройстве. Для загрузки (временная установка) или перепрошивки (постоянная установка) этого восстановления вам потребуется выполнить команды fastboot. Это, в свою очередь, делается путем выполнения команд в окне PowerShell или командной строки после того, как вы установили Android SDK Platform Tools «на свой компьютер». Но ждать! Разве мы не можем выполнять команды ADB и Fastboot через приложения для Android, такие как Termux и Terminal Emulator?
Ну, вы можете, но для этого в первую очередь требуется Android-устройство с root-правами! А как насчет использования таких приложений, как Flashify, которые могут прошивать файлы ZIP и IMG без использования TWRP? Что ж, для запуска этого приложения также требуется рутированное устройство Android. Так что все это в конечном итоге доказывает, что вы не можете рутировать свое Android-устройство через TWRP без ПК. Теперь обратим внимание на второй метод.
Через Magisk
Хорошо, а что если мы вообще не воспользуемся помощью TWRP. Ну, рутирование устройства Android без TWRP существовало целую вечность. Это предпочтительнее, чем описанный выше метод, потому что для большинства устройств нет активной сборки TWRP. Первый шаг требует получения файла Stock Boot.img. В настоящее время большинство OEM-производителей поставляют свои стоковые прошивки в файле payload.bin. И для этого требуется, чтобы на вашем компьютере был установлен Python. Прочтите: Как извлечь файл payload.bin и получить стандартный файл загрузочного образа.
Но есть еще некоторые устройства, файлы прошивки которых находятся в сжатом ZIP-файле. Затем его можно легко извлечь на ваше устройство с помощью приложений WinZIP или WinRAR для Android. Ну, даже устройство, имеющее файл payload.bin, может запросить стоковый файл boot.img у своих друзей. Следовательно, они могли контролировать весь процесс извлечения. Таким образом, первый шаг получения стокового файла boot.img возможен без использования ПК.
Второй шаг включает в себя исправление стандартного файла boot.img через приложение Magisk Manager. Что ж, это снова возможно без использования ПК. Просто установите Magisk, а затем исправьте файл boot.img. Опять же, вы также можете пропустить этот метод, и один из ваших друзей напрямую загрузит для вас пропатченный стандартный файл boot.img. Читайте: исправьте загрузочный образ через Magisk и прошейте его с помощью Fastboot
Короче говоря, первые два шага для рутирования через Magisk не требуют ПК. Теперь идет третья и последняя часть: вам нужно прошить этот пропатченный загрузочный IMG-файл через Fastboot. Во-первых, вам нужно будет загрузить ваше устройство в fastboot. Это можно легко сделать, выключив устройство и используя комбинации аппаратных клавиш для загрузки устройства в режим Fastboot.
Но, к сожалению, здесь дело заходит в тупик. Вы не можете прошивать файлы IMG без использования команд Fastboot внутри PowerShell или командной строки на вашем ПК. Хотя некоторые приложения для Android могут позволить вам напрямую прошивать файлы IMG и ZIP (как упоминалось ранее), но в первую очередь для этого требуется устройство Android с root-правами.
Итак, в завершение, вы не можете использовать оба метода (с TWRP или без TWRP) для рутирования вашего Android-устройства без ПК. Компьютер с Windows или Mac является обязательным требованием. Теперь, прежде чем мы двинемся дальше, я хотел бы обсудить еще один довольно важный момент, с которым вы могли столкнуться:
ПРОБЛЕМА 3. Приложения для получения root-доступа в один клик
Прежде всего, держитесь на безопасном расстоянии от всех корневых приложений, запускаемых одним щелчком мыши. Я повторяю, никогда не используйте эти типы приложений, НИКОГДА. Они несут довольно много рисков, и вы создаете нежелательные риски для конфиденциальности. Слушай, я понимаю. Укоренение само по себе небезопасно, но на самом деле вы будете иметь полное представление о том, что вы делаете на каждом этапе.
К сожалению, этого нельзя сказать об этих приложениях. Более того, они даже не будут работать на новых устройствах Android. В основном они были разработаны для работы с уровнем API 25 (Nougat 7.1) или ниже. В любом случае, если вы можете установить их на устройства текущего поколения, я бы посоветовал сразу удалить эти приложения.
Получите root права на любое устройство Android без ПК
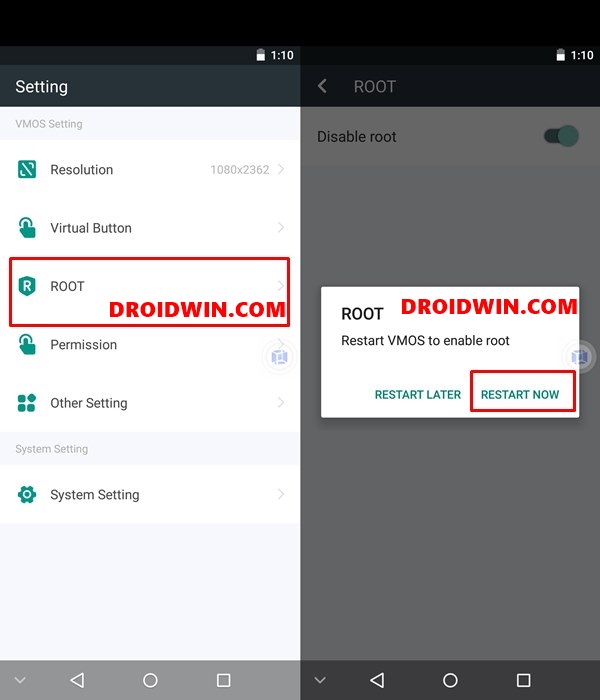
До сих пор мы обсуждали все причины, по которым обычные методы рутирования не работают без ПК. Это дало вам полный фон. Итак, теперь, когда это не так, давайте сосредоточимся на более яркой стороне и проверим исправление. Это будет связано с использованием эмулятора Android. Да, вы не ослышались, мы будем использовать эмулятор Android на устройстве Android. Для тех, кто не знает, эмулятор — это программа, которая позволяет запускать несовместимые приложения на оборудовании, на котором она установлена.
Например, вы можете играть в игры для PS4 на устройстве Android через приложение PS4 Emulator для Android или запускать приложения Android на своем ПК через Bluestacks. Но здесь мы будем использовать немного другой подход. Мы будем использовать эмулятор Android внутри самой ОС Android. Таким образом, вместо того, чтобы на самом деле рутировать ваше устройство, мы будем рутировать этот эмулятор. Это, в свою очередь, даст вам множество преимуществ, как указано ниже:
Преимущества этого метода для рутирования вашего устройства Android без ПК
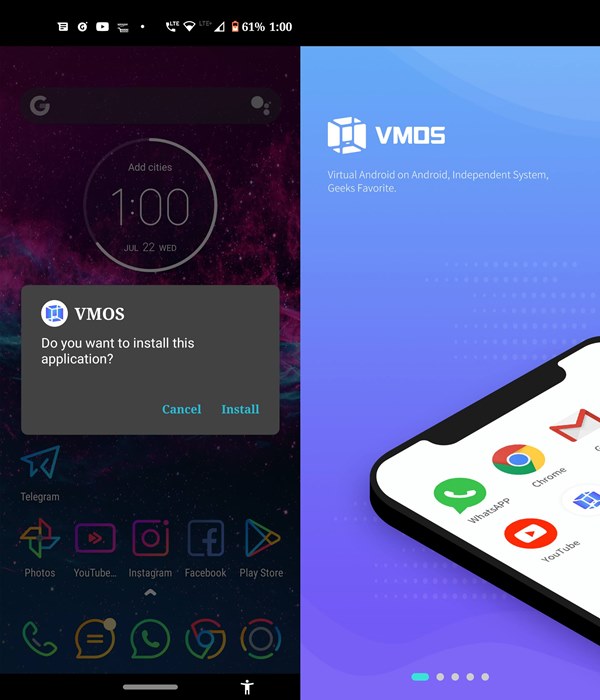
Настройте эмулятор
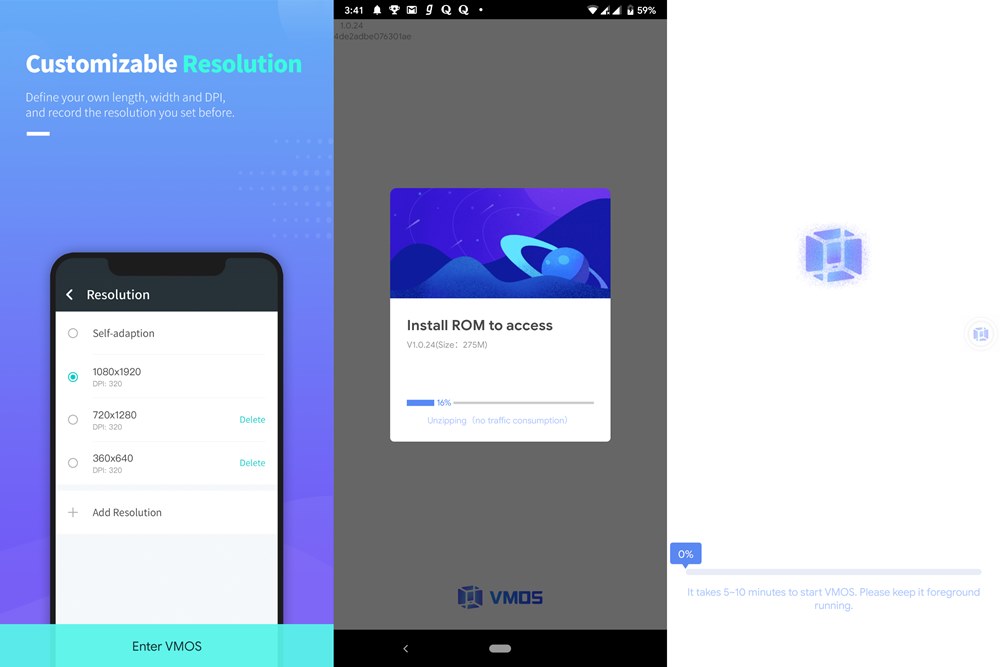

ШАГ 3. Получите root права на Android-устройство без ПК с помощью эмулятора.
Проверка со снимком экрана

Заключение
Итак, на этом мы завершаем руководство о том, как получить root права на ваше устройство Android без ПК. Единственным недостатком (если его можно так назвать) является тот факт, что он основан на Android Lollipop. Для меня это скрытое благословение, поскольку большинство приложений теперь вызывают конфликты с версиями Android 10 или более поздними. Но теперь они работают без каких-либо проблем как таковых. Одним из таких примеров является приложение Xposed Installer.
Начиная с Android 9.0 Pie, вам потребуется пара модулей Magisk, чтобы сделать его совместимым. Но для его запуска внутри VMOS ничего как такового не требовалось. Добавьте к этому тот факт, что все происходит внутри самого эмулятора и не оказывает никакого влияния как такового на ваше устройство, о большем мы и просить не могли. На этой ноте сообщите нам свое мнение об этом в разделе комментариев ниже. А поскольку стабильная сборка Android 11 уже запущена, вот несколько статей, которые могут быть полезны нашим читателям:
Update (14 January 2021): TWRP 3.5.0 has been released with improved Android 10 support, a new naming scheme, and more.
Below, you will find the links to download the latest TWRP 3.4 recovery image for all supported Android devices, along with the Installer ZIP files for devices that support the A/B partition scheme.
There are 400+ officially supported devices from different OEMs (manufactures) including but not limited to Asus, Google, HTC, Huawei, LG, Motorola, Oppo, OnePlus, Realme, Samsung, and Xiaomi. However, the latest TWRP 3.4.0-0 builds could take some time before they are released for each and every device.
Since the list is very long, you can use Ctrl + F in your browser and search for your device name, model, or codename.
Asus
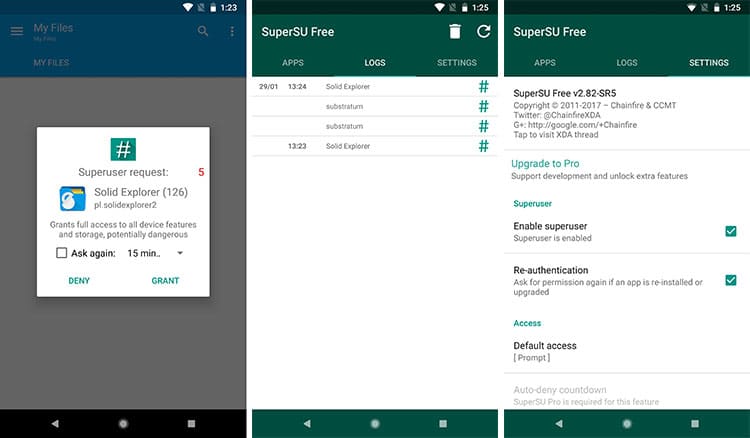
1. First Open the “SuperSU” app.2. Move to the “Settings” tab.3. Scroll down below and select the “Cleanup” section.4. Then Tap on “Full Unroot” so that you can uninstall SuperSU and unroot your phone.5. Confirm the selection by pressing “Continue”.6. Finally, Reboot your phone.
What’s new in TWRP 3
Since the release of TWRP 3.3 a year ago we have observed some of the most drastic changes in the Android ecosystem. From the new System-as-Root implementations to dynamic partitioning system in Android 10, a lot of these changes have posed new problems in TWRP development and real-time usage.
TWRP 3.4 is possibly one of the biggest updates to the custom recovery considering the large variety of changes it brings. So before you head over to download links and installation instructions, let us discuss these first.
Major Changes & Features
If you’re interested, you can find the complete changelog of this latest version on the official website. You’d observe that the list of changes, new features, and bug fixes is quite stretched. And a lot of these wouldn’t make sense if you’re not a developer.
Apart from the ones mentioned above, there are several fixes and changes concerning the decryption, and much more.
What about support for devices running Android 10?
Well, it’s not exactly Android 10 that poses the problem, but the new changes that are introduced with it, which are applicable to devices that ship with Android 10 as their original version. This includes phones like the Pixel 3, Pixel 4, and future devices that will come with Android 10 out-of-the-box.
The most notable change, and the one that poses the biggest problem with TWRP development is the new dynamic/logical partitioning system. Android 10 devices now use a super partition, instead of dedicated partitions like system, vendor, etc. This in turns make it really hard for TWRP to mount the system partition. Which makes it extremely hard to flash ZIP files like ROMs, GApps, etc since the /system is read-only and couldn’t be mounted easily.
The developers are constantly working to find a proper solution for implementing TWRP to handle the super partition. However, the ETA is yet unknown. But what we do know for now is that TWRP 3.4 doesn’t support devices with the dynamic partitioning system, at least not yet. At the same time, it is also worth noting that other non-Pixel devices shipped with an older Android version (Android Pie, Oreo, etc) and received upgrades to Android 10 are not affected by this.
Considering the amount of dedication the developers have put into it, we are quite certain that they will surely find a way to get TWRP to support the dynamic partition system at some point in the future. It’s quite similar to the challenge the developers faced back when the A/B partition scheme was introduced with the original Google Pixel devices back in 2016.
Related Article: How to take a NANDroid backup of your phone via ADB
Chainfire provides the SuperSU root packages via two different channels – SR (Service Release) / BETA and Stable versions for which the official links have been provided below.
It is always good to use the latest BETA version as it has the most recent changes and can support the newer Android versions (Oreo 8.0 and 8.1).
The download links have been added here.
How to Install TWRP 3. 4 Recovery?
Installing TWRP is quite an easy task. But before you begin with the instructions, it is required to enable OEM Unlocking and unlock the bootloader of your Android device. That is because without an unlocked bootloader, flashing anything to your device, including TWRP would not be possible.
Further, you will also need to install your OEM’s USB drivers and set up Android SDK platform-tools on your PC. The platform-tools includes the Fastboot tool that you’ll be using to flash TWRP.
Benefits of Rooting your Android device
Do you ever wonder why bother with rooting an Android devices that you have? Well, after reading this post, all your questions will be answered. It is true that rooting the Android device will scrap off the warranty that people have on their phones. This is one of the main reasons why people often do not root their devices in the first place.
However, there are many hidden advantages of doing so, and you will agree with us as well. Rooting of an Android devices unlocks the full-on power of the phones and other devices. This also provides some other benefits such as updates, battery saving benefits, deletion of unnecessary things. There are other benefits as well which we shall be discussing here.
Let’s get started then.
Why do you need to Root Android phones and tablets?
Here are some of the benefits that will convince you all about rooting your android devices. However, you do need to be careful while doing so.
Running Custom ROMs
If you have a budget Android phone, then this benefit will be very useful for you. For example, if anyone doesn’t have much internal storage on their low-budget phone, the apps can be transferred into the SD card very easily if the device is rooted. So, you can very efficiently free up space in the internal storage. Who doesn’t love having a tidied up storage right?
Remove the Bloatware
You can easily get rid of the bloatware that is troubling your phone. So, you can easily control all the applications that are present in the phone. You won’t have to deal with the clutters in the drawers as well. Cutting the bloatware would mean that you will have more memory as well.
Real Backups
Another great thing about rooting the phone or tablet would mean that your backup will be improved and restored very easily. Rooting the device helps your device to back up every single thing that you have on your device and not just the app downloads and some special settings.
There are many different benefits when it comes to rooting the Android device. You will have a longer life for your battery and who can forget about the clean storage, right? Well, why not go ahead and do it then? Root your Android phone and tablet now to see impressive results.
There are plenty of features that are present in teh latest Supersu zip. Developers are making it to compete against the Magisk and other competitors in the market. SuperSu Developers also tend to bring easy yet secured way to root the device.
These days Supersu 2.82 is the latest stable build. You can download both the SuperSu Zip and SuperSu APK from the links below.
What is Magisk App?
Now to root Android using Magisk you need TWRP or any Custom Recovery installed on your device. This is because Magisk is a flashable Zip file that can be flashed via any Custom recovery.
But what if you don’t have TWRP recovery installed on your device? or you want to install Magisk without TWRP? There is a solution which is the Magisk Manager app, with the help of this app, you can directly install Magisk on your phone. This app is essential if you have rooted your Android smartphone.
Download Magisk App
How to Root Android phone using SuperSU ZIP
It’s always confusing about how to root an Android device especially for those who are going to do it for the first time.
SuperSU is considered to be one of most renowned and efficient root solution for Android by Chainfire.
Before going to install SuperSU Zip, let us know about a few benefits of using it as your go-to root solution.
How to Update to TWRP 3. 4 from an Existing Version of TWRP?
In case you already have a previous version of the TWRP custom recovery installed on your device, you can easily update TWRP 3.4.0-0 or above through the recovery’s interface itself.
To do this, download the latest TWRP recovery image (.img) file for your Android device and transfer it to your phone’s internal/external storage. Once transferred, boot your device into TWRP recovery mode using the buttons sequence, or by issuing the “adb reboot recovery” command from your PC.
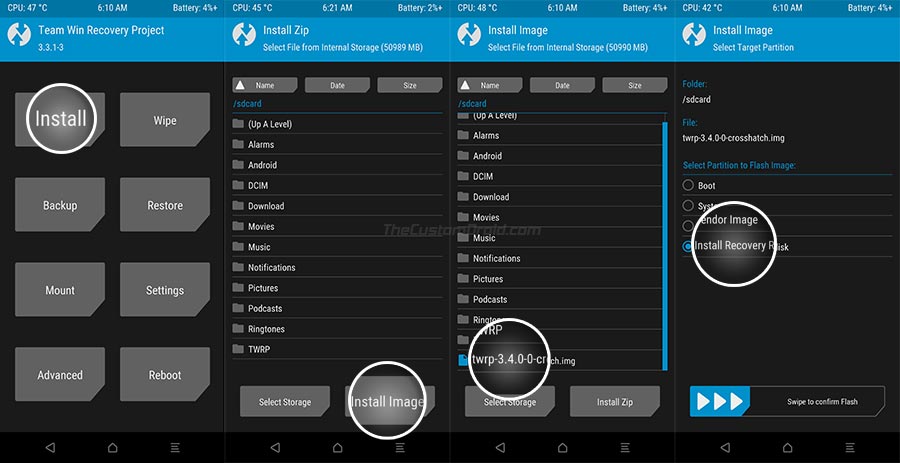
Now, tap on “” in TWRP’s main screen and press the “” button at the bottom-right of the screen. Then navigate to your device’s storage and select the TWRP 3.4 image file that you transferred earlier. As soon as you select the file, you’d be prompted to select the target partition, choose “Install Recovery Ramdisk” and swipe the button on the screen to flash the image file.
Once the file has been flashed, go to the “” menu of TWRP and press the “” button. This will reboot your Android device into the updated and latest version of TWRP recovery.
Now that you have the latest TWRP installed on your Android device, you can use it to flash custom ROMs like LineageOS or Paranoid Android. You can also install mods like Dolby Atmos Port or root your phone by flashing the Magisk zip.
There you go! You have just downloaded the latest TWRP 3.4 for your Android device and learned how to install/update it. If you have any problems regarding the installation process or the custom recovery itself, then please let us know.
That’s it guys for now. Hope, you understood the use of SuperSu and method to root any Android device using it. Happy rooting !!
Note: If anything goes wrong, we are not responsible for it. Do it at your own risk.
Features of Magisk App

As I have already said, Magisk comes with hell lots of features it’s a complete package for Android lovers. Below I have explained each feature of this tool in detail.
Magisk is known for its systemless root method. This is the first tool with this amazing feature; the biggest advantage of this feature is that you can still use popular apps like Google Pay, Netflix, and Pokemon GO after rooting.
Also, you can receive OTA updates from your device manufacturer without any issue, isn’t that amazing? Unlike other root methods like SuperSU, you have to struggle a lot.
When it comes to rooting Android Magisk is the safest and most powerful way to Root any Android. It comes with a Systemless Interface that basically mounts system (vendor) mirrors, a regular way of dealing with the vendor partition, and the ability to add any file to any partition.
Magisk Hide (Removed)
The app got the ability to hide your root status from the apps that you want to know about your phone’s current status. It is the best rooting software to hide root access because it still lets you run very secure banking apps on your Android-rooted phone.
If you use custom modules, you can access the official Magisk repository by using the Modules Repository. Here you will find the module of your choice, which you can download directly and install.
In case you can’t find the perfect module in the official Magisk repo, you’re luckier with unofficial modules, but you’ll have to find a good download source and install it yourself.
The biggest advantage of using Magisk to root your device is consistent updates. Google will occasionally release an update that impacts the SafetyNet workarounds.
Topjohnwu will release a remedy for everything working again as fast as he can. We are thankful for the developer topjohnwu, who is working hard on this project.
What is Magisk?
Magisk is a rooting software that is developed by topjohnwu. It is prevalent for rooting Android without changing or modifying the system files. That is why Magisk is known as the “systemless” root method. With the help of Magisk, you can easily and effectively root your Android device.
The best part about Magisk is that it does not trigger Google’s SafetyNet. This means you can easily run Banking apps and media Streaming apps (Netflix, Prime Video) on your device.
Download Magisk Zip
How to root any Android smartphone using SuperSu Zip
That’s it, your Android device is now rooted.
Steps to Uninstall SuperSU on Android Device
So SuperSU uninstallation is accomplished and you can use your device.
Download Magisk App (Magisk Manager) For Android 2023
You can Download Magisk 26.1 APK from the below links –

Size: 10.9 MB
You can Download the latest Magisk 26.1 Zip file from the below links –
File Name: Magisk-v26.1.zip
Magisk Uninstaller ZIP
How to Root the Android devices using SuperSU ZIP?
These steps will help you to root your device as well as to install the official companion app. So you can start to use the root-enabled apps, and you will be asked to allow/deny root permissions once it’s is rebooted. Now you can update the official app directly from the Play Store very easily.
")


")