
Инструкция по получению root прав и установке TWRP recovery для Lenovo S650
Важно! Данная инструкция подходит только для европейской версии (ROW) Lenovo S650 c прошивкой ROW_s215 (Android 4.4.2)Установка TWRP recovery.
- Для установки нужно извлечь аккумулятор из телефона и подключить к компьютеру. После установки телефон следует отключить от ПК.
Скачайте архив с кастомным рекавери TWRP_v2.6.3.0_S650.rar, распакуйте его в корень диска С.
Скачайте SP Flash Tool v5.1352.01, распакуйте тоже в корень диска.
Запустите flash_tool.exe
В окне программы нажмите кнопку с надписью Scatter-loading, затем в открывшемся окне выберите файл MT6582_Android_scatter.txt, который находится в папке с TWRP recovery.- что в сплывающем меню выбран режим Download Only
- что стоит галочка только на против пункта recovery и путь к recovery.img указан верно.
Вверху окна программы нажмите на кнопку Download
Извлеките аккумулятор из телефона, затем подключите его к ПК, процесс прошивки рекавери начнется автоматически. Сделать это нужно в течении 10секунд, если прошивка не стартовала, тогда отключите телефон от пк, нажмите на Stop и затем опять Download, после чего сразу подключите телефон.
Recovery установлено. Для того чтобы загрузиться в него нужно: на выключенном телефоне нажать кнопку питания и удерживать 1-2 секунды, затем нажать качельку громкости «+» и «-» одновременно и отпустить кнопку питания, качельку держать до входа в recovery-меню. С первого раза может не получится, нужно потренироваться.
Получение root прав.
- установленное TWRP recovery
Скачайте архив UPDATE-SuperSU-v2.02.zip, поместите его на карту sd.
Загрузитесь в TWRP recovery.
В рекавери выберите пункт Install
В проводнике выберите архив UPDATE-SuperSU-v2.02.zip, установите его сделав свайп-движение вправо.
Вернитесь и выберите пункт Reboot.
Загрузившись в систему вы найдете новое приложение SuperSu для управления root доступом для приложений. Рут получен.Тема с обсуждением Lenovo S650
Содержание- Cкачать:
- Спойлер
- Спойлер
- Pre-requisites
- Create data backup
- Charge your phone
- Download and Install Android SDK tools to your PC
- Install Smartphone USB Drivers to your PC
- Unlock the Bootloader of your Android phone
- Method 1 – Employing Magisk Manager
- Step 1 – Download and Install latest Magisk version
- Step 2 – Download and install the TWRP Recovery tool
- Step 3 – Download and rename the Magisk file
- Step 4 – Finally, Install Magisk using TWRP
- Method 2 – Using One-Click Root
- Method 3 – Using Root Master
- Final words
- Frequently Asked Questions (FAQs)
- Leave a Reply
- Рут права для телефона lenovo s650
- Вариант 1 — Rootkhp Pro версия 3.4
- Другой вариант получения рут прав на lenovo s650
- Программы которые не помогли решить вопрос с root правами
- Как проверить наличие root
- Перепрошивка и обновление lenovo s650
- Причины прошивки смартфона
- Как получить root права для lenovo s650
- RootKHP 3.3
- ZYKURooot
- Видео как получить рут права для lenovo s650
- Root в операционной системе Android
- Видео как пользоваться Rootkhp Pro
- Brief Details and Advantage of TWRP Recovery
- Prerequiste
- Steps to Flash/ Install TWRP on Lenovo S650
- Procedure to Root Lenovo S650/ Install SuperSU
- Prerequisites:
- Tutorial To Root Lenovo S650 Without PC:
- Reader Interactions
Cкачать:
Спасибо большое за инструкцию, но при установке драйвера возникает ошибка: «INF стороннего производителя не содержит информации о подписке»
Что делать? Где-то проверку информации можно отключить?Сообщение от villain
Что делать? Где-то проверку информации можно отключить?
а кнопки нет «всё равно установить»?
у тебя какая версия win?
8.1 Оно типо начинает установку, а потом останавливает, когда прогресс бар процентов на 5 проползёт и выдаёт эту ошибку. Была б кнопка «всё равно продолжить» — я б нажал…

22.08.2014, 23:34
Сообщение от villain
какую ошибку выдаёт? глянь тут: Ошибки SP Flash Tool
villain, вот так попробуй
Спойлер
Б)
Win+I -> Изменение параметров компьютера -> Общие -> Особые варианты загрузки -> Перезагрузить сейчас.
При выключении нажмите Диагностика -> Дополнительные параметры -> Параметры загрузки -> Перезагрузить.
После появится меню, в нем выберите «Отключить обязательную проверку подписи драйверов» (F7)Сообщение от Brick Top
какую ошибку выдаёт? глянь тут: Ошибки SP Flash Tool
причем тут флэштул? он драйвер поставить не может
23.08.2014, 18:44
Сообщение от Fish
villain, вот так попробуй
Спойлер
Б)
Win+I -> Изменение параметров компьютера -> Общие -> Особые варианты загрузки -> Перезагрузить сейчас.
При выключении нажмите Диагностика -> Дополнительные параметры -> Параметры загрузки -> Перезагрузить.
После появится меню, в нем выберите «Отключить обязательную проверку подписи драйверов» (F7)причем тут флэштул? он драйвер поставить не может
он написал что у него пункт 8 не пошел, я подумал что с фт проблемы.
8. Извлеките аккумулятор из телефона, затем подключите его к ПК, процесс прошивки рекавери начнется автоматически. Сделать это нужно в течении 10секунд, если прошивка не стартовала, тогда отключите телефон от пк, нажмите на Stop и затем опять Download, после чего сразу подключите телефон.
Сообщение от Brick Top
он написал что у него пункт 8 не пошел, я подумал что с фт проблемы.
он написал 8.1 <- это ОС Windows
а до этого:
Сообщение от villain
но при установке драйвера возникает ошибка: «INF стороннего производителя не содержит информации о подписке»
Что делать? Где-то проверку информации можно отключить?23.08.2014, 19:33
я осёл

Спасибо…все получилось с первого раза и без каких либо заморочек )

Файлы к видео (Lenovo Usb Driver, VRoot, mobileuncle) — http://dfiles.ru/files/chfc38x28
В данном видео я покажу как получить ROOT права для телефона Lenovo S650. Данный метод работает также и для других телефонов. ROOT права нужны если вы собираетесь вносить изменения в системные файлы android. Практически при всех манипуляциях с телефоном в данной серии видео по Lenovo S650 мы будем вынуждены получать ROOT права. ROOT делается очень просто — подробнее в видео.
#0. (Lenovo S650) INTRO, проверка, бэкап прошивки, прошивка, прошивка радиомодуля
#1. (Lenovo S650) Сброс настроек Android
#2. (Lenovo S650) Как проверить?
#3. (Lenovo S650) Прошивка по воздуху
#4. (Lenovo S650) ROOT (Lenovo S650)
#5. (Lenovo S650) Как сделать бэкап прошивки?
#6. (Lenovo S650) Откат на заводскую прошивку
#7. (Lenovo S650) Что важно сделать до «перепрошивки»? NVram
#8. (Lenovo S650) Перепрошивка Андроида
#9. (Lenovo S650) Прошивка радиомодуля
Всем привет! На столе сейчас телефон Lenovo S650 и я планирую его перепрошить, но перед перепрошивкой нужно сохранить данные. Для того, чтобы это сделать нужно иметь root права. В данном видео я покажу, как получить root права для телефона Lenovo S650.

Я буду использовать персональный компьютер и мне также потребуются несколько файлов. Драйвер для режима отладки телефона, MobileUncle для того чтобы проверять есть root права или их нет. Ну и программа при помощи которой я буду получать root права, она называется vROOT.

Я показываю, как я это сделал, у меня все получилось, все работает. Однако, я не несу никакой ответственности если в результате ваших действий вы что-то испортите либо получите не телефон – а кирпич. Подключу наш Lenovo к компьютеру и закину на него программу MobileUncle. Теперь я захожу в проводник и устанавливаю MobileUncle. Ну вот, приложение установилось. Видим, что нет root прав.

Давайте их получим. Первое, что нам нужно сделать – это загнать телефон в режим отладки по USB. Т.е. выбрать этот пункт.

Но есть одна проблема: дело в том, что нужно поставить драйвера. Windows его не поставит. Поэтому ему нужно помочь. Для этого запускаем файл LenovoUsbDriver_autorun. Драйвера установятся всем скопом. Посмотрите, как выглядит диспетчер устройств, когда драйвера не установлены.

Есть неопределенное устройство. После того, как установим LenovoUsbDriver_autorun в диспетчере устройств появится Lenovo ADB интерфейс.

Теперь можно получить root права.
Для того, чтобы получить root права запускаем программу VROOT. В ней есть одна важная фишка, дело в том, что это китайская программа, на китайском языке, но ребята ее перепаковали, т.е. сделали ее с нормальным английским языком. При запуске она проверит наличие обновлений и найдя их – установит. При этом она будет и иероглифах, поэтому отключаемся от интернета. И можем работать.
VROOT устанавливается как обычная программа. Дальше, дальше, дальше, и запускаем.

VROOT подключился к телефону S650, из его сообщений понятно что телефон обнаружен, но ROOT прав не имеет.

Действительно ROOT прав нет, так как MobileUncle тоже писал, что ROOT прав нет. Нажимаем кнопку ROOT, начинается процесс получения ROOT прав.

Все, root права получены. Сейчас наш Lenovo S650 сам ушел на перезагрузку. Как только он включится, я сразу проверю программой MobileUncle, что действительно есть root права. Приложение, которое создает root права, при запуске любого приложения требующего ROOT спрашивает: разрешить ли конкретно данному приложению ROOT права или нет. Мы естественно разрешаем. Как видим MobileUncle имеет root права. Что мы и хотели сделать.
- Home
- Lenovo
- Lenovo S650
- Rooting allows users to replace system settings and applications, install custom ROMs, increase the speed of the processor, and run specialized apps that require administrator level access.
- There are several other possibilities that come with rooting a device and thus makes this process a sought after technique.
- Before rooting your device you need to be aware of the downsides it entails and more importantly there are a few prerequisites that need to be followed to ensure that the rootings achieved without a hassle.

Even before, we get in to the details of rooting, lets clear the confusion between flashing and rooting.
They are two different concepts and shouldn’t be confused. Here’s a handy guide to help you understand the differences between Rooting and Flashing.
Table of Contents
Pre-requisites
- Are you here to have some tweaks on your phone? Do you want to perform things like personalization, customization, and overclocking stuff! Have you dreamed it but finding it tough to find a the real way to root your Android phone.
- If the answer is YES, then the process will get started from the below prerequisites here –
Create data backup
- Never mess with the data because it’s all you created and the important part of your personal life, including your memories.
- Being the most important thing on your Lenovo S650, that data includes all the important stuff, like your contacts, messages, call logs, as well as the pictures you clicked of your loved ones.
- Everything matters, and that’s why you need to create a backup of all your data before starting the process to root Lenovo S650.
- Rooting reinitializes the phone from the front state, wiping all your essential data.
- So please create a complete data backup before rooting your phone via any below process.
Charge your phone
- After creating the backup, what matters the most is the phone’s battery.
- This point contains significance because it’d be a big problem if your phone gets switched off between the process by accident.
- This problem can either be an uncomplicated reboot or disastrous like the Android brick.
You can bypass this prerequisite just with a simple step, charge your phone at least 40%, and that’s it!
Download and Install Android SDK tools to your PC
Behind taking the above big way, you’ve finally reached the most crucial prerequisite required before any below rooting method.
- These tools are important because the platform tools or SDK tools are required when installing any firmware on the phone.
- So no matter which approach you’re choosing from the below list, download SDK tools below first –
Android SDK Tools – (LINK)
- Downloading would be the first thing, and later you would have to install these SDK tools to your PC.
- You can install SDK Tools simply with the default PC installation steps. Make it!
Note – When installing the Android SDK tools, you must choose the location as C/android-sdk/; otherwise, remember the location if you’re installing it on a different one.
Install Smartphone USB Drivers to your PC
There are two paramount downloads mandated while root Lenovo S650.
he first one was SDK tools, which we downloaded with the a fore-mentioned steps, and subsequently, the next important thing is the USB Drivers.
In that case, we couldn’t skip providing USB Drivers for each phone, and that’s what we’ve done below.
You can observe and catch out your Smartphone manufacturer brand links from the below index and download the compatible USB driver instantly –
- ASUS
- Alcatel
- HTC
- Huawei
- Lenovo
- Motorola
- Realme
- Samsung
- Sony
- Vivo
- Xiaomi
Download the proper driver version from the above list and install it ASAP to your PC to start any procedure below.
Disclaimer: (Unlocking Bootloader section) – If you’re unlocking the bootloader of your Android phone, it means that you’re initializing unlocked access to install any Custom ROM. Subsequently, your phone warranty would get voided, so please be careful about that.
Unlock the Bootloader of your Android phone
Finally, we’re here at the most vital prerequisite needed before every rooting process and always sound complex in front of almost all the rooters. Yeah, you thought right! I’m talking about the Bootloader Unlocking Procedure.
For those who don’t know, Bootloader is a set of code installed on your phone which runs every time while booting the phone to make all the internal processes task. You can call it the brain software of your phone.
However, most brands provide locked Bootloaders with secret keys, whereas some have open access.
If you’re reckoned to find a key or using devices like Motorola, HTC, LG, and Sony, please first visit the official website and find the bootloader key. Or, if you’re not among the above brands, go through the below steps.
The first step toward unlocking Bootloader would be enabling USB Debugging and OEM Unlocking.
For doing that, you need to make the below procedure –
- Open Settings > About phone and find the Build Number there.
- After finding the Build Number, click it repeatedly 7 times to become a developer.
- Get back to Settings main menu and open Developer Options from there.
- Scroll down, and search USB Debugging and OEM Unlocking to enable them both instantly.


Step 1 – Connect your phone with the PC using a working Data cable.
Step 2 – Open the folder where you’ve installed the Android SDK Tools from the above steps.
Step 3 – Find an empty space on that folder screen, and press Shift+Right Click there.
Step 4 – Now, click the “Open PowerShell window here” tab from right-click menu.

Step 5 – Inscribe the below command on the PowerShell window and press Enter button. You will now observe your phone getting rebooted.
adb reboot bootloader
Step 6 – Afterward, choose one of the below commands to execute as per your smartphone model –
- For smartphones designed after 2015 and all SAMSUNG phones – fastboot flashing unlock
- For smartphones designed prior 2015 and all PIXEL phones- fastboot oem unlock
- For smartphones requiring a unique key to find on the website – oem unlock UNIQUE_KEY(Here, insert the unique key in place of UNIQUE_KEY as the command.)
Step 7 – After putting in the proper command from the above list, press the ENTER button.
Step 8 – The Bootloader unlocking process will start soon, and you will get success results soon. After that, paste the below command on PowerShell window –
The above command will reboot your phone with an unlocked bootloader warning message. Thereafter, you can initialize any of the below methods –
Methods to root Lenovo S650
Disclaimer: (Below most) – Rooting an Android phone employing any below method would void your Android Smartphone’s warranty and will clear all the data from your phone. So in any above case, we wouldn’t be responsible, and you would have to take this crapshoot on your own.
Method 1 – Employing Magisk Manager
What if we would say that the very first method we’re revealing here is the world’s favorite rooting procedure? It sounds like someone is talking about the Magisk Manager, right?
Magisk Manager offers thousands of personalization and interface customization modules, which help internalize even a simple Android smartphone with the kind of tweaks one might notice on a flagship phone. You can try this incredible Magisk Manager on any phone to experiment varied customisations and interfaces.
Handy tasks with the handy steps to install Magisk Manager listed below –
Step 1 – Download and Install latest Magisk version
Hit the below-listed download link, where we stored both the Magisk Manager APK version. Download it on your Lenovo S650 by clicking the below download link –
Magisk Manager app – (LINK)
- After downloading the Magisk Manager app version, you need to install it on your phone. It’s again a simple process.
- Open Settings > Security > Unknown Sources, and enable the Unknown Sources for third-party installation.
- Afterward, click the Magisk Manager APK file to install it handily.

Step 2 – Download and install the TWRP Recovery tool
- The process would start and end within your phone’s interface.
- This time, you would have to install Team Win Recovery Project on your phone, which is a protocol required to install Magisk.
- Download it from below and install the TWRP recovery to your phone using the ADB installation method –
TWRP Recovery – (LINK)
Step 3 – Download and rename the Magisk file
This is the most convenient, where all you ought to do is download the Magisk app from the below link and rename it from Magisk-v23.0.apk to Magisk-v23.0.zip.

Magisk app file – (LINK)
(Rename this .apk file extension to the .zip.)
Step 4 – Finally, Install Magisk using TWRP
- Reboot the phone to the TWRP recovery mode using the button combination.
- Click the Install button on the top left corner of the TWRP screen.
- Now, locate the folder where you’ve downloaded and renamed the Magisk file, and click the Select Storage tab.
- Finally, Swipe to confirm flashing Magisk to your phone and wait for the process completion.
- Later after process completion, click the Reboot System button, and your phone will get rebooted with Magisk Manager root access.


Method 2 – Using One-Click Root
The second method here is the most simplistic one, named with its most influential privilege, One-Click Root. However, it’s a paid tool, which charges $40 for providing you with all the rooting privileges at a single click.
- Firstly, click here, and download the Root Availability tool to find the One-Click Root compatibility with your device.
- If your device is compatible, download Windows/Mac One Click Root program software from this official link.
- Enable USB Debugging on your phone using the above prerequisite steps.
- Connect your phone with the PC using a working USB cable.
- Finally, open the One-Click Root app on your PC and run the Root command ASAP to get root access on your Lenovo S650.


Method 3 – Using Root Master
Root Master is the last method we’ve got here as the best 3 methods of rooting Android phones. Again, this method is also one of the simplest ways to root Lenovo S650 and won’t take more than 5 minutes of your most crucial time.
The Root Master is an Android app, and it’ll help you by providing root access without any need for a PC.
This protocol was developed by one of the XDA developers to make the rooting process time-efficient.
- Priorly, download the Root Master APK file on your Android phone.
- Open the app on your phone, and press the tangy START button listed on the app interface.
- Root Master would firstly check for the compatibility of your device with the procedure. You can go one with the same system if your phone is compatible, but if not, choose a different method from the above 2 methods.
- After getting on the next and final procedure step, the Root Master will start the rooting procedure.
- Restart your phone after the successful completion of the procedure.
- Your phone would now have root access, and you can enjoy any privileges without a single interruption.


Final words
No one would ever have the Android rooting topic complex after reading this article entirely.
We can state that true, as we listed above three different procedures, including the convenient steps with most general words and vocabulary. Hope you liked this article, and we solved all your doubts related to rooting.
Frequently Asked Questions (FAQs)
What are the features of rooting Lenovo S650 Android phone?
Immense features are waiting for you on the rooting path, where you can observe the most fabulous customization modules, overclocking hacks, and the system app uninstallation capability.
Is there any disadvantage of rooting Lenovo S650?
There is nothing with only advantages, and subsequently, rooting also includes colossal disadvantages, including device vulnerability, unable to access banking apps, and voided warranty.
Did rooting a Lenovo S650 smartphone void its warranty?
Absolutely Yes! If you’re dreaming of rooting your phone and enjoying privileges, you’ll have to pay the warranty back.
Is it okay to enable USB Debugging and OEM Unlock on Lenovo S650 Android phone?
USB Debugging and OEM Unlock are just some simple developer options, and they won’t have got any side issues at all. So you can enable them without getting worried.
What is the simplest way to root Lenovo S650?
If you want the most simple rooting, you can go for One-Click root. The software is listed in the above methods offers root access at a single click.
Where to get the official Android SDK tools?
We’ve gathered the official Android SDK tools and stored them above. You can download the ZIP file using the link below and enjoy using it.
What is Magisk Manager?
How to root an Lenovo S650 Android phone without using a PC?
If you’re unable to use a PC while rooting your phone, you can try the third method, without including a PC, and root your phone within minutes.
Will bootloader unlocking void device warranty?
Leave a Reply

Подборка лучших способов получения root прав для lenovo s650 на операционной системе Android. Все инструкции подобраны, разработаны и протестированы техническими специалистами и экспертами в IT, для сотрудничества с нами перейдите сюда. Чтобы получить результат вам необходимо всего лишь повторить одну из представленных в статье инструкций.
Что такое root доступ, какие возможности открывает для пользователя можно узнать здесь. Почитать про root доступ можно тут.
Рут права для телефона lenovo s650
Работник сервисного центра со стажем 3 года – Лазарев Бронислав
Прежде чем начать необходимо:
- Произведите зарядку устройства на 40% и более — этого вполне достаточно даже с запасом
- Включить USB отладку. Она может быть включена, если вы ранее производили какие-то действия через компьютер, допустим запускали консоль ADB. В ином случае:
- В настройках-> о телефоне -> номер сборки, кликайте по номеру сборки пока устройство не скажет что вы разработчик (не больше 10 кликов).
- Вернитесь в главное меню с настройками и перейдите в пункт для разработчиков, там можно включить USB отладку.
- Подключите телефон к ПК.
- Если необходимо сделать разблокировку загрузчика (boot loader) перейдите сюда.
Наиболее удобный и простой вариант получить Root доступ — программное обеспечение типа «One Click», которые в буквальном понимании делают это в 1 клик.
Вариант 1 — Rootkhp Pro версия 3.4

- Скачиваем Rootkhp Pro 3.4 на ПК, если нажать по ссылке в правом углу вы перейдёте на сайт автора программы, где есть официальная инструкция, она такая же как и у нас.

- Запускаем и нажимаем Root, далее в случае успеха появится уведомления что процесс начался, после этого ждём ещё одно.

- Если у вас вылезло сообщение «Congratulations…» (Поздравления с успехом) можете перезагружать свой Андроид.

Другой вариант получения рут прав на lenovo s650

- Скачать ZYKURoot на компьютер, я использую версию 2.6, инструкцию можно посмотреть тут или прямо у них на сайте.

- Зукурут работает без установки, просто запускаете и жмёте кнопки.
- Нажимаем Root, пройдёт какое-то время прежде чем вы увидите финальное оповещение.
- Ждём уведомления «Rooted» или же ошибки в случае если что-то пошло не так (не волнуйтесь, ваше телефон в любом случае останется жив).

Программы которые не помогли решить вопрос с root правами
- Ioroot (Иорут) — что-то не очень известное, но попробовать надо было в научных целях
- Кинго
- Фрамарут — то ещё старьё, но а вдруг справился бы?
- Bin4ry (Бинфору)
Как проверить наличие root
Проверка на рут не обязательна, скорее это трата времени, но если хочется можно посмотреть видео. В целом суть простая, качаете приложение из маркета и оно проверяет наличие рут прав, но оно может и ошибиться.
Не надо пытаться лезть в дебри и пытаться порутить Андроид старым неликвидным софтом, тем же framaroot или Vroot. Это как считать деньги в банке на деревянных счётах. Их время закончилось много лет назад.
Перепрошивка и обновление lenovo s650

Работник сервисного центра со стажем 4 года – Евсеев Владлен
Обновление версии Андроида через перепрошивку можно осуществить через программу ZYKUFlasher версии 1.1 – это ПО является универсальным вариантом прошивки в 1 клик. То есть указываем путь к прошивке и ещё пара настроек, нажимаем Start. Всё что нужно для быстрой прошивки, более подробная инструкция конечно же будет ниже. Можно установить как официальные сток прошивки, так и альтернативные кастомные сборки (ROM, TWRP Recovery), кому что по душе.
Как пользоваться программой ZYKUFlasher:
- Скачиваем ZYKUFlasher (инструкция с сайта программы, в общем то такая же как и тут)
- В строчке «Download Agent» выбираем путь к файлу .bin (в 99% случаев находится в папке с прошивкой)
- В строчке «Scatter-loading» прописываем путь к файлу, с маской *_emmc.txt, например, lenovo s650_emmc.txt
- Кликаем по кнопке «Start Flash» — т.е начать прошивку
Можно порекомендовать вот этот портал тут обычно свежак.
Причины прошивки смартфона
Чаще всего причина кроется в списке вариантов ниже, а также интерес к обновлениям.
- Неожиданные перезагрузки, сбои системы, подвисания главного меню, смс, звонков и других важных, но не ресурсоёмких приложений
- Хочется научиться обновлять прошивку
- Телефон зависает на этапе загрузки, светится логотип Андроид, дальше ничего не происходит
- Циклическая то есть бесконечная перезагрузка телефона, называемая boot loop.

Root неплохо улучшает жизнь владельцу смартфона, открывается куча новых возможностей — от установки приложений на карту памяти до блокировки рекламы в приложениях. Что вам понадобится для практически 100% получения рут прав:
- Идти по пунктам инструкции, не перепрыгивая;
- Зарядить батарею смартфона до 40% и выше, чтобы мобила не разрядилась внезапно;
- На всякий случай скопируйте важную информацию с вашего смартфона, потерь данных лично у нас не было, но перестраховаться не помешает!
- Это всё, остальное за вас сделает софт.
А также важно понимать что вы можете:
- Сделать смартфон «кирпичом» (это надо ой как постараться конечно на софте делающем рут в 1 клик);
- Лишиться гарантии магазина (тут важно понимать что любой уважающий себя сервис считает деньги и будет любыми способами пытаться отказать в бесплатном ремонте);
- Сделать устройство более уязвимым для злоумышленников (бредовый пункт на самом деле, кому вы нужны);
Данный сайт не даёт вам 100% гарантии, что методы в этой статье заработают и у вас, однако вся информация собрана и получена опытным путём от множества людей в теме, которые проворачивали данную операцию. При наличии вопросов по нашей инструкции, вы всегда можете подробно описать ваш случай в комментариях.
Здесь мы расскажем про получение root на lenovo s650 бесплатно через компьютер.
Как получить root права для lenovo s650
Мы будем использовать бесплатные программы RootKHP 3.3 или же ZYKURoot, 2 варианта на выбор. Это самые удобные и простые способы.
Объясняем что к чему:
- Это freeware софт
- Работает практически без вмешательства пользователя (пару раз надо будет кликнуть по кнопкам).
- Данный софт умеет делать разблокировку загрузчика автоматически, в таком случае процесс будет идти дольше чем обычно.
RootKHP 3.3

- Подключаем смартфон к ПК по USB.
- Скачиваем программу и запускаем, нажима заветную кнопку Root, оранжевая такая кнопка.
- Получаем уведомление и нажимаем что всё OK.

- Вишенкой на торте становятся полученные root права

ZYKURooot

- Подключаем смартфон к ПК по USB.
- Загружаем утилиту и запускаем, нажимаем кнопку root с картинкой Андроид робота
- Получаем уведомление

- Резво нажимаем на кнопку OK и ожидаем финальное уведомление.

- И вот он, здоровенный Root на Андроиде!
Не надо пытаться порутить Андроид старыми как динозавр программами, речь про framaroot, baidu, Vroot они отжили своё ещё много лет назад.
Видео как получить рут права для lenovo s650

Для того чтобы получить root права на Lenovo S650 прочитайте статью полностью и выполните нашу инструкцию.
Root в операционной системе Android
Это аккаунт суперпользователя в операционной системе, имеющий повышенные привилегии доступа к файлам. Данный пользователь может блокировать рекламу в приложениях, редактировать системные файлы, установить прошивку CyanogenMod, ParanoidAndroid или MIUI, изменять меню.
Для получения root прав нам понадобиться microUSB кабель, мобильное устройство и компьютер.
- Включите в мобильном устройстве отладку по USB
- Подключите его к компьютеру с помощью MicroUSB провода
- Скачайте и запустите программу Rootkhp PRO 3.2 или более старшей версии на компьютере. В программе есть кнопка Update, с помощью которой можно попасть на сайт разработчиков и проверить есть ли новая версия
- Используйте инструкцию по работе с программой Rootkhp PRO
Процесс получения root прав пройдёт гладко если следовать пунктам нашей инструкции.
Видео как пользоваться Rootkhp Pro
Видеоинструкция по использованию программы на компьютере.
https://youtube.com/watch?v=pAA0ugFQIpA
If you are an owner of a Lenovo S650 smartphone, and also want to customize this rugged smartphone, then you have visited the right page.
If you are an Android Enthusiast, and want to Root and Install TWRP recovery on your beloved, then you have landed on the right page. In the due course of the article, we will guiding you through the process to install TWRP and root Lenovo S650.
If you want to unleash the full potential of the hardware of your Lenovo S650, then rooting and flashing the TWRP is the main concern. The Stock ROMs have often limited and unsupported features in the sense of Customization. When you have a rooted device and also flashed TWRP recovery, then you are free to install any Custom ROMs, Mods, Kernel, and Xposed etc., as well as many apps which requires root access to work properly.
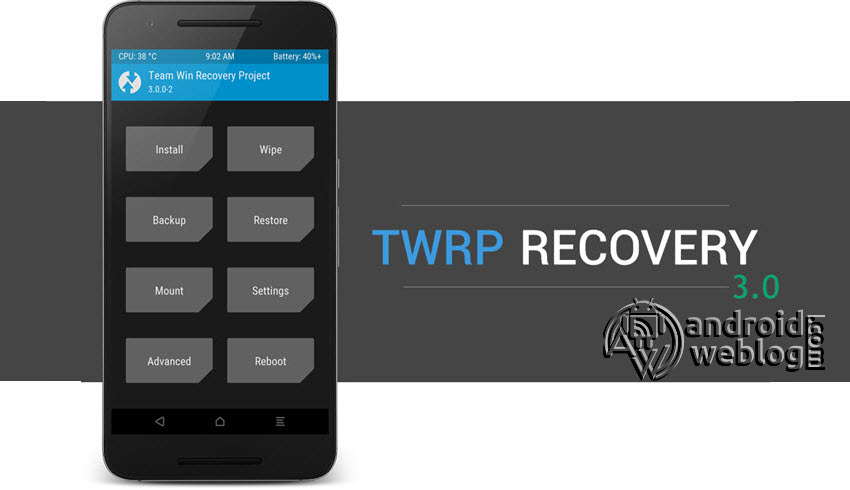
Brief Details and Advantage of TWRP Recovery
TWRP (Team Win Recovery Project) is an open source, community development project. By flashing the TWRP, your device will be enabled to install any custom firmware, rooting your smartphone, mod zip files for customizations, Xposed Modules for customized features, one click root and unroot processes. Apart from that, it allows you to take Full Nandroid Backup and restore it later, one click image file flashing, remove bloatware, overclock and underclock. Using TWRP, one can easily clean Wipe, Cache and Data after flashing any image file to reflect the changes and rectify minor errors due to cache.
For installing the TWRP, your Lenovo S650 phone must have the Unlocked bootloader. That means you have to firstly unlock the bootloader to root your device as well doing any customization.
Rooting and flashing the Custom ROM firmware, certainly without any doubt voids your devices warranty and AndroidWeblog.com in no way will be held responsible for warranty void or your bricked device.
Prerequiste
Ensure to check your model number, which must be:
- Lenovo S650
You must have to ensure that prior to rooting your phone , you have read thoroughly the disclaimer and you agree to proceed further on your risk.
- Phone Should be Charged
Your phone must be 70% charged atleast else, it may lead to complications sometimes while experimenting. Why to take risk, try to charge it fully.
- Back Up
If you are either going to root your phone or install a Custom ROM, it is a good habit to make a back up of your phone. Make a back up of all your media like images, videos and all on your PC and your contacts on Cloud.
- Enable USB Debugging
You must enable USB debugging option by going in to Settings, Applications and Developer options.
Downloads For Rooting Lenovo S650
Download Universal ADB Drivers here (If your PC have already drivers installed then skip this)
Download platform-tools/ SDK Tools package from Android SDK on PC from here. (Android command line tools> SDK Tools package)
Download TWRP Recovery for Lenovo S650 from here:
TWRP Recovery 3.1.1.0. (Login required)
Download SuperSU by Chainfire from here.
Steps to Flash/ Install TWRP on Lenovo S650
Step 1: Assuming you have already downloaded the platform-tools from Android SDK (SDK Manager) platform-tools on your PC. The platform-tools contains the required adb and fastboot binaries.
Step 2: Make sure that the drivers are installed on your computer. Then, skip to the next step.
Step 3: Now, enable the developer settings on your Lenovo S650 Device. To achieve the same, just navigate to the Settings -> About and then find the ‘Build Number ‘, and then tap on ‘Build Number’ for 7 times, this will enable the developer settings on your device.
Step 4: If you have USB Debugging already, then skip this step. If you have not, then open the Developer Options and then enable USB debugging option.
Step 5: Now, open the command prompt in computer/ ADB Terminal, and simply type the command:
adb reboot bootloader
Step 6: Your device should have not entered into fastboot mode. Now copy the TWRP.img file downloaded in prerequisite section, to the same folder where adb and fastboot binaries are located. Rename the file to ‘twrp.img’ and then enter this command:
fastboot flash recovery twrp.img
and then run this command, type:
fastboot reboot
Step 7 : Some devices might not replace the custom recovery automatically during the first boot. You can search Google for key combinations to enter your device into recovery mode. After running the ‘fastboot reboot’ command, press and hold the proper key combination to enter device into TWRP Mode. Once the device boots to TWRP mode, the TWRP will automatically patch the stock ROM, to prevent the chances of replacing TWRP with Stock Recovery.
Procedure to Root Lenovo S650/ Install SuperSU
Make sure that you have downloaded SuperSU (link in pre-requisite section of this article). Then, proceed to the steps.
Step 1: Transfer the downloaded SuperSU.zip file to the internal storage / SD card of your Lenovo S650 smartphone.
Step 2: Now, just boot into the recovery. From the TWRP interface, you can optionally backup the Stock ROM. Though, I would recommend to backup the Stock ROM. Because if in case process gets failed, you can flash the Stock ROM.
Step 3: Tap on Install ‘, and then navigate to the file ‘SuperSU.zip’ and swipe to confirm flash (located at the bottom of the screen). The flashing process of SuperSU has been started and will take few seconds to complete.
Congratulations, now you have rooted Lenovo S650 and also flashed the TWRP. Now, you can install Xposed Framework, and customize your smartphone as per your preference. If you wish to verify, you may download and check the Root Status through Root Checker app.
» » How To Root Lenovo S650 Android Smartphone
This procedure doesn’t require any PC or Laptop to root your device. So, Root Lenovo S650 device without using a computer and get the ability to remove pre-installed applications, install custom ROM firmware’s, custom-built Android applications, Etc.

Prerequisites:
Step 1: Make sure that you have deactivated all antivirus applications on your Smartphone as they tend to interrupt the rooting process.
Step 2: Then, ensure that your device has at least 50-60% battery backup in it before getting started with the rooting process.

Step 4: Next, the rooting procedure given here is not a data-loss process, but it won’t hurt to have a backup of personal data on your Smartphone. So, take a complete backup before getting started with the rooting process.
Once you finish all these preliminary tasks, you can move forward with the rooting tutorial given below.
Tutorial To Root Lenovo S650 Without PC:
Step 1: To get started, download Towelroot apk (tr.apk) file directly to your device. While doing so, you might get a warning message stating that this file might harm your device. Just ignore it and download the APK file.
Step 2: Once the tr.apk file is downloaded, click on it to install the Towelroot app on your device. While doing so, you will again get a warning message stating that the app is harmful because it contains code that will bypass Android security protections. Just ignore it and click on “Install Anyway” to install the app on your device.

Step 3: Once done, open up the Towelroot app on your Lenovo S650 Smartphone and click on “make it ra1n” to launch the rooting procedure. Once the rooting process gets finished, your Smartphone will reboot automatically.

That’s it. Now you have successfully finished rooting Lenovo S650 Smartphone using Towelroot one-click rooting application. For confirmation, download Root checker app from Google Play Store, install it on your device, and confirm root access on your Smartphone.
If you own a smartphone or tablet other than Lenovo S650 and would like to get rooting tutorials for the same, kindly visit our Rooting Tutorials page.
")


")