

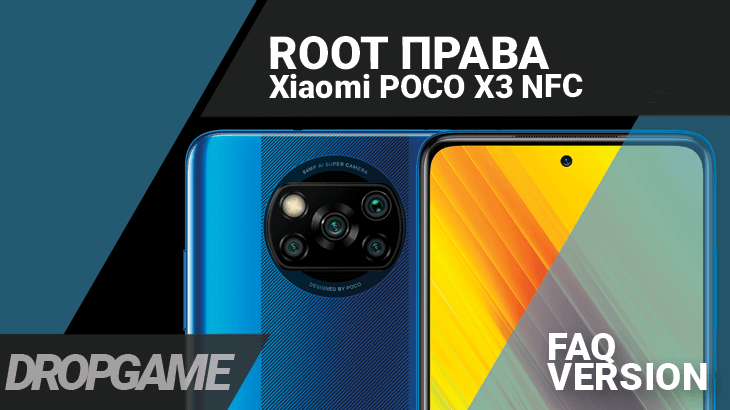
- Копируем все фотографии, музыку и прочие данные, которые хранятся в памяти устройства на ПК или карту памяти, так как в последствии они будут удалены.
- Если загрузчик на вашем устройстве заблокирован, то выполняем разблокировку — КАК РАЗБЛОКИРОВАТЬ ЗАГРУЗЧИК НА XIAOMI.
- Скачиваем на компьютер архив с необходимым набором инструментов – surya.zip
- Загружаем на ПК архив – Magisk.zip
- Скачиваем на компьютер и устанавливаем драйвера для вашего смартфона – Xiaomi POCO X3 NFC Driver.zip
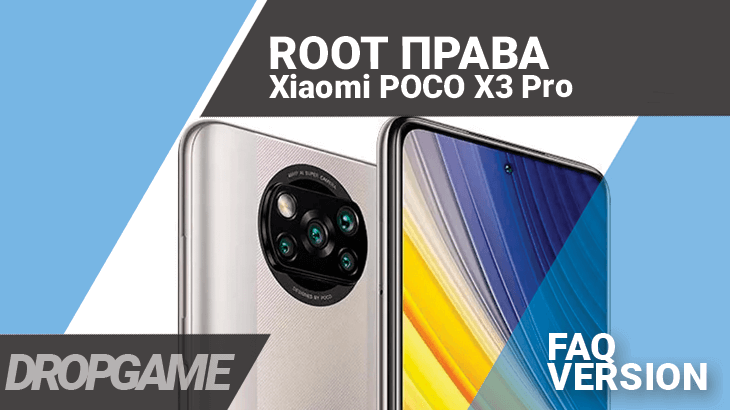
- Копируем все фотографии, музыку и прочие данные, которые хранятся в памяти устройства на ПК или карту памяти, так как в последствии они будут удалены.
- Если загрузчик на вашем устройстве заблокирован, то выполняем разблокировку — КАК РАЗБЛОКИРОВАТЬ ЗАГРУЗЧИК НА XIAOMI.
- Скачиваем на компьютер архив с необходимым набором инструментов – vayu.zip
- Загружаем на ПК архив – Magisk.zip
- Скачиваем на компьютер и устанавливаем драйвера для вашего смартфона – Xiaomi POCO X3 Pro Driver.zip
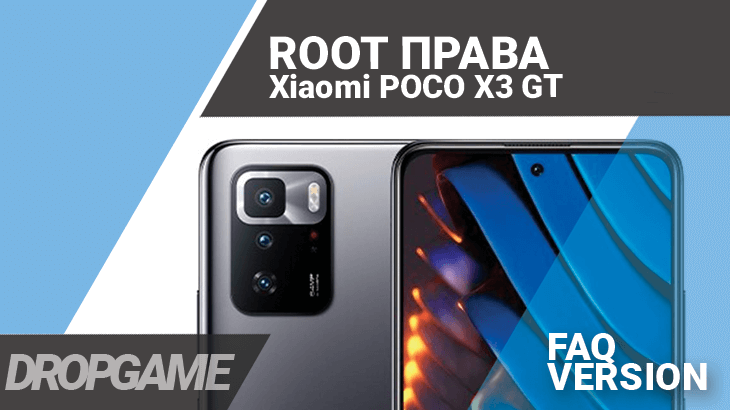
- Копируем все фотографии, музыку и прочие данные, которые хранятся в памяти устройства на ПК или карту памяти, так как в последствии они будут удалены.
- Если загрузчик на вашем устройстве заблокирован, то выполняем разблокировку — КАК РАЗБЛОКИРОВАТЬ ЗАГРУЗЧИК НА XIAOMI.
- Скачиваем на компьютер архив с необходимым набором инструментов – chopin.zip
- Загружаем на ПК архив – Magisk.zip
- Скачиваем на компьютер и устанавливаем драйвера для вашего смартфона – Xiaomi POCO X3 GT Driver.zip
Rooting your device will give you access to all sorts of excellent features, such as being able to install custom ROMs, systemless Xposed framework, and other mods that would have otherwise been unavailable on an unrooted Android device.
The process outlined in this blog post requires no knowledge of flashing or rooting devices whatsoever; it’s easy enough for anyone who knows how to use a computer and has some time on their hands, even if they’ve never rooted a phone before.
- What is Rooting Android?
- Pre-requirements
- Steps to Root Poco X3 NFC using Magisk
- Conclusion
- What is Rooting Android?
- Advantages of Rooting
- Disadvantages of Rooting
- Steps to Root Poco X3 NFC using Magisk
- Step 1: Unlock Bootloader on Poco X3 NFC
- Step 2: Install Magisk App and Patch Boot Image
- Step 3: Flash Magisk patched boot image
- Step 4: Verify Root Access on Poco X3 NFC
- Как получить root права для Xiaomi Poco X3
- RootKHP 3.3
- ZYKURooot
- Видео как получить рут права для Xiaomi Poco X3
- Как получить root права для Xiaomi Poco X3 Pro
- RootKHP 3.3
- ZYKURooot
- Видео как получить рут права для Xiaomi Poco X3 Pro
- Общее
- Размеры
- Процессор
- Память
- Коммуникации
- Мультимедиа
- Управление и ввод
- Расширение
- Общее
- Размеры
- Процессор
- ROOT Xiaomi Poco X3 NFC via Magisk
- ROOT Xiaomi Poco X3 NFC via SuperSU
- Check if Xiaomi Poco X3 NFC Rooted
- Overview On Rooting
- Download Custom TWRP Recovery For Poco X3 With Other Files
- Root Poco X3 NFC Without Pc
- How To Unroot or Repair Poco X3 NFC
What is Rooting Android?
The main intention of this process is to remove all default restrictions set by the manufacturer so you can modify and delete anything you want from the ROM of your device.
Also read: How to fix Poco X3 NFC common problems
Advantages of Rooting
- Easy to install Custom ROMs
- Flash Magisk Modules
- Removing pre-installed OEM apps
- Ad-blocking for all apps
- Installing incompatible apps
- More display options and internal storage
- Greater battery life and speed
- Making full device backups
- Access to system files
- CPU Clocking
- More tweaking
Also read: Download Google Camera for Poco X3 NFC
Disadvantages of Rooting
- It can brick your device
- No more warranty
- Root and superuser access
- Tweaking risks
- Ad-blocking
- Update problems
Related Guide: How to Hard Reset & Factory Reset Poco X3 NFC
- The process will wipe all data from the device, so please back up any information you don’t want to be lost before proceeding with this installation.
- Before moving to the steps, fully charge your Poco X3 NFC device to avoid any errors in between the process.
- You need to download and install ADB drivers on your PC. If you don’t have drivers, your phone will not be recognized by your computer.
Also, Try One Click Root
If you want a professional to Root your Phone, you must try One Click Root.
Why Choose One Click Root?
- Safe and Secure
- Warranty Protection
- No Root – No Charge
- 100% Rooting Guarantee
- Skillfully Rooted Remotely
- 24/7 Live Chat – Lifetime Access
Steps to Root Poco X3 NFC using Magisk
Installing Magisk on your phone simplifies the process of rooting. There are two steps to installing it, unlocking the bootloader and flashing a modified boot image.
Unlocking allows you to flash unofficial images and modify system files.
Step 1: Unlock Bootloader on Poco X3 NFC
Unlocking the bootloader on an Android phone is essential for those who want to flash Custom ROMs, Root, and much more. You can’t get as far without unlocking the bootloader, which prevents rooting and flashing custom images, making it necessary before you proceed with other steps.
Step 2: Install Magisk App and Patch Boot Image
First, you need to Download the Stock firmware file for Poco X3 NFC device. There are various sources from where you can download the Xiaomi firmware.
Once we get the firmware, we extract it, and we will get the boot image file. We will patch this boot image file with the help of the Magisk application and then flash it on the phone to obtain root access.
- After you have downloaded the firmware file, extract it.
- Open the extracted folder and copy the boot.img file to your phone.
- Download the latest Magisk App and Install it.
- Open the Magisk App from the app drawer.
- Go to Install > tap on “Select and Patch a File.”
- Navigate to the location where you copied boot.img file and select it.
- Once you selected the file, tap on “LET’S GO.”
- Wait until Magisk patches the boot image file. The patched boot image (magisk_patched.img) file can be found in the “Downloads folder.”
- Rename magisk_patched.img to boot.img again.
- Copy the boot.img file to your PC/laptop.
Step 3: Flash Magisk patched boot image
Once you have copied the boot image file to PC, now you need to move this file to this location – C:\adb.
- Once you are inside the ADB folder. Type “cmd” in the address bar.
- Now command prompt window will appear on your screen.
- Connect your Xiaomi device to your computer.
- On the command line window, type the below command and hit Enter.
fastboot devices
- This will show the list of connected devices. Check if your device is showing on the command line windows. If it is showing, that means your phone is successfully connected to your computer.
adb reboot bootloader
- The above command will boot your phone into fastboot mode. Next, type the below command to flash the boot image file and again hit Enter.
- For A/B partition system:
fastboot flash boot boot.img
- For Non-A/B partition system:
fastboot flash boot_a patched_boot.img
fastboot flash boot_b patched_boot.img
- For A/B partition system:
- We have successfully flashed the boot image file. Now Reboot your phone by entering the below command.
fastboot reboot
- That’s it. Your Poco X3 NFC smartphone is successfully Rooted using Magisk.
Step 4: Verify Root Access on Poco X3 NFC
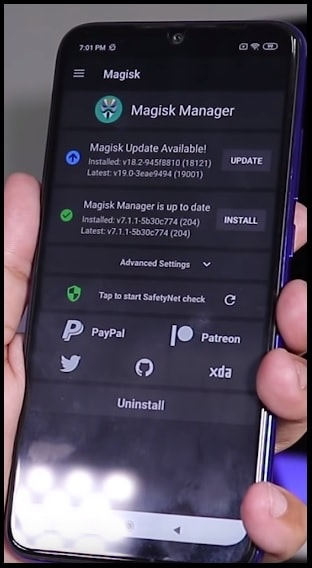
- Open Magisk App from the app drawer.
- You will see the option to “Uninstall Magisk,” which indicates that your phone is rooted successfully.
We hope you have found our tutorial on Rooting Poco X3 NFC with the help of Magisk to be informative. With these instructions, your device will be rooted in a few simple steps and running smoothly again.
If there are any additional questions, please feel free to reach out, and we will get back to you as soon as possible!

Root неплохо улучшает жизнь владельцу смартфона, открывается куча новых возможностей — от установки приложений на карту памяти до блокировки рекламы в приложениях. Что вам понадобится для практически 100% получения рут прав:
- Идти по пунктам инструкции, не перепрыгивая;
- Зарядить батарею смартфона до 40% и выше, чтобы мобила не разрядилась внезапно;
- На всякий случай скопируйте важную информацию с вашего смартфона, потерь данных лично у нас не было, но перестраховаться не помешает!
- Это всё, остальное за вас сделает софт.
Что ещё важно знать (пугалки они такие):
- Сделать смартфон «кирпичом» (это надо ой как постараться конечно на софте делающем рут в 1 клик);
- Лишиться гарантии магазина (тут важно понимать что любой уважающий себя сервис считает деньги и будет любыми способами пытаться отказать в бесплатном ремонте);
- Сделать устройство более уязвимым для злоумышленников (бредовый пункт на самом деле, кому вы нужны);
Мы не даём вам гарантию на все 100% что у вас будет такой же результат, но вся информация получена от людей, которые через это прошли. Мы всегда готовы помочь вам и ответить на вопросы по рутированию и прошивке Андроид смартфонов и планшетов.
В этой статье вы узнаете как получить root права на Xiaomi Poco X3 с помощью ПК в несколько кликов мышью.
Как получить root права для Xiaomi Poco X3
Мы будем использовать бесплатные программы RootKHP 3.3 или же ZYKURoot, 2 варианта на выбор. Это самые удобные и простые способы.
Объясняем что к чему:
- Это freeware софт
- Работает практически без вмешательства пользователя (пару раз надо будет кликнуть по кнопкам).
- Данный софт умеет делать разблокировку загрузчика автоматически, в таком случае процесс будет идти дольше чем обычно.
RootKHP 3.3

- Подключаем смартфон к ПК по USB.
- Скачиваем программу и запускаем, нажима заветную кнопку Root, оранжевая такая кнопка.
- Получаем уведомление и нажимаем что всё OK.

- Вишенкой на торте становятся полученные root права

ZYKURooot

- Подключаем смартфон к ПК по USB.
- Загружаем утилиту и запускаем, нажимаем кнопку root с картинкой Андроид робота
- Получаем уведомление

- Резво нажимаем на кнопку OK и ожидаем финальное уведомление.

- И вот он, здоровенный Root на Андроиде!
Также вы можете попробовать получить root через Magisk (не умеет делать разблокировку загрузчика) а также требуют прошивку, которую он установит. В общем Магиск требует довольно много телодвижений, поэтому обычно пользователи предпочитают варианты попроще.
Видео как получить рут права для Xiaomi Poco X3

Root неплохо улучшает жизнь владельцу смартфона, открывается куча новых возможностей — от установки приложений на карту памяти до блокировки рекламы в приложениях. Что вам понадобится для практически 100% получения рут прав:
- Следовать указаниям по пунктам;
- Зарядить батарею смартфона до 40% и выше, чтобы мобила не разрядилась внезапно;
- На всякий случай скопируйте важную информацию с вашего смартфона, потерь данных лично у нас не было, но перестраховаться не помешает!
- Сила воли чтобы скачать софт и нажать 2-3 кнопки 😀 Не, ну а вы что думали лафа будет совсем).
Что ещё важно знать (пугалки они такие):
- Сделать смартфон «кирпичом» (это надо ой как постараться конечно на софте делающем рут в 1 клик);
- Лишиться гарантийного обслуживания от продавца, но будем честны, практически любой продавец в СНГ работают по принципу, деньги взял, давай до свидания и будет открещиваться от бесплатного ремонта. Так что тут можно особо не переживать;
- Сделать устройство более уязвимым для злоумышленников (бредовый пункт на самом деле, кому вы нужны);
Данный сайт не даёт вам 100% гарантии, что методы в этой статье заработают и у вас, однако вся информация собрана и получена опытным путём от множества людей в теме, которые проворачивали данную операцию. Мы всегда готовы помочь вам и ответить на вопросы по рутированию и прошивке Андроид смартфонов и планшетов.
Здесь мы расскажем про получение root на Xiaomi Poco X3 Pro бесплатно через компьютер.
Как получить root права для Xiaomi Poco X3 Pro
Мы будем использовать бесплатные программы RootKHP 3.3 или же ZYKURoot, 2 варианта на выбор. Это самые удобные и простые способы.
Объясняем что к чему:
- Это freeware софт
- Работает практически без вмешательства пользователя (пару раз надо будет кликнуть по кнопкам).
- Данный софт умеет делать разблокировку загрузчика автоматически, в таком случае процесс будет идти дольше чем обычно.
RootKHP 3.3
- Подключаем смартфон к ПК по USB.
- Скачиваем программу и запускаем, нажима заветную кнопку Root, оранжевая такая кнопка.
- Получаем уведомление и нажимаем что всё OK.
- Вишенкой на торте становятся полученные root права
ZYKURooot
- Подключаем смартфон к ПК по USB.
- Загружаем утилиту и запускаем, нажимаем кнопку root с картинкой Андроид робота
- Получаем уведомление
- Резво нажимаем на кнопку OK и ожидаем финальное уведомление.
- И вот он, здоровенный Root на Андроиде!
Также вы можете попробовать получить root через Magisk (не умеет делать разблокировку загрузчика) а также требуют прошивку, которую он установит. В общем Магиск требует довольно много телодвижений, поэтому обычно пользователи предпочитают варианты попроще.
Видео как получить рут права для Xiaomi Poco X3 Pro

Здесь вы узнаете как получить РУТ права для телефона Pocophone X3 NFC, работающем на Android 10.0.
Телефон Pocophone X3 NFC выпущен в 2020 году фирмой Pocophone. Экран телефона обладает диагональю 6,67 дюйма и имеет разрешение 1080 x 2400.
В смартфоне установлен процессор Qualcomm Snapdragon SDM732G с частотой и видеоускоритель Adreno 618.
Общее
- Производитель:
- Pocophone
- Модель:
- X3 NFC
- Другие названия:
- POCO X3 NFC
- Год выпуска:
- 2020
- Операционная система:
- Android 10
- Емкость аккум. (мА·ч):
- 5 160
Размеры
- Габариты (ШхВхТ, мм):
- 76,8 x 165,3 x 9,4
- Вес (г):
- 215
Процессор
- Тип процессора:
- Qualcomm Snapdragon SDM732G
- Максимальная тактовая частота (МГц):
- 2 300
Память
- Оперативная память (Гб):
- 6
- Встроенная память (Гб):
- 64 / 128
Коммуникации
- Телефон:
- GSM (850, 900, 1800, 1900), LTE (700 (12/17/28), 800 (20), 850 (5/26), 900 (8), 1500 (21), 1700 (4), 1800 (3), 1900 (2), 2100 (1), 2600 (7)), UMTS (800, 850 (5), 900 (8), 1700 (4), 1900 (2), 2100 (1))
- Bluetooth:
- 5.1
- Wi-Fi:
- 802.11b,g
- Другое:
- 2G (GPRS, EDGE), 3.5G (HSDPA, HSDPA+, HSUPA, HSPA, HSPA+), 3G UMTS/WCDMA, GPS, IrDA, NFC, ГЛОНАСС, Поддержка 2 SIM-карт
Мультимедиа
- Размер экрана:
- 6,67″
- Разрешение экрана (px):
- 1080 x 2400
- Тип экрана:
- IPS+
- Частота обновления экрана
- 120 Гц
- Видеоускоритель:
- Adreno 618
- Камера сзади (Мп):
- 64
- Вторая камера (Мп):
- 13
- Третья камера (Мп):
- 2
- Четвертая камера (Мп):
- 2
- Камера спереди (Мп):
- 20
- Автофокус:
- Есть
- Фотовспышка:
- Есть
- Динамик:
- стерео
- Выход наушников:
- 3.5
- Другое:
- G-Sensor, Гироскоп, Датчик освещенности, Датчик приближения
Управление и ввод
- Сенсорный экран:
- ёмкостный
- Кнопки и датчики:
- распознавание лица, сканер отпечатков пальцев
Расширение
- Карты памяти:
- microSD, microSDHC, microSDXC
- Разъемы:
- Type-C, USB-хост / OTG


Приложение для root-прав на андроид. Версии для ПК Windows и для OS Android


Популярное приложение для получения root-прав на андроид телефоны и планшеты.


Разработчик: HEXAMOB S.L.
Программа, которая поможет вам узнать, как получить права ROOT на вашем мобильном устройстве.


Самое необходимое приложение для всех, у кого есть ROOT доступ и права суперпользователя на телефоне.


Хотите получить root права на телефон? Это приложение поможет

ROOT права позволяют расширить функционал Pocophone X3 NFC и операционной системы Android 10.0, на которой он работает. Вы сможете изменять стандартное программное обеспечение, удалять любые приложения, получите возможность устанавливать сторонние прошивки и программы, требующие полный доступ к системе. К установке РУТ прав стоит отнестись очень серьезно!
Что именно дают права Root на Андроид:
- Доступ к системным файлам и программам с возможностью изменения и удаления
- Активация дополнительных функций Андроид
- Увеличение быстродействия операционной системы
- Создание резервных копий прошивки и данных, их переноса
- Детальное изменение внешнего вида ОС Андроид
- Установка сторонних прошивок и модов
- Удаление рекламы из приложений
- Увеличение автономности работы батареи
- Разгон или понижение скорости процессора
- Установка приложений, которые требуют ROOT
И многие другие полезности.

Здесь вы узнаете как получить РУТ права для телефона POCO X3 Pro, работающем на Android 11.0.
Телефон POCO X3 Pro выпущен в 2021 году фирмой POCO. Экран телефона обладает диагональю дюйма и имеет разрешение .
В смартфоне установлен процессор Qualcomm Snapdragon SDM860 с частотой и видеоускоритель .
Общее
- Производитель:
- POCO
- Модель:
- X3 Pro
- Другие названия:
- M2102J20SG
- Год выпуска:
- 2021
- Операционная система:
- Android 11
- Емкость аккум. (мА·ч):
- 5 160
Размеры
- Габариты (ШхВхТ, мм):
- 76,8 x 165,3 x 9,4
- Вес (г):
- 215
Процессор
- Тип процессора:
- Qualcomm Snapdragon SDM860
- Максимальная тактовая частота (МГц):
- 2 960
Приложение для root-прав на андроид. Версии для ПК Windows и для OS Android
Популярное приложение для получения root-прав на андроид телефоны и планшеты.
Разработчик: HEXAMOB S.L.
Программа, которая поможет вам узнать, как получить права ROOT на вашем мобильном устройстве.
Самое необходимое приложение для всех, у кого есть ROOT доступ и права суперпользователя на телефоне.
Хотите получить root права на телефон? Это приложение поможет

ROOT права позволяют расширить функционал POCO X3 Pro и операционной системы Android 11.0, на которой он работает. Вы сможете изменять стандартное программное обеспечение, удалять любые приложения, получите возможность устанавливать сторонние прошивки и программы, требующие полный доступ к системе. К установке РУТ прав стоит отнестись очень серьезно!
Что именно дают права Root на Андроид:
- Доступ к системным файлам и программам с возможностью изменения и удаления
- Активация дополнительных функций Андроид
- Увеличение быстродействия операционной системы
- Создание резервных копий прошивки и данных, их переноса
- Детальное изменение внешнего вида ОС Андроид
- Установка сторонних прошивок и модов
- Удаление рекламы из приложений
- Увеличение автономности работы батареи
- Разгон или понижение скорости процессора
- Установка приложений, которые требуют ROOT
И многие другие полезности.
We recommend you to Backup all your important data contacts, SMS, photos, music, and other data before you root Xiaomi Poco X3 NFC Device.
Install TWRP on Xiaomi Poco X3 NFC
Download Magisk Manager
Download SuperSU.zip & SuperSU APK
Download disabler Force encryption ZIP
ROOT Xiaomi Poco X3 NFC via Magisk
- Copy Magisk.ZIP & disablerForceencryption.zip files to the internal storage or SD card.
- Reboot your Xiaomi Poco X3 NFC to TWRP:
- Power off your Xiaomi mobile.
- Press & hold The Power button + Volume Up key together for a few seconds.
- Tap on the Install button

- Select the disablerForceencryption.zip file that you have copied.
- Swipe to Confirm Flash.
- Then Tap on Reboot to Restart your Xiaomi Poco X3 NFC.

- Reboot your Xiaomi Poco X3 NFC to TWRP again:
- Power off your Xiaomi mobile.
- Press & hold The Power button + Volume Up key together for a few seconds.
- Select the Magisk.zip file that you have copied.

- Swipe to Confirm Flash to install Magisk.

- Then Tap on Reboot to Restart your Xiaomi Poco X3 NFC.
- Download Magisk Manager & Install it on your Xiaomi Poco X3 NFC.
- Finally, Restart your Xiaomi Poco X3 NFC phone.
- Your Xiaomi Poco X3 NFC device is now officially rooted Via Magisk.
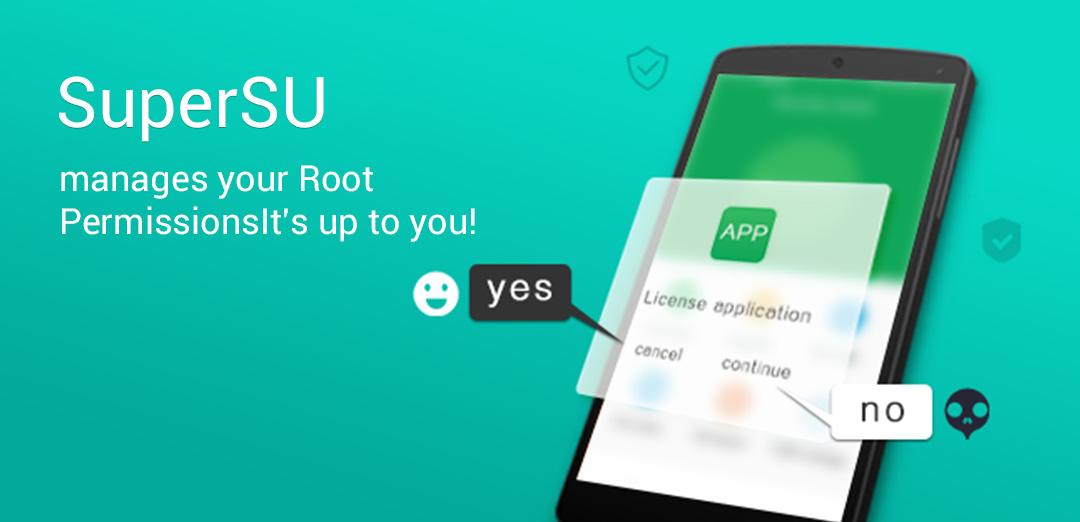
ROOT Xiaomi Poco X3 NFC via SuperSU
- Copy the SuperSU.ZIP & disablerForceencryption.zip files to the internal storage or SD card.
- Reboot your Xiaomi Poco X3 NFC to TWRP:
- Power off your Xiaomi mobile.
- Press & hold The Power button + Volume Up key together for a few seconds.
- Tap on Install button.

- Select the disablerForceencryption.zip file that you have copied.
- Swipe to Confirm Flash.
- Then Tap on Reboot to Restart your Xiaomi Poco X3 NFC.
- Reboot your Xiaomi Poco X3 NFC to TWRP Again:
- Power off your Xiaomi mobile.
- Press & hold The Power button + Volume Up key together for a few seconds.
- Select the SuperSU.zip file that you have copied.

- Swipe to Confirm Flash to install SuperSU.

- Then Tap on Reboot to Restart your Xiaomi Poco X3 NFC.
- Download SuperSU & Install it on your Xiaomi Poco X3 NFC.
- Finally, Restart your Xiaomi Poco X3 NFC phone.
- Your Xiaomi Poco X3 NFC device is now officially rooted Via SuperSU.
Check if Xiaomi Poco X3 NFC Rooted

- You can easily Unroot your Xiaomi Poco X3 NFC:
- For Magisk: Open the Magisk Manager app, Then click on the Uninstall button.

- For SuperSu: Open SuperSu app, go to the settings page Then click on Full Unroot.

Unlock bootloader, flash TWRP and root Poco X3 NFC MIUI 12 without any dead risk.
In today’s guide we are going to discuss about how to root Poco X3 & Poco X3 NFC model by flashing TWRp recovery? Download Poco X3 NFC TWRP recovery, disable DM verify zip file and flash it by fastboot commands.
So, if you are using latest Poco X3 NFC MIUI 12 android 10 and want to root your device, this guide is for you. In this tutorial we will show you all the Poco X3 NFC custom recovery flashing instructions with all necessary screenshots. So that you can apply them on your device to replace the stock recovery with TWRP 3.4.0-0 recovery. Once you have twrp recovery on Poco X3 NFC, you can easily root your device with Magisk root package.
Please Note : Poco X3 NFC 96913 and Poco X3 97272 both models work on same Octa-Core processor, Qualcomm Snapdragon 732G chipset and android 10 including MIUI 12 version. Just because of same hardware configuration, we can use the same custom TWRP recovery, root files for both Poco X3 & Poco X3 NFC MIUI 12.
Overview On Rooting
Without any doubt, rooting is the perfect way to modify the system files for customizations. But we never suggest you to root your device until you don’t have any strong reason. Out of the box Poco X3 & poco X3 NFC mode comes with company’s MIUI12 skin and android Q version. Officially company claims that its near-stock android features and experience.
Any third party custom ROM can’t gives more stability and smooth performance in comparison of stock ROM. After installing of custom ROM, you may face bugs and software crash issues. Additionally, you may see battery daring because of unsupportable features. But if you are willing to root Poco X3 NFC to remove bloatware or want to change IMEI of the device then it’s good to go.
So make sure you have a strong reason to root your device. Otherwise, there are very limited advantages over the non-rooted devices.
Download Custom TWRP Recovery For Poco X3 With Other Files
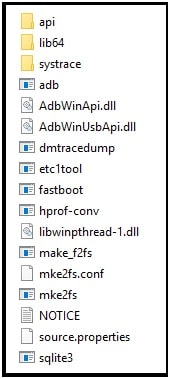
Get the latest official twrp file for Poco X3 NFC 96913 MIUI 12 including DM verify zip file from below download links. Both files are important to install custom TWRP recovery on Poco X3 without bootloop issue and dead risk.
Download TWRP For POCO X3 NFC & Poco X3 : DOWNLOAD / MIRROR
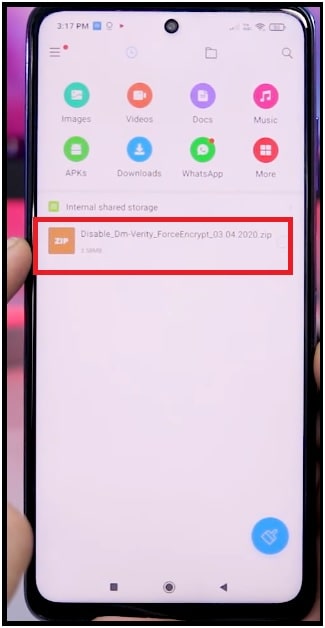
Download DM Verity Zip file For Poco X3 NFC : Disable_Dm-Verity_ForceEncrypt_03.04.2020.zip / MIRROR
Minimal adb & Fastboot Tool For Windows Pc : DOWNLOAD
mFastboot Platform tool : DOWNLOAD

Unlock Bootloder Of Poco X3 Instantly
In order to flash TWRP on Poco X3 NFC, bootloader unlocking is first step. Same as Motorola, Realme Smartphone, Xiaomi Poco devices come with pre-locked bootloader from manufacturer. Because of this feature, we can’t apply any changes in system files. So, bootloader unlocking is the only solution before starting the customization. Just unlock bootloader using mi flash unlock tool or Mi bootloader unlock tool and then go for next step.
Official Method To Unlock Poco X3 NFC Bootloader
Enable USB Debugging & OEM Unlock
- Enable Developer Options : Go to “Settings” >> “About Phone” >>> tap 7-10 times on MIUI version. this step will enable the hidden “Developer Option” on your mobile.
- Turn ON OEM And USB Debugging : Go to “Settings” >> “Additional setting” >>> “Developer Option” >> >enable USB debugging & OEM Unlock
- Download and install “Minimal adb & fastboot tool” on pc. [ GUIDE ]
- Extract the downloaded “mFastboot tool” on pc to run adb & fastboot commands directly from pc.
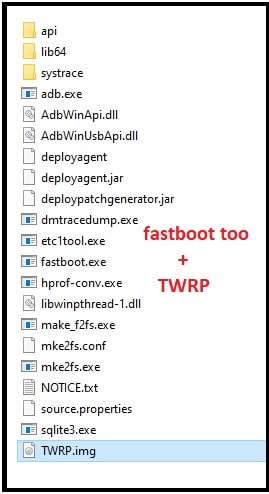
- Again, extract the Poco X3 NFC TWRP Zip file and move it into extracted “mFastboot tool folder”. That means, TWRp image file and mFastboot files should be in the same folder.
- Copy the downloaded disable DM-verify zip file and move it into phone’s internal storage without any folder.
Boot Poco X3 NFC Into Fastboot Mode
In this process will execute the fastboot commands from pc to our mobile. For this, our device should be into fastboot mode. Use the hardware keys of your mobile and boot Poco X3 NFC into fastboot mode manually. Otherwise, you can also use free fastboot mode tool for Xiaomi phones.
- Switch off the device properly.
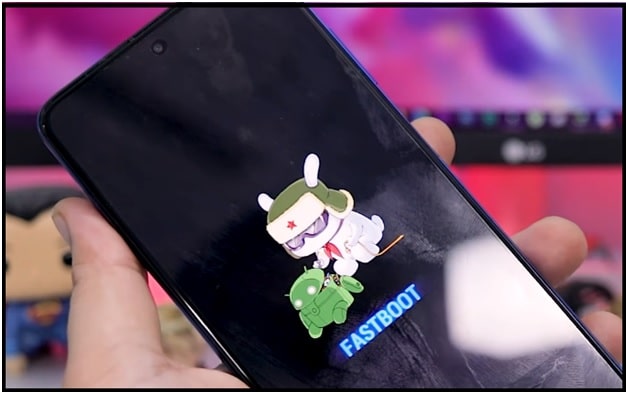
- Press & hold volume down key + power key at the same time and release all the keys once you are able to see the mi fastboot bunny logo.
- Connect the device with pc via working USB cable and device should be into fastboot mode.
Install TWRP On Poco X3 NFC Using Commands
Now it’s the time to run twrp flashing commands on Poco X3 NFC directly from pc. For this, you have to run few simple fastboot commands as shown below.
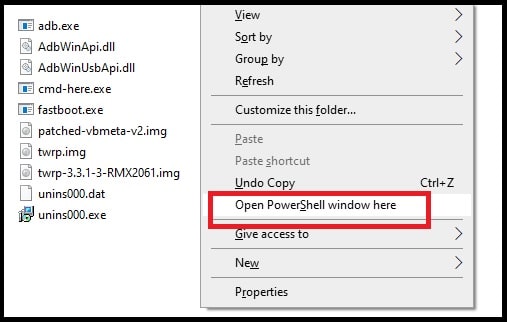
- Enter into extracted “mFastboot Platform tool” folder.
- Press & hold the Shift key and right-click in an empty location inside the platform-tools folder and then select “Open PowerShell window here” or “Open the command prompt window here” option. This will open a new command window on your pc.
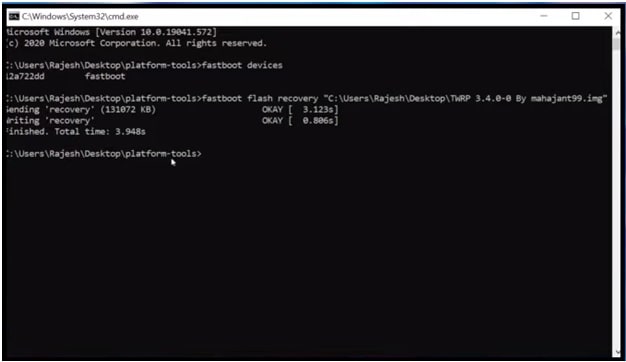
- Type the below command and hit enter to check if the device is properly connected with pc or not.
fastboot devices
- Next, execute the below twrp flashing command. This command will flash twrp recovery on Xiaomi Poco X3 within few seconds.
fastboot flash recovery recovery.img
Please Note: If the names of img file is different then replace the recovery.img with original file name. For example – fastboot flash recovery twrpname.img
: TWRP recovery flashing done. But till now it’s not permanently placed on your phone. We have to install this twrp as a permanent recovery for our device.
- Boot Poco X3 NFC Into TWRP Recovery
- Unplug USb cable from mobile.
- Press & Hold volume up key + power key at the same time.
- Release the power key once you see the poco logo and continuously press the volume up key until you see the twrp recovery menu and then release it too.
- Once you are into newly installed TWRP menu, click on “Install” option >>> find the “dm-verify zip file” from internal storage and flash it.
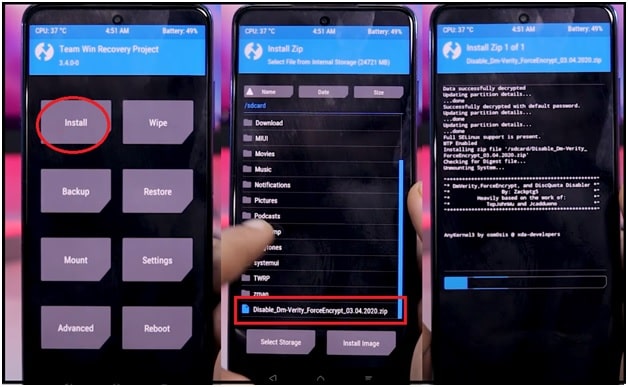
Note: This disable DM verify zip file flashing is required to avoid bootloop issue. Additionally, after flashing this file, twrp recovery will start working as stock recovery of the device. That means, now it’s your permanent recovery and you can boot your device into twrp recovery anytime.
- Next, click on “reboot system” >>> “Do not install” and device will reboot again into normal mode.
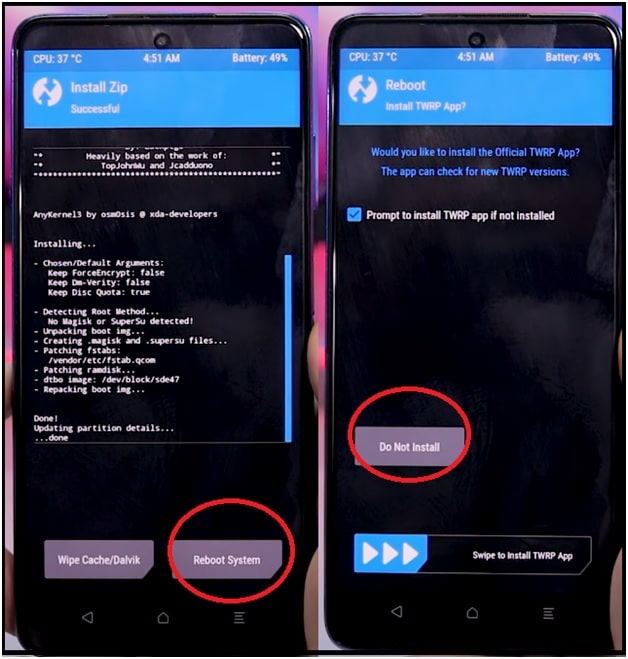
- Done!!! We have successfully installed custom twrp recovery v3.4.0 on Poco X3 NFC MIUI 12 android 10 version.
Root Poco X3 NFC Without Pc

Once you have twrp recovery on your mobile, you are free to root Poco X3 NFC without pc or computer. Yes, you no need to use your pc or any other tool to gain root access. Simply flash Magisk Zip file and get root privilege on android 10 Poco X3 NFC model.
- Download latest Magisk zip file and save it on your phone’s internal storage. Download Magisk root file [zip file] directly from mobile browser or connect the device with pc and move the file from pc. [ Downlead Root File – Magisk ]
- Now boot device into twrp recovery by pressing hardware keys.
- Power off
- Press & hold volume up key + power key and wait to boot device into custom TWRP recovery.
- Tap on “Install” option from main menu, find the “Magisk zip file” and flash it. Here it will take couple of minutes for successful flashing.

- Now you no need to do anything. Just reboot your device in normal mode.
- Once the device rebooted into normal mode, find the “magisk Manager app” in app drawer.
- Open the app and update it if required. You have successfully rooted your Poco X3 NFC using Magisk file.
How To Unroot or Repair Poco X3 NFC
If you want to confirm the root access, install “Root checker” app from Google play store and check the root access status.
")


")