
Below are some more articles on LUKS based Disk Encryption
- Resizing ~ Overview
- Introduction
- Introduction
- What is a root partition?
- Change size of partition using parted CLI utility
- List available partitions
- Disable swap partition
- Delete swap and expand partition
- Re-create swap partition
- Resize a filesystem/partition
- Detailed resizing ~ Enlarging an encrypted partition
- Create a Script to perform Shrink
- Install kexec
- Reduce an encrypted partition
- Resize root LVM partition
- Reduce or Shrink root LVM partition size in Linux
- Increase root partition size in Linux
- How to expand Ubuntu root filesystem
- Ubuntu Root Resize in Review
- Follow me
- Copy essential binaries to image
- Verify the new size of root partition
- Detailed resizing ~ Reducing an encrypted partition
- Can I resize a dm-crypt or LUKS partition?
- Terminology
- Perform File system Check
- Boot into rescue mode
- Activate Logical Volume
- Alternatives for different situations (LVM, jfs)
- Reduce or Shrink encrypted LUKS partition volume
- Enlarge an encrypted partition
- Lab Environment
- Resizing Partitions
- My Lab Environment
- Resize root partition on Linux Ubuntu and Debian
- Create LUKS Encrypted LVM with cryptsetup
- Lab Environment to resize primary partition (RHEL/CentOS 7/8) in Linux
- Resize LUKS Partition
- Grow or Extend Encrypted LUKS partition volume
- Initialize LUKS partition
- Decompress initrd image
- Regenerating the initrd image
- Boot into modified initrd
- Add script to init File
- Conclusion
- Conclusion
- Backup your data (Optional but recommended)
- References
Resizing ~ Overview
The order of the steps depends on if you are shrinking or enlarging your encrypted partition. Enlarging is somewhat easier as the defaults of many of the commands is to fill the available space.
- Introduction
- Terminology
- Setup ~ Desktop (Live) CD, Adding the tools to manage encrypted partitions
- Resizing ~ Overview
- Detailed resizing ~ Reducing an encrypted partition
- Detailed resizing ~ Enlarging an encrypted partition
- Alternatives for different situations (LVM, jfs)
- References
I used to be able to do these tasks with my eyes closed with AIX and other version of Linux and Unix. Today my brain blue screened on me while trying to expand my Ubuntu machine’s root volume group, logical volume, and filesystem. Wow it’s been awhile.
So instead of racking my brain in the future I will jot down the process here for anyone else stuck in the same situation.
Shrinking the root partition can be a challenging task since it is usually mounted and in use by the operating system. The Linux kernel does not allow you to unmount the root partition while the system is running.
One solution to this problem is to use a live USB or CD to boot into a separate environment where the root partition is not mounted and can be resized. However, the guide explores an alternative method that does not require an external device.
A filesystem can be grown to make use of the free space after its
partition. Often this is even possible while the filesystem is
mounted.
To make space for another partition after the filesystem, it can be
shrunk according to the free space within it.
Not all filesystems have resize support.
The partition size will be changed together with the filesystem size.
It is also possible to resize a partition without a filesystem in the
same way.
Introduction
Initramfs is an initial ramdisk that is loaded by the bootloader and used by the kernel during the boot process. It contains a minimal set of tools and drivers that are needed to mount the root filesystem and continue with the boot process.
By modifying the initrd image, we can add the necessary tools and scripts to unmount and shrink the root partition. The exact steps for modifying the initrd image may vary depending on the Linux distribution, but for Ubuntu, it typically involves unpacking the initrd image, making the necessary modifications, and repacking the image.
Even though I have tested and verified these steps in my environment, you should avoid shrinking or reducing LVM size of such primary partition such as «/» in production environment. As these are not officially supported by any vendor such as Red Hat, SuSE etc and it can also destroy your system.
How to clone or backup Linux partition using fsarchiver
Introduction
Encryption seems to becoming more popular and the Alternate CD allows installation onto a LUKS encrypted root and swap partitions.
Resizing an encrypted partition is somewhat complicated. GUI tools such as Gparted see the LUKS container or crypt as unpartitioned space and thus resizing encrypted partitions must be performed entirely from the command line.
 WARNING! Although unlikely (each step is reversible), resizing your encrypted partitions may result in data loss. BACKUP YOUR DATA FIRST
It may in fact be easier to re-install and restore your data from backup rather then attempt to resize your encrypted partition.
Sometimes you may want to increase your disk space and partition capacity in Linux. For example, in VMware or VirtualBox or even ESXi, you gave the extra capacity to your Linux and Linux recognizes that extra space as unallocated. You do not want to create a new partition but you want to increase the partition that has limited space. In this article, we are going to teach you step by step How to resize root partition on Linux Ubuntu and Debian. It should be noted that you can visit the packages available in Eldernode if you want to buy a Linux VPS server.
The method we are going to teach you in this article works on most Linuxes, including Ubuntu, Debian, and so on. So in the continuation of this tutorial, join us to introduce you to the Tutorial resize root partition on Linux Ubuntu and Debian.
What is a root partition?
The most important reason for partitioning is the optimal use of hard disk space and easier and faster access to classified information. You need to know that all the programs and software that you will later install on your system will be in the root partition. In fact, other directories related to the Linux file system will be placed as subdirectories within this partition. In other words, it is the storage location of the entire operating system. Like the partition, you install Windows into. In the next section, we will teach you how to Resize root partition on Linux Ubuntu and Debian. Please join us.
Related Searches: How to resize primary partition in Linux. How to extend non lvm root partition. How to change size of partition in Linux using parted and fdisk without destroying data. Steps to expand partition in RHEL/CentOS 7 and 8 Linux. Perform Disk Management in CentOS. How to use unallocated space to change size of partition in a disk in Linux. How to resize root partition not on LVM in Linux. Step by step guide to resize primary partition. How to expand partition with examples in Linux. centos disk management. rhel 7 extend non lvm root partition. centos 7 resize root partition. Steps to resize primary partition to extend non lvm root partition in linux. how to add unallocated disk space to a partition in Linux. centos shrink or extend non lvm root partition. add space to partition. fdisk extend partition. resize boot partition. extend non lvm root partition in linux. change size of partition.how to expand partition. centos resize primary partition. rhel change size of partition.
- This article covers steps to resize primary partition (non-lvm) which can be dangerous and can leave your Linux system in an unusable broken state. It is important that you backup your content before you attempt to change size of partition.
- You can change size of partition (non-lvm) only on the last partition on the storage device with unallocated space. If the respective partition is not the last partition then the only way to expand partition is to backup your data, rebuild the disk and partitions, then restore the data. No tool such as gparted, parted or fdisk can help you change size of partition in such case.
- You must have some unallocated space or free space available in the concerned device to be able to expand partition. In some of the virtual environment you have an option to change the storage device size but on physical node if there is no enough unallocated space then resize primary partition (extend non lvm root partition) is not possible
- This article assumes you’re using either a GPT partition table, or an msdos partition table using primary partition types to extend non lvm root partition.
I will only demonstrate the steps to extend non lvm root partition, but using the same methods you can also shrink and change size of partition to lower value in Linux. But be sure to backup your data.
Change size of partition using parted CLI utility
You can either use (GUI utility) or (CLI utility) to change size of partition in Linux. Here we plan to resize primary partition which in our case is /dev/sda.
List available partitions
To list the available partitions in /dev/sda we will execute below command
[root@centos-8 ~]# parted -l /dev/sda
Model: ATA VBOX HARDDISK (scsi)
Disk /dev/sda: 16.1GB
Sector size (logical/physical): 512B/512B
Partition Table: msdos
Disk Flags:
Number Start End Size Type File system Flags <--- This is my partition layout 1 1049kB 538MB 537MB primary ext4 boot 2 538MB 11.3GB 10.7GB primary ext4 3 11.3GB 12.3GB 1074MB primary linux-swap(v1)
As I mentioned in the disclaimer section, you can change size of partition only on the last partition of the device but here root partition (/dev/sda2) is not the last one instead swap (/dev/sda3) is my last partition. So to expand root partition I must delete swap device to be able to to use unallocated space and extend non lvm root partition. After deleting swap, root partition will become the last partition on /dev/sda after which we can resize primary partition.
Overview on different disk types and disk interface types
Disable swap partition
Currently I have around 1GB reserved for swap partition
[root@centos-8 ~]# free -m total used free shared buff/cache available
Mem: 3781 164 3245 8 371 3389Swap: 1023 0 1023
I will turn off my swap (disable swap partition) and use this space to extend non lvm root partition in Linux
[root@centos-8 ~]# swapoff -a
Verify the swap partition space, as you see not it is 0
[root@centos-8 ~]# free -m total used free shared buff/cache available
Mem: 3781 164 3241 8 375 3389Swap: 0 0 0
Update /etc/fstab to make sure swap partition is not mounted at boot up stage.
[root@centos-8 ~]# cat /etc/fstab
UUID=b3ba77fc-86a7-40dc-a93e-402d8e3987ab / ext4 defaults 1 1
UUID=621d26e4-4bcc-441d-b336-a9bae280343d /boot ext4 defaults 1 2
UUID=3816d191-31fd-4e20-874d-b18360133aca swap swap defaults 0 0
Delete swap and expand partition
Now to resize primary partition /dev/sda2 and expand partition to a new value we must first delete swap partition using parted utility. As we need root partition to be the last partition of /dev/sda before we expand partition.
[root@centos-8 ~]# parted /dev/sda
GNU Parted 3.2
Using /dev/sda
Welcome to GNU Parted! Type 'help' to view a list of commands.
(parted) p
Model: ATA VBOX HARDDISK (scsi)
Disk /dev/sda: 16.1GB
Sector size (logical/physical): 512B/512B
Partition Table: msdos
Disk Flags:
Number Start End Size Type File system Flags 1 1049kB 538MB 537MB primary ext4 boot 2 538MB 11.3GB 10.7GB primary ext4 3 11.3GB 12.3GB 1074MB primary linux-swap(v1)
(parted) <-- First we need to delete swap partition(parted)
Model: ATA VBOX HARDDISK (scsi)
Disk /dev/sda: 16.1GB
Sector size (logical/physical): 512B/512B
Partition Table: msdos
Disk Flags:
Number Start End Size Type File system Flags 1 1049kB 538MB 537MB primary ext4 boot 2 538MB 11.3GB 10.7GB primary ext4
(parted) <-- Change the unit type to sector to avoid any risk of loosing data when you resize root partitionUnit? [compact]?
(parted) <-- Print the available partition tableModel: ATA VBOX HARDDISK (scsi)
Disk /dev/sda: 31457280s
Sector size (logical/physical): 512B/512B
Partition Table: msdos
Disk Flags:
Number Start End Size Type File system Flags 1 2048s 1050623s 1048576s primary ext4 boot 2 1050624s 22022143s 20971520s primary ext4<--- Note down the start sector number, this will be used in next step(parted) <-- We will delete the root partition's entry. This will not impact the content of root partition and only partition table is modified.
Warning: Partition /dev/sda2 is being used. Are you sure you want to continue?
Yes/No?
Error: Partition(s) 2 on /dev/sda have been written, but we have been unable to inform the kernel of the change, probably because
it/they are in use. As a result, the old partition(s) will remain in use. You should reboot now before making further changes.
Ignore/Cancel? <-- If you reboot your server at this stage then you may end up with a broken node so don't reboot your node at this stage.(parted) <-- Print the current partition tableModel: ATA VBOX HARDDISK (scsi)
Disk /dev/sda: 31457280s
Sector size (logical/physical): 512B/512B
Partition Table: msdos
Disk Flags:
Number Start End Size Type File system Flags 1 2048s 1050623s 1048576s primary ext4 boot
(parted) <-- Now we will create root partition with new sizePartition type? primary/extended?
File system type? [ext2]?
Start? <-- Here give the start sector as it was earlier for root partitionEnd? <-- Give the new end sector higher than the earlier value to resize root partition(parted) <-- Print the new partition table after you extend non lvm root partitionModel: ATA VBOX HARDDISK (scsi)
Disk /dev/sda:
Sector size (logical/physical): 512B/512B
Partition Table: msdos
Disk Flags:
Number Start End Size Type File system Flags 1 2048s 1050623s 1048576s primary ext4 boot 2 1050624s 24022143s 22971520s primary ext4 lba
(parted) <-- We are all done hereInformation: You may need to update /etc/fstab.
But our root partition is showing the same size as earlier i.e. ~10GB
[root@centos-8 ~]# df -h /dev/sda2
Filesystem Size Used Avail Use% Mounted on
/dev/sda2 9.8G 1.2G 8.1G 13% /
To complete the steps to resize non lvm root partition, execute resizefs for ext3 and ext4 partitions or xfs_growfs for xfs partition to expand partition and refresh the changes
[root@centos-8 ~]# resize2fs /dev/sda2
resize2fs 1.44.3 (10-July-2018)
Filesystem at /dev/sda2 is mounted on /; on-line resizing required
old_desc_blocks = 2, new_desc_blocks = 2
The filesystem on /dev/sda2 is now 2871440 (4k) blocks long.
Re-verify the new size of root partition to make sure our steps to extend non lvm root partition was successful.
[root@centos-8 ~]# df -h /dev/sda2
Filesystem Size Used Avail Use% Mounted on
/dev/sda2 11G 1.3G 9.0G 12% /
Understanding resource group and constraints in a Cluster with examples
Re-create swap partition
Now we must create Swap partition which we deleted earlier in this article. We will again use parted utility to create swap partition
[root@centos-8 ~]# parted /dev/sda
GNU Parted 3.2
Using /dev/sda
Welcome to GNU Parted! Type 'help' to view a list of commands.
(parted)
Partition type? primary/extended?
File system type? [ext2]? <-- To create swap partitionStart?
Start?
End?
Warning: The resulting partition is not properly aligned for best performance: 24022144s % 2048s != 0s
Ignore/Cancel?
(parted)
Model: ATA VBOX HARDDISK (scsi)
Disk /dev/sda: 16.1GB
Sector size (logical/physical): 512B/512B
Partition Table: msdos
Disk Flags:
Number Start End Size Type File system Flags 1 1049kB 538MB 537MB primary ext4 boot 2 538MB 12.3GB 11.8GB primary ext4 3 12.3GB 12.8GB 512MB primary linux-swap(v1) lba <-- Now we have a swap partition(parted)
Information: You may need to update /etc/fstab.
Now with parted we only created a partition with file system type as swap. Use mkswap to turn this partition into swap.
[root@centos-8 ~]# mkswap /dev/sda3
Setting up swapspace version 1, size = 488.3 MiB (511995904 bytes)
no label, UUID=decb7df5-8d7a-41b4-bfd7-bee076006ec9
Next we must update /etc/fstab with the UUID of our new swap partition. To get the new UUID of swap partition
[root@centos-8 ~]# blkid /dev/sda3
/dev/sda3: UUID="decb7df5-8d7a-41b4-bfd7-bee076006ec9" TYPE="swap" PARTUUID="5290bf38-03"
Update this UUID in /etc/fstab as shown below
[root@centos-8 ~]# cat /etc/fstab
UUID=b3ba77fc-86a7-40dc-a93e-402d8e3987ab / ext4 defaults 1 1
UUID=621d26e4-4bcc-441d-b336-a9bae280343d /boot ext4 defaults 1 2
UUID=3816d191-31fd-4e20-874d-b18360133aca swap swap defaults 0 0
Finally turn on the new swap partition
[root@centos-8 ~]# swapon /dev/sda3
Verify the new swap partition
[root@centos-8 ~]# free -m total used free shared buff/cache available
Mem: 3781 155 3390 8 235 3407
Swap: 488 0 488
Now you can reboot your Linux server to make sure everything is OK and resize primary partition was successful.
How to mount filesystem without fstab using systemd (CentOS/RHEL 7/8)
Resize a filesystem/partition
Open from the overview.
Select the disk containing the filesystem in question from the list
of storage devices on the left. If there is more than one volume on
the disk, select the volume which contains the filesystem.A dialog will open where the new size can be chosen. The filesystem will
be mounted to calculate the minimum size by the amount of current
content. If shrinking is not supported the minimum size is the current
size. Leave enough space within the filesystem when shrinking to ensure
that it can work fast and reliably.Depending on how much data has to be moved from the shrunk part, the
filesystem resize may take longer time.The filesystem resize automatically involves
of the filesystem. Therefore
it is advised to back up important data before starting. The action
must not be stopped or it will result in a damaged filesystem.Confirm to start the action by clicking
.The action will unmount the filesystem if resizing a mounted filesystem
is not supported. Be patient while the filesystem is resized.After completion of the needed resize and repair actions the filesystem
is ready to be used again.
Detailed resizing ~ Enlarging an encrypted partition
This section will be shorter, it is basically the reverse of the above. Enlarging is easier as the defaults resize the containers to the largest available space.
1. Boot a live CD and, using any tool, using any tool create a new partition, lets call it /dev/sda6 , next to and to the left of (after) your crypt.
2. Write random data to the new partition with dd.
Make sure you have the correct partition for this command or you will overwrite your crypt.
sudo dd if=/dev/urandom of=/dev/sda6
 You can run that command as many times as your paranoia requires.
3. Use fdisk as above to delete and then re-create a larger crypt partition.
4. Reboot to the live CD.
5. Install lvm2 and cryptsetup
sudo apt-get update && sudo apt-get install lvm2 cryptsetup
6. Load the cryptsetup module.
sudo modprobe dm-crypt
7. Decrypt your file system.
sudo cryptsetup luksOpen /dev/sda5 crypt1
8. Get the live CD to recognize (activate) your LVM.
sudo vgscan --mknodessudo vgchange -ay
9. Resize the Crypt.
sudo cryptsetup resize crypt1
10. Resize the (LVM) Physical Volume.
sudo pvresize /dev/mapper/crypt1
11. Resize your root (LVM) Logical Volume.
- Unlock the (LVM) Physical Volume.
sudo pvchange -x y /dev/mapper/crypt1
Resize the (LVM) Physical Volume.
sudo lvresize -l +4G /dev/ubuntu-vg/root
: Change the +4G to the amount of space you are adding, or +100%FREE to use all of the available space.
Re-lock the physical volume.
sudo pvchange -x n /dev/mapper/crypt1
12. Resize the filesystem.
sudo e2fsck -f /dev/mapper/ubuntu--vg-rootsudo resize2fs -p /dev/mapper/ubuntu--vg-root
- You can check the size of the file system by mounting it before and after resizing the file system and running df -h . DO NOT RESIZE A MOUNTED PARTITION
- Before :
Filesystem Size Used Avail Use% Mounted on /dev/mapper/ubuntu--vg-root 5.0G 2.1G 2.7G 45% /mnt
After :
Filesystem Size Used Avail Use% Mounted on /dev/mapper/ubuntu--vg-root 9.2G 2.1G 6.6G 24% /mnt
- Before :
13. <Say prayer here> 
Reboot to your hard drive, enter your crypt password.
If all went well your system should boot normally.
: With most of those commands the default was to resize by expanding to take up the available space. This is why expanding is easier then reducing.
Create a Script to perform Shrink
Before creating the script, let’s collect some prerequisite information.
Find the mount point of the root partition in Linux
findmnt --noheadings / | awk '{print $2}'Find start sector of the root partition.
Use fdisk to check the start sector of root partition. This is critical because after deleting and recreating it must start with the same start sector.
sudo fdisk /dev/nbd1Type print to see partition table information:
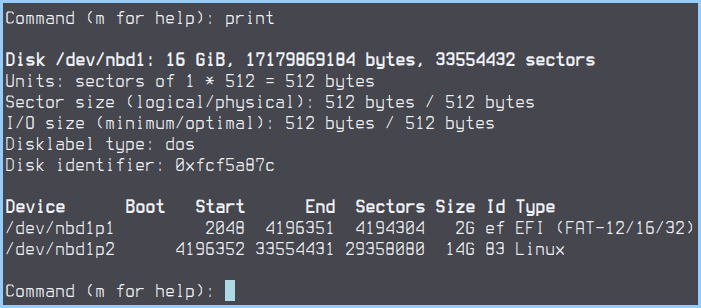
In my case, nbd1p2 is the root partition and 4196352 is the start sector.
In the script, we will use e2fsck to check filesystem health and resize2fs to shrink the filesystem.
- Start delete command
- Choose partition number 2 for deletion
- Create a new partition
- Make it a primary partition
- Enter for confirmation
- Paste the start sector of the partition, double check to be sure
- Enter total storage of root. In this case, it will be shrunk from 14GB to 5GB.
- Create another partition
- Set it as primary
- Confirm
- Default start
- Use the all available space which will be 9GB in this case
- Save changes and exit
Create a file named shrink.sh in ./main/bin.
vi /tmp/init/main/usr/bin/shrink.sh#!/bin/sh # Check file system health e2fsck -fy /dev/nbd1p2 # Shrink the file system to 5GB resize2fs /dev/nbd1p2 5G # Delete and create new partitions with fdisk ( echo d echo 2 echo n echo p echo echo 4196352 echo +5G echo n echo p echo echo echo echo w ) | sudo fdisk /dev/nbd1 # Create the ext4 file system on new partition (it will be last partition number + 1) mkfs.ext4 /dev/nbd1p3
Make the script executable, type:
sudo chmod +x /tmp/init/main/usr/bin/shrink.shInstall kexec
kexec allows a Linux system to «reboot» without restarting the hardware. Here we will use it to reboot the current kernel with the modified initrd which will handle the shrink operation.
To install kexec, type:
sudo apt install kexec-toolsNote: Kexec will not work properly in a virtual machine.
Reduce an encrypted partition
Boot the desktop, live CD. Install & configure the tools (lvm2 and cryptsetup).
Reduce the (root) file system with resize2fs.
Reduce the (root) (LVM) Logical Volume with lvreduce.
Reduce the (LVM) Physical Volume with pvresize.
Reduce the Crypt with cryptsetup.
Reboot to reduce the Partition storing the crypt with fdisk.
- Reboot to your encrypted hard drive ~ You should always reboot after changing your partition table with fdisk.
Resize root LVM partition
Once you boot in rescue mode, you can resize root LVM partition or any other partition which you cannot un-mount runtime in default.target such as boot partition. In the below examples we will decrease root LVM partition size and also increase root LVM partition size.
Beginners guide to how LVM works in Linux (architecture)
Reduce or Shrink root LVM partition size in Linux
Next use resize2fs to resize root LVM partition. Currently my «/» file system is 13.5 GB which I want to decrease root partition size to 7GB
[anaconda root@centos-8 ~]# resize2fs /dev/mapper/rhel-root 7G
resize2fs 1.44.3 (10-July-2018)
Resizing the filesystem on /dev/mapper/rhel-root to 1835008 (4k) blocks.
Next use lvreduce with the same size (7G) as used in above command to decrease root partition size.
[anaconda root@centos-8 ~]# lvreduce -L 7G /dev/mapper/rhel-root WARNING: Reducing active logical volume to 7.00 GiB. THIS MAY DESTROY YOUR DATA (filesystem etc.)
Do you really want to reduce rhel/root? [y/n]: Size of logical volume rhel/root changed from 13.56 GiB (3472 extents) to 7.00 GiB (1792 extents). Logical volume rhel/root successfully resized.
So the resize root LVM partition was successful. You can mount the root file system on /mnt/sysimage to verify the size
[anaconda root@centos-8 ~]# mount /dev/mapper/rhel-root /mnt/sysimage/
As you see my root partition is now 7GB
[anaconda root@centos-8 ~]# df -h
Filesystem Size Used Avail Use% Mounted on
devtmpfs 2.4G 0 2.4G 0% /dev
tmpfs 2.5G 12K 2.5G 1% /dev/shm
tmpfs 2.5G 17M 2.5G 1% /run
tmpfs 2.5G 0 2.5G 0% /sys/fs/cgroup
/dev/sr0 6.7G 6.7G 0 100% /run/install/repo
/dev/mapper/live-rw 2.9G 1.8G 1.2G 61% /
tmpfs 2.5G 724K 2.5G 1% /tmp/dev/mapper/rhel-root 6.9G 1.8G 4.8G 27% /mnt/sysimage
Increase root partition size in Linux
Now to extend root partition size I will use the same node. Here we will increase root partition size by 1GB from 7G to 8G.
[anaconda root@centos-8 ~]# lvextend -L +1G /dev/mapper/rhel-root Size of logical volume rhel/root changed from 7.00 GiB (1792 extents) to 8.00 GiB (2048 extents). Logical volume rhel/root successfully resized.lvextend command was successful, next we will execute resize2fs to increase root partition size
[anaconda root@centos-8 ~]# resize2fs /dev/mapper/rhel-root
resize2fs 1.44.3 (10-July-2018)
Resizing the filesystem on /dev/mapper/rhel-root to 2097152 (4k) blocks.
Post resize2fs you can verify the changes for which you must mount the root partition. Since we are in rescue mode we will mount it on /mnt/sysimage
[anaconda root@centos-8 ~]# mount /dev/mapper/rhel-root /mnt/sysimage/
Next using df command we see we were successfully able to increase root partition size
[anaconda root@centos-8 ~]# df -h /mnt/sysimage/
Filesystem Size Used Avail Use% Mounted on
/dev/mapper/rhel-root 7.9G 1.8G 5.7G 24% /mnt/sysimage
How to expand Ubuntu root filesystem
In my scenario I increased the size of my Virtual Machine disk in VMware from 18GB to 28 GB.
- Step 1 Before we get started run pvdisplay in order to see the current state of the physical volume
root@Docker01:~# pvdisplay
--- Physical volume --- PV Name /dev/sda1 VG Name ubuvg PV Size 16.00 GiB / not usable 2.00 MiB Allocatable yes PE Size 4.00 MiB Total PE 4095 Free PE 678 Allocated PE 3417 PV UUID HiNAY2-sfqz-7fwT-tLvy-XKfT-3QR6-BXash5- Step 2 Manipulate the disk partition table with fdisk
root@Docker01:~# fdisk /dev/sdb
n (create new partition, select start and end cylinders, all free space is selected by default)
Partition type: p primary (1 primary, 0 extended, 3 free) e extended
Select (default p):
Using default response p
Partition number (1-4, default 2):
Using default value 2
First sector (33552384-33554431, default 33552384):
Using default value 33552384
Last sector, +sectors or +size{K,M,G} (33552384-33554431, default 33554431):
Using default value 33554431
w (save partition table and exit)
Accept the default values that are provide that the «n» option returns.
Step 5 Intialize the newly created partition with pvcreate
root@Docker01:~# pvcreate /dev/sda3
Physical volume "/dev/sda3" successfully created- Step 6 Add the newly created partition to the root volume group. First rerun pvdisplay to show the new physical volume details. You should now see the new partition
"/dev/sda3" is a new physical volume of "9.00 GiB" --- NEW Physical volume --- PV Name /dev/sda3 VG Name PV Size 9.00 GiB Allocatable NO PE Size 0 Total PE 0 Free PE 0 Allocated PE 0 PV UUID OEADew-tamR-EHil-FU4p-kIuW-F5rT-V0CTcYRun the command vgs in order to get the name of your volume group
root@Docker01:~# vgs VG #PV #LV #SN Attr VSize VFree ubuvg 1 5 0 wz--n- 16.00g 2.65gExpand the volume group with vgextend then verify your volume group again once complete with vgs
root@Docker01:~# vgextend ubuvg /dev/sda3 Volume group "ubuvg" successfully extended
root@Docker01:~# vgs VG #PV #LV #SN Attr VSize VFree ubuvg 2 5 0 wz--n- 24.99g 11.64g
root@Docker01:~#- Step 7 Next we need to extend the Logical Volume with lvextend
root@Docker01:~# df -k
Filesystem 1K-blocks Used Available Use% Mounted on
/dev/mapper/ubuvg-ubulv 8726456 7739868 520260 94% /
root@Docker01:~# lvextend -L +10G /dev/mapper/ubuvg-ubulv Extending logical volume ubulv to 18.58 GiB Logical volume ubulv successfully resized- Step 8 Extend the Filesystem to fill the logical volume
root@Docker01:~# resize2fs /dev/mapper/ubuvg-ubulv
resize2fs 1.42.9 (4-Feb-2014)
Filesystem at /dev/mapper/ubuvg-ubulv is mounted on /; on-line resizing required
old_desc_blocks = 1, new_desc_blocks = 2
The filesystem on /dev/mapper/ubuvg-ubulv is now 4871168 blocks long.
root@Docker01:~# df -k
Filesystem 1K-blocks Used Available Use% Mounted on
/dev/mapper/ubuvg-ubulv 19048316 7744220 10420152 43% /
Ubuntu Root Resize in Review
I’m a CLI junkie so no plans of me finding out how a GUI works anytime soon.
Follow me
Copy essential binaries to image
Shrinking a partition needs several programs that do not exist in initrd image.
List of required programs:
- resize2fs: For changing size of an ext2/ext3/ext4 partition
- e2fsck: To check file system health, required by resize2fs before changing partition size. If the partition is corrupted, resize2fs will not execute.
- fdisk: Modify the partition table, create/delete partitions
- mkfs.ext4: Used for creating ext4 file system
Copy required binaries to the bin which resides under the main directory:
sudo cp $(which fdisk) $(which resize2fs) $(which e2fsck) $(which mkfs.ext4) ./main/binVerify the new size of root partition
Now above command will only mount the root partition. Next we will mount all other partitions to properly verify our changes before we boot into default.target
[anaconda root@centos-8 ~]# mount -o bind /dev /mnt/sysimage/dev
[anaconda root@centos-8 ~]# mount -o bind /usr /mnt/sysimage/usr
[anaconda root@centos-8 ~]# mount -o bind /sys /mnt/sysimage/sys
[anaconda root@centos-8 ~]# mount -t proc /proc /mnt/sysimage/proc
[anaconda root@centos-8 ~]# mount -o bind /dev/shm /mnt/sysimage/dev/shm
Since we have already mounted root partition, next we will mount boot partition. Now if you have any other partitions on your system then you can mount them as well.
[anaconda root@centos-8 ~]# mount /dev/sda1 /mnt/sysimage/boot
Next use chroot to change file system to /mnt/sysimage.
[anaconda root@centos-8 ~]# chroot /mnt/sysimage/
Verify if everything is working as expected before you reboot the node to default.target
[anaconda root@centos-8 /]# df -h
Filesystem Size Used Avail Use% Mounted on
/dev/mapper/rhel-root 1.8G 5.7G 24% /
/dev/sda1 488M 130M 323M 29% /boot
devtmpfs 2.4G 0 2.4G 0% /dev
/dev/mapper/live-rw 2.9G 1.8G 1.2G 61% /usr
tmpfs 2.5G 12K 2.5G 1% /dev/shm
Create Stratis Snapshot, Restore Stratis FileSystem & more (CentOS/RHEL 8)
Lastly I hope the steps from the article to resize root LVM partition on RHEL/CentOS 7/8 Linux was helpful. So, let me know your suggestions and feedback using the comment section.
Detailed resizing ~ Reducing an encrypted partition
1. Reduce the size of your file system.
If you have an ext2 or ext3 filesystem, you can use resize2fs and you need to check the file system before you can resize it.
sudo e2fsck -f /dev/mapper/ubuntu--vg-rootsudo resize2fs -p /dev/mapper/ubuntu--vg-root 5g
- Replace the «5g» with your intended size (in Gb) of your filesystem.
- The -p flag shows a progress hash.
Check that the file system is still intact with e2fsck.
sudo e2fsck -f /dev/mapper/ubuntu--vg-root
If you have a btrfs filesystem, you should instead use a command like:
btrfs filesystem resize -500m /dev/mapper/ubuntu--vg-root/@subvolume
- You can use a variety of commands to reduce the size. The example above reduces it by 500MB, but it can be increased in a similar way or can be set to a specific size.
You can verify that the shrink worked by running:
btrfs filesystem show -d
- -d will show information for all devices.
2. Reduce the size of your root (LVM) Logical Volume. The -L flag is how much you want to reduce the size of your (LVM) Logical Volume, so keep this in mind.
Display your (LVM) Logical Volumes with lvdisplay.
sudo lvdisplay
- Note how much you need to reduce your root (LVM) Logical Volume by (in my case it was 4.3 Gb).
sudo lvreduce -L -4.3G /dev/ubuntu--vg/root
- Note: You will need to change the «-4.3G» to the proper size to reduce your (LVM) Logical Volume to your desired size.
Re-display your (LVM) Logical Volumes to check the final size is correct.
sudo lvdisplay
3. Resize your (LVM) Physical Volume.
 The physical volume used by LVM can become «fragmented» in that the (LVM) Logical Volumes within the (LVM) Physical Volume are not always in order. There is no defragmentation tool, so if you may need to manually move the logical partitions (back up the data, delete the (LVM) Logical Volume, re-create a replacement (LVM) Logical Volume, restore data from backup).
In order to resize the (LVM) Physical Volume I had to manually move (delete then recreate) the swap (LVM) Logical Volume.
Show the size of your physical volume with pvdisplay
pvdisplay
Remove the swap (LVM) Logical Volume
lvremove /dev/ubuntu--vg/swap_1
Resize the (LVM) Physical Volume.
sudo pvresize --setphysicalvolumesize 5.6G /dev/mapper/crypt1
Now we will restore (recreate) the swap (LVM) Logical volume.
Set permissions of (LVM) Physical Volume to allow allocation (if needed)
sudo pvchange -x y /dev/mapper/crypt1
Restore the swap (LVM) Logical Volume.
sudo lvcreate -L 512m -n swap_1 ubuntu--vgsudo mkswap -L swap_1 /dev/ubuntu--vg/swap_1
- As the mkswap command finishes it will print the new uuid to the terminal.
Update fstab with new uuid (use any editor)
- Mount the root (LVM) Logical Volume.
sudo mount /dev/ubuntu--vg/root /mnt
Edit /etc/fstab
gksu gedit /mnt//etc/fstab
Copy-paste the new uuid from the terminal to fstab, updating the uuid for your swap partition. Save and exit gedit Unmount the root (LVM) Logical Volume
sudo umount /mnt
Re-lock the (LVM) Physical Volume after adding the (LVM) Logical Volume swap (locking the (LVM) Physical Volume keeps it from changing).
sudo pvchange -x n /dev/mapper/crypt1
4. Resize your crypt.
Show the size of your crypt with cryptsetup.
sudo cryptsetup status crypt1
- This shows the size of your crypt in sectors.
Make note of the offset
Resize with cryptsetup. Note: nowadays the cryptsetup does not accept the -o parameter.
sudo cryptsetup -o 2056 -b 11800000 resize crypt1
- -o = offset (get this from the status command) -b = size in sectors.
5. Resize your partitions with fdisk.
Unmount your LVM and crypt :
sudo vgchange -ansudo cryptsetup luksClose crypt1
- cryptsetup luksClose throws error: ioctl, busy device (a bug?). So you have to reboot before using fdisk!
Now the scary part, use fdisk to manually resize your partitions.
- If you are unfamiliar with fdisk, I advise you read this link. How to partition with fdisk Note : fdisk does NOT overwrite data, so if you make a mistake you should be able to «undo» the changes.
List your partition information with fdisk.
sudo fdisk -l
- WRITE THIS INFORMATION DOWN (or print it out).
Re-write your partition table. To do this, use fdisk to DELETE your partitions and RECREATE them, but in a smaller size.
sudo fdisk /dev/sda
This was my fdisk session :
The number of cylinders for this disk is set to 1305. There is nothing wrong with that, but this is larger than 1024, and could in certain setups cause problems with: 1) software that runs at boot time (e.g., old versions of LILO) 2) booting and partitioning software from other OSs (e.g., DOS FDISK, OS/2 FDISK) Command (m for help): d Partition number (1-5): 5 Command (m for help): d Partition number (1-5): 2 Command (m for help): n Command action e extended p primary partition (1-4) e Partition number (1-4): 2 First cylinder (32-1305, default 32): Using default value 32 Last cylinder or +size or +sizeM or +sizeK (32-1305, default 1305): +6000M Command (m for help): n Command action l logical (5 or over) p primary partition (1-4) l First cylinder (32-761, default 32): Using default value 32 Last cylinder or +size or +sizeM or +sizeK (32-761, default 761): Using default value 761 Command (m for help): n Command action l logical (5 or over) p primary partition (1-4) p Partition number (1-4): 3 First cylinder (762-1305, default 762): Using default value 762 Last cylinder or +size or +sizeM or +sizeK (762-1305, default 1305): Using default value 1305 Command (m for help): p Disk /dev/sda: 10.7 GB, 10737418240 bytes 255 heads, 63 sectors/track, 1305 cylinders Units = cylinders of 16065 * 512 = 8225280 bytes Disk identifier: 0x000a6bf9 Device Boot Start End Blocks Id System /dev/sda1 * 1 31 248976 83 Linux /dev/sda2 32 761 5863725 5 Extended /dev/sda3 762 1305 4369680 83 Linux /dev/sda5 32 761 5863693+ 83 Linux Command (m for help): w The partition table has been altered! Calling ioctl() to re-read partition table. Syncing disks.
Note : go to fdisk expert mode by commanding x to move (‘b’) the sda5 to start at it’s original sector (eg. 501760).
Cancel the «Authentication» dialog that appears (the live CD is trying to auto-mount your new partition).
The LVM partition’s system id should also be changed to «Linux LVM»:
Command (m for help): t Partition number (1-5): 5 Hex code (type L to list codes): 8e Command (m for help): w
Failure to do this may cause the beginning sector of the logical partition not to line up with where it used to be, and the LVM will be unreadable!
6. <Say prayer here>
Reboot to your hard drive, enter your crypt password.
If all went well your system should boot normally.
Can I resize a dm-crypt or LUKS partition?
Disclaimer: Official Page of cryptsetup
Yes, you can, as neither dm-crypt nor LUKS stores partition size. Whether you should is a different question. Personally I recommend backup, recreation of the encrypted partition with new size, recreation of the filesystem and restore. This gets around the tricky business of resizing the filesystem. Resizing a dm-crypt or LUKS container does not resize the filesystem in it. The backup is really non-optional here, as a lot can go wrong, resulting in partial or complete data loss. Using something like gparted to resize an encrypted partition is slow, but typically works. This will not change the size of the filesystem hidden under the encryption though.
You also need to be aware of size-based limitations. The one currently relevant is that aes-xts-plain should not be used for encrypted container sizes larger than 2TiB. Use aes-xts-plain64 for that.
As you see performing resize LUKS partition, extend or shrink encrypted LUKS partition are not recommend.
Easy steps to open a port in Linux RHEL/CentOS 7/8
Terminology
Encrypted partitions are akin to a Russian Nesting Dolls and the terminology can be confusing. While a detailed explanation of either LVM or encryption is beyond this how to, think of an encrypted system we have multiple containers, the physical partition on the hard drive, the LUKS container or crypt, LVM, and the file system. We need to resize each of these containers in the proper order.
-> This is a partition on your hard drive to contain the LUKS crypt (The Alternate CD defaults to /dev/sda5 for encryption).
Crypt or LUKS container. LUKS = Linux Unified Key Setup. LUKS creates a crypt within the physical partition. The contents of the crypt are, of course, encrypted. The crypt is mapped to /dev/mapper/crypt1 and LVM is utilized to create partitions within the crypt.
LVM or Logical Volume Management. LVM takes physical partitions (AKA Physical Volumes) and creates Logical Volumes, somewhat similar to a logical partition within an extended partition.
. The (LVM) Physical Volume used for encryption is the LUKS crypt, which is mapped to /dev/mapper/crypt1.
. The (LVM) Physical Volume is divided into (LVM) Logical Volumes which are in turn used for / (root partition) and swap. Similar to logical partitions, these are contained within the (LVM) physical volume within (LUKS) crypt within the physical partition (Hard Drive).
. The actual file system (ext3 / swap) written onto the (LVM) logical volumes.
Resizing an encrypted partition must be performed from a live CD and support for encryption and LVM are not included on the live CD.
1. Boot the live (Desktop) CD and install lvm2 and cryptsetup.
sudo apt-get update && sudo apt-get install lvm2 cryptsetup
2. Load the cryptsetup module.
sudo modprobe dm-crypt
3. Decrypt your file system.
sudo cryptsetup luksOpen /dev/sda5 crypt1
4. Get the live CD to recognize (activate) your LVM.
sudo vgscan --mknodessudo vgchange -ay
You can now manage your encrypted partitions, mount them, copy them, or perform maintenance (fsck, backup, resize).
Perform File system Check
Next run a file system check to make sure the file system is proper and not corrupted. Without a file system check you cannot shrink root LVM partition or any other partition.
[anaconda root@centos-8 ~]# e2fsck -f /dev/mapper/rhel-root
e2fsck 1.44.3 (10-July-2018)
Pass 1: Checking inodes, blocks, and sizes
Pass 2: Checking directory structure
Pass 3: Checking directory connectivity
Pass 4: Checking reference counts
Pass 5: Checking group summary information
/dev/mapper/rhel-root: 49755/522240 files (0.2% non-contiguous), 502880/2097152 blocks
So our file system check has passed.
Boot into rescue mode
You cannot shrink root LVM partition online without reboot. Also you will need your RHEL/CentOS 7/8 ISO DVD depending on your environment to boot into rescue mode. Here I am using CentOS 8 so I will use the vanilla DVD of CentOS 8 to go to rescue mode.
Once you boot your Linux node with rescue DVD you can enable SSH and configure network in rescue mode. In this example I have disabled consistent network device naming and assigned a static IP address but you can also use DHCP by using ip=dhcp

In the next screen, select «3» to skip to shell. Make sure the file system is not mounted. If you select 1 or 2 then the root partition will get mounted on /mnt/sysimage which will not allow you to resize root LVM partition.

Since I have enabled SSH and configured network for my rescue mode, I have connected using Putty. Currently the system is mounted with LIVE DVD as you can see so our LVM root partition is not in mounted state so we can decrease or increase root partition size.
[anaconda root@centos-8 ~]# df -h
Filesystem Size Used Avail Use% Mounted on
devtmpfs 2.4G 0 2.4G 0% /dev
tmpfs 2.5G 12K 2.5G 1% /dev/shm
tmpfs 2.5G 17M 2.5G 1% /run
tmpfs 2.5G 0 2.5G 0% /sys/fs/cgroup
/dev/sr0 6.7G 6.7G 0 100% /run/install/repo
/dev/mapper/live-rw 2.9G 1.8G 1.2G 61% /
tmpfs 2.5G 724K 2.5G 1% /tmp
Activate Logical Volume
Next we must activate our logical volume before we can shrink root LVM filesystem.
[anaconda root@centos-8 ~]# vgchange -ay 2 logical volume(s) in volume group "rhel" now active
To list the available logical volumes and volume groups:
[anaconda root@centos-8 ~]# lvs LV VG Attr LSize Pool Origin Data% Meta% Move Log Cpy%Sync Convert root rhel -wi------- 13.56g swap rhel -wi------- 956.00m
[anaconda root@centos-8 ~]# vgs VG #PV #LV #SN Attr VSize VFree rhel 1 2 0 wz--n- <14.50g 0
Alternatives for different situations (LVM, jfs)
Some different steps are needed with different filesystems, LVM etc. Sometimes there’s no need to reboot or even umount.
For example, I just enlarged an encrypted jfs volume under LVM like this (logical volume /dev/vg00/extra encrypted as extra_crypt and mounted on /extra):
lvextend -L820G /dev/vg00/extracryptsetup resize extra_cryptmount -o remount,resize /extra/
That’s all — no fsck’s, umounts or reboots needed.
For ext3/ext4 filesystem it should work similarly, just use resize2fs instead of the remount.
Reduce or Shrink encrypted LUKS partition volume
— Before modifying any system, it is always recommended to create a backup first as there is an elevated risk of data corruption with reducing an LVM size.
— Shrinking is not supported on a GFS2 or XFS file system, so you cannot reduce or shrink encrypted LUKS partition volume that contains a GFS2 or XFS file system.
To shrink encrypted LUKS partition you can use lvreduce command. Make sure the disk is unmounted, so this must be done when there is no need for activity on the disk.
[root@centos-8 ~]# umount /secret
Before you resize LUKS partition, it is important to run a file system check to verify data integrity:
[root@centos-8 ~]# e2fsck -f /dev/mapper/secret
e2fsck 1.44.3 (10-July-2018)
Pass 1: Checking inodes, blocks, and sizes
Pass 2: Checking directory structure
Pass 3: Checking directory connectivity
Pass 4: Checking reference counts
Pass 5: Checking group summary information
/dev/mapper/secret: 11/195840 files (0.0% non-contiguous), 22022/784384 blocks
I hope the LUKS partition is still in Open state to shrink LUKS encrypted partition, if not map the LUKS partition on a device mapper using luksOpen
[root@centos-8 ~]# cryptsetup luksOpen /dev/rhel/secret secret
Enter passphrase for /dev/rhel/secret:
Here we will shrink LUKS encrypted partition /dev/mapper/secret logical volume:
[root@centos-8 ~]# blkid /dev/mapper/secret
/dev/mapper/secret: UUID="d6b707da-04c5-4c19-9c9d-5e1df2332488" TYPE="ext4"
Execute lvreduce with the size of the LUKS volume which you wish to have after shrinking. Here my LUKS volume was 3GB, and I wish to remove 1GB from this volume so the final size should be 2GB for my LUKS encrypted volume.
In RHEL 5 to resize LUKS partition you must also execute resize2fs before running lvreduce, for example here resize2fs /dev/mapper/secret 2G
[root@centos-8 ~]# lvreduce -r -L 2G /dev/rhel/secret
fsck from util-linux 2.32.1
/dev/mapper/secret: clean, 11/195840 files, 22022/784384 blocks
resize2fs 1.44.3 (10-July-2018)
Resizing the filesystem on /dev/mapper/secret to 522240 (4k) blocks.
The filesystem on /dev/mapper/secret is now 522240 (4k) blocks long.
Enter passphrase for /dev/mapper/rhel-secret: Size of logical volume rhel/secret changed from 3.00 GiB (768 extents) to 2.00 GiB (512 extents). Logical volume rhel/secret successfully resized.
Next mount the LUKS volume to it’s mount point
[root@centos-8 ~]# mount /dev/mapper/secret /secret/
Verify the new size of secret volume to make sure you were able to shrink LUKS encrypted partition size
[root@centos-8 ~]# df -h /secret/
Filesystem Size Used Avail Use% Mounted on
/dev/mapper/secret 6.0M 1.9G 1% /secret
9 commands to check if connected to internet with shell script examples
Lastly I hope the steps from the article to resize LUKS volume, extend or shrink LUKS encrypted partition in CentOS/RHEL 7/8 Linux was helpful. So, let me know your suggestions and feedback using the comment section.
References:
How to shrink an LVM Logical Volume
How to reduce LVM size in Linux step by step (online without reboot)
Enlarge an encrypted partition
- Boot the desktop, live CD. Use gparted (or any tool) to put unallocated space adjacent, and to the left of your Crypt partition.
Enlarge the Partition storing the crypt with fdisk.
Reboot ~ You should always reboot after changing your partition table with fdisk.
Boot the desktop, live CD. Install & configure the tools (lvm2 and cryptsetup).
Enlarge the Crypt with cryptsetup.
Enlarge the (LVM) Physical Volume with pvresize.
Enlarge the (root) (LVM) Logical Volume with lvresize.
Enlarge the (root) file system with resize2fs.
- Reboot to your encrypted hard drive.
Lab Environment
I have verified the steps from this article to (extend and shrink) resize root LVM partition (ext4) on RHEL/CentOS 7 and 8 Linux environment.
The screenshots are captured from CentOS 8 node running on Oracle VirtualBox installed on a Linux server.
I have a very simple environment with minimal partitions.
[root@centos-8 ~]# df -h
Filesystem Size Used Avail Use% Mounted on
devtmpfs 2.4G 0 2.4G 0% /dev
tmpfs 2.4G 0 2.4G 0% /dev/shm
tmpfs 2.4G 8.6M 2.4G 1% /run
tmpfs 2.4G 0 2.4G 0% /sys/fs/cgroup  1.8G 11G 15% //dev/sda1 488M 130M 323M 29% /boot
tmpfs 479M 0 479M 0% /run/user/0
Below are the available logical volumes. As you see I have not created too many logical volumes.
[root@centos-8 ~]# lvs LV VG Attr LSize Pool Origin Data% Meta% Move Log Cpy%Sync Convert root rhel -wi-ao---- 13.56g swap rhel -wi-ao---- 956.00mResizing Partitions
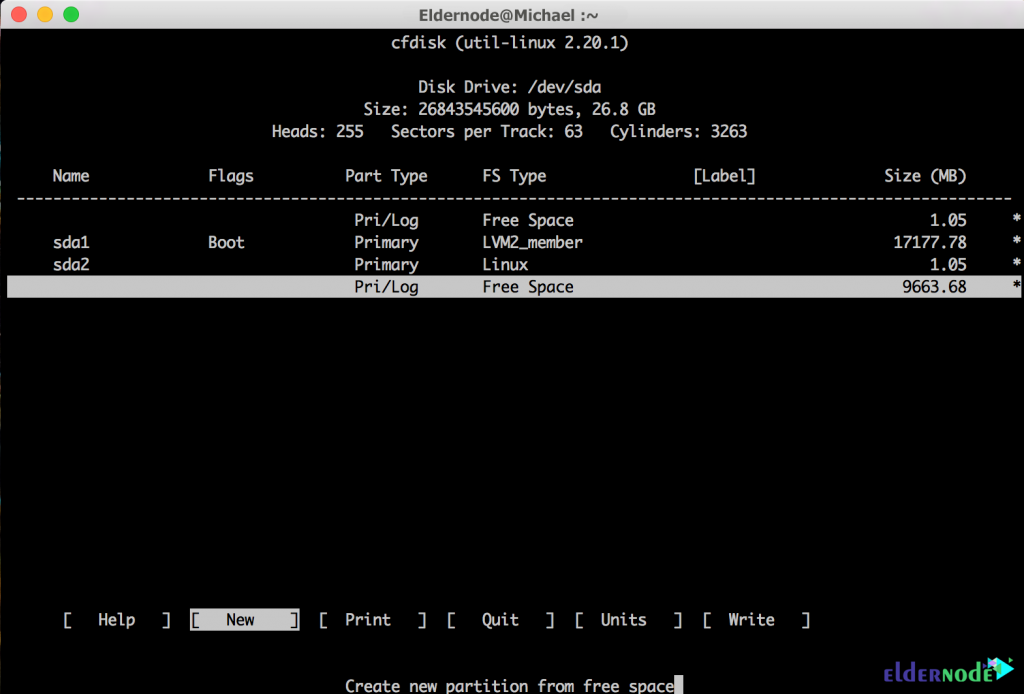
If you wish to create a partition (in which to install Ubuntu Linux, for example) on a hard drive which already contains a Windows partition, or if you need to provide more space in an existing partition that is running out of space, you will need to perform one or more partition resizing operations. You can re-allocate hard drive space from one partition to another, or add previously UnallocatedSpace to a partition.
Resizing Windows Partitions requires special attention and is accomplished in a manner different from that used to resize other types of partitions.
<img alt="Info » src=»https://help.ubuntu.com/moin_static198/light/img/icon_cool.png» title=»Info «> When shrinking a partition containing data, attention must be given to the amount of free space left in the partition; especially a Windows partition, but true for any filesystem. The less room left in a partition, the more likelihood of fragmentation of files, and the harder it will be to defragment that partition.
Rule of Thumb: Leave at least 10% free space on any partition to reduce fragmentation and make defragmentation easier.
") Note that, in order to expand a partition, you must have free space next to it in which to expand. This can be accomplished either by shrinking another partition next to it, or moving a (or some) partition(s) away from it. See the Moving A Partition page for details on moving a partition. See notes in Additional Notes on Partitions on the Operating Systems And Primary/Extended Partitions page for additional restrictions on resizing operations.
Note that, in order to expand a partition, you must have free space next to it in which to expand. This can be accomplished either by shrinking another partition next to it, or moving a (or some) partition(s) away from it. See the Moving A Partition page for details on moving a partition. See notes in Additional Notes on Partitions on the Operating Systems And Primary/Extended Partitions page for additional restrictions on resizing operations.
To resize a partition, first make sure the partition is unmounted. If the partition is mounted, most of the options in the menu will be unavailable, except for one that says «Unmount,» which you should select to unmount the partition.
Notice in the image that the partition I am resizing is the Windows NTFS partition that covers the entire hard drive, which I created earlier. A new Windows computer’s hard drive will typically be formatted in this manner; one large partition covering the entire drive.
Resizing a partition can be done one of two ways:
Dragging and sliding. Position the cursor over the arrow on either side of the graphical bar shown in the screenshot, left click and hold, then drag the arrow; away from the edge for shrinking or towards the edge (into the free space, if available) to expand it.
Next Page — Creating An Extended Partition
HowtoPartition/ResizingPartition (last edited 2018-01-15 10:38:20 by )
My Lab Environment
I am using VM running on Oracle VirtualBox installed on my Linux Server with CentOS 8 to execute these steps to resize LUKS partition and perform extend or shrink encrypted LUKS partition.
So it is safe to say the same steps would work on RHEL 8. Earlier I had executed the same set of steps on RHEL/CentOS 7. If you face any problems while executing these steps then please report the same using the comment section below this article.
Resize root partition on Linux Ubuntu and Debian
Physical Volume >> Volume Group >> Logical Volume >> Filesystem
pvdisplay
fdisk /dev/sdb
Now you need to use the reboot command to apply the changes:
rebootcfdiskNote: The new partition you created may be likely /dev/sda1.
pvcreate /dev/sda3It’s time to add the newly created partition to the root volume group. You will need to first run the pvdisplay again to display new physical volume details. You can see the new partition as shown below:

vgsvgextend ubuvg /dev/sda3vgsIt should be noted that you must expand the Logical Volume using the lvextend command:
df -klvextend -L +10G /dev/mapper/ubuvg-ubulv
resize2fs /dev/mapper/ubuvg-ubuldf -k
Create LUKS Encrypted LVM with cryptsetup
So I will quickly create LVM based LUKS encrypted partition.
[root@centos-8 ~]# pvcreate /dev/sdb1 Physical volume "/dev/sdb1" successfully created.
After adding new physical volume, verify the available list of physical volumes using pvs:
[root@centos-8 ~]# pvs PV VG Fmt Attr PSize PFree /dev/sda2 rhel lvm2 a-- <14.50g 0 /dev/sdb1 lvm2 --- <8.00g <8.00gGet the list of available volume groups using vgs
[root@centos-8 ~]# vgs VG #PV #LV #SN Attr VSize VFree rhel 2 0 wz--n- <14.50g 0
I will extend my existing VG rhel instead of creating a new one:
[root@centos-8 ~]# vgextend rhel /dev/sdb1 Volume group "rhel" successfully extended
Verify the new size of your volume group:
[root@centos-8 ~]# vgs VG #PV #LV #SN Attr VSize VFree rhel 2 0 wz--n- <14.50g 0
Check the list of available logical volumes:
[root@centos-8 ~]# lvs LV VG Attr LSize Pool Origin Data% Meta% Move Log Cpy%Sync Convert root rhel -wi-ao---- 13.56g swap rhel -wi-ao---- 956.00m
I will create a new logical volume «secret» which will act as device for LUKS encrypted partition
[root@centos-8 ~]# lvcreate -n secret -L 2G rhel Logical volume "secret" created.
Check the new list of logical volumesr
[root@centos-8 ~]# lvs LV VG Attr LSize Pool Origin Data% Meta% Move Log Cpy%Sync Convert root rhel -wi-ao---- 13.56g secret rhel -wi-a----- 2.00g swap rhel -wi-ao---- 956.00mHow to PROPERLY check memory usage per process in Linux?
Lab Environment to resize primary partition (RHEL/CentOS 7/8) in Linux
I have performed resize primary partition operation on Virtual Machine running on Oracle VirtualBox installed on Linux server. My VM is running with CentOS 8 but I have also verified these steps on RHEL/CentOS 7 and RHEL 8 Linux.
Here my VM is installed on /dev/sda device where /dev/sda1 is boot partition, /dev/sda2 is root while /dev/sda3 is for swap.. Additionally I have left some unallocated free space in /dev/sda for the demonstration of this article to extend non lvm root partition.
Resize LUKS Partition
Now this was all our pre-requisite to set up lab environment. From here on we will start with the steps to resize LUKS partition.
How to exclude some accounts from being locked after multiple incorrect password
First let us extend encrypted LUKS partition. Currently my LUKS partition is of 2GB which we will resize and extend to 3GB. We have around 8GB space available in our rhel VG so we can easily resize and extend encrypted LUKS partition with additional 1GB.
Grow or Extend Encrypted LUKS partition volume
Since our LUKS encrypted volume is mapped to /dev/mapper/secret volume, we will use the same volume to extend encrypted LUKS partition with additional 1GB space. Use df to inspect the file system that needs to be extended, e.g.:
[root@centos-8 ~]# df -h /secret/
Filesystem Size Used Avail Use% Mounted on
/dev/mapper/secret 47M 2.0G 3% /secret
The current size of /dev/mapper/secret LUKS volume is 2GB. Figure out what the backing device is by querying the MAPPING
Use blkid -t TYPE=crypto_LUKS -o device to get the list of available LUKS device on your Linux system
[root@centos-8 ~]# cryptsetup status secret
/dev/mapper/secret is active and is in use. type: LUKS2 cipher: aes-xts-plain64 keysize: 256 bits key location: keyring device: sector size: 512 offset: 16384 sectors size: sectors mode: read/write
The backing device will always be listed on the «device: /dev/XXXX» line. In the above example the backing device is «/dev/mapper/rhel-secret«
Un-mount the file system before we extend encrypted LUKS partition
[root@centos-8 ~]# umount /secret
Close out the dm-crypt volume with cryptsetup luksClose MAPPING
[root@centos-8 ~]# cryptsetup luksClose secret
Next extend encrypted LUKS partition using lvextend command. Here we wish to add 1GB to our existing LUKS volume
[root@centos-8 ~]# lvextend -L /dev/rhel/secret Size of logical volume rhel/secret changed from 2.00 GiB (512 extents) to 3.00 GiB (768 extents). Logical volume rhel/secret successfully resized.
Verify the new size of the secret logical volume
[root@centos-8 ~]# lvs LV VG Attr LSize Pool Origin Data% Meta% Move Log Cpy%Sync Convert root rhel -wi-ao---- 13.56g secret rhel -wi-a----- 3.00g swap rhel -wi-ao---- 956.00mNext open the LUKS encrypted partition /dev/mapper/secret to perform resize
[root@centos-8 ~]# cryptsetup luksOpen /dev/rhel/secret secret
Enter passphrase for /dev/rhel/secret:
Check the new size of the LUKS encrypted volume
[root@centos-8 ~]# cryptsetup status secret
/dev/mapper/secret is active. type: LUKS2 cipher: aes-xts-plain64 keysize: 256 bits key location: keyring device: /dev/mapper/rhel-secret sector size: 512 offset: 16384 sectors size: mode: read/write
Compare the size with the command output from your last execution which we did earlier in this article. Earlier the size of secret volume was 4177920 while the new size is 6275072 sectors. Here resize LUKS partition is not yet complete.
Perform a file system check before performing the final steps to extend encrypted LUKS partition
[root@centos-8 ~]# e2fsck -f /dev/mapper/secret
e2fsck 1.44.3 (10-July-2018)
Pass 1: Checking inodes, blocks, and sizes
Pass 2: Checking directory structure
Pass 3: Checking directory connectivity
Pass 4: Checking reference counts
Pass 5: Checking group summary information
/dev/mapper/secret: 11/65280 files (0.0% non-contiguous), 13574/260096 blocks
Since the file system check has passed, execute resize2fs to resize LUKS partition
[root@centos-8 ~]# resize2fs -p /dev/mapper/secret
resize2fs 1.44.3 (10-July-2018)
Resizing the filesystem on /dev/mapper/secret to 784384 (4k) blocks.
The filesystem on /dev/mapper/secret is now 784384 (4k) blocks long.
Next mount the LUKS encrypted partition to it’s mount point
[root@centos-8 ~]# mount /dev/mapper/secret /secret/
If you are using XFS file system then you must first mount the DEV MAPPING, then perform lvm extend using xfs_grow
Execute xfs_grow to extend the partition for example here xfs_growfs /secret/
Verify the new partition size
[root@centos-8 ~]# df -h /secret/
Filesystem Size Used Avail Use% Mounted on
/dev/mapper/secret 54M 3.0G 2% /secret
Initialize LUKS partition
Now create the LUKS formatted encrypted volume /dev/mapper/secret that is password protected.
[root@centos-8 ~]# cryptsetup luksFormat /dev/rhel/secret
WARNING!
========
This will overwrite data on /dev/rhel/secret irrevocably.
Are you sure? (Type uppercase yes):
Enter passphrase for /dev/rhel/secret:
Verify passphrase:
We will use luksOpen to open the encrypted partition and map it to /dev/mapper/secret. Here /dev/mapper/secret will be created.
[root@centos-8 ~]# cryptsetup luksOpen /dev/rhel/secret secret
Enter passphrase for /dev/rhel/secret:
I will use ext4 file system for my LUKS partition, you can choose a file system type as per your requirement to resize LUKS partition
[root@centos-8 ~]# mkfs.ext4 /dev/mapper/secret
mke2fs 1.44.3 (10-July-2018)
Creating filesystem with 522240 4k blocks and 130560 inodes
Filesystem UUID: d6b707da-04c5-4c19-9c9d-5e1df2332488
Superblock backups stored on blocks: 32768, 98304, 163840, 229376, 294912
Allocating group tables: done
Writing inode tables: done
Creating journal (8192 blocks): done
Writing superblocks and filesystem accounting information: done
Now to access the LUKS partition, mount it on a mount point. I had already created a mount point /secret in my previous articles so I will use the same path:
[root@centos-8 ~]# mount /dev/mapper/secret /secret/
Verify if the LUKS partition is properly mounted
[root@centos-8 ~]# mount | grep secret
/dev/mapper/secret on /secret type ext4 (rw,relatime)
Decompress initrd image
The initrd image is typically compressed to save space and reduce the time it takes to load into memory during the boot process. Each kernel has a unique initrd image that can be found in /boot directory. These images will get automatically rebuilt during important system updates like a new kernel or a dkms module.
To list initrd image, type
ls /boot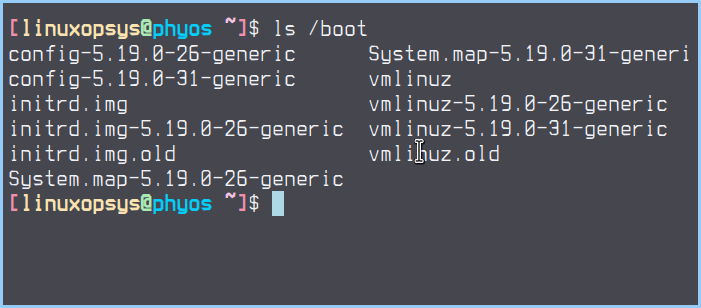
Let’s decompress initrd image file to extract the files.
Make a directory named init inside /tmp and change the directory to it.
mkdir /tmp/init
cd /tmp/init
Here we will use unmkinitramfs command which is part of initramfs-tools package to decompress .img file.
sudo unmkinitramfs /boot/initrd.img-$(uname -r) .The command will decompress the initrd image of the current running kernel. You may also use alternative tools such dracut for the same purpose.
After decompressing, there should be 3 directories in /tmp/init such as early, early2, and main.

early: Holds microcode for AMD-based processors
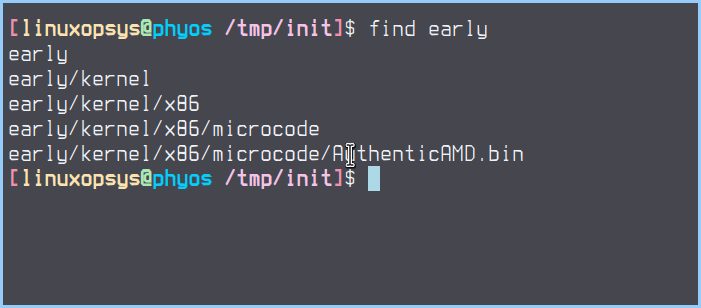
early2: Holds microcode for intel-based processors
main: Rootfs of the boot process. This folder itself is a small root partition.
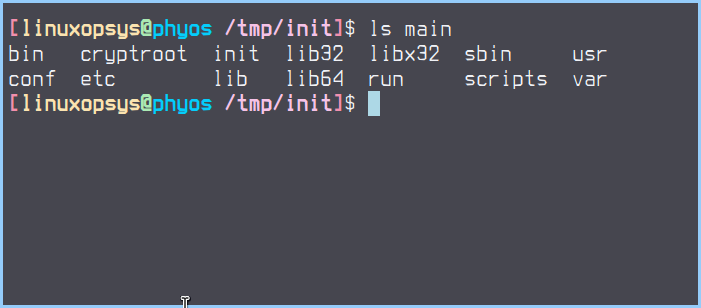
The main folder it is pretty similar to the root partition except for some missing folders like /proc,/dev,/sys. They will get mounted or created by the init script at the beginning of the boot process.
The init file in main directory is the first process that will be started, and we will change that script to handle the shrinking task.
Regenerating the initrd image
Creating initrd is a hard and complex process. As this is going to be for one time only no compression will be used. It will be a cpio archive image, without using any extra features.
Navigate to main folder:
cd /tmp/init/mainTo recreate the initrd image, type:
find . | LC_ALL=C sort | cpio --quiet -R 0:0 -o -H newc > /tmp/shrink-initrd.imgHere’s a breakdown of what each part of the command does:
find .: This command starts a recursive search in the current directory, listing all the files and directories.|: The pipe symbol is used to redirect the output of thefindcommand to thesortcommand.LC_ALL=C sort: This sorts the output offindalphabetically, with theLC_ALL=Cparameter ensuring that the sorting is done in a consistent way across different locales.|: Another pipe symbol is used to redirect the output ofsortto thecpiocommand.cpio: This command creates an archive of files, in this case, the contents of the current initrd image.--quiet: This option suppresses the verbose output ofcpio.-R 0:0: This sets the ownership of the files in the archive to root.-o: This tellscpioto create a new archive.-H newc: This specifies the format of the new archive.> /tmp/shrink-initrd.img: This redirects the output ofcpioto a new file called/tmp/shrink-initrd.img.
Boot into modified initrd
sudo kexec -l /boot/vmlinuz-$(uname -r) --initrd=/tmp/shrink-initrd.img --reuse-cmdlinesudo kexec: This runs thekexeccommand with root privileges.-l: This specifies that we want to load a current kernel and initrd image./boot/vmlinuz-$(uname -r): This specifies the location of the kernel image to be loaded, which is located in the/bootdirectory and has the same version as the currently running kernel (as determined by theuname -rcommand).--initrd=/tmp/shrink-initrd.img: This specifies the location of the initrd image to be loaded, which we created earlier and saved to the/tmpdirectory.--reuse-cmdline: This option tellskexecto reuse the same command-line parameters that were used to start the current kernel.
Use systemctl kexec to reboot the system, and see the changes!
sudo systemctl kexecAdd script to init File
Now we can add the above-created shrink.sh script to /tmp/init/main/init file. This makes sure it gets executed before mounting the root partition.
sudo sed -i '/^maybe_break premount/i /usr/bin/shrink.sh' /tmp/init/main/initIn the init script there are several breakpoints for debugging. One of them is called premount, which is to debug initramfs right before it mounts the root partition. This place is where the script execution will start and it is the most appropriate location for it. Script execution may fail due to unloaded modules if it is executed too early in the boot process.
Conclusion
In this guide, we learned how to shrink root partition without using an external device.
- Created a script to perform shrink operations. Used fdisk, resize2fs, and e2fsck for partition and file system manipulation.
- Modified the initrd image.
- Used kexec to boot without actual firmware reboot.
Conclusion
Before performing the method mentioned in this tutorial, it is better to make a backup or snapshot of your data or operating system. Because one wrong move can cause you to lose your data. In this article, we tried to teach you to step by step how to resize root partition on Linux Ubuntu and Debian.
Backup your data (Optional but recommended)
Since you plan to shrink root LVM partition it is important that you backup your data before starting with the process. As if anything goes wrong you will end up with an unusable system.
Reasons to migrate your app to AWS
References
LUKS wiki page :
Manage encrypted partitions from a live CD :
:
:
: The first (and only comment at the time of this post) on this blog reads
How to get the data back ?
BACK UP before your Resize.
")


")