

<?xml version="1.0" encoding="utf-8"?>


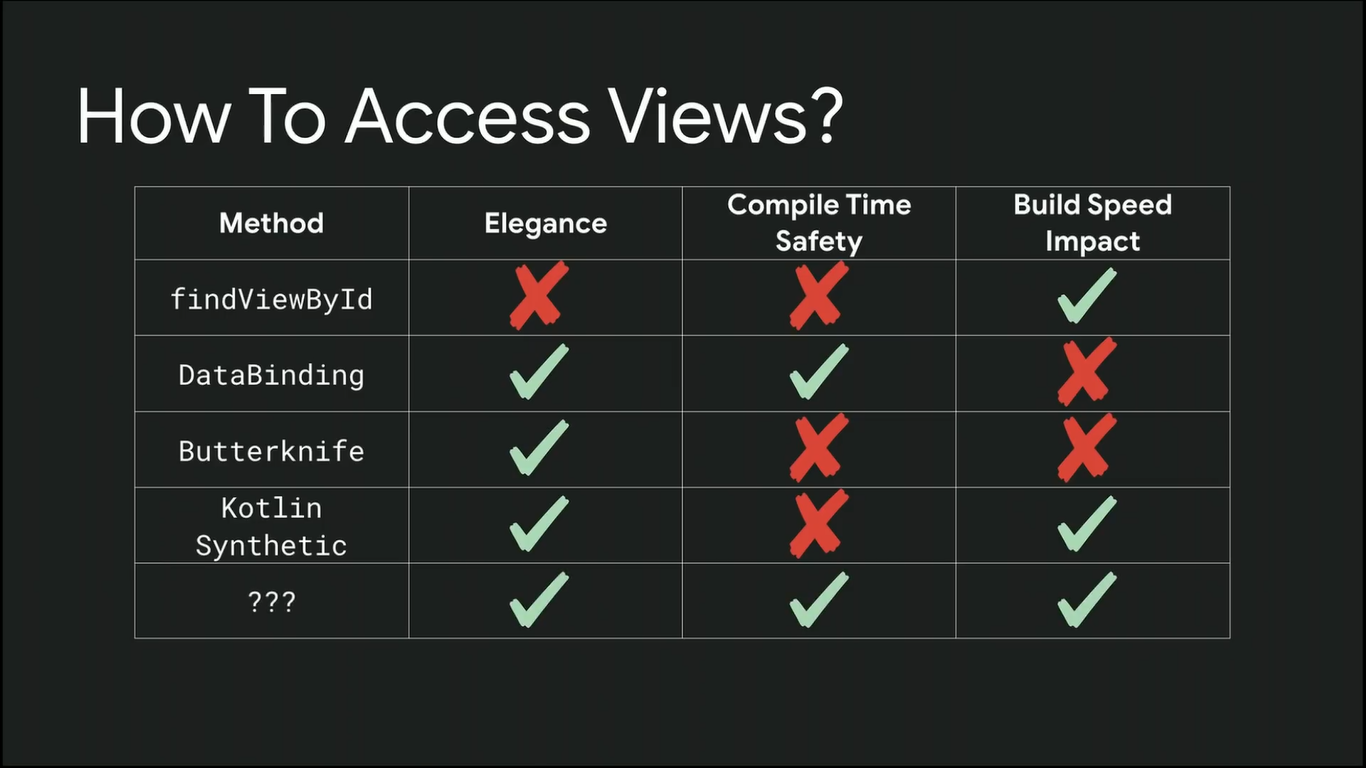
Android uses XML to create GUI components for applications. Most developers use findViewById to communicate with the GUI components since the beginning.
However, the Jetpack framework also has another great way to communicate with GUI components which is ViewBinding.
ViewBinding offers null and types safety over findViewById which are great benefits for developers to reduce multiple issues during runtime.
View Binding is a part of Android Jetpack which provides the views to bind with the classes by replacing the findViewById() method in a null safe way. In this article, we will see its implementations in the Adapter class of RecyclerView. Note that we are going to implement this project using the Kotlin language.
- Step by Step Implementation
- XML
- XML
- Kotlin
- Kotlin
- Kotlin
- What is Data Binding?
- How it works?
- Setting up project for Data Binding
- Getting Started with the code
- Setup binding in Activity
- Setup binding in Fragment
- Assign value to XML variables
- Handle Variable inside the Data Binding
- Handle interface inside the Data Binding
- Default values and Null safety
- Resource Reference
- Passing variables to included layout
- View Binding Features in Android
- Step by Step Implementation
- XML
- Kotlin
- Java
- Output:
- Как включить
- Как использовать
- Отличия от других подходов
- Использование в RecyclerView.ViewHolder
- ListView или RecyclerView?
- Основные компоненты RecyclerView
- Практический пример
- Usage
- Enabling Support
- Using in Activity
- Using in Fragments
Step by Step Implementation
Step 1: Create a new project
To create a new project in Android Studio please refer to How to Create/Start a New Project in Android Studio. Note that select Kotlin as the programming language
Step 2: Add view binding dependency
Step 3: Working with the activity_main.xml file
XML
<?xml version="1.0" encoding="utf-8"?>
Step 4: Create a new layout file and name it as single_item.xml file
XML
<?xml version="1.0" encoding="utf-8"?>
android:text="Exp : 3 years"
Step 5: Create a new Model class
Create a new class Language.kt we will use data of custom generic “Language” to pass in the list that will be shown in RecyclerView.
Kotlin
val name : String ="",
val exp : String =""
Step 6: Working with the Adapter class
Create a new class RvAdapter.kt this will act as an Adapter class for the recycler view. Using View binding we use the generated class of the layout single_item.xml ie SingleItemBinding to add data and view in the recycler view of MainActivity.kt in our case. Comments are added before the code for better understanding.
Kotlin
var languageList: List<Language>,
inner class ViewHolder(val binding: SingleItemBinding) : RecyclerView.ViewHolder(binding.root)
val binding = SingleItemBinding.inflate(LayoutInflater.from(parent.context), parent, false)
binding.tvLangName.text = this.name
binding.tvExp.text = this.exp
Step 7: Working with the MainActivity.kt file
Kotlin
private var _binding : ActivityMainBinding? = null
private val binding get() = _binding!!
private lateinit var rvAdapter: RvAdapter
private lateinit var languageList : List<Language>
_binding = ActivityMainBinding.inflate(layoutInflater)
val layoutManager: RecyclerView.LayoutManager = LinearLayoutManager(this)
rvAdapter = RvAdapter(languageList)
binding.rvList.adapter = rvAdapter
languageList = listOf(
Language("Java" , "Exp : 3 years"),
Language("Kotlin" , "Exp : 2 years"),
Language("Python" , "Exp : 4 years"),
Language("JavaScript" , "Exp : 6 years"),
Language("PHP" , "Exp : 1 years"),
Language("CPP" , "Exp : 8 years"),
_binding = null

Vote for difficulty
Current difficulty :
Easy
What is Data Binding?
It is a technique to connect Data with your views.
How it works?
It generates a java file that connects your views with the data.
Setting up project for Data Binding
Getting Started with the code
To add data binding wrap your parent view/view group with the <layout> tag
<layout> tag contains 2 sections <data> and your parent view group.
<data> tag can contain 2 more tags, <import> & <variable>, as the name shows import is used to import the dependencies like class, interface, etc. And variable used to declare variables that we can use in our layout file (later in this post).
Our hierarchy looks like this.
..............
Setup binding in Activity
// start using the binding Note: **ActivityMainBinding* is an auto-generated file, the file name will be based on your XML file, (not the activity or fragment file) *
Setup binding in Fragment
// Inflate the layout for this fragment
Assign value to XML variables
// adding lifecycler owner to binding to use live data inside your XML// this refer to lifecycler owner in Activity // use viewLifecycleOwner to get lifecyclerOwner for Fragment, Bottomsheet, Dialog, etc. // this will do the pending binding things
Handle Variable inside the Data Binding
Handle interface inside the Data Binding
Note: you can also get the reference of current view by
(view) -> mViewModel.yourFunction(view)
Default values and Null safety
Default value is used to show in the preview
android:text="@{mViewModel.name, default =`Default Value` }"Handle null variables ??
android:text="@{mViewModel.name ?? `Nullable Value`}"If mViewModel or name is null or not assigned then TextView will show ‘Nullable Value’
Resource Reference
android:padding="@{large? @dimen/largePadding : @dimen/smallPadding}"String & plurals
android:text="@{@string/nameFormat(firstName, etFirstName.text)}"
android:text="@{@plurals/banana(bananaCount)}"etFirstName is an edit text in the same layout file
Passing variables to included layout
sample_layout.xml
....
main_layout.xml
Thank you, guys.
Keep learning, Keep Sharing ❤️
Original post on yogeshpaliyal.com

In this post i would show you how to use View binding in Activities and Fragments.
As an Android software developer, am sure you are very familiar with findViewById and how tedious it is to track what id belonged to what Widget in what layout file, not to mention the amount of boilerplate it can cause if you have a lot of views for a particular layout file.
View binding is a feature that allows you to more easily write code that interacts with views. Once view binding is enabled in a module, it generates a binding class for each XML layout file present in that module. An instance of a binding class contains direct references to all views that have an ID in the corresponding layout.
Google documentation
According to that quote from Google docs for every xml layout there is generated binding class, all you just need to do is instantiate that class and every view with an Id would be available for use. Alright much talk lets start coding.
android { ... buildFeatures { viewBinding true }
}Now sync the project, after sync is successful move to your MainActivity.kt class let us instantiate the binding class
class MainActivity : AppCompatActivity {
private lateinit var binding: ActivityMainBinding
override fun onCreate(savedInstanceState: Bundle?) { super.onCreate(savedInstanceState) binding = ActivityMainBinding.inflate(layoutInflater) setContentView(binding.root) }
}The code snippet above is doing three things
We declared the variable named binding as a lateinit which means we would initialize it later, and this variable is of type ActivityMainBinding which is the generated binding class of activity_main layout.
Now in the onCreate method the variable binding is initialized by setting it equal to ActivityMainBinding then call the inflate method of this class and also passing the parameter layoutInflater.
The final step is to remove the R.layout.activity_main from setContentView() and instead pass binding.root as the parameter.
Now with just this setup we can access any View with an id in activity_main layout file without calling findViewById, let us test what we have done so far.
For testing this out add a button to your layout file and give it an id, my button’s id would be clickBtn.
In the MainActivity.kt class we can reference that button by simply calling binding.clickBtn
....
....
binding.clickBtn.setOnClickListener(-> Toast.makeText(this, "Button Clicked", Toast.LENGHT_SHORT).show() ) }
}And there you have it clean and simple less boilerplate, now let me show you how to instantiate the binding class inside a fragment.
class TestFragment : Fragment() {
private lateinit var binding: TestFragmentBinding
override fun onCreateView( inflater: LayoutInflater, container: ViewGroup?, savedInstanceState: Bundle?
): View? { binding = TestFragmentBinding.inflate(inflater, container, false) val view = binding.root return view
}
override fun onDestroyView() { super.onDestroyView() binding = null
}
}The key difference between Activity and Fragment is the onDestroyView() where we set binding = null because fragments outlive their views so every reference to the binding class has to be cleared.
<LinearLayout ... tools:viewBindingIgnore="true" > ...
</LinearLayout>I hope this little write up has helped you clarify how View binding works generally, if you have ever built an App with a lot of Views then you would have noticed how tiring having to write findViewById everytime a view is added to our layout can be.
View Binding should not be confused for Data binding — which is also a way of binding views but it works in a completely different way to View binding. Thanks for reading.
View Binding is one of the best features which provides the views to bind with the activity which is ongoing. Replacing the findViewById() method, hence reducing the boilerplate code, generated the instances of the views of the current layout. And most important feature about the View Binding is it’s always null safe. In this article detailed it’s been provided in detail approach for the View Binding.
View Binding Features in Android
- ViewBinding is always null safe and type-safe, which supports both Java and Kotlin.
- ViewBinding is introduced in the Gradle version 3.6 and above (which comes with the Android Studio 4.0, only gradle 3.6).
- ViewBinding also helps to reduce the boilerplate code, hence reducing the code redundancy.
- While using the ViewBinding proper naming conventions are need to be followed because it creates the binding class internally using the name of the same layout file. Naming the layout file in the snake case is preferred. For Example, the ViewBinding creates activity_main.xml(snake case) file as ActivityMainBinding(pascal case), which contains all the property and instances of all the views containing in that layout.
- And also whatever IDs of all elements are created inside the layout XML file, the ViewBinding converts them to camel case. For example: android:id=”button_submit” -> buttonSubmit. Which is much useful in the code readability.
- Using ViewBinding the compilation of the code is a bit faster as compared to the traditional findViewById() method.
- The ActivityMainBinding class is generated in the following path under the project hierarchy this can be viewed.

- The following is the flow of how the objects of the properties from the layout are generated.

- However, if the layout has to be ignored with the binding the views of it, can be done by adding the following attribute to the root layout.
Step by Step Implementation
Step 1: Create an empty activity project
Step 2: Enabling the ViewBinding Feature
- There is a need to enabling the ViewBinding feature in Android Studio 4.0 and above, inside the app-level build gradle file.
- Invoke the following code snippet inside the android{} body of the gradle file.
viewBinding = true
- Refer to the following image if unable to locate the app-level gradle file and invoke the feature under the project view hierarchy.

Step 3: Working with the activity_main.xml file
- The main layout of the file contains one EditText and one Button. To implement the same UI invoke the following code inside the actitvity_main.xml file.
XML
<?xml version="1.0" encoding="utf-8"?>
![]()
Step 4: Working with the MainActivity file
- The things that need to be focused on here are, creating the instance of the ViewBinding. Following is the code snippet which is used to create an instance.
var binding: ActivityMainBinding = ActivityMainBinding.inflate(layoutInflater)
which may under global or local scope according to the usage.
- Accessing the properties of the layout goes as follows.
- Invoke the following code inside the MainActivity.kt/MainActivity.java file, comments are added for better understanding.
Kotlin
private lateinit var binding: ActivityMainBinding
var binding: ActivityMainBinding = ActivityMainBinding.inflate(layoutInflater)
val str: String = binding.editText.text.toString()
Toast.makeText(this, "You entered " + binding.editText.text.toString(), Toast.LENGTH_SHORT).show()
Toast.makeText(this, "Please enter something", Toast.LENGTH_SHORT).show()
Java
activityMainBinding = ActivityMainBinding.inflate(getLayoutInflater());
View view = activityMainBinding.getRoot();
String str = activityMainBinding.editText.getText().toString();
Toast.makeText(this, "Please enter something", Toast.LENGTH_SHORT).show();
Toast.makeText(this, "You entered " + activityMainBinding.editText.geText().toString(), Toast.LENGTH_SHORT).show();
Output:
В этой статье пойдет речь о вынисении UI в отдельный блок, компоновкой стандартных элементов.
Я расскажу о проблемах с которыми встретился сам, для искушенных пользователей, прилагаю ссылку на более подробный ресурс.
Основной пример будет рассмотрен на простой задаче когда нам необходим Switch в котором будет и текст и описание.

Как создать что-то подобное и не нагружать верстку ?
По началу может показаться что это муторно, однако в больших проектах без этого не обойтись, иначе будет много вложенностей и код постепенно станет не читабельным.
первое что потребуется сделать это выделить один элемент и вынести верстку из файла xml.
Создаем файл CusomSwitch.xml
<androidx.constraintlayout.widget.ConstraintLayout xmlns:android="http://schemas.android.com/apk/res/android" xmlns:app="http://schemas.android.com/apk/res-auto" xmlns:tools="http://schemas.android.com/tools" android:layout_width="match_parent" android:layout_height="match_parent" tools:context=".MainActivity"> <LinearLayout android:layout_width="match_parent" android:layout_height="wrap_content" android:orientation="vertical" android:paddingStart="22dp" android:paddingEnd="22dp" app:layout_constraintBottom_toBottomOf="parent" app:layout_constraintEnd_toEndOf="parent" app:layout_constraintStart_toStartOf="parent" app:layout_constraintTop_toTopOf="parent"> <com.example.customviewblock.CustomSwitch android:id="@+id/first" android:layout_width="match_parent" android:layout_height="wrap_content" android:checked="false" app:cs_subtitle="SubTitle" android:title="Title" /> <com.example.customviewblock.CustomSwitch android:id="@+id/second" android:layout_width="match_parent" android:layout_height="wrap_content" android:layout_marginTop="10dp" android:checked="true" app:cs_subtitle="SubTitle" android:title="Title" /> </LinearLayout>
</androidx.constraintlayout.widget.ConstraintLayout>
Теперь создаем в папке с UI папку view (для хранения кодовой части ваших кастомных view). И создаем файл CustomSwitch.kt
class CustomSwitch ( context: Context, attributeSet: AttributeSet
) : LinearLayout(context, attributeSet) { private var binding: CustomSwitchBinding = CustomSwitchBinding.inflate(LayoutInflater.from(context), this, false) var addOnChangeListener: ((Boolean) -> Unit)? = null var isChecked: Boolean get() = binding.switchSC.isChecked set(value) { binding.switchSC.isChecked = value } init { addView(binding.root) val typedArray = context.theme.obtainStyledAttributes( attributeSet, R.styleable.CustomSwitch, 0, 0 ) binding.apply { val title = typedArray.getString(R.styleable.CustomSwitch_android_title) val subTitle = typedArray.getString(R.styleable.CustomSwitch_cs_subtitle) val isChecked = typedArray.getBoolean(R.styleable.CustomSwitch_android_checked, false) switchSC.isChecked = isChecked titleTV.text = title subTitleTV.text = subTitle switchSC.setOnCheckedChangeListener { _, _isChecked -> addOnChangeListener?.invoke(_isChecked) } } } fun setTitle(text: String){ binding.titleTV.text = text } fun setSubTitle(text: String) { binding.subTitleTV.text = text }
}
Сейчас этот файл будет ругаться на то что он не может найти R.styleable.CustomSwitch.
В этом файле вы будете указывать какие атрибуты можно задать для вашего кастового view в файле xml. давайте создадим его.
идем в res далее в values и создаем файл attrs.
<declare-styleable name="CustomSwitch"> <attr name="cs_subtitle" format="string"/> <attr name="android:title"/> <attr name="android:checked" /> </declare-styleable>в поле name — обязательно нужно указывать имя вашего класса в нашем случае это был CustomSwitch.kt — соответственно поле name будет CustomSwitch. если назвать его иначе то в файле xml мы не будем получать подсказок, какие поля еще имеются для заполнения.

весьма полезная функция чтобы ее потерять)
Также хочу заметить что в этом файле имеется два типа полей, те которые добавляются из анроида и те которые мы создаем лично.
поле checked имеется в платформе и соответственно может переиспользываться, также как и title. вы можете переиспользовать их сколь угодно раз.
subtitle так же имеется в платформе, однако для примера я не стал указывать что хочу переиспользовать его и не указал слово android:.
будте внимательны так как новое имя может использоваться только в одной кастовой вю по этому я добавил абривиатуру cs — которая обозначает что этот атрибут будет использоваться только с CustomSwitch.
в файле CustomSwitch — обязательно в блоке init() не забудьте указать addView(binding.root). что привяжет вашу верстку к файлу kt.
теперь все готово к спользыванию. далее с этой вю мы работаем как и с любым другим экраном, у нас имеется binding c помощью которого мы можем обращаться к вю и файл в котором мы можем размещать наш функционал.
В примере имеются несколько базовых функций для работы с этой вю:
setTitle, setSubTitle — для установки соответствующих полей, isChecked — для проверки/устаноки состояния и addOnChangeListener — для прослушивания нажатий.
вот как можно применить это в коде:
class MainActivity : AppCompatActivity() { lateinit var binding: ActivityMainBinding override fun onCreate(savedInstanceState: Bundle?) { super.onCreate(savedInstanceState) binding = ActivityMainBinding.inflate(layoutInflater) setContentView(binding.root) binding.run { first.isChecked = !first.isChecked // get or set checked first.addOnChangeListener = { boolean -> // boolean on change } first.setTitle("text") // set title first.setSubTitle("text2") // set subTitle } }
}Пару дней назад Google выпустил Android Studio 3.6 Canary 11, главным нововведением в которой стал View Binding, о котором было рассказано еще в мае на Google I/O 2019.
View Binding — это инструмент, который позволяет проще писать код для взаимодейтсвия с view. При включении View Binding в определенном модуле он генерирует binding классы для каждого файла разметки (layout) в модуле. Объект сгенерированного binding класса содержит ссылки на все view из файла разметки, для которых указан android:id.
Как включить
Чтобы включить View Binding в модуле надо добавить элемент в файл build.gradle:
android { ... viewBinding { enabled = true }
}
Также можно указать, что для определенного файла разметки генерировать binding класс не надо. Для этого надо указать аттрибут tools:viewBindingIgnore="true" в корневой view в нужном файле разметки.
Как использовать
Каждый сгенерированный binding класс содержит ссылку на корневой view разметки (root) и ссылки на все view, которые имеют id. Имя генерируемого класса формируется как «название файла разметки», переведенное в camel case + «Binding».
Например, для файла разметки result_profile.xml:
<LinearLayout ... > <TextView android:id="@+id/name" /> <ImageView android:cropToPadding="true" /> <Button android:id="@+id/button" android:background="@drawable/rounded_button" />
</LinearLayout>
Будет сгенерирован класс ResultProfileBinding, содержащий 2 поля: TextView name и Button button. Для ImageView ничего сгенерировано не будет, как как оно не имеет id. Также в классе ResultProfileBinding будет метод getRoot(), возвращающий корневой LinearLayout.
Чтобы создать объект класса ResultProfileBinding, надо вызвать статический метод inflate(). После этого можно использовать корневой view как content view в Activity:
private lateinit var binding: ResultProfileBinding
@Override
fun onCreate(savedInstanceState: Bundle) { super.onCreate(savedInstanceState) binding = ResultProfileBinding.inflate(layoutInflater) setContentView(binding.root)
}
Позже binding можно использовать для получения view:
binding.name.text = viewModel.name
binding.button.setOnClickListener { viewModel.userClicked() }
Отличия от других подходов
Главные преимущества View Binding — это Null safety и Type safety.
Также, если в разных конфигурациях разметки имеются view с одинаковыми id, но разными типами, то для них будет сгенерировано поле с типом android.view.View.
(По крайней мере, в версии 3.6 Canary 11)
А вообще, было бы удобно, если бы сгенерированное поле имело наиболее возможный специфичный тип. Например, чтобы для Button в одной конфигурации и TextView в другой генерировалось поле с типом TextView (public class Button extends TextView).
При использовании View Binding все несоответствия между разметкой и кодом будут выявляться на этапе компиляции, что позволит избежать ненужных ошибок во время работы приложения.
Использование в RecyclerView.ViewHolder
Ничего не мешает использовать View Binding при создании view для RecyclerView.ViewHolder:
class PersonViewHolder(private val itemPersonBinding: ItemPersonBinding) : RecyclerView.ViewHolder(itemPersonBinding.root) { fun bind(person: Person) { itemPersonBinding.name.text = person.name }
}
Однако, для создания такого ViewHolder придется написать немного бойлерплейта:
override fun onCreateViewHolder(parent: ViewGroup, viewType: Int): PersonViewHolder { val layoutInflater = LayoutInflater.from(parent.context) val itemPersonBinding = ItemPersonBinding.inflate(layoutInflater, parent, false) return PersonViewHolder(itemPersonBinding)
}
Тут нужно ещё упомянуть, что при использовании View Binding поиск view через findViewById() производится только один раз при вызове метода inflate(). Это дает преимущество над kotlin-android-extensions, в котором кеширование view по умолчанию работало только в Activity и Fragment, а для RecyclerView.ViewHolder требовалась дополнительная настройка.
В целом, View Binding это очень удобная вещь, которую легко начать использовать в существующих проектах. Создатель Butter Knife уже рекомендует переключаться на View Binding.
Немного жаль, что такой инструмент не появился несколько лет назад.
In this android example we will see what is DataBinding, Two way DataBinding and its implementation in Android Studio using Kotlin language.
- We can construct binding classes for xml layout files using the Android data binding framework.
- We may utilise those binding classes to easily employ view components without executing findViewById().
- We can also utilise layout variables and layout expressions to automatically set and retrieve values from layouts.
- Data binding is a simple concept to grasp and apply.
Advantages of Data binding
- Eliminate findViewById()
- Update the values automatically.
- Very effective for UI Testing.
- More readable and maintainable code.
- Faster development & execution times.
- Well suited for MVVM and MVI architectures.
Two Way DataBinding:
The sharing of data between a component class and its layout is referred to as two-way data binding. If you alter data in one location, it will automatically reflate at the other. If you alter the value of an input box, for example, it will also modify the value of an attached property in a component class.
Simple Two Way Data Binding Implementation Example:
Step 1: Create a new Project in android studio.
Go to File > New > New Project > Empty Activity > Next > Enter Name > Select Language Kotlin > Finish
Add the viewModel and LiveData Lifecycle dependency in app level build.gradle file and insert inside dependencies
// ViewModel
implementation «androidx.lifecycle:lifecycle-viewmodel-ktx:2.4.0»
// LiveData
implementation «androidx.lifecycle:lifecycle-livedata-ktx:2.4.0»
<?xml version=»1.0″ encoding=»utf-8″?>
<layout xmlns:android=»http://schemas.android.com/apk/res/android»
xmlns:tools=»http://schemas.android.com/tools»>
<data>
<variable
name=»viewModel»
type=»com.nishajain.databindingkotlin.MainViewModel» />
</data>
<LinearLayout
android:layout_width=»match_parent»
android:layout_height=»match_parent»
android:orientation=»vertical»
android:gravity=»center»
android:padding=»20dp»
android:background=»#F1EAEA»
tools:context=».MainActivity»>
In MainActivity(or whatever activity) we do 4 common things, when working with Data Binding, ViewModel and LiveData.
- Create an instance(object) of Data Binding class of the layout.(ActivityMainBinding)
- Create an instance(object) of ViewModel class.(MainActivityViewModel)
- Send the ViewModel instance to the Data Binding instance.
- Set the life cycle owner of the Data Binding instance.
private lateinit var binding: ActivityMain
private lateinit var viewModel: MainViewModel
binding = DataBindingUtil.setContentView(this, R.layout.activity_main)
viewModel = ViewModelProvider(this).get(MainViewModel::class.java)
binding.viewModel = viewModel
binding.lifecycleOwner = this
}
}
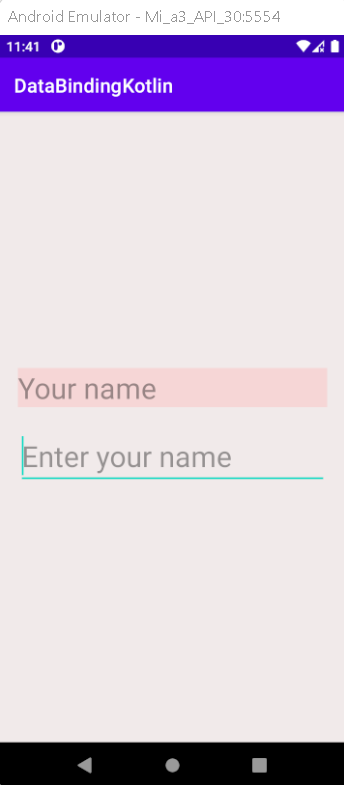
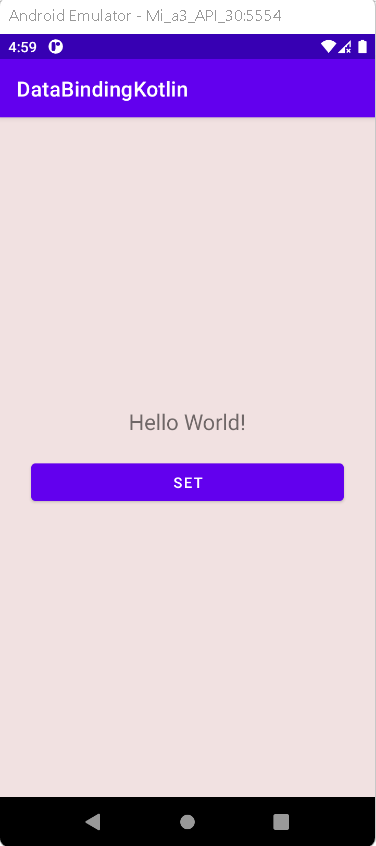
Step 6: Now run the app in your emulator or real device you will get the given output:
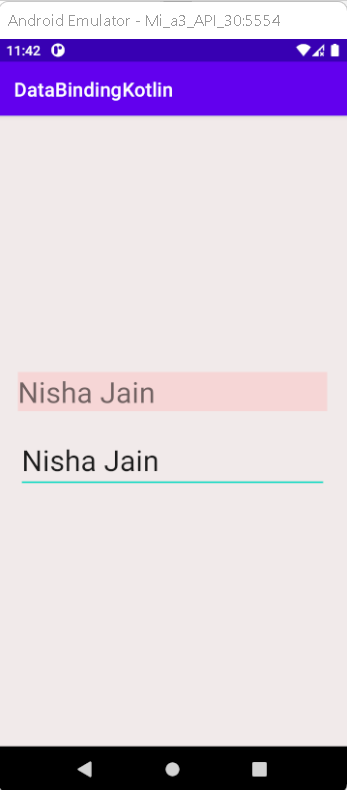
You will see a blank EditText at first. Type someting on it. Then, you will see the same text on TextView simultaneously. That is the magic of Two way data binding.
Default view, when we run app at first time..
After adding the input in Edittext..
Simple Implementation of ViewBinding Example:
Step 1: Create a new Project in android studio.
Go to File > New > New Project > Empty Activity > Next > Enter Name > Select Language Kotlin > Finish
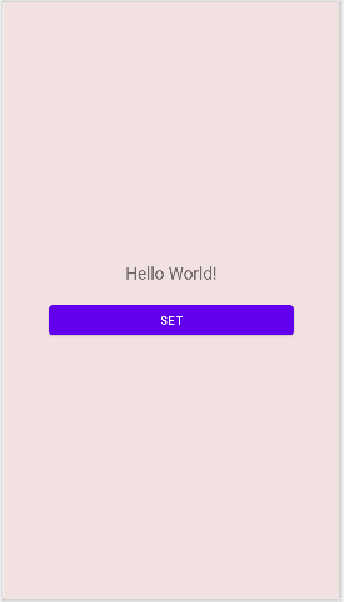
Step 3: Open activity_main.xml file and add a TextView and a Button Widget.
Above xml code layout will look like:
Step 4: Go to MainActivity.kt file
Declare the object reference variable at the top of the class.
private lateinit var binding: ActivityMainBinding
Then, within the onCreate function, replace the default setContentView(R.layout.activity main) function call with the data binding instance.
binding = ActivityMainBinding.inflate(layoutInflater)
setContentView(binding.root)
Now, we are ready to use data binding in this class.
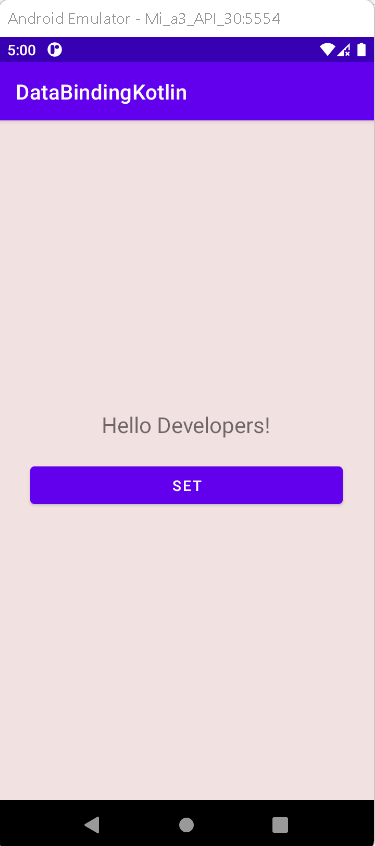
So, lets write a simple code to change the text of textView by using clickListener on Button.
Final Code of MainActivity.kt file,
Step 5: Now run the app in your emulator or real device, you will get the given output
Complete Source Code of Two Way Data Binding Example:
<?xml version=»1.0″ encoding=»utf-8″?>
<layout xmlns:android=»http://schemas.android.com/apk/res/android»
xmlns:tools=»http://schemas.android.com/tools»>
<data>
<variable
name=»viewModel»
type=»com.nishajain.databindingkotlin.MainViewModel» />
</data>
<LinearLayout
android:layout_width=»match_parent»
android:layout_height=»match_parent»
android:orientation=»vertical»
android:gravity=»center»
android:padding=»20dp»
android:background=»#F1EAEA»
tools:context=».MainActivity»>
import androidx.appcompat.app.AppCompatActivity
import android.os.Bundle
import androidx.databinding.DataBindingUtil
import androidx.lifecycle.ViewModelProvider
import com.nishajain.databindingkotlin.databinding.ActivityMainBinding
private lateinit var binding: ActivityMainBinding
private lateinit var viewModel: MainViewModel
binding = DataBindingUtil.setContentView(this, R.layout.activity_main)
viewModel = ViewModelProvider(this).get(MainViewModel::class.java)
binding.viewModel = viewModel
binding.lifecycleOwner = this
}
}
import androidx.lifecycle.MutableLiveData
import androidx.lifecycle.ViewModel
testInstrumentationRunner «androidx.test.runner.AndroidJUnitRunner»
}
implementation ‘androidx.core:core-ktx:1.7.0’
implementation ‘androidx.appcompat:appcompat:1.4.0’
implementation ‘com.google.android.material:material:1.4.0’
implementation ‘androidx.constraintlayout:constraintlayout:2.1.2’
implementation ‘androidx.databinding:databinding-runtime:7.0.4’
testImplementation ‘junit:junit:4.13.2’
androidTestImplementation ‘androidx.test.ext:junit:1.1.3’
androidTestImplementation ‘androidx.test.espresso:espresso-core:3.4.0’
// ViewModel
implementation «androidx.lifecycle:lifecycle-viewmodel-ktx:2.4.0»
// LiveData
implementation «androidx.lifecycle:lifecycle-livedata-ktx:2.4.0»
}
Complete Source Code of DataBinding Example:
<?xml version=»1.0″ encoding=»utf-8″?>
<LinearLayout xmlns:android=»http://schemas.android.com/apk/res/android»
xmlns:tools=»http://schemas.android.com/tools»
android:layout_width=»match_parent»
android:layout_height=»match_parent»
android:gravity=»center»
android:orientation=»vertical»
android:background=»#F1E1E1″
tools:context=».MainActivity»>
import androidx.appcompat.app.AppCompatActivity
import android.os.Bundle
import com.nishajain.databindingkotlin.databinding.ActivityMainBinding
implementation ‘androidx.core:core-ktx:1.7.0’
implementation ‘androidx.appcompat:appcompat:1.4.0’
implementation ‘com.google.android.material:material:1.4.0’
implementation ‘androidx.constraintlayout:constraintlayout:2.1.2’
testImplementation ‘junit:junit:4.+’
androidTestImplementation ‘androidx.test.ext:junit:1.1.3’
androidTestImplementation ‘androidx.test.espresso:espresso-core:3.4.0’
}
Conclusion: In this example we have covered what is DataBinding, Two Way Data Binding and its implementation with example in Android Studio using Kotlin Language.
Здравствуй, дорогой читатель. Каждый Android-разработчик сталкивался с задачей, в которой необходимо создать какой-то список, для отображения данных. Данная статья поможет новичку разобраться с таким очень важным и интересным компонентом, как RecyclerView.
В статье будет рассказано о том, почему необходимо использовать именно RecyclerView, описаны его основные компоненты и также будет разобран базовый, не очень сложный пример.
Статья предназначена для новичков, которые хотят разобраться со списками в Android.
Все материалы и исходный код можно найти здесь.
ListView или RecyclerView?
Для реализации какого-то прокручиваемого списка у Android разработчика существуют два пути — ListView и RecyclerView.
Первый виджет интуитивно понятен и довольно прост. Но, к сожалению, имеет много недостатков, например, ListView позволяет создать только вертикальный список.
В свою же очередь RecyclerView «из коробки» предоставляет гораздо больше инструментов для кастомизации и оптимизации списка, чем ListView. Если кратко характеризовать RecyclerView, то можно сказать, что это список на стероидах.
RecyclerView работает следующим образом: на экране устройства отображаются видимые элементы списка; при прокрутке списка верхний элемент уходит за пределы экрана и очищается, а после помещается вниз экрана и заполняется новыми данными.
Основные компоненты RecyclerView
Для корректной работы RecyclerView необходимо реализовать следующие компоненты:
RecyclerView, который необходимо добавить в макет нашего Activity;Adapter, который содержит, обрабатывает и связывает данные со списком;ViewHolder, который служит для оптимизации ресурсов и является своеобразным контейнером для всех элементов, входящих в список;ItemDecorator, который позволяет отрисовать весь декор;ItemAnimator, который отвечает за анимацию элементов при добавлении, редактировании и других операций;DiffUtil, который служит для оптимизации списка и добавления стандартных анимаций.
Практический пример
В качестве не сложного примера, создадим приложение со списком, в котором будут отображены данные о людях. Каждый человек будет иметь имя, название компании, фотографию и несколько операций над ним (показать уникальный номер, удалить, переместить вверх/вниз, лайкнуть).
Реализация примера будет выполнена на языке Kotlin. Также будут использованы библиотеки Glide и Faker, которые никак не относятся к RecyclerView.
В первую очередь укажем все зависимости, которые будут использованы приложением, в файл сборки build.gradle нашего приложения:
implementation 'androidx.recyclerview:recyclerview:1.2.1' implementation 'com.github.javafaker:javafaker:1.0.2' implementation 'com.github.bumptech.glide:glide:4.14.2'Примечание: в последних версиях AndroidStudio не обязательно подключать библиотеку RecyclerView. Доступен в библиотеке Material.
И необходимо подключить ViewBinding в файле сборки build.gradle нашего приложения:
buildFeatures { viewBinding = true
}
Также необходимо указать разрешение на доступ в Интернет в файле AndroidManifest.xml (для работы с библиотекой Glide):
<uses-permission android:name="android.permission.INTERNET"/>
<uses-permission android:name="android.permission.ACCESS_NETWORK_STATE"/>
После создадим макетные файлы: первый для ActivityMain, который хранит RecyclerView, второй для элемента списка (человек).
<?xml version="1.0" encoding="utf-8"?>
<FrameLayout xmlns:android="http://schemas.android.com/apk/res/android" xmlns:tools="http://schemas.android.com/tools" android:id="@+id/activityMain" android:layout_width="match_parent" android:layout_height="match_parent" tools:context=".MainActivity"> <androidx.recyclerview.widget.RecyclerView android:id="@+id/recyclerView" android:layout_width="match_parent" android:layout_height="match_parent" />
</FrameLayout>
<?xml version="1.0" encoding="utf-8"?>
<androidx.constraintlayout.widget.ConstraintLayout xmlns:android="http://schemas.android.com/apk/res/android" xmlns:app="http://schemas.android.com/apk/res-auto" xmlns:tools="http://schemas.android.com/tools" android:layout_width="match_parent" android:layout_height="wrap_content" android:background="?selectableItemBackground" android:paddingStart="10dp" android:paddingTop="5dp" android:paddingEnd="10dp" android:paddingBottom="5dp"> <ImageView android:id="@+id/imageView" android:layout_width="wrap_content" android:layout_height="match_parent" android:src="@drawable/ic_person" app:layout_constraintBottom_toBottomOf="parent" app:layout_constraintStart_toStartOf="parent" app:layout_constraintTop_toTopOf="parent" /> <TextView android:id="@+id/nameTextView" style="@style/TextAppearance.AppCompat.Body2" android:layout_width="wrap_content" android:layout_height="wrap_content" android:layout_marginStart="15dp" app:layout_constraintStart_toEndOf="@id/imageView" app:layout_constraintTop_toTopOf="parent" /> <TextView android:id="@+id/companyTextView" android:layout_width="wrap_content" android:layout_height="wrap_content" android:layout_marginStart="15dp" app:layout_constraintStart_toEndOf="@id/imageView" app:layout_constraintTop_toBottomOf="@id/nameTextView" /> <ImageView android:id="@+id/likedImageView" android:layout_width="wrap_content" android:layout_height="wrap_content" android:layout_marginEnd="15dp" android:src="@drawable/ic_like" app:layout_constraintBottom_toBottomOf="parent" app:layout_constraintEnd_toStartOf="@id/more" app:layout_constraintTop_toTopOf="parent" /> <ImageView android:id="@+id/more" android:layout_width="wrap_content" android:layout_height="wrap_content" android:src="@drawable/ic_more" app:layout_constraintBottom_toBottomOf="parent" app:layout_constraintEnd_toEndOf="parent" app:layout_constraintTop_toTopOf="parent" />
</androidx.constraintlayout.widget.ConstraintLayout>После того, как все библиотеки были подключены, все макеты созданы и разрешения получены, необходимо создать данные о людях (в настоящем, боевом примере эти данные будут приходить, например, с сервера, но в нашем случае мы создадим их самостоятельно). Для этого создадим класс PersonService и data-class Person:
data class Person( val id: Long, // Уникальный номер пользователя val name: String, // Имя человека val companyName: String, // Название комании val photo: String, // Ссылка на фото человека val isLiked: Boolean // Был ли лайкнут пользователь
)
class PersonService { private var persons = mutableListOf<Person>() // Все пользователи init { val faker = Faker.instance() // Переменная для создания случайных данных persons = (1..50).map { Person( id = it.toLong(), name = faker.name().fullName(), companyName = faker.company().name(), photo = IMAGES[it % IMAGES.size], isLiked = false ) }.toMutableList() } companion object { private val IMAGES = mutableListOf( "https://images.unsplash.com/photo-1600267185393-e158a98703de?crop=entropy&cs=tinysrgb&fit=crop&fm=jpg&h=600&ixid=MnwxfDB8MXxyYW5kb218fHx8fHx8fHwxNjI0MDE0NjQ0&ixlib=rb-1.2.1&q=80&utm_campaign=api-credit&utm_medium=referral&utm_source=unsplash_source&w=800", "https://images.unsplash.com/photo-1579710039144-85d6bdffddc9?crop=entropy&cs=tinysrgb&fit=crop&fm=jpg&h=600&ixid=MnwxfDB8MXxyYW5kb218fHx8fHx8fHwxNjI0MDE0Njk1&ixlib=rb-1.2.1&q=80&utm_campaign=api-credit&utm_medium=referral&utm_source=unsplash_source&w=800", "https://images.unsplash.com/photo-1488426862026-3ee34a7d66df?crop=entropy&cs=tinysrgb&fit=crop&fm=jpg&h=600&ixid=MnwxfDB8MXxyYW5kb218fHx8fHx8fHwxNjI0MDE0ODE0&ixlib=rb-1.2.1&q=80&utm_campaign=api-credit&utm_medium=referral&utm_source=unsplash_source&w=800", "https://images.unsplash.com/photo-1620252655460-080dbec533ca?crop=entropy&cs=tinysrgb&fit=crop&fm=jpg&h=600&ixid=MnwxfDB8MXxyYW5kb218fHx8fHx8fHwxNjI0MDE0NzQ1&ixlib=rb-1.2.1&q=80&utm_campaign=api-credit&utm_medium=referral&utm_source=unsplash_source&w=800", "https://images.unsplash.com/photo-1613679074971-91fc27180061?crop=entropy&cs=tinysrgb&fit=crop&fm=jpg&h=600&ixid=MnwxfDB8MXxyYW5kb218fHx8fHx8fHwxNjI0MDE0NzUz&ixlib=rb-1.2.1&q=80&utm_campaign=api-credit&utm_medium=referral&utm_source=unsplash_source&w=800", "https://images.unsplash.com/photo-1485795959911-ea5ebf41b6ae?crop=entropy&cs=tinysrgb&fit=crop&fm=jpg&h=600&ixid=MnwxfDB8MXxyYW5kb218fHx8fHx8fHwxNjI0MDE0NzU4&ixlib=rb-1.2.1&q=80&utm_campaign=api-credit&utm_medium=referral&utm_source=unsplash_source&w=800", "https://images.unsplash.com/photo-1545996124-0501ebae84d0?crop=entropy&cs=tinysrgb&fit=crop&fm=jpg&h=600&ixid=MnwxfDB8MXxyYW5kb218fHx8fHx8fHwxNjI0MDE0NzY1&ixlib=rb-1.2.1&q=80&utm_campaign=api-credit&utm_medium=referral&utm_source=unsplash_source&w=800", "https://images.unsplash.com/flagged/photo-1568225061049-70fb3006b5be?crop=entropy&cs=tinysrgb&fit=crop&fm=jpg&h=600&ixid=MnwxfDB8MXxyYW5kb218fHx8fHx8fHwxNjI0MDE0Nzcy&ixlib=rb-1.2.1&q=80&utm_campaign=api-credit&utm_medium=referral&utm_source=unsplash_source&w=800", "https://images.unsplash.com/photo-1567186937675-a5131c8a89ea?crop=entropy&cs=tinysrgb&fit=crop&fm=jpg&h=600&ixid=MnwxfDB8MXxyYW5kb218fHx8fHx8fHwxNjI0MDE0ODYx&ixlib=rb-1.2.1&q=80&utm_campaign=api-credit&utm_medium=referral&utm_source=unsplash_source&w=800", "https://images.unsplash.com/photo-1546456073-92b9f0a8d413?crop=entropy&cs=tinysrgb&fit=crop&fm=jpg&h=600&ixid=MnwxfDB8MXxyYW5kb218fHx8fHx8fHwxNjI0MDE0ODY1&ixlib=rb-1.2.1&q=80&utm_campaign=api-credit&utm_medium=referral&utm_source=unsplash_source&w=800" ) }
}После создания классов необходимо класс PersonService сделать Singleton для корректной работы. Для этого создадим класс App, и укажем в нем следующее:
class App : Application() { val personService = PersonService()
}
Теперь реализуем адаптер PersonAdapter, который будет обрабатывать наши данные и связывать их со списком.
Данный класс будет реализовать RecyclerView.Adapter, которому нужен ViewHolder. Соответственно необходимо создать PersonViewHolder, который будет реализовывать RecyclerView.ViewHolder и принимать наш binding.
Также PersonAdapter должен иметь данные, с которыми ему предстоит работать. Для этого создадим пустой список и перепишем его сеттер. В итоге получаем:
class PersonAdapter : RecyclerView.Adapter<PersonAdapter.PersonViewHolder>() { var data: List<Person> = emptyList() set(newValue) { field = newValue notifyDataSetChanged() } class PersonViewHolder(val binding: ItemPersonBinding) : RecyclerView.ViewHolder(binding.root)
}
Но для работы адаптера необходимо переопределить минимум три метода (AndroidStudio подскажет нам).
Метод getItemCount, который будет возвращать количество элементов нашего списка с данными;
Метод onCreateViewHolder, в котором будет происходить создание ViewHolder. Данный метод принимает в себя parent и viewType (используется в том случае, если в списке будут разные типы элементов списка);
Метод onBindViewHolder, в котором будет происходить отрисовка всех элементов в объекте списка (имя человека, компания и т.д.):
После переопределения методов и их реализации получаем:
override fun getItemCount(): Int = data.size // Количество элементов в списке данных override fun onCreateViewHolder(parent: ViewGroup, viewType: Int): PersonViewHolder { val inflater = LayoutInflater.from(parent.context) val binding = ItemPersonBinding.inflate(inflater, parent, false) return PersonViewHolder(binding) } override fun onBindViewHolder(holder: PersonViewHolder, position: Int) { val person = data[position] // Получение человека из списка данных по позиции val context = holder.itemView.context with(holder.binding) { val color = if (person.isLiked) R.color.red else R.color.grey // Цвет "сердца", если пользователь был лайкнут nameTextView.text = person.name // Отрисовка имени пользователя companyTextView.text = person.companyName // Отрисовка компании пользователя likedImageView.setColorFilter( // Отрисовка цвета "сердца" ContextCompat.getColor(context, color), android.graphics.PorterDuff.Mode.SRC_IN ) Glide.with(context).load(person.photo).circleCrop() // Отрисовка фотографии пользователя с помощью библиотеки Glide .error(R.drawable.ic_person) .placeholder(R.drawable.ic_person).into(imageView) } }На этом наш простой адаптер, который будет просто выводить горизонтальный список готов.
Теперь необходимо повесить на наш RecyclerView созданный адаптер и LayoutManager. Для этого в классе MainActivity пропишем следующее:
class MainActivity : AppCompatActivity() { private lateinit var binding: ActivityMainBinding private lateinit var adapter: PersonAdapter // Объект Adapter private val personService: PersonService // Объект PersonService get() = (applicationContext as App).personService override fun onCreate(savedInstanceState: Bundle?) { super.onCreate(savedInstanceState) binding = ActivityMainBinding.inflate(layoutInflater) setContentView(binding.root) val manager = LinearLayoutManager(this) // LayoutManager adapter = PersonAdapter() // Создание объекта adapter.data = personService.getPersons() // Заполнение данными binding.recyclerView.layoutManager = manager // Назначение LayoutManager для RecyclerView binding.recyclerView.adapter = adapter // Назначение адаптера для RecyclerView }
}
Запускаем наше приложение на устройстве и получаем список пользователей!

На данном этапе наше приложение просто выводит данные, которые мы можем прокручивать, но взаимодействовать с ними у нас не получится. Исправим это.
В классе PersonService добавим три метода:
likePerson — лайкаем человека;
removePerson — удаляем человека;
movePerson — перемещаем человека (принимает человека и куда надо переместить: «1» — вниз, «-1» — вверх).
fun likePerson(person: Person) { val index = persons.indexOfFirst { it.id == person.id } // Находим индекс человека в списке if (index == -1) return // Останавливаемся, если не находим такого человека persons = ArrayList(persons) // Создаем новый список persons[index] = persons[index].copy(isLiked = !persons[index].isLiked) // Меняем значение "лайка" на противоположное } fun removePerson(person: Person) { val index = persons.indexOfFirst { it.id == person.id } // Находим индекс человека в списке if (index == -1) return // Останавливаемся, если не находим такого человека persons = ArrayList(persons) // Создаем новый список persons.removeAt(index) // Удаляем человека } fun movePerson(person: Person, moveBy: Int) { val oldIndex = persons.indexOfFirst { it.id == person.id } // Находим индекс человека в списке if (oldIndex == -1) return // Останавливаемся, если не находим такого человека val newIndex = oldIndex + moveBy // Вычисляем новый индекс, на котором должен находится человек persons = ArrayList(persons) // Создаем новый список Collections.swap(persons, oldIndex, newIndex) // Меняем местами людей }После того, как были созданы методы взаимодействия с людьми, в классе PersonService необходимо объявить слушателя:
typealias PersonListener = (persons: List<Person>) -> UnitТак же создадим список слушателей, два метода, которые будут добавлять и удалять слушателей, и один, который будет «регистрировать изменения»:
private var listeners = mutableListOf<PersonListener>() // Все слушатели fun addListener(listener: PersonListener) { listeners.add(listener) listener.invoke(persons) } fun removeListener(listener: PersonListener) { listeners.remove(listener) listener.invoke(persons) } private fun notifyChanges() = listeners.forEach { it.invoke(persons) }Метод notifyChanges необходимо обязательно вызвать в методах, в которых происходит модификация данных, то есть в методах likePerson, removePerson и movePerson.
На этом наш сервис людей полностью готов. Перейдем в PersonAdapter, в котором реализуем обработку событий наших людей. Создадим интерфейс PersonActionListener, в котором буду четыре метода:
onPersonGetId — получить уникальный номер выбранного человека;
onPersonLike — человек был лайкнут;
onPersonRemove — удалить человека;
onPersonMove — переместить человека.
interface PersonActionListener { fun onPersonGetId(person: Person) fun onPersonLike(person: Person) fun onPersonRemove(person: Person) fun onPersonMove(person: Person, moveBy: Int)
}
Класс PersonAdapter во входные параметры будет принимать наш интерфейс. Также данный класс должен реализовать интерфейс OnClickListener. В итоге сигнатура объявления класса PersonAdaper выглядит следующим образом:
class PersonAdapter(private val personActionListener: PersonActionListener) : RecyclerView.Adapter<PersonAdapter.PersonViewHolder>(), View.OnClickListener {Теперь в классе PersonAdapter в методе onBindViewHolder кладём в tag каждого view, на которую будет происходить нажатие, нужного человека:
holder.itemView.tag = person
holder.binding.likedImageView.tag = person
holder.binding.more.tag = person
Теперь в методе onCreateViewHolder необходимо проинициализировать слушателей при нажатии. В данном примере будет слушатель на нажатие на элемент списка, кнопку more (три точки) и likedImageView (сердце):
binding.root.setOnClickListener(this)
binding.more.setOnClickListener(this)
binding.likedImageView.setOnClickListener(this)
Теперь создадим метод showPopupMenu, который будет «рисовать» выпадающее меню с доступными действиями, а именно: удалить пользователя, переместить вверх, переместить вниз:
private fun showPopupMenu(view: View) { val popupMenu = PopupMenu(view.context, view) val person = view.tag as Person val position = data.indexOfFirst { it.id == person.id } popupMenu.menu.add(0, ID_MOVE_UP, Menu.NONE, "Up").apply { isEnabled = position > 0 } popupMenu.menu.add(0, ID_MOVE_DOWN, Menu.NONE, "Down").apply { isEnabled = position < data.size - 1 } popupMenu.menu.add(0, ID_REMOVE, Menu.NONE, "Remove") popupMenu.setOnMenuItemClickListener { when (it.itemId) { ID_MOVE_UP -> personActionListener.onPersonMove(person, -1) ID_MOVE_DOWN -> personActionListener.onPersonMove(person, 1) ID_REMOVE -> personActionListener.onPersonRemove(person) } return@setOnMenuItemClickListener true } popupMenu.show() } companion object { private const val ID_MOVE_UP = 1 private const val ID_MOVE_DOWN = 2 private const val ID_REMOVE = 3 }В методе onClick обработаем нажатия на элементы списка:
override fun onClick(view: View) { val person: Person = view.tag as Person // Получаем из тэга человека when (view.id) { R.id.more -> showPopupMenu(view) R.id.likedImageView -> personActionListener.onPersonLike(person) else -> personActionListener.onPersonGetId(person) } }На этом наш адаптер готов. Теперь перейдем в MainActivity и, при инициализации нашего адаптера, передадим реализацию интерфейса:
adapter = PersonAdapter(object : PersonActionListener { // Создание объекта override fun onPersonGetId(person: Person) = Toast.makeText(this@MainActivity, "Persons ID: ${person.id}", Toast.LENGTH_SHORT).show() override fun onPersonLike(person: Person) = personService.likePerson(person) override fun onPersonRemove(person: Person) = personService.removePerson(person) override fun onPersonMove(person: Person, moveBy: Int) = personService.movePerson(person, moveBy)
})
Также добавим слушателя в MainActivity, который будет прослушивать изменения, происходящие в PersonService:
private val listener: PersonListener = {adapter.data = it}И в методе onCreate добавим этого слушателя:
personService.addListener(listener)На этом наша работа выполнена. Запускаем проект и смотрим результат:

Мы рассмотрели основы RecyclerView. Естественно это далеко не все, что позволяет сделать этот мощный инструмент. Всегда можно добавить DiffUtil, который поможет оптимизировать список, ItemDecorator, для декора наших элементов и т.д.
Ссылка на репозиторий.
Usage
Enabling Support
To use ViewBinding, you need to declare it as supported in your module-level build.gradle file under the android section.
android { buildFeatures { viewBinding true }
}Android Studio will prompt you to sync Gradle changes with the project. Doing it will generate a binding class for every layout file in the module. We will use these generated classes to communicate with the GUI components.
Using in Activity
Now head over to your file containing Activity in which you want to use ViewBinding. In my case, I will use MainActivity as an example.
Here is how my MainActivity.kt file looks right now:
package dev.theimpulson.viewbinding
import androidx.appcompat.app.AppCompatActivity
import android.os.Bundle
class MainActivity : AppCompatActivity() { override fun onCreate(savedInstanceState: Bundle?) { super.onCreate(savedInstanceState) setContentView(R.layout.activity_main) }
}Now, to use ViewBinding, declare a private lateinit var of type ActivityMainBinding. You can notice that the binding type is named after the layout used to generate the specific binding.
private lateinit var binding: ActivityMainBindingNow to get an instance of the activity, modify the onCreate method to create an instance of the AcitvityMainBinding with inflate method.
binding = ActivityMainBinding.inflate(layoutInflater)Now you can use this binding variable to access the GUI components. Modify the setContentView to use the ViewBinding as well. This can be done by using root property.
setContentView(binding.root)Here is how my MainActivity.kt looks after enabling support for ViewBinding:
package dev.theimpulson.viewbinding
import androidx.appcompat.app.AppCompatActivity
import android.os.Bundle
import dev.theimpulson.codepurviewbinding.databinding.ActivityMainBinding
class MainActivity : AppCompatActivity() { private lateinit var binding: ActivityMainBinding override fun onCreate(savedInstanceState: Bundle?) { super.onCreate(savedInstanceState) binding = ActivityMainBinding.inflate(layoutInflater) setContentView(binding.root) }
}and that’s it. Now your Activity class is ready to use ViewBinding to communicate with the GUI components. Just call the components using their id as property on the binding variable you created earlier and you can perform functions you want to.
Using in Fragments
Using ViewBinding in Fragments is also similar to Activities except for the fact that you need to set the binding to null onDestroyView. In case you are wondering why is that, here is a good answer on StackOverflow regarding this different treatment.
Oct 14 ’14
![]()
![]()
I am reading ListFragment source code and I see this implementation:
ListAdapter mAdapter;
ListView mList;
View mEmptyView;
TextView mStandardEmptyView;
View mProgressContainer;
View mListContainer;
CharSequence mEmptyText;
boolean mListShown;
/** * Detach from list view. */
@Override
public void onDestroyView() { mHandler.removeCallbacks(mRequestFocus); mList = null; mListShown = false; mEmptyView = mProgressContainer =
I will be using my FirstFragment class to show you how you can do this. Here is how my FirstFragment.kt looks before using ViewBinding:
package dev.theimpulson.viewbinding
import android.os.Bundle
import android.view.LayoutInflater
import android.view.View
import android.view.ViewGroup
import androidx.fragment.app.Fragment
class FirstFragment : Fragment() { override fun onCreateView( inflater: LayoutInflater, container: ViewGroup?, savedInstanceState: Bundle? ): View? { // Inflate the layout for this fragment return inflater.inflate(R.layout.fragment_first, container, false) }
}Now, create a private var of type FragmentFirstBinding which is null as well as a private val with a getter to obtain a non-null instance of the first variable.
private var _binding: FragmentFirstBinding? = null
private val binding get() = _binding!!Now, modify onCreateView to instantiate your first variable to inflate the Fragment. We will use the inflater and container which onCreateView accepts as arguments to achieve this.
_binding = FragmentFirstBinding.inflate(inflater, container, false)Now similar to activity, we can use root property to return a view.
return binding.rootRemember, to set the variable to null onDestroyView to ensure that view gets released once the fragment is destroyed.
override fun onDestroyView() { super.onDestroyView() _binding = null
}Here is how my FirstFragment.kt looks after adding support for ViewBinding:
package dev.theimpulson.viewbinding
import android.os.Bundle
import android.view.LayoutInflater
import android.view.View
import android.view.ViewGroup
import androidx.fragment.app.Fragment
import dev.theimpulson.codepurviewbinding.databinding.FragmentFirstBinding
class FirstFragment : Fragment() { private var _binding: FragmentFirstBinding? = null private val binding get() = _binding!! override fun onCreateView( inflater: LayoutInflater, container: ViewGroup?, savedInstanceState: Bundle? ): View? { _binding = FragmentFirstBinding.inflate(inflater, container, false) return binding.root } override fun onDestroyView() { super.onDestroyView() _binding = null }
}and that’s all. Now you can use the binding variable to call the required GUI components to modify their behavior in your Fragment class as well.
")


")