
")
Xposed is a platform that offers you to install small modules on your Android device to customize your phone’s functionality and look. The biggest benefit of this platform is that you don’t need to install a big module with multiple features to do one task. Here you can just install the one that you need. Once you install Xposed, you will be able to find and install small mods for carrying out different tasks. But as we all know, using Xposed is a little troublesome since it modifies system. The good news is, now you can use Xposed without modifying system, you can install it like a normal App, no need root or system privilege. Can’t wait to try it now? In this article, you will learn how to use Xposed framework without root as well as how to use Xposed installer without root. But, first let’s check out what actually it is, and how to download it.
- Part 1: What is Xposed Framework?
- Part 2: How to Download and Install Xposed?
- Part 3: How to Set up and Use Xposed?
- How to Use Xposed Modules That Are Installed?
- How to Enable or Disable Xposed Modules
- Part 4: How to Recover Lost Android Data?
- Conclusion
- How to Install Recovery without Root
- Here are the Steps to Install TWRP Recovery without PC/Root
- Step I : Download TWRP Recovery File
- Step II : Download and Install Minimal ADB and Fastboot Tool
- Step III : Enable USB Debugging and OEM Unlock
- Step IV :Install TWRP Recovery without Root
- ADB reboot bootloader
- Fastboot flash recovery recovery.img
- Step V: installed twrp Android
- How you can take Backup in TWRP Recovery mode
- Google Edition camera app w/ Photosphere — easy install, no root needed
Part 1: What is Xposed Framework?
As said earlier, Xposed is platform or framework that you can install on your Android device to be able to install the required mods on your phone using it. Not only can you change the UI of your Android device, but also its performance and tweak system level functionality will be increased greatly with this framework.
There are two parts of the Xposed; one is the app installer and the second is the framework that supports it to work.
Part 2: How to Download and Install Xposed?
Step 1: You need to install the Xposed installer app first which later lets you install the Xposed framework as well. So, the first step is to download the Xposed installer app’s APK on your Android device. Also, make sure that on your phone “Unkown sources” are enabled for installing apps to be able to install apps using APK files.
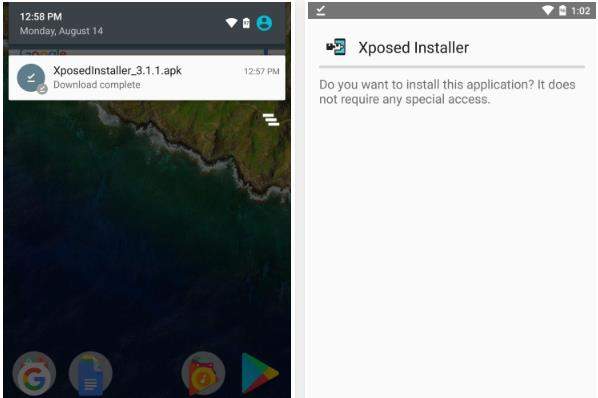
Step 2: Now, you need to install the Xposed Framework. Since the Xposed installer app is installed already, launch it, and from the left side navigation menu, tap “Framework”.
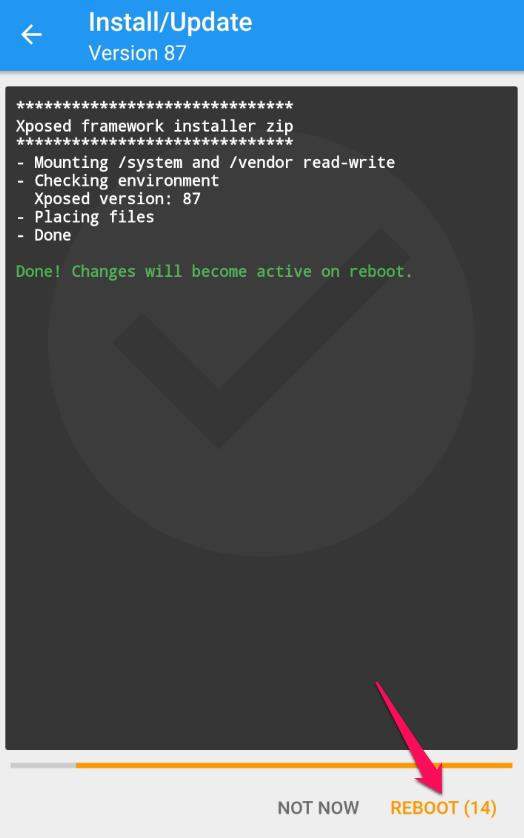
After the reboot, the framework will be completely installed on the phone.
For some reason, if this process of installing the Xposed framework fails, do everything same, but choose “Install via recovery.”
Part 3: How to Set up and Use Xposed?
Now since Xposed installer app and the Xposed framework is installed, you are ready to install the modules using these.
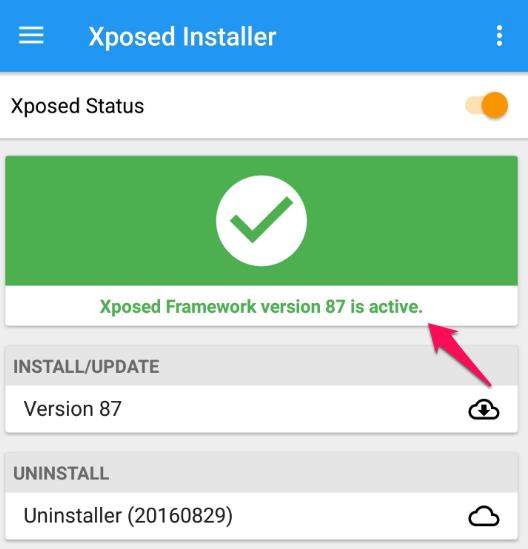
After the install processes are done, first thing, you should check is to check the framework status. For that, launch Xposed installer app. If you see that “Xposed Framework version xx is Active” you are ready to go.
Now, you can go to the “download” option, and browse for modules. Once you get the list, tap to download and install.
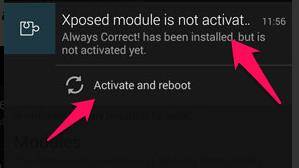
Once done with the downloading the module, you must activate and reboot the phone to get the installed module be working.
How to Use Xposed Modules That Are Installed?
After the phone reboots, you will find the module as the normal app showing in your phone’s app drawer. Just tap to launch it, and try it out to know what it does.
This is how you can use Xposed without root on your Android device.
How to Enable or Disable Xposed Modules
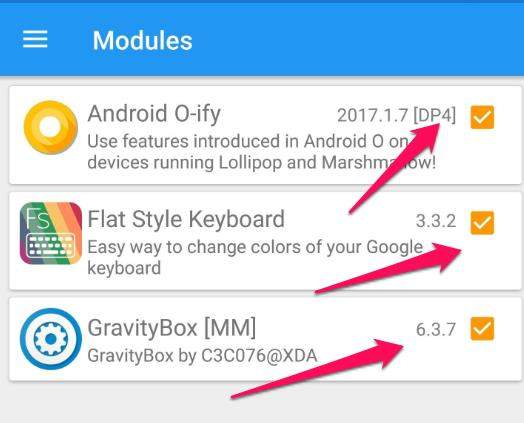
At some point of time, if you want to disable or enable a module that is already installed, you have to launch the Xposed Installer app, and from the navigation, go to Modules. To the right of the module name, tap the box to enable or disable it. The check mark will disappear when you disable a module. Once done, reboot the device to apply the changes.
Part 4: How to Recover Lost Android Data?
Conclusion
Installing them using Xposed installer app and framework is reallyan excellent choice, and all you can do without rooting your device. So, use Xposed without rooting your device and enjoy!


How to Install Recovery without Root
Since we can easily install TWRP recovery without PC on any Android smartphone, the only concern is that we must need a device that is rooted. You can flash TWRP on your Android device with root access by using several apps. Here, we will be dealing with a process that does not require root access when you want to install TWRP on your cell phone.
Here are the Steps to Install TWRP Recovery without PC/Root
Step I : Download TWRP Recovery File

To Download TWRP Recovery File, firstly, you need to determine your Android device’s name and number and then click the link provided below and search for the TWRP image which matches your device’s specification. It is important to download the same TWRP file, which is compatible with your device name and number.
Step II : Download and Install Minimal ADB and Fastboot Tool
Once you download and install Minimal ADB and Fastboot tool, click the given link in order to top link and setup ADB & fastboot tool on your computer.
Minimal ADB & Fastboot tool Setup

Step III : Enable USB Debugging and OEM Unlock
In order to conduct perfect bridge connection between PC and Mobile, you need to make sure that USB debugging and OEM must remain unlocked
- To launch the developer option, an open setting menu on your device
- Tap 7 times on build number option to make yourself a developer. You will notify with a message “you are now a developer” after tapping 7 times on the build number option.
- Go back again and now navigate to the developer option
- You need to search for the “USB debugging” and enable it.
- After that, you need to search for the “OEM” option, and once again like USB Debugging, enable it.
Step IV : Install TWRP Recovery without Root
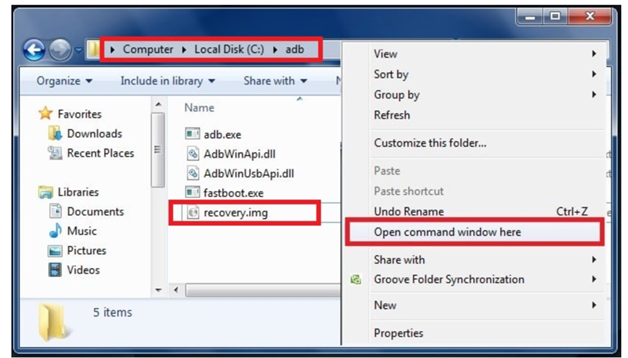
- Navigate to the location where adb and fastboot tool installed

- Copy download TWRP recovery file and paste it into adb folder
- Thereafter, you need to rename the recovery file to ‘recovery.img’
- Then, click into the adb folder. Subsequently, press and hold the Shift key + Right mouse click. After that, select “open command window here” which is same like following image.
- Now, you will find a new command window appears in front of you. Let it be as it is, do not try to close it.
- Link your mobile device with computer using USB cable

- Now, write the command mentioned below and tap enter
ADB reboot bootloader
Once you enter the command and hit enter, you will get a message which will show “Allow USB Debugging on the screen. Tap OK!
Once you booted into fastboot mode, write the command mentioned below and tap enter
Fastboot flash recovery recovery.img
- Once you enter the command, you will get TWRP recovery flashed on your non-rooted android device. In addition to that, you will also get a message displaying that the process is successful in the command window.
Step V: installed twrp Android
Once you have downloaded and installed TWRP recovery on your Android device, it is time for us to make you aware of the procedure to boot your device into TWRP recovery mode.
You can also boot your device by using volume keys and power button if you want to boot your device into TWRP recovery mode. Just press and hold the VOLUME UP key and POWER key at once for a few seconds. Once you feel the vibration, release the buttons. This technique is used all over the world, but depending upon your device model, you may have a different key combination to boot the device into TWRP recovery mode.
“if you are using Samsung device then press & Hold volume up key + Home Key + Power key together at the same time to boot Samsung devices into TWRP mode.”
If you are asked to enter the password in TWRP recovery, you can use your phone password/PIN in order to unlock the TWRP recovery file. TWRP recovery file will decrypt in order to get access to the phone’s storage.
Therefore, it is necessary to take backup whenever you want to modify your device in order to restore them.
How you can take Backup in TWRP Recovery mode
Launch TWRP recovery mode and tap on ‘Backup’ option. Thereafter, choose ‘Boot’, System and Data selection and then swipe the bar to initiate the backup.

Note: backup may take a few minutes to finish since it also depends on your device and device’s ROMs size
How to get iPhone Emojis for Android (Root & No Root)
Root Android without Computer or PC
How to Record Voice Memos & Audio on iPhone & iPad
How to set up iMessage on your Mac
Google Edition camera app w/ Photosphere — easy install, no root needed
-
Alex Dobie
-
Jun 27, 2013
alternative browser

So far I’ve been able to install it normally on the GS4 and HTC One (Euro, skinned versions), the Xperia Tablet Z and Xperia SP. I’m charging an old ICS device as I write this to test on that too. Should definitely work on 4.1 and up, though.
Update: Direct link, since the file uploader is having issues. Seems to work on the LG Optimus Vu, which runs ICS 4.0.3.
Update 2: New URL that’s just the APK, no unzipping required. If you downloaded the earlier one, just unzip it, don’t try to flash it.
Last edited by a moderator: Jun 27, 2013
*edit* tried just downloading the APK and it works fine
Last edited: Jun 27, 2013

Edit: After backing up Gallery2.apk and uninstalling with Titanium Backup, I was able to install the new camera. Works great!
Last edited: Jun 27, 2013
— — — Updated — — —
It did not install on my GS3 with CyanogenMod 10.1.0 stable

EDIT: 10.1 from a pre-stable nightly, which seems to be a variation on the people who posted above me.


Panorama >>>>>>> !


I don’t have a photosphere option, it’s just the normal Panorama that I always had.

Sent from my SCH-I605 using Tapatalk 4 Beta
")


")