

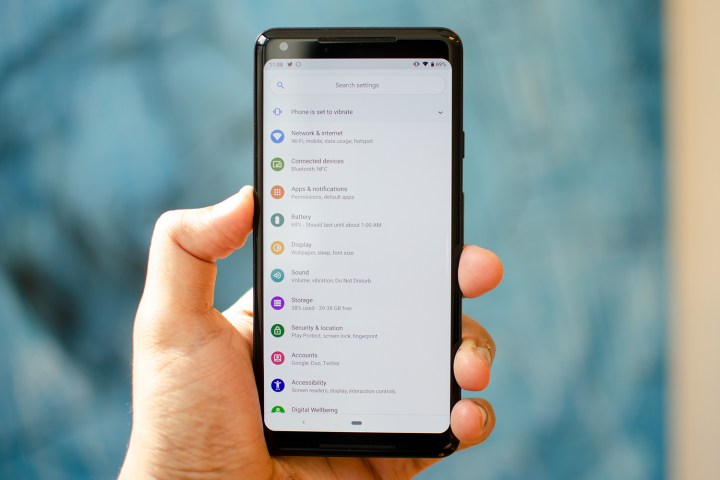
In this era of smartphones or android phones, where we feel almost incomplete without these gadgets, there is also a need for us to push a little more to get familiar with these devices. For those who feel annoyed with the unwanted preinstalled applications and want to remove them from their phones, all they need is to get informed about root access. Read on for tip how to get root access on Android.
— Advertisement —
What is Root Access?
VMOS: Virtual Machine Operating System
As its name suggests, with this app you can virtualize an Android version into Android. This version of Android includes Root Access so you can run applications in this environment, without compromising the warranty and integrity of your device.
The minimum requirements are:
Remember that virtualizing another operating system requires a lot of resources, so we recommend you using mid-range devices. The more powerful your device is, the better your experience will be.
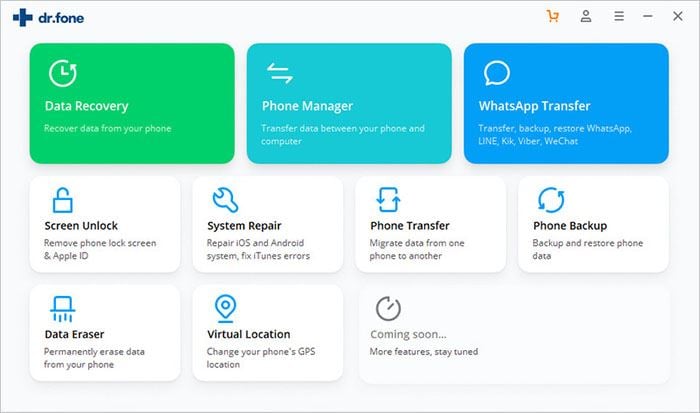
Step 1: Install the iSkysoft toolbox and download Android Toolkit on computer using this link below. Launch the application and then select “Root”. Connect your phone to the computer using USB cable. In case, if you haven’t connected your android device before, you need to install the right driver on your computer.
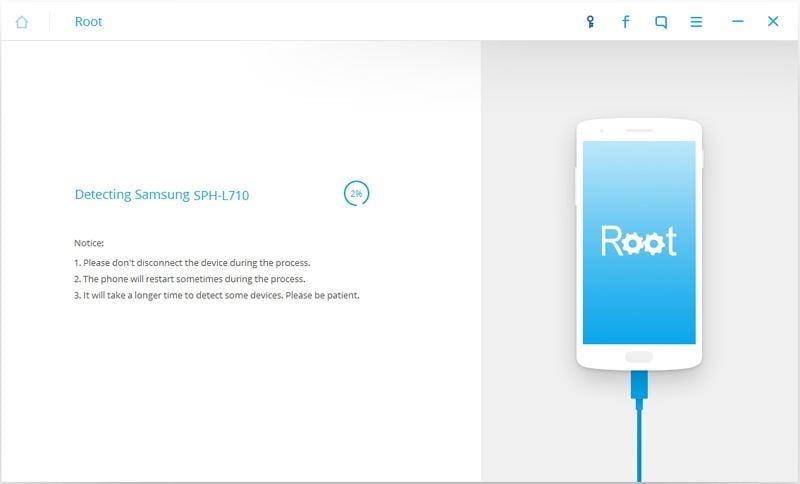
Step 2: Make sure that the USB Debugging Mode is turned on. Clicking on ‘Root Now’ will begin the rooting method.
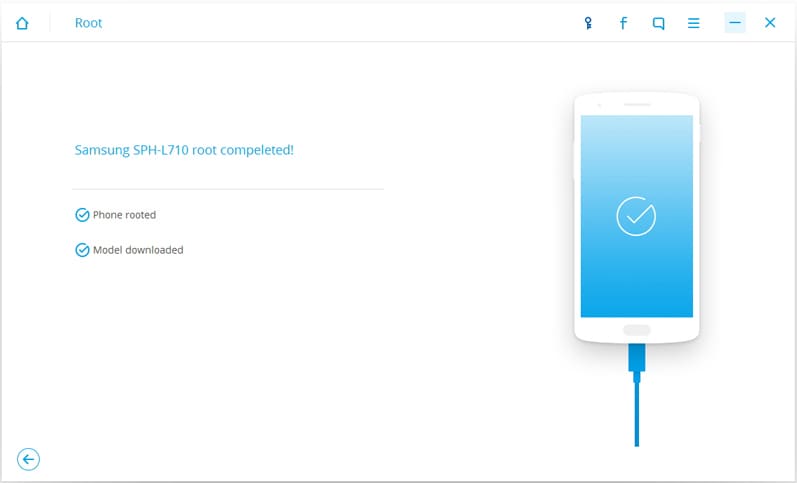
Step 3: Within a few minutes, your device will be successfully rooted. Once rooted, a prompt message will appear on phone’s screen notifying you the process is done!
1. Before beginning, make sure that the level of device’s battery is 50% and more. Also, remember to make a backup file of your data.
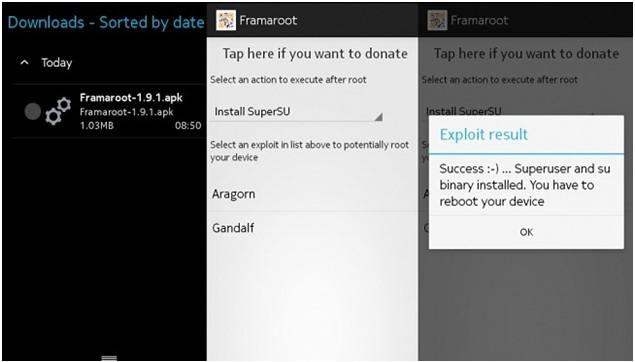
2. Download the Framaroot application file on your device.
4. Choose the apt exploit for your device for different exploits works for different devices.
6. The rooting process will start and you need to reboot your device once it’s done, to let it apply the settings properly.
Possible outcomes after choosing the exploit
Crux of the matter:
To put everything as a whole, dr.fone — Android Toolkit guarantees excellent success rate ensuring full safety while rooting. Moreover, there’s no need to worry about the device’s battery level, as in the case of Framaroot, where the device needs minimum 50% battery level. Also, Framaroot fails to assist android version that are 4.3 and above.

Root права (или Суперюзер) – Предоставляют владельцу Android устройства полный контроль над системой, что позволяет редактировать и изменять системные файлы и папки.
Root доступ можно получить при помощи специальных программ, и если вы видите, что ваш антивирус показывает уведомление о том, что программа заражена, не обращайте на это внимание. Программы требуют доступ к ядру вашего устройства, и это является взломом, именно по этой причине, они выдают угрозы.
Мы предлагаем вам множество основных программ для получения root прав, на своё Android устройство.
Все root программы
Если вам не удалось найти способ для своего android устройства, то вы можете заказать его отдельно.
Обсудить можно тут: https://vk.com/r_device
В данной статье мы рассмотрим виды Root прав, на какие типы можно разделить методы для получения Суперпользователя и обучим вас проводить процесс Rooting(Рутирование). Важно заметить, что после получения данных прав вы теряете возможность получать гарантийное обслуживание и вообще можете превратить свое устройство в бесполезную пластмассу.
Root права (Режим суперпользователя) – при получении данных прав, пользователь имеет влияние на различные системные файлы и папки, тем самым изменить можно от ярлыков программ до установки модифицированных прошивок.
Внимание! Мы не несем ответственность за ваши действия. Все действия со своим смартфоном вы выполняете на свой страх и риск!
В данный момент различают всего 3 вида Root прав:
Если вы хорошо владеете английским языком и хотите узнать ещё больше информации про различные программы для Root прав, прочитайте интересную статью от joyofandroid
- Получение Root прав на Android
- Типы методов получения прав Суперпользователя
- Подготовка смартфона к получению Root
- Режим отладки по USB
- Разрешение установки из неизвестных источников
- Получение Root прав с использование ПК
- Получение Root прав с помощью APK приложений
- Подводим итоги
- See more
- Why would you root?
- Why wouldn’t you root?
- How to prepare your Android device for rooting
- Preparing for rooting
- Installing the Android SDK Platform Tools
- Installing device drivers
- Unlock your bootloader
- How to root your Android device with multiple programs
- Rooting with Root Master
- Rooting with Framaroot
- Rooting your Android device with Firmware. mobi
- Rooting your Android device with BaiduRoot
- Rooting with One Click Root
- How to use Kingo Android Root
- Resources you will need after you root and how to unroot
- Download Root Checker
- How to unroot your Android device
- Unroot with Universal Unroot
- Unroot by flashing stock firmware
- Unroot with file explorer
- Installing VMOS
- Second step
- Third Step
- Fourth step
- Fifth Step
- Full Advantages and Disadvantages of Rooting an Android Device
- What is Rooting?
Получение Root прав на Android
Процесс получения Root прав называется рутингом.
Rooting (или рутинг) – процесс получения Суперпользователя на устройствах с Android OS. Основной целью данного процесса является снятие ограничений с устройства для дальнейших его модификаций. Аналогом Rooting у Apple пользователей – JailBreak.
Можно выделить несколько общих этапов рутинга:
Эксплойт – программный код, набор команд или компьютерная программа, которая использует уязвимости в том или ином ПО.
Chmod – с помощью данной программы можно изменить права доступа к каталогам и файлам.
Типы методов получения прав Суперпользователя
Так как в наше время получение Root прав стало легче, благодаря разному ПО, то мы можем себе позволить разделить методы получения Суперпользователя на типа:
Подготовка смартфона к получению Root
Можно было бы уже приступать к получению Root прав, но для начала мы должны рассказать, как подготовить устройство к Rooting.
Режим отладки по USB
Если вы решили получить Root права с помощью подключения к ПК ( по USB), то без данного режима у вас ничего не получиться. Начинать стоит с включения режима “Отладка по USB” и алгоритм очень прост, буквально в 5 тапов. Давайте рассмотрим (прим. с Meizu):
После подключения устройства к ПК по USB, у вас на устройстве (в строке уведомлений) высветится:
Разрешение установки из неизвестных источников
Давать разрешение для установки из неизвестных источников нужно в любом случае, пусть вы будете получать Суперпользователя по USB или локально. Тем более, данное разрешение пусть и нарушение безопасности личного смартфона, но установщик в вашем смартфоне все-равно будет проверять надежность тех или иных приложений, из-за чего смело давайте разрешение. Следующий алгоритм действий позволит вам это сделать:
Все, теперь ваш смартфон официально готов к получению Root прав.
Получение Root прав с использование ПК
Когда мы уже подготовили свое устройство к Rooting, то подключаем его к ПК с помощью USB кабеля. Далее будет список, по мнению Make-Info, лучших программ для данного процесса. Важно заметить, что иногда программа может не поддерживать определенную модель смартфона, поэтому мы рекомендуем не огорчаться, а просто попробовать следующую по списку программу.
Внимание! Если программа для получения Root прав требует от вас какую-то сумму денег, то лучше откажите ей в этом, ведь любая программа не имеет гарантию того, что сможет дать вам Суперпользователя на вашем устройстве.
Порядок действий таков:
Алгоритм действий таков:
Приступаем к рутингу:
Получение Root прав осуществляется следующим образом:
Рутинг проводится по следующему алгоритму:
Rooting проводится следующим образом:
Алгоритм действий прост:
Получение Root прав с помощью APK приложений
Перед началом топа стоит отметить то, что некоторые приложения имеют версии для ПК, поэтому мы не будем дублировать информацию в статье, если между ПК и APK версией программы разницы нету. Также нужно предупредить, что получать Root права обязательно нужно со стабильным Интернет соединением и зарядом батареи смартфона (или планшета) не ниже 50%.
Чтобы получить Root права, нужно выполнить следующие действия:
Может быть такое, что у вас не получится получить Root права из-за того, что у вас заблокирован Bootloader Android. В таком случае рекомендуем разблокировать и попробовать снова.
Чтобы получить Root права нужно сделать так:
Чтобы получить Root права вы должны сделать следующее:
Алгоритм рутинга прост:
Действия для получения Root прав прост:
Для получения Root прав вам нужно сделать:
Следующим образом вы можете получить Root права:
Подводим итоги
Надеемся, что смогли помочь вам получить Root права посредством представленных программ. Важно помнить, что без разрешений “Отладки по USB” и установки из неизвестных источников вы не сможете получить Root. Если остались вопросы – пишите в комментариях. Еще больше про Android вы можете прочитать в категории “Операционная система Android”.
Android rooting is the ideal way to get more control over your smartphone, opening up a world of unknown possibilities, but it’s important to approach it with caution. Rooting isn’t without its risks — and if something goes wrong, it can void your warranty, leave you with a broken smartphone or tablet, or worse.
Before proceeding, it is important to understand that rooting is not always a straightforward process, and you may encounter hiccups along the way. If you decide that you absolutely need to root your Android device, continue below, but know that it isn’t for the faint of heart or technology-inexperienced.
This guide on how to root Android phones will walk you through the steps to root your device. While we can root some phones in minutes, others are going to take a little more research. But one thing is clear: rooting your phone is one of the best ways to tap into your Android device’s true potential.
See more
Rooting an Android phone or tablet is akin to jailbreaking an iPhone — basically, it allows you to dive deeper into a phone’s sub-system. After rooting, you can access the entire operating system to customize just about anything on your Android device, and you can get around any restrictions that your manufacturer or carrier may have applied.
Rooting is best undertaken with caution. You must back up your phone’s software before installing — or “flash,” in rooting terms — a custom ROM (a modified version of Android).
Why would you root?
Julian Chokkattu/Digital Trends
One of the biggest incentives to root your Android phone is so you can strip away bloatware that’s impossible to uninstall otherwise (although you can sometimes disable it — check out our guide on disabling bloatware). On some devices, rooting will enable previously disabled settings, like wireless tethering. Additional benefits include the ability to install specialized tools and flash custom ROMs, each of which can add extra features and improve your phone or tablet’s performance.
Why wouldn’t you root?
There are essentially four potential cons to rooting your Android.
How to prepare your Android device for rooting
One of the easiest ways to root an Android device is by using an app, and several rooting apps have garnered attention over the years — Framaroot, Firmware.mobi, Kingo Root, BaiduRoot, One Click Root, SuperSU, and Root Master are among the most reliable. These services will usually root your device in the time you take to brush your teeth. But some of them only support devices running older versions of Android, so you may need to do some shopping around to find one that works for your device. If you’re looking to root an even older device, you may need to check Firmware.mobi.
It used to be that rooting Android versions from Android 7.0 Nougat upwards was more difficult. The verified boot service will check the device’s cryptographic integrity to detect if your device’s system files are compromised, inhibiting legitimate rooting apps. Thankfully, rooting apps have caught up with the curve, and rooting newer Android versions is much easier than it used to be.
If your phone isn’t compatible with a one-click rooting app, you must spend a little time researching alternatives on Android forums. The best place to start is XDA Developers Forum — look for a thread about your phone or tablet, and you’re likely to find a method.
Preparing for rooting
Back up everything you cannot live without before you start. You should also always back up your phone’s current ROM before you flash a new one. You will also want to ensure that your device has a full charge before you begin.
Installing the Android SDK Platform Tools
Rooting used to involve downloading Google’s entire Android development kit. Thankfully, that’s not the case anymore, and all you need is the Android SDK Platform Tools.
Download and install the Android SDK Platform Tools from Google’s developer site. There are choices for Windows, Mac, and Linux. These instructions are for Windows machines. Extract the zipped files. When asked what directory to install the software to, we recommend setting it to C:android-sdk. If you choose a different location, make sure you remember it.
Installing device drivers
To ensure your computer can properly communicate with your smartphone or tablet, you will need to install the appropriate USB driver.
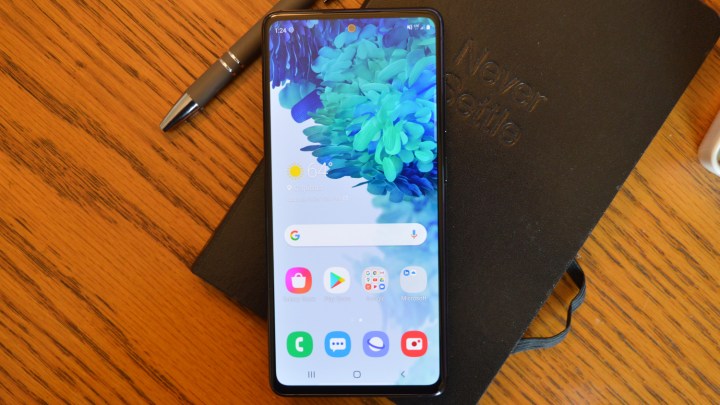
Devices from some manufacturers come with the drivers included in the phone’s software, so all you need to do to install the appropriate USB driver is attach your phone to your PC by USB cable. OnePlus is an example of this, but it’s worth connecting your phone first to see whether USB drivers will automatically install.
Otherwise, here is a list of drivers from the most popular manufacturers:
Unlock your bootloader
Before you get started, you need to unlock your device’s bootloader. The bootloader, simply put, is the program that loads the device’s operating system. It determines which applications run during your phone or tablet’s startup process.
Some manufacturers require you to get a key to unlock the bootloader. Motorola, HTC, LG, and Sony provide step-by-step instructions on how to do so, but a word of warning: They require you to register for a developer account.
Once you have taken those steps, you can embark on the unlocking process. You will need to put your device in fastboot mode. It’s different for every phone, but on most devices, rebooting the device and holding down the Power and Volume Down buttons for 10 seconds does the trick (HTC phones require that you hit the Volume Down key and press the Power button to select it).
Once you have booted into fastboot, head to the folder you previously unzipped your Android SDK files to. Then, open your computer’s command prompt by holding down Shift + Right Click and choosing Open a Command Prompt Here. If your device requires a code, you will get a long string of characters. Paste it into the box on your device manufacturer’s website, submit the form, and await an email with a key, a file, and further instructions.
Unlock your device’s bootloader by connecting it to your computer and placing it in fastboot mode again. Pull up the command prompt by typing cmd into your Start menu.
For Google Nexus and Pixel devices, the commands are easy:
It’s the same for Samsung devices:
Motorola’s command is a little different:
So is HTC’s:
Confirm the unlock, and you’re one step closer to rooting your Android device.
Some manufacturers and carriers don’t sanction bootloader unlocking, but that doesn’t mean it can’t be done. Try searching the XDA Developers forum for workarounds and unofficial solutions.
How to root your Android device with multiple programs
There are a lot of different ways to root your phone or tablet. Here are a few of our favorites.
Rooting with Root Master

Rooting with Framaroot

Framaroot is a newer one-click rooting service, and it aims to make the process of rooting easy for everyone with a simple one-click “root” button. However, you might have to jump through a couple of hoops to get it started.
Then that’s it — you’re ready!
Rooting your Android device with Firmware. mobi

Firmware.mobi, an unlocking utility by developer Chainfire, isn’t the easiest way to root your Android smartphone, but it is one of the most stable. It works on over 300 devices and provides step-by-step instructions that make the rooting process as seamless as it could be.
You will need to download the ZIP file intended for your device.
Rooting your Android device with BaiduRoot
BaiduRoot, a software utility by Beijing-based Baidu Inc., supports over 6,000 Android devices. Still, since those only include devices running Android 2.2 up to Android 4.4, it’s going to have limited use for most. However, if you’ve got an ancient phone lying around, this is a great tool for rooting and repurposing that. It’s coded in Chinese, but a crafty translator has released an English version.
BaiduRoot is one of the more straightforward rooting applications. Once you’ve downloaded it on your computer, it’s a step-by-step affair.
First, you must unzip the file. Find Baidu_Root.RAR and extract its contents (if you’re using Windows, you might need a third-party application like 7-Zip).
Next, attach the device you want to root to your computer via USB and transfer the files. Once that’s done, unplug your phone.
Now, switch to BaiduRoot:
Here’s a video showing the installation process.
Rooting with One Click Root

The One Click Root procedure is simple:
How to use Kingo Android Root

Kingo Root can install on a Windows-based computer or directly to the device you want to root. First, check to see if your device is compatible with Kingo by checking the official list. Then, grab the Kingo Android Root for Windows program, and install it. Alternatively, download the Kingo Android Root APK to your device, check the Unknown Sources box (see above), and install it.
If you’ve opted to use the Windows client, ensure to enable USB Debugging mode on your phone.
From there, usage is pretty simple:
Resources you will need after you root and how to unroot
Arguably no other mobile operating system parallels the diversity of Android OS. For this reason, there is no universal way to root your device. If the above options fail, do not fret. There is likely a guide on how to root your specific device available somewhere online — a few reliable resources include XDA Developers’ forum and the Android Forums.
Download Root Checker
Rooting will make your phone more vulnerable to security threats. Installing a root management app will give you more peace of mind. Normally, every app that requires rooted privileges will ask for your approval. This is where root management apps, such as Magisk Manager, come in. Magisk Manager is open-source software that allows you to manage your phone’s root permissions, granting or denying individual apps’ permission.
How to unroot your Android device
For all the benefits you can gain from rooting, you can go back to the way things were. Whichever method you attempt, always make sure you back up your data before changing your phone.
Unroot with Universal Unroot
You can easily unroot your phone with Universal Unroot. It removes root privileges in most Android devices, but it’s not perfect. Most Samsung devices are not compatible, and LG devices will be unrooted but still show as rooted after the app has worked its magic. It used to be a dollar, but it’s now free since the developers are no longer updating it. But if you’ve got an older device that’s supported, it’s a good way to be sure.
Unroot by flashing stock firmware
One of the most thorough ways to remove root access is by flashing your device with factory firmware. This method will completely wipe your phone or tablet clean of any root traces, but a word of warning: It’s not for the faint of heart.
First, download the factory image for your device to your computer. Once again, XDA is a great resource.
Next, unzip the file. You will see another zipped file — unzip that one, too. The unzipped folder should contain a bootloader image, radio, various scripts, and one more zipped file. Again, unzip that.
The next step involves installing ADB and Fastboot on your computer.
Switch back to your computer. Copy boot.img in the folder you unzipped and place it in your ADB folder, C:android-sdk.
Connect your phone to your computer via USB. Open your computer’s command prompt by holding down Shift + Right Click and choosing Open a Command Prompt Here. Then, enter these commands:
Unroot with file explorer
You can install Root checker to check the status of the Root Access. You can also do this with any app that needs Root Access.
Installing VMOS

Second step
Installing the apk file: From Google Chrome, open the apk file, then Chrome will notify you that you don’t have enough permissions, after that, press “settings” and then “Allow from this source“. Now go back and the installation wizard will appear, finally, press install.
Third Step
To be able to start VMOS you need to have VMOS Unlocker installed. This app looks like a calculator. This is a verification method included by the VMOS team to avoid plagiarism. Remember to always have the latest version installed.
After that press Download Latest apk. Then from Google Chrome, open the apk file, the installation wizard will appear, finally, press install.

Fourth step
Setting up VMOS
Open VMOS and slide to the right until you see the Enter VMOS button then press it to start.

After that, VMOS will ask you to enable some permissions. To enable the floating window mode press the On button, you will be redirected to the configuration then press Allow display over other apps.
Come back, again VMOS will ask you more permissions for storage, location, and microphone. Then press To authorize, also press Allow for each one.
After that VMOS will start to install the ROM and then it will boot, this process can take a few minutes.

Fifth Step
Activating Root Access
From the main screen press the Settings icon, then press Root, then press Enable root.
After that VMOS will notify you that you must watch an Ad video to continue, press watch now. Finally press Restart Now. And that’s it, you have Root Access on your device.

Full Advantages and Disadvantages of Rooting an Android Device

What is Rooting?
Years ago we would never have thought that this would be possible due to the limitations of the hardware. But virtualizing Android on an Android device is now possible, plus we have a Root environment where we can perform different operations without any damage to our device. We have all this freedom without affecting the warranty of our device.
")


")