
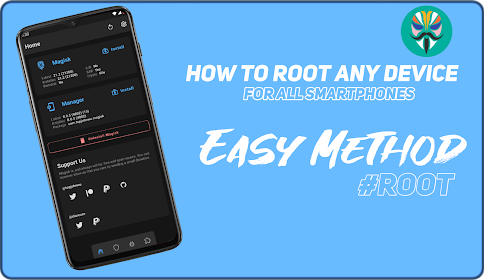
Android rooting is the ideal way to get more control over your smartphone, opening up a world of unknown possibilities, but it’s important to approach it with caution. Rooting isn’t without its risks — and if something goes wrong, it can void your warranty, leave you with a broken smartphone or tablet, or worse.
Before proceeding, it is important to understand that rooting is not always a straightforward process, and you may encounter hiccups along the way. If you decide that you absolutely need to root your Android device, continue below, but know that it isn’t for the faint of heart or technology-inexperienced.
This guide on how to root Android phones will walk you through the steps to root your device. While we can root some phones in minutes, others are going to take a little more research. But one thing is clear: rooting your phone is one of the best ways to tap into your Android device’s true potential.
- See more
- What is rooting?
- Why would you root?
- Why wouldn’t you root?
- How to prepare your Android device for rooting
- Preparing for rooting
- Installing the Android SDK Platform Tools
- Installing device drivers
- Unlock your bootloader
- How to root your Android device with multiple programs
- Rooting with Root Master
- Rooting with Framaroot
- Rooting your Android device with Firmware.mobi
- Rooting your Android device with BaiduRoot
- Rooting with One Click Root
- How to use Kingo Android Root
- Resources you will need after you root and how to unroot
- Download Root Checker
- Install a root management app
- How to unroot your Android device
- Unroot with Universal Unroot
- Unroot by flashing stock firmware
- Unroot with file explorer
- Unroot with OTA update
- Editors’ Recommendations
- What About Kingroot XDA?
- What to do if Kingroot will not install on your phone ?
- Method 1 – Replace Kingroot with SuperSU (Easiest Way)
- How to Remove KingRoot XDA KingUser?
- How to Download and Install in Your Device?
- Questions?
- How do I do root?
- Rooting Guides Index
- Amazon
- Huawei
- I’ve rooted my device. Now what?
- Cкачать:
- What Does Rooting An Android Phone Mean
- What is Magisk?
See more
What is rooting?
Rooting an Android phone or tablet is akin to jailbreaking an iPhone — basically, it allows you to dive deeper into a phone’s sub-system. After rooting, you can access the entire operating system to customize just about anything on your Android device, and you can get around any restrictions that your manufacturer or carrier may have applied.
Rooting is best undertaken with caution. You must back up your phone’s software before installing — or “flash,” in rooting terms — a custom ROM (a modified version of Android).
Why would you root?
One of the biggest incentives to root your Android phone is so you can strip away bloatware that’s impossible to uninstall otherwise (although you can sometimes disable it — check out our guide on disabling bloatware). On some devices, rooting will enable previously disabled settings, like wireless tethering. Additional benefits include the ability to install specialized tools and flash custom ROMs, each of which can add extra features and improve your phone or tablet’s performance.
Why wouldn’t you root?
There are essentially four potential cons to rooting your Android.
- Voiding your warranty: Some manufacturers or carriers will void your warranty if you root your device, so it is worth keeping in mind that you can always unroot. If you need to send the device back for repair, simply flash the software backup you made, and it’ll be good as new.
- Bricking your phone: If something goes wrong during the rooting process, you risk bricking — i.e., corrupting — your device. The easiest way to prevent that from happening is to follow the instructions carefully. Ensure the guide you are following is up to date and that the custom ROM you flash is specifically for your phone. If you do your research, you won’t have to worry about bricking your smartphone.
- Security risks: Rooting introduces some security risks. Depending on what services or apps you use on your device, it could create a security vulnerability. And certain malware takes advantage of rooted status to steal data, install additional malware, or target other devices with harmful web traffic.
- Disabled apps: Some security-conscious apps and services do not work on rooted devices — financial platforms like Google Pay and Barclays Mobile Banking do not support them. Apps that serve copyrighted TV shows and movies, like Sky Go and Virgin TV Anywhere, will not start on rooted devices, either — and neither will Netflix.
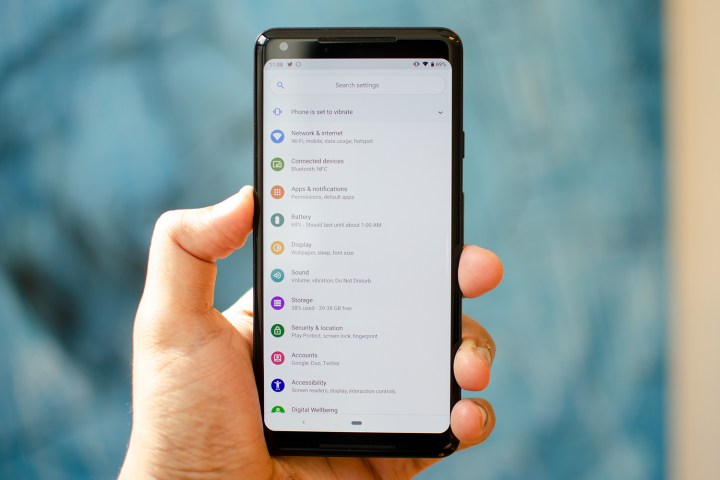
How to prepare your Android device for rooting
One of the easiest ways to root an Android device is by using an app, and several rooting apps have garnered attention over the years — Framaroot, Firmware.mobi, Kingo Root, BaiduRoot, One Click Root, SuperSU, and Root Master are among the most reliable. These services will usually root your device in the time you take to brush your teeth. But some of them only support devices running older versions of Android, so you may need to do some shopping around to find one that works for your device. If you’re looking to root an even older device, you may need to check Firmware.mobi.
It used to be that rooting Android versions from Android 7.0 Nougat upwards was more difficult. The verified boot service will check the device’s cryptographic integrity to detect if your device’s system files are compromised, inhibiting legitimate rooting apps. Thankfully, rooting apps have caught up with the curve, and rooting newer Android versions is much easier than it used to be.
If your phone isn’t compatible with a one-click rooting app, you must spend a little time researching alternatives on Android forums. The best place to start is XDA Developers Forum — look for a thread about your phone or tablet, and you’re likely to find a method.
Preparing for rooting
Back up everything you cannot live without before you start. You should also always back up your phone’s current ROM before you flash a new one. You will also want to ensure that your device has a full charge before you begin.
- Tap on About Phone and find the Build Number. The exact path depends on your phone, but it’ll usually be found with other software information.
- Tap on the Build Number seven times, and the Developer Options will appear on the Settings main page. You may need to confirm your security passcode to enable this.
- Tap on the Back key to see your new developer options.
- Tap Developer Options.
- Check to enable USB Debugging.
- Check to enable OEM Unlocking.
Installing the Android SDK Platform Tools
Rooting used to involve downloading Google’s entire Android development kit. Thankfully, that’s not the case anymore, and all you need is the Android SDK Platform Tools.
Download and install the Android SDK Platform Tools from Google’s developer site. There are choices for Windows, Mac, and Linux. These instructions are for Windows machines. Extract the zipped files. When asked what directory to install the software to, we recommend setting it to C:android-sdk. If you choose a different location, make sure you remember it.
Installing device drivers
To ensure your computer can properly communicate with your smartphone or tablet, you will need to install the appropriate USB driver.
Devices from some manufacturers come with the drivers included in the phone’s software, so all you need to do to install the appropriate USB driver is attach your phone to your PC by USB cable. OnePlus is an example of this, but it’s worth connecting your phone first to see whether USB drivers will automatically install.
Otherwise, here is a list of drivers from the most popular manufacturers:
- Alcatel
- Coolpad
- Google/Nexus/Pixel
- Lenovo/Motorola
- Sony
- Xiaomi
Unlock your bootloader
Before you get started, you need to unlock your device’s bootloader. The bootloader, simply put, is the program that loads the device’s operating system. It determines which applications run during your phone or tablet’s startup process.
Some manufacturers require you to get a key to unlock the bootloader. Motorola, HTC, LG, and Sony provide step-by-step instructions on how to do so, but a word of warning: They require you to register for a developer account.
Once you have taken those steps, you can embark on the unlocking process. You will need to put your device in fastboot mode. It’s different for every phone, but on most devices, rebooting the device and holding down the Power and Volume Down buttons for 10 seconds does the trick (HTC phones require that you hit the Volume Down key and press the Power button to select it).
Once you have booted into fastboot, head to the folder you previously unzipped your Android SDK files to. Then, open your computer’s command prompt by holding down Shift + Right Click and choosing Open a Command Prompt Here. If your device requires a code, you will get a long string of characters. Paste it into the box on your device manufacturer’s website, submit the form, and await an email with a key, a file, and further instructions.
Unlock your device’s bootloader by connecting it to your computer and placing it in fastboot mode again. Pull up the command prompt by typing cmd into your Start menu.
For Google Nexus and Pixel devices, the commands are easy:
- Nexus phones: Type “fastboot oem unlock” (without quotes) and hit Enter.
- Pixel phones: Type “fastboot flashing unlock” (without quotes) and hit Enter.
It’s the same for Samsung devices:
- Samsung phones: Type “fastboot flashing unlock” (without quotes) and hit Enter.
Motorola’s command is a little different:
- Type “oem unlock UNIQUE_KEY” (without quotes), replacing “UNIQUE KEY” with the code you received
So is HTC’s:
- Type “unlocktoken Unlock_code.bin” (without quotes), replacing “Unlock_code.bin” with the file you received.
Confirm the unlock, and you’re one step closer to rooting your Android device.
Some manufacturers and carriers don’t sanction bootloader unlocking, but that doesn’t mean it can’t be done. Try searching the XDA Developers forum for workarounds and unofficial solutions.
How to root your Android device with multiple programs
There are a lot of different ways to root your phone or tablet. Here are a few of our favorites.
Rooting with Root Master

- Download and install the APK. You may need to tap the Unknown Sources button in your Android Security settings to complete the installation.
- Launch the app, then tap Start.
- The app will let you know if your device is compatible. If it isn’t, you must try one of the other apps on our list.
- If you can root your device, proceed to the next step, and the app will begin rooting. This may take some time, and it’s a good idea to try not to use your phone for anything else while it’s running.
- Once you see the Success screen, restart your device, and you’re done!
- Once it’s finished, you can download and run Magisk to manage your root access.
Rooting with Framaroot

Framaroot is a newer one-click rooting service, and it aims to make the process of rooting easy for everyone with a simple one-click “root” button. However, you might have to jump through a couple of hoops to get it started.
- Download the APK.
- Install it — you may need to tap the Unknown Sources button in your Android Security settings to complete the installation.
- Open the app, and tap Root.
- If it can root your device, you can root your device.
- You then must download and run Magisk to manage your root access.
Then that’s it — you’re ready!
Rooting your Android device with Firmware.mobi

Firmware.mobi, an unlocking utility by developer Chainfire, isn’t the easiest way to root your Android smartphone, but it is one of the most stable. It works on over 300 devices and provides step-by-step instructions that make the rooting process as seamless as it could be.
You will need to download the ZIP file intended for your device.
- Extract the folder.
- Navigate to it and find the root-windows.bat file. Double-click it.
- Wait for the script to execute, and press any key.
- When the process is complete, your phone will automatically reboot, and it will root you.
Rooting your Android device with BaiduRoot
BaiduRoot, a software utility by Beijing-based Baidu Inc., supports over 6,000 Android devices. Still, since those only include devices running Android 2.2 up to Android 4.4, it’s going to have limited use for most. However, if you’ve got an ancient phone lying around, this is a great tool for rooting and repurposing that. It’s coded in Chinese, but a crafty translator has released an English version.
BaiduRoot is one of the more straightforward rooting applications. Once you’ve downloaded it on your computer, it’s a step-by-step affair.
First, you must unzip the file. Find Baidu_Root.RAR and extract its contents (if you’re using Windows, you might need a third-party application like 7-Zip).
Next, attach the device you want to root to your computer via USB and transfer the files. Once that’s done, unplug your phone.
- On your smartphone or tablet, head to Settings > Security (or Lock Screen and Security).
- Toggle Unknown Sources, and press OK on the pop-up.
- Find the folder containing the BaiduRoot app and tap the APK file. Follow the instructions to complete the installation.
Now, switch to BaiduRoot:
- Open BaiduRoot and accept the license agreement.
- Tap the Root button in the center of the screen.
- After a few seconds, you’ll get a message showing that the device successfully rooted.
Here’s a video showing the installation process.
Rooting with One Click Root

The One Click Root procedure is simple:
- Check that your device is supported by the Root Availability Tool.
- Download the Windows/Mac One Click Root program.
- Connect your device via USB cable.
- Enable USB debugging on your device.
- Run One Click Root and let the software handle the tricky bit.
How to use Kingo Android Root

Kingo Root can install on a Windows-based computer or directly to the device you want to root. First, check to see if your device is compatible with Kingo by checking the official list. Then, grab the Kingo Android Root for Windows program, and install it. Alternatively, download the Kingo Android Root APK to your device, check the Unknown Sources box (see above), and install it.
If you’ve opted to use the Windows client, ensure to enable USB Debugging mode on your phone.
From there, usage is pretty simple:
- Launch Kingo Root on your computer and connect your device via USB.
- Kingo Root should detect your device automatically and prompt you to root it. Click Root, and then hang tight — Kingo will only take a few minutes to grant root privileges.
- Install the Kingo Root APK.
- Open the Kingo Root app.
- If your device is compatible, you will see a One Click Root button. Tap it and be patient — it can take a while.
- If the root is successful, you will see a large checkmark.
Resources you will need after you root and how to unroot
Arguably no other mobile operating system parallels the diversity of Android OS. For this reason, there is no universal way to root your device. If the above options fail, do not fret. There is likely a guide on how to root your specific device available somewhere online — a few reliable resources include XDA Developers’ forum and the Android Forums.
Download Root Checker
Install a root management app
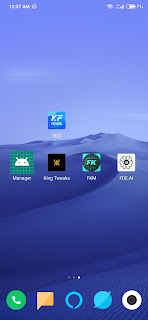
Rooting will make your phone more vulnerable to security threats. Installing a root management app will give you more peace of mind. Normally, every app that requires rooted privileges will ask for your approval. This is where root management apps, such as Magisk Manager, come in. Magisk Manager is open-source software that allows you to manage your phone’s root permissions, granting or denying individual apps’ permission.
How to unroot your Android device
For all the benefits you can gain from rooting, you can go back to the way things were. Whichever method you attempt, always make sure you back up your data before changing your phone.
Unroot with Universal Unroot
You can easily unroot your phone with Universal Unroot. It removes root privileges in most Android devices, but it’s not perfect. Most Samsung devices are not compatible, and LG devices will be unrooted but still show as rooted after the app has worked its magic. It used to be a dollar, but it’s now free since the developers are no longer updating it. But if you’ve got an older device that’s supported, it’s a good way to be sure.
Unroot by flashing stock firmware
One of the most thorough ways to remove root access is by flashing your device with factory firmware. This method will completely wipe your phone or tablet clean of any root traces, but a word of warning: It’s not for the faint of heart.
First, download the factory image for your device to your computer. Once again, XDA is a great resource.
Next, unzip the file. You will see another zipped file — unzip that one, too. The unzipped folder should contain a bootloader image, radio, various scripts, and one more zipped file. Again, unzip that.
The next step involves installing ADB and Fastboot on your computer.
Download and install the Android SDK Platform Tools from Google’s developer site. There are choices for Windows, Mac, and Linux. These instructions are for Windows machines. Extract the zipped files. When asked what directory to install the software to, we recommend setting it to C:android-sdk. If you choose a different location, make sure you remember it.
- Tap on About Phone and find the Build Number.
- Tap on the Build Number seven times, and the Developer Options will appear on the Settings main page.
- Tap on the Back key to see the Developer Options.
- Tap on Developer Options.
- Check to enable OEM Unlocking.
Switch back to your computer. Copy boot.img in the folder you unzipped and place it in your ADB folder, C:android-sdk.
Connect your phone to your computer via USB. Open your computer’s command prompt by holding down Shift + Right Click and choosing Open a Command Prompt Here. Then, enter these commands:
- adb reboot bootloader
- fastboot flash boot boot.img
- fastboot reboot
Unroot with file explorer
- Find your device’s main drive under /.
- Go to System > Bin, then tap and hold on busybox and su and delete them.
- Now go to System > Xbin, then tap and hold on busybox and su and delete them.
- Finally, go to System > App and delete supeuser.apk.
- Restart the device, and you should be unrooted.
Unroot with OTA update
Sometimes just installing an OTA update will break root. Look for a software update under Settings > About Device. Just be careful — it might prove impossible to recover from. In that case, you may need to flash the original firmware first.
Editors’ Recommendations
Table of Contents
Rooting an android enables you to unlock a various number of possibilities, After rooting your android device one can easily do things which he wouldn’t have done at the first place in xda root. One of the common ways to root your android device without pc is “Kingroot XDA”. But, XDA root isn’t as powerful as the SuperSU.
What About Kingroot XDA?
A lot of people looking for an easy way to root their android device, end up using the Kingroot and other rooting apps like Framaroot. Although, these apps root your android device, but their functionality is limited.
That’s why for people who are looking forward to make complete use of your rooted android device, SuperSU is your way out. In this guide, we will be explaining with steps to replace Kingroot with SuperSU. So without wasting a minute more, let’s begin with the steps.
What to do if Kingroot will not install on your phone?
We don’t say Kingroot does that, but it’s kind of unknown and that’s what makes the app vulnerable. So, if you’ve installed XDA root, you surely might be looking for steps to convert XDA root into SuperSU.
Method 1 – Replace Kingroot with SuperSU (Easiest Way)
How to Remove KingRoot XDA KingUser?
- Go to the PlayStore.
- Install SuperSU (Download SuperSU officially)
- Give it permission as a SuperUser.
- Uninstall KingRoot XDA.
- Update SuperUser Binary and Restart the device.
- Voila, you’ve replaced your KingUser with SuperSU.
However, if the steps in the above method didn’t work for you, you don’t have to worry much and head towards the next method listed below, which works for most of the devices replace kingroot with supersu.
How to Download and Install in Your Device?
- Download & Install Terminal Emulator for Android.
- Download “Replace_Kinguser_with_SuperSU-v2.4.zip” and unzip the file.
After granting permissions you will have to type one single line of code, The other command will be
After writing the above command, it might show some error, but ignore that error, it will automatically launch SuperSU, in case it doesn’t manually open SuperSU.
In case you are still not able to replace the KingRoot XDA with SuperSu, then you can install an app which shows the location or path, were the root is installed. Say, the root has been installed on /system/xbin/, then you are supposed to navigate to that particular location with the commands.
You shall try all of these methods, and in case they don’t work, you shall comment here in Google play services. We would surely help you about how to solve your problem.
DISCLAIMER: ROOTING YOUR DEVICE WILL PROBABLY VOID YOUR WARRANTY FROM BOTH THE CARRIER AND THE MANUFACTURER. IF YOU DO NOT WISH TO ACCEPT FAULT FOR ANY ADVERSE EFFECTS OF ROOTING, THEN DO NOT READ ANY FURTHER. HERE BE DRAGONS.
Questions?
Before rooting, you might have some questions about it. Fortunately, they’ve already been answered! Refer to the handy list below:
- What does «to root a phone» mean?
- What is the difference between: Rooting, Jailbreak, ROM, Mod, etc.?
- Are there any risks to rooting a device?
- What do I gain from rooting?
- Do all applications run as root on a rooted phone?
- See the sidebar to the right for more potentially relevant questions!
How do I do root?
Note there is no known method that will root all devices, nor is there any guarantee that any mentioned program or method will actually work. This is because there are many variables at play and device OEMs have no incentive to make the process easy.
A final caution: Your warranties may be voided, you may screw up your device, and there may also be other adverse effects. If you do not want to risk it, stop now. If you are not confident in what you are doing, please do not deviate from the guides and read carefully.
Methods typically vary between models and even between firmware versions of the same model. Check your rooting method is compatible with:
- Your device model/brand (e.g. Samsung Note)
- Your Android version (e.g. 4.4 KitKat vs 5.1 Lollipop)
- Your firmware version (e.g. European vs. USA vs. Verizon telecom provider)
- Your hardware version (e.g. 32GB model with antenna vs. 16GB without one)
Rooting Guides Index
These are links to questions on this site that have been asked for specific devices. If the question for your device hasn’t been answered, don’t post a duplicate — you can attract attention to the question by offering a bounty on it, sharing the link, posting in our chatroom, etc.
Amazon
- Fire TV
- Kindle Fire Version 6.x / 10.x
- Kindle Fire 5th gen (aka 2015)
- Kindle Fire HD
Huawei
- Ascend Y330
- Ascend Y530
- G330D U8825D
- Mate 8 (aka Ascend Mate8)
- Mediapad S7-301U
- Nexus 6P
- P1 U9202L
- PLDT Telpad QS S7-961WD
- STREAM X GL07S
- U8160 (Vodafone 858)
- X3 U8510
- Y210
I’ve rooted my device. Now what?
- We have another question about that!
- If you have another method or know how to root a device that’s not listed, feel free to add it to the list! Just follow the same format.
Как получить root права почти на любом Андроид устройстве с помощью Framaroot.
На начальных стадиях развития платформы Андроид, получение root-прав в один клик было нормой. Но с каждым новым обновлением система становилась все более и более защищенной, плюс в добавок к этому производители устройств и мобильные операторы добавляли все более и более усовершенствованные методы защиты. В итоге пользователи должны были прибегать к разным способам получения root-прав для каждого отдельного устройства.
Как получить рут права на Андроид
Но, похоже, панацея найдена, по крайней мере до следующих обновлений операционной системы. Пользователь форума XDA-Developers (самого большого сообщество посвященного мобильным устройствам и технологиям в сети) , совсем недавно выпустил Framaroot — приложение которое поможет вам получить root-права почти на любом Андроид устройстве, как на популярных моделях, так и на немного устаревших устройствах. И что самое главное, так это то, что вам даже не понадобится подключать ваше устройство к большому брату (компьютеру), исполнять какие-либо команды в строке, или прошивать какие-то файлы!
Установите скачанный apk файл на ваше Андроид устройство.
Запустите приложение и если одна или больше уязвимостей доступны на вашем устройстве, вы их увидите.
Нажмите на любую из доступных уязвимостей. Далее должно появиться окошко с сообщением об успешном получении root-прав. Если же вы увидите сообщение об неудачной попытке, то попробуйте другую доступную на вашем устройстве уязвимость.
Как только ваше устройство было успешно рутировано, перезагрузите его.
Cкачать:
<img src="https://mdforum.su/images/mdf/attach/apk.gif" alt=" mdforum.ru_Framaroot-1.9.1.apk
<img src="https://mdforum.su/images/mdf/attach/apk.gif" alt=" Framaroot-1.9.3.apk


I’m trying to install TWRP but it says (boot image with correct signature or disable verified boot)
My device is (Umidigi power)
Or root my device
I have try with this:
UniversalAndroot
Framaroot
Magisk Manager
Magisk v20
KingoRoot
Can someone help me with this?
Note 24/1-2020 17:31
step 1: adb reboot bootloader
step 2: fastboot flashing unlock
step 3: Volume Up
SP_Flash_Tool for magisk_patched_boot.img in boot sector in SP_FLash_Tool
Install Magisk Manager V20.3 new version. and here we go. thanks for all imput 🙂
asked Jan 24, 2020 at 13:27

2 silver badges4 bronze badges
- Install ADB in your PC. Update the drivers of your device.
- Boot your phone into recovery mode. (Make sure you turned on USB Debugging and OEM from developer options).
- Open the ADB in your PC and check your phone is connected by USB or
not. If it shows your phone in terminal then proceed further.- Reboot into fastboot.
- Then unlock the bootloader (fastboot oem unlock).
- After unlocking the bootloader flash the TWRP recovery’s img file (Be careful becuase TWRP recovery isn’t same for every phone. You’ve
to go tho their website and find your phone’s. If it’s not available
in their website then don’t worry you’ll find it in unofficial
websites).- Now boot your phone into recovery mode. This will open TWRP recovery now.
- Now you should use ADB sideload method or use your phones internal or external memory to store magisk zip and flash it using TWRP.
You don’t need to use KingoRoot to root. Magisk is an amazing tool to root any device.
answered Jan 24, 2020 at 16:33

surajit das
2 silver badges12 bronze badges
I know nothing about this device myself but, I have managed to find a thread over on XDA that contains a very beginner oriented guide on how to root the Umidigi power.
This post is actually part of a thread on installing TWRP on the phone, however, after a quick read I couldn’t easily see instructions for installing TWRP itself.
answered Jan 24, 2020 at 14:35

9 bronze badges
What Does Rooting An Android Phone Mean
What is Magisk?
Magisk may be a nothing & App — If you root your device and you get all system permissions .by magisk. It’s a comparatively new tool for customizing robot devices. it absolutely was developed by XDA Developer topjohnwu. Magisk is an alternate to the long-standing SuperSU Root, however, it’s way more than simply a root technique. Their area unit some key belongings you ought to fathom this well-liked tool before you dive in.
Magisk Manager App-
How To DOWNLOAD With My Links in 30 Sec CLick Hare To Watch

USE ANY ROOTED APPS 📲
According To Magisk — Magisk is thought of as a “systemless” root methodology. It’s primarily how to switch the system while not truly modifying it. Modifications are kept safely within the boot partition rather than modifying the important system files. this is often the foremost necessary feature of this tool. Since the initial system files stay unchanged, modifications will go unseen by Google SafetyNet.
")


")