
- The Easiest Method
- Introduction
- Step 5 — Restart the Database Server Normally
- Changing Password using SET
- Changing Password using UPDATE
- Step 2 — Restarting the Database Server Without Permission Checks
- Configuring MariaDB to Start Without Grant Tables
- Configuring MySQL to Start Without Grant Tables
- Check MySQL version
- Stop MySQL service
- Check MySQL status
- Skipping Networking and Grant Tables
- Start MySQL service
- Log in to MySQL
- Flush privileges
- Choose MySQL database
- Change MySQL root password
- Exit MySQL
- Reverting Database to its normal settings
- Kill MySQL processes
- Restart MySQL service
- Conclusion
- Check the version of MySQL on Ubuntu 20
- Stop the MySQL server
- Skip Grant Tables & Networking
- Start the MySQL service
- Confirm the status of the MySQL Server
- Sign In to the MySQL shell
- Alter the root password
- Revert Database Server to Normal settings
- Kill all MySQL processes & Restart the MySQL service
- Log in with the newly set Password
- Wrap Up
- Step 1 — Identifying the Database Version
- Step 4 — Reverting Your Database Server to Normal Settings
- Why are you looking at this wiki page?
- Step 3 — Changing the Root Password
- Changing the MariaDB Password
- Changing the MySQL Password
- Step 4 — Changing the Root Password
- Шаг 1. Проверьте версию MySQL в Ubuntu 20
- Шаг 2. Остановите сервер MySQL
- Step 1 — Identifying the Database Version and Stopping the Server
- Prerequisites
- Шаг 7. Измените пароль root
- How can I reset my MySQL password?
- Войдите в систему с новым паролем
- Шаг 4. Запустите службу MySQL
- Шаг 3. Пропустите таблицы грантов и нетворкинг
- Подтвердите статус сервера MySQL
- Шаг 6. Войдите в оболочку MySQL
- Another way, purge
- Шаг 8. Завершите все процессы MySQL и перезапустите службу MySQL
- Step 2 — Stopping the Database Server
- Итог
The Easiest Method
sudo dpkg-reconfigure mysql-server-N.N
(where N.N is the MySql Server version)
Introduction
This tutorial will cover how to reset the root password for older and newer versions of MySQL and MariaDB.
Please do not make any edits to this article. Its contents are currently under review and being merged with the Ubuntu Server Guide. To find the Ubuntu Server Guide related to your specific version, please go to:
Step 5 — Restart the Database Server Normally
For MySQL, use:
For MariaDB, use:
Then, restart the service using systemctl.
systemctl start mysql
systemctl start mariadb
Now you can confirm that the new password has been applied correctly by running:
mysql root
The command should now prompt for the newly assigned password. Enter it, and you should gain access to the database prompt as expected.

Changing Password using SET


Now, run the command with correct root password which is set in previous step. If you provide the correct password then it will be able to connect successfully with the server.
Changing Password using UPDATE

Again, exit from the server and restart the database server before testing the new password.
$ sudo service mysql restart

Start the database without loading the grant tables or enabling networking:
mysqld_safe —skip-grant-tables —skip-networking
The ampersand at the end of this command will make this process run in the background so you can continue to use your terminal.
You’ll immediately see a database shell prompt instead.
Now that you have root access, you can change the root password.
На какие бы мы ни встали ходули, без своих ног не обойдемся (П. Буаст).
ароли сложно запомнить, поэтому, если вы забыли пароль root MySQL, к счастью, есть способ его изменить. Этот пост был написан для вас, и к концу этого поста вы успешно измените пароль MySQL.
Прежде чем перейти непосредственно к решению, предполагается, что вы используете последнюю версию базы данных MySQL в системе Ubuntu 20.04 LTS. В этом посте будет предоставлено пошаговое руководство по изменению пароля root MySQL в Ubuntu 20.04. Итак, не теряя времени, приступим.
The author selected the COVID-19 Relief Fund to receive a donation as part of the Write for DOnations program.
This tutorial demonstrates how to reset the root password for MySQL and MariaDB databases installed with the apt package manager on Ubuntu 20.04. The procedure for changing the root password differs depending on whether you have MySQL or MariaDB installed and the default systemd configuration that ships with the distribution or packages from other vendors. While the instructions in this tutorial may work with other system or database server versions, they have been tested with Ubuntu 20.04 and distribution-supplied packages.
This tutorial demonstrates how to reset the root password for MySQL and MariaDB databases installed with the apt package manager on Ubuntu 18.04. The procedure for changing the root password differs depending on whether you have MySQL or MariaDB installed and the default systemd configuration that ships with the distribution or packages from other vendors. While this tutorial’s instructions may work with other system or database server versions, they have been explicitly tested with Ubuntu 18.04 and distribution-supplied packages.
Задержаться в литературе удается немногим, но остаться — почти никому (К.И. Чуковский).

тот учебник покажет вам, как сбросить в MySQL пароль для root на вашем Linux VPS в случае, если Вы забыли его.
1.Войдите как root через SSH и остановитt сервер MySQL.
debian-ubuntu# /etc/init.d/mysql stop
centos-fedora# /etc/init.d/mysqld stop
2. Запустите сервер MySQL с опцией «skip-grant-tables».
# mysqld_safe —skip-grant-tables &
Это отключит проверку подлинности MySQL и запустить процесс в фоновом режиме.
3. Войдите в MySQL как root.
# mysql -u root mysql
4. Сбросьте пароль MySQL.
Заменить «new_your_password» новым паролем!
5. После того, как пароль будет сброшен, запустите сервер MySQL в нормальном режиме.
debian-ubuntu# /etc/init.d/mysql restart
centos-fedora# /etc/init.d/mysqld restart
Теперь вы можете подключиться к MySQL как пользователь root, используя новый пароль.
Введите «mysql -u root -p» в терминале, и введите пароль при появлении соответствующего запроса.

Если вы нашли ошибку, пожалуйста, выделите фрагмент текста и нажмите Ctrl+Enter.
Step 2 — Restarting the Database Server Without Permission Checks
Depending on which database server you’ve installed, the way of starting the server without loading the grant tables differs.
Configuring MariaDB to Start Without Grant Tables
In order to start the MariaDB server without the grant tables, we’ll use the systemd unit file to set additional parameters for the MariaDB server daemon.
Then start the MariaDB server:
This command won’t produce any output, but it will restart the database server, taking into account the new environment variable settings.
You can ensure it started with sudo systemctl status mariadb.
You’ll immediately see a database shell prompt:
Now that you have access to the database server, you can change the root password as shown in Step 3.
Configuring MySQL to Start Without Grant Tables
In order to start the MySQL server without its grant tables, you’ll alter the systemd configuration for MySQL to pass additional command-line parameters to the server upon startup.
systemctl edit mysql
This command will open a new file in the nano editor, which you’ll use to edit MySQL’s service overrides. These change the default service parameters for MySQL.
MySQL service overrides
/usr/sbin/mysqld —skip-grant-tables —skip-networking
The first ExecStart statement clears the default value, while the second one provides systemd with the new startup command, including parameters to disable loading the grant tables and networking capabilities.
Press CTRL-x to exit the file, then Y to save the changes that you made, then ENTER to confirm the file name.
Reload the systemd configuration to apply these changes:
Now start the MySQL server:
The command will show no output, but the database server will start. The grant tables and networking will not be enabled.
Now that you have access to the server, you can change the root password.
/usr/sbin/mysqld —daemonize —pid-file=/run/mysqld/mysqld.pid —skip-grant-tables —skip-networking

этой статье мы покажем вам, как изменить пароль пользователя MySQL. Инструкции должны работать с любым современным дистрибутивом Linux, таким как Ubuntu 18.04 и CentOS 7.
В зависимости от версии сервера MySQL или MariaDB, которую вы используете в своей системе, вам потребуется использовать разные команды для изменения пароля пользователя.
Вы можете найти версию сервера базы данных, введя следующую команду:
Если в вашей системе установлен MySQL, результат будет выглядеть примерно так:
mysql Ver 14.14 Distrib 5.7.22, for Linux (x86_64) using EditLine wrapper
Или вывод, как этот для MariaDB:
mysql Ver 15.1 Distrib 10.1.33-MariaDB, for debian-linux-gnu (x86_64) using readline 5.2
Обязательно запишите, какую версию MySQL или MariaDB вы используете. Если вы хотите получить список всех учетных записей пользователей MySQL, пожалуйста, проверьте это руководство.
Выполните шаги ниже, чтобы изменить пароль пользователя MySQL:
Чтобы получить доступ к оболочке MySQL, введите следующую команду и при появлении запроса введите пароль пользователя root MySQL:
В обоих случаях, если все пойдет хорошо, вы увидите следующий вывод:
Query OK, 0 rows affected (0.00 sec)
Выйдите из командной строки MySQL, выполнив:
Чтобы убедиться, что новый пароль был введен правильно, введите:
Вам будет предложено ввести новый пароль пользователя. Введите его, и вы войдете в свой сервер MySQL.
Из этого руководства вы узнали, как изменить пароль пользователя MySQL или MariaDB. Убедитесь, что новый пароль надежный и безопасный, и храните его в надежном месте.
Not everybody is good at remembering passwords. Do not panic in case you cannot remember the password of your MySQL account. You can still access the MySQL server and change the root password even if you have misplaced or forgotten the root password. But how is a beginner going to perform this operation?
This blog will demonstrate the method for changing the MySQL root password in Ubuntu 22.04. Let’s get started.
Note: The given method for changing password only implies for MySQL version greater or equal to “8”.
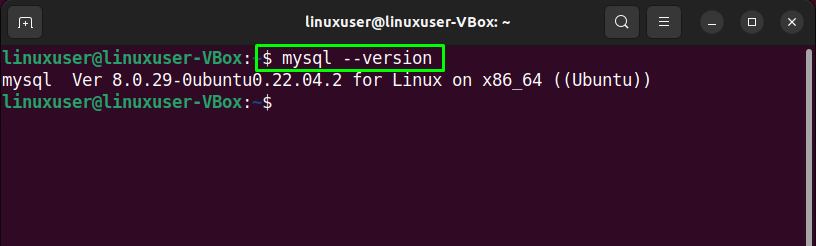
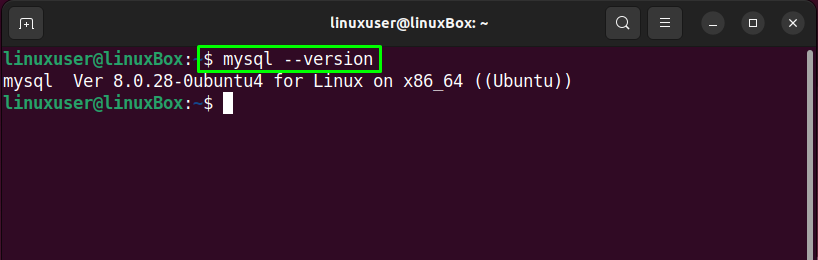
Check MySQL version
First thing you need to do is check the version of installed MySQL on your system:
As you can see, we have installed MySQL version “8.0.29”:
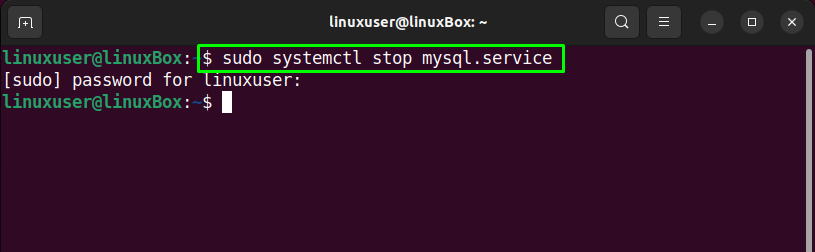
Stop MySQL service
In the next step, utilize the below-given command for stopping the MySQL service:
systemctl stop mysql.service
Now, the MQL service is stopped:

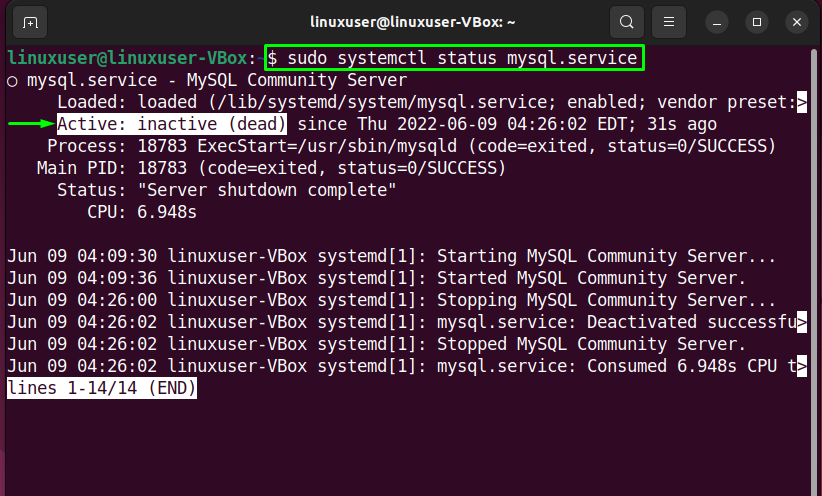
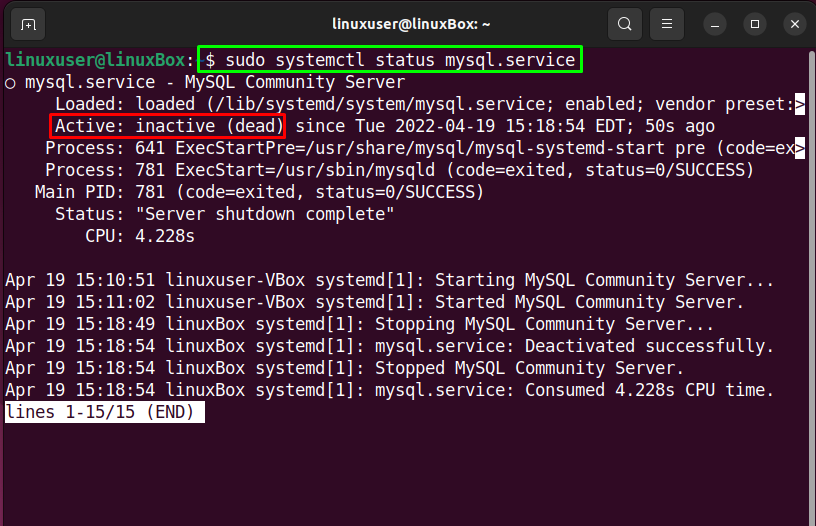
Check MySQL status
After stopping the MySQL service, verify its status with the help of the provided command:
systemctl status mysql.service
The given output indicates that MySQL is currently inactive on our system:
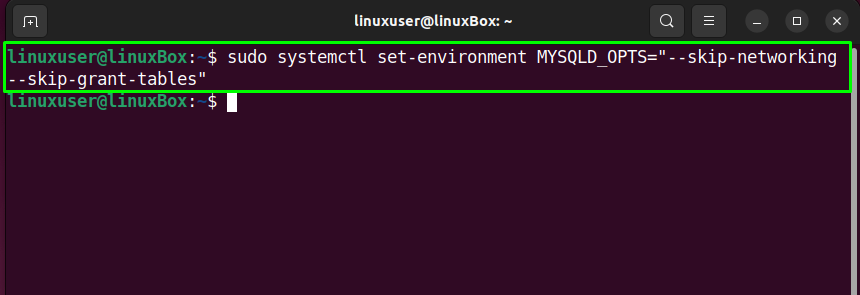
Skipping Networking and Grant Tables
MYSQL server should start without networking checks and granting tables. To do so, set the value of “MYSQLD_OPTS”:
systemctl set-environment =

Then head towards the next step.
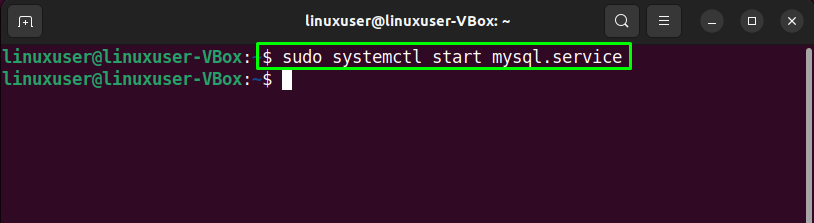
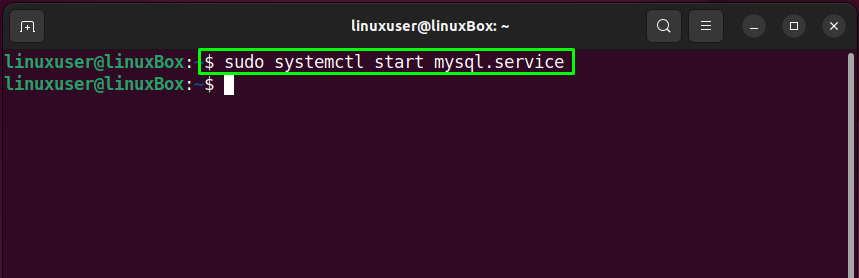
Start MySQL service
systemctl start mysql.service
MySQL service is now started:
Again, check the status of the MySQL service to ensure that it is currently active and running on the Ubuntu 22.04 system:
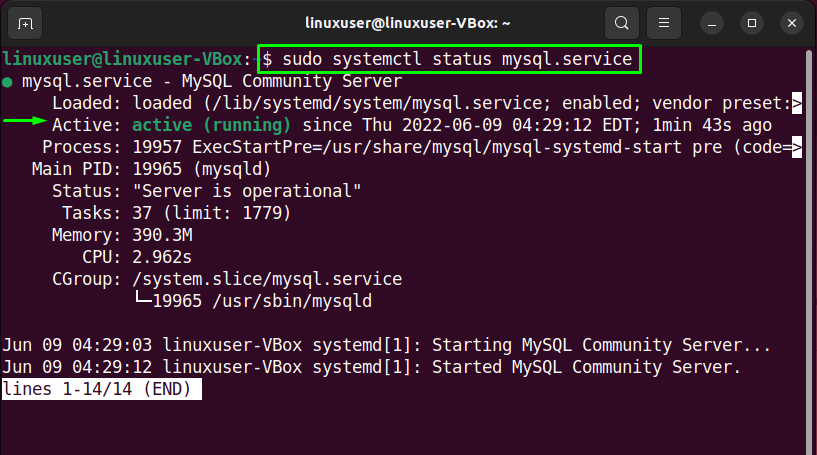
Now head towards the next step.
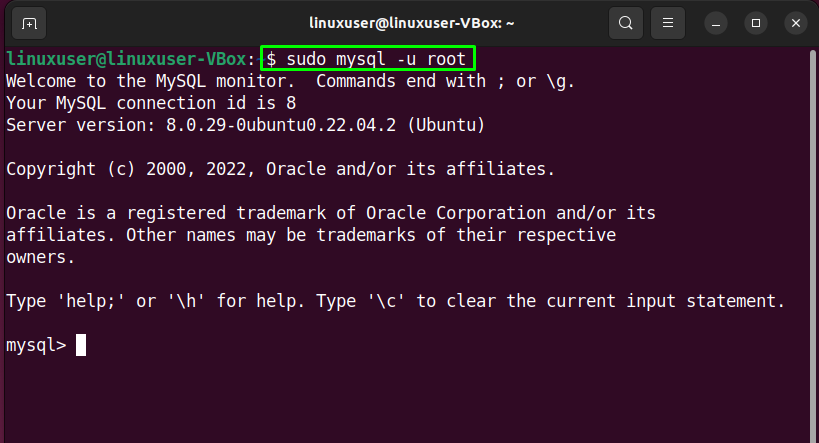
Log in to MySQL
Write out the provided command in terminal for loging in to MySQL account:
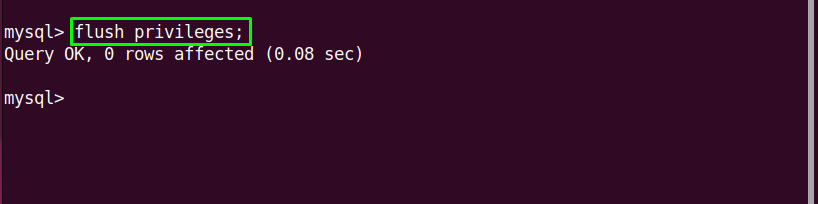
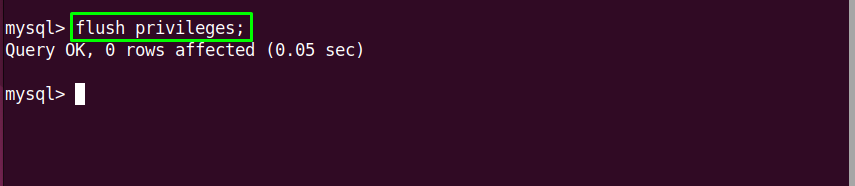
Flush privileges
To change the MySQL root password, firstly, it is required to flush all privileges:
Choose MySQL database
Then choose the MySQL database:

Change MySQL root password
After doing so, utilize the “ALTER” command and specify the new password:

Exit MySQL
Lastly, type “quit” to logout from the active MySQL shell:

Reverting Database to its normal settings
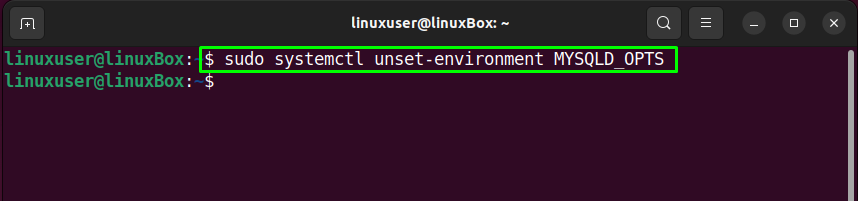
In order to restart MySQL database back in “normal” mode, first of all, “revert” the added changes by unsetting the value of environment variable:
systemctl unset-environment MYSQLD_OPTS

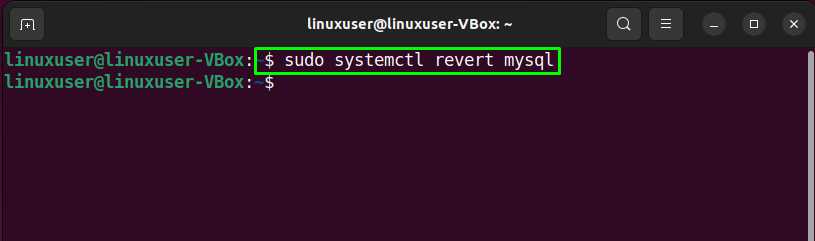
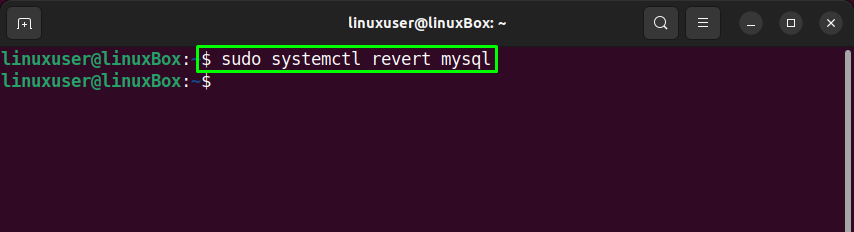
Next, revert “MySQL” for removing the set system configuration:
systemctl revert mysql
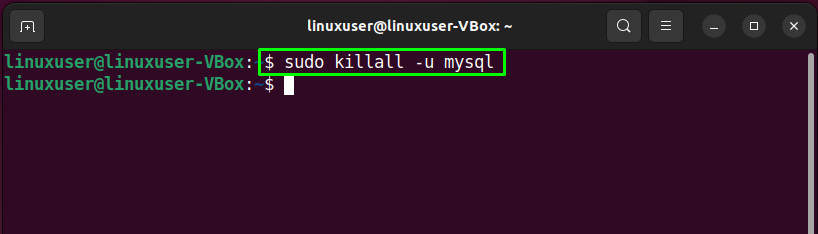
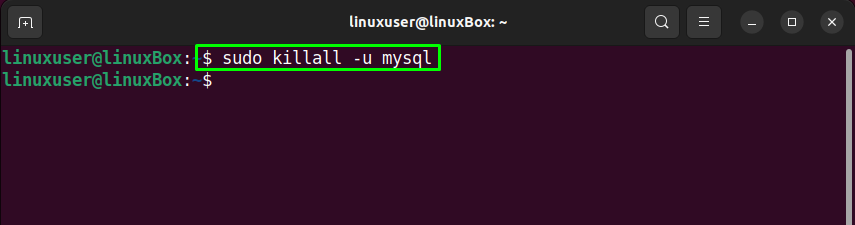
Kill MySQL processes
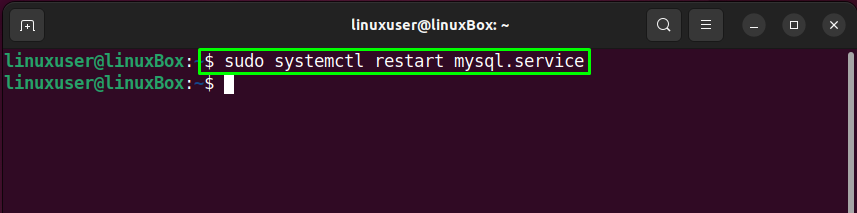
Restart MySQL service
In the final step, restart the MySQL service so that it can take changes from the configured settings:
systemctl restart mysql.service

Now, move to the next step.
That’s it. You have successfully changed the password of MySQL:
We have compiled the easiest method for changing the MySQL root password in Ubuntu 22.04.
Conclusion
To change the MySQL root password in Ubuntu 22.04, firstly, stop the MySQL service and unset the value of the environment variable. After doing so, start the MySQL service, log in to the MySQL root account, flush all privileges, choose a database, and use the “ALTER” command to specify the new password. Lastly, revert the database back to the normal mode, restart the MySQL service, and log in with the new password. This blog demonstrated the method for changing the MySQL root password in Ubuntu 22.04.
I am a Linux enthusiast, I love to read Every Linux blog on the internet. I hold masters degree in computer science and am passionate about learning and teaching.
Passwords are hard to remember, so if you have forgotten the MySQL root password, luckily, there is a way to change it. This post has been written for you, and by the end of this post, you will have successfully changed the password of MySQL.
Before getting straight to the solution, it is assumed that you are using the latest version of the MySQL database on Ubuntu 20.04 LTS system. This post will provide a step-by-step guide on how to change the MySQL root password in Ubuntu 20.04. So, without wasting any time, let’s start.
Check the version of MySQL on Ubuntu 20
First of all, check the version of your MySQL because this post contains the solution of changing the root password on version 8 or higher. If the version of your MySQL is lower than 8, then the solution will be different. The command for checking the version of MySQL is given below:
Stop the MySQL server
To change the MySQL root password, you first need to shut down the MySQL server, and you can do so using the command:
$ sudo systemctl stop mysql.service
$ sudo systemctl status mysql.service
Skip Grant Tables & Networking
To start the MySQL server without granting the tables and networking check, set the environment variable “MYSQLD_OPTS” which MySQL uses on startup:
$ sudo systemctl set-environment MYSQLD_OPTS=»—skip-networking —skip-grant-tables»
Alright, the environment variable is set, and we can log in to the MySQL shell without providing any password.
Start the MySQL service
After setting the environment variable “MYSQLD_OPTS”, start the MySQL service now using the command:
$ sudo systemctl start mysql.service
Confirm the status of the MySQL Server
Confirm the status of the MySQL service, whether it is running or not:

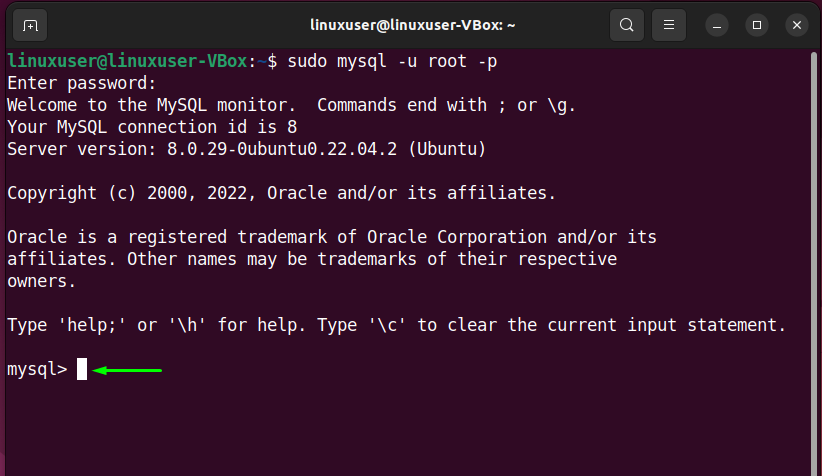
Sign In to the MySQL shell

Without providing any password, you will log in to the MySQL shell.
Alter the root password
Now, flush the privileges first:


Revert Database Server to Normal settings
For restarting the database server in “normal” mode, it is required to “revert” the changes we have made so that the networking is enabled and grant tables are loaded.
To do so, firstly unset the “MYSQLD_OPTS” environment variable which you have set previously:
$ sudo systemctl unset-environment MYSQLD_OPTS
$ sudo systemctl revert mysql
Kill all MySQL processes & Restart the MySQL service
Now, kill all the processes of MySQL before restarting the MySQL server:
$ sudo systemctl restart mysql.service
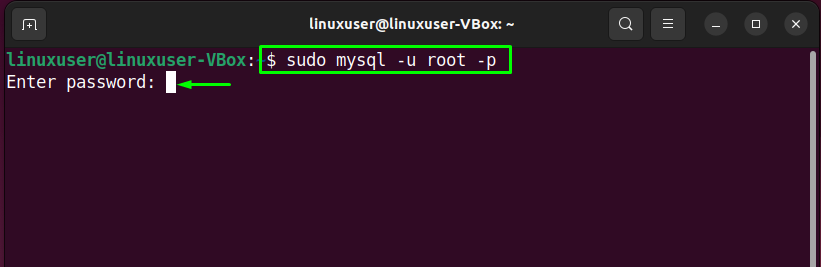
Log in with the newly set Password
Log in to the MySQL shell with the newly set password:
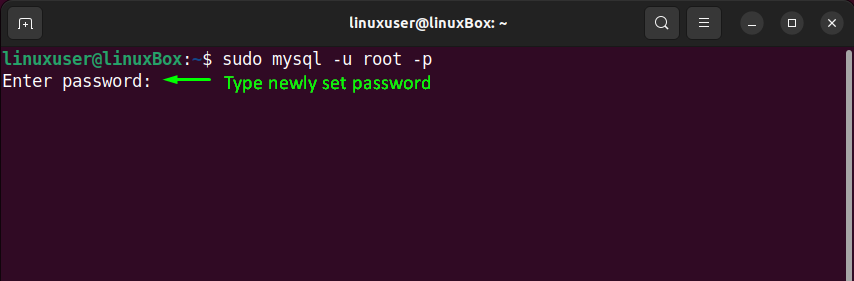
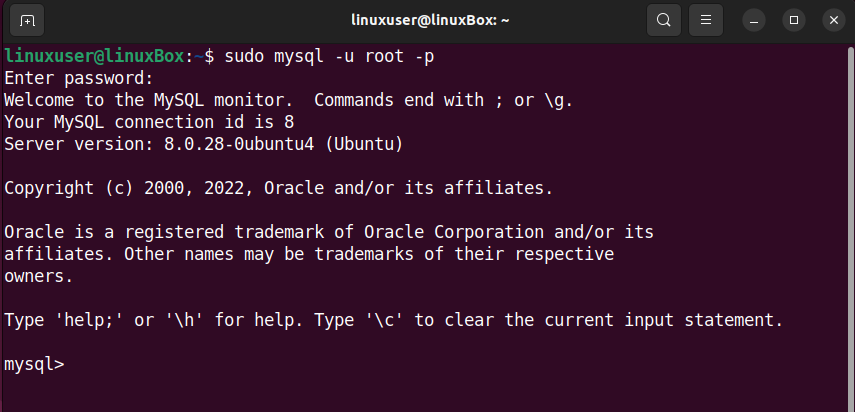
This is it. MySQL’s root password is successfully changed, and you are logged back into the MySQL shell.
Wrap Up
In this step-by-step guide, you have learned to change the MySQL root password on the Ubuntu 20.04 LTS system. This post contains a profound and easy-to-understand solution on resetting the root password of MySQL on Ubuntu 20.04.
A Javascript Developer & Linux enthusiast with 4 years of industrial experience and proven know-how to combine creative and usability viewpoints resulting in world-class web applications. I have experience working with Vue, React & Node.js & currently working on article writing and video creation.
Step 1 — Identifying the Database Version
Most modern Linux distributions ship with either MySQL or MariaDB, a popular drop-in replacement which is fully compatible with MySQL. Depending on the database used and its version, you’ll need to use different commands to recover the root password.
You’ll see some output like this with MySQL:
mysql Ver 14.14 Distrib 5.7.16, for Linux (x86_64) using EditLine wrapper
Or output like this for MariaDB:
mysql Ver 15.1 Distrib 5.5.52-MariaDB, for Linux (x86_64) using readline 5.1
Make note of which database and which version you’re running, as you’ll use them later. Next, you need to stop the database so you can access it manually.
Step 4 — Reverting Your Database Server to Normal Settings
In order to restart the database server in its normal mode, you have to revert the changes you made so that networking is enabled and the grant tables are loaded. Again, the method you use depends on whether you used MariaDB or MySQL.
For MariaDB, unset the MYSQLD_OPTS environment variable you set previously:
Then, restart the service using systemctl:
systemctl restart mariadb
For MySQL, remove the modified systemd configuration:
Removed /etc/systemd/system/mysql.service.d/override.conf.
Removed /etc/systemd/system/mysql.service.d.
Then, reload the systemd configuration to apply the changes:
Finally, restart the service:
You’ll be prompted for a password. Enter your new password, and you’ll gain access to the database prompt as expected.
Why are you looking at this wiki page?
To resolve this problem ,a fast and always working way is the «Password Resetting» .
Step 3 — Changing the Root Password
The database server is now running in a limited mode; the grant tables are not loaded, and there’s no networking support enabled. This lets you access the server without providing a password, but it prohibits you from executing commands that alter data. To reset the root password, you must load the grant tables now that you’ve gained access to the server.
Tell the database server to reload the grant tables by issuing the FLUSH PRIVILEGES command:
You can now change the root password. The method you use depends on whether you are using MariaDB or MySQL.
Changing the MariaDB Password
You’ll see this output indicating that the password changed:
Query OK, 1 row affected (0.00 sec)
Query OK, 0 rows affected (0.01 sec)
The password is now changed. Type exit to exit the MariaDB console and proceed to Step 4 to restart the database server in normal mode.
Changing the MySQL Password
You’ll see this output indicating the password was changed successfully:
You’ll see output similar to the previous command:
The password is now changed. Exit the MySQL console by typing exit.
Let’s restart the database in normal operational mode.
Step 4 — Changing the Root Password
Let’s tell the database server to reload the grant tables by issuing the FLUSH PRIVILEGES command.
Now we can actually change the root password.
For MySQL 5.7.5 and older as well as MariaDB 10.1.20 and older, use:
Make sure to replace new_password with your new password of choice.
Remember to reload the grant tables after this.
In either case, you should see confirmation that the command has been successfully executed.
The password has been changed, so you can now stop the manual instance of the database server and restart it as it was before.
Шаг 1. Проверьте версию MySQL в Ubuntu 20
Прежде всего, проверьте версию своего MySQL, потому что этот пост содержит решение по изменению пароля root в версии 8 или выше. Если версия вашего MySQL ниже 8, решение будет другим. Команда для проверки версии MySQL приведена ниже.
Шаг 2. Остановите сервер MySQL
Чтобы изменить пароль root MySQL, вам сначала нужно выключить сервер MySQL, и вы можете сделать это с помощью команды:
$ sudo systemctl stop mysql.service
Проверьте состояние сервера MySQL, чтобы проверить его, используя команду:
$ sudo systemctl status mysql.service
Step 1 — Identifying the Database Version and Stopping the Server
If you’re running MariaDB, you’ll see “MariaDB” preceded by the version number in the output:
mysql Ver 15.1 Distrib 10.3.25-MariaDB, for debian-linux-gnu (x86_64) using readline 5.2
You’ll see output like this if you’re running MySQL:
mysql Ver 8.0.22-0ubuntu0.20.04.3 for Linux on x86_64 ((Ubuntu))
systemctl stop mariadb
For MySQL, shut down the database server by running:
With the database stopped, you can restart it in safe mode to reset the root password.
mysql Ver 15.1 Distrib 10.1.47-MariaDB, for debian-linux-gnu (x86_64) using readline 5.2
mysql Ver 14.14 Distrib 5.7.32, for Linux (x86_64) using EditLine wrapper
Prerequisites
To recover your root MySQL/MariaDB password, you will need:
Шаг 7. Измените пароль root
Теперь сначала удалите привилегии.
Выберите базу данных MySQL.
И установите новый пароль для пользователя root с помощью команды Alter, набрав следующую инструкцию.
Вместо «the-new-password» укажите свой новый пароль. После успешного изменения пароля root MySQL выйдите из оболочки MySQL.
How can I reset my MySQL password?
For either method, once have received a message indicating a successful query (one or more rows affected), flush privileges:
Then stop the mysqld process and relaunch it with the classical way:
sudo /etc/init.d/mysql stop
sudo /etc/init.d/mysql start
All packages can be found browsing synaptic.
Войдите в систему с новым паролем
Теперь войдите в оболочку MySQL с новым установленным паролем.
Введите недавно установленный пароль в команде ALTER.
Все. Пароль root MySQL успешно изменен, и вы снова вошли в оболочку MySQL.
Шаг 4. Запустите службу MySQL
После установки переменной окружения MYSQLD_OPTS запустите службу MySQL, используя команду:
$ sudo systemctl start mysql.service
To recover your MySQL or MariaDB root password, you will need:
Query OK, 0 rows affected (0.001 sec)
Шаг 3. Пропустите таблицы грантов и нетворкинг
Чтобы запустить сервер MySQL без предоставления таблиц и проверки сети, установите переменную среды MYSQLD_OPTS, которую MySQL использует при запуске.
$ sudo systemctl set-environment MYSQLD_OPTS=»—skip-networking —skip-grant-tables»
Подтвердите статус сервера MySQL
Подтвердите статус службы MySQL, работает она или нет:
Шаг 6. Войдите в оболочку MySQL
Без ввода пароля вы войдете в оболочку MySQL.
Another way, purge
I also had some problems with mysql just not accepting my password. I tried the other way as well and it just ended up being difficult. I had not been able to use mysql so it was empty anyway. If this is also your case you may opt for the PURGE way. This removes every file related to mysql. Depending on your installation the packages might be diffrent, mysql-server in 6.10 is called mysql-server-5.0 as an example.
USE THIS AS A LAST RESORT METHOD, YOU WILL LOSE ALL YOUR MYSQL DATA
sudo apt-get —purge remove mysql-server mysql-common mysql-client
sudo apt-get install mysql-server mysql-common mysql-client
In the next step be sure to chance the your-new-password with the password you want!
You should now be logged in as root. Make sure to notedown your password! Thanks to Illuvator for posting this method in the ubuntu forum.
Шаг 8. Завершите все процессы MySQL и перезапустите службу MySQL
Прежде всего, убейте все процессы MySQL еще до перезапуска сервера MySQL.
Получив результат, нажмите «Enter» и перезапустите сервер MySQL, используя команду, приведенную ниже.
$ sudo systemctl restart mysql.service
Step 2 — Stopping the Database Server
To change the root password, you have to shut down the database server beforehand.
You can do that for MySQL with:
And for MariaDB wtih:
After the database server is stopped, you’ll access it manually to reset the root password.
Итог
В этой статье вы научились изменять пароль root MySQL в системе Ubuntu 20.04 LTS. Этот пост содержит глубокое и простое для понимания решение по сбросу пароля root MySQL в Ubuntu 20.04.
")


")