
- 6.2.22 Troubleshooting Problems Connecting to MySQL
- To log in as a root user in Linux:
- Installing and Starting MySQL
- Steps to change plugin and password
- Recover your MySQL password
- How To Solve The MySQL Error: Access denied for user root@localhost
- ПРИМЕЧАНИЕ
- ОБНОВЛЕНИЕ 2014-04-26 20
- Connecting to the MySQL Server with the mysql Client
- Legal Notices
- Other Helpful Resources
- Some Basic Operations with MySQL
- Cause of the issue
- How to set up, change, and recover a MySQL root password
- Setting the password for the first time
- Changing the MySQL root user password
- Other Important Tasks to Perform
- ОБНОВЛЕНИЕ 2014-05-09 16
- Conclusion
6.2.22 Troubleshooting Problems Connecting to MySQL
Note: Empty/blank password means there is no password; hence anyone can log in as long as MySQL privileges have been granted.
To log in as a root user in Linux:
- Select start menu > Log Out on the top right corner. This allows you to log out of the user account that you are using at the moment.
- You will now see a login window, and here is where you log in using the username “root” and the password you set up for the root user. If there are several users in the login window, select others and log in.
If the password is not set up or you forgot or need to change your MySQL password, below is a guide on how to do set up/recover the password.
In short, on MariaDB
UPDATE mysql.user SET plugin = 'mysql_native_password', Password = PASSWORD('NEWPASSWORD') WHERE User = 'root';where you replace NEWPASSWORD with the password you want, and everything else verbatim.
mysql -uroot -pselect User,host,plugin from mysql.user;
+----------------+-----------+-----------------------+
| User | host | plugin |
+----------------+-----------+-----------------------+
| root | localhost | auth_socket |
+----------------+-----------+-----------------------+On MariaDB (<10.2, see comments below) which is on the Ubuntu version 16 as of 2017 this should suffice. NEWPASSWORD is your password. mysql_native_password you type verbatim.
UPDATE mysql.user SET plugin = 'mysql_native_password', Password = PASSWORD('NEWPASSWORD') WHERE User = 'root';(It’s possible that setting the plugin to empty would work. YMMV. I didn’t try this. So this is an alternative.)
UPDATE mysql.user SET plugin = '', Password = PASSWORD('NEWPASSWORD') WHERE User = 'root';ALTER USER 'root'@'localhost' IDENTIFIED WITH mysql_native_password BY 'NEWPASSWORD';FLUSH PRIVILEGES;Прежде чем что-то испортить, при входе в систему с помощью $ mysql -u root -p и показе баз данных:
+--------------------+
| Database |
+--------------------+
| information_schema |
| mysql |
| performance_schema |
| game_data |
| test |
+--------------------+
Затем я попытался создать нового пользователя и заметил, что с PRIVILEGES что-то не так.
Затем я снова пытаюсь создать «root», но получаю ошибку «Отказано в доступе» при предоставлении всех прав.
mysql> CREATE USER 'root'@'localhost' IDENTIFIED BY 'password';
mysql> grant all privileges on *.* to 'root'@'localhost' identified by 'password' with grant option;
ERROR 1045 (28000): Access denied for user 'root'@'localhost' (using password: YES)
Если я снова войду в MySQL, используя $ mysql -u root -p , и покажу базы данных,
+--------------------+
| Database |
+--------------------+
| information_schema |
+--------------------+
Все остальные базы данных исчезли.
Как мне исправить MySQL сейчас?
Я не могу найти базу данных «mysql», не могу создать базу данных, создать пользователя, все, что я пытаюсь сделать, приведет к ошибке.
Должен ли я переустановить MySQL с помощью MacPorts? Если переустановить, я потеряю базу данных game_data , верно?
Посмотрите на последние три строки
Server version: 5.1.61-log Source distribution
Protocol version: 10
Connection: 127.0.0.1 via TCP/IP
Последняя строка говорит 127.0.0.1 via TCP/IP так что вы на 100% используете протокол TCP/IP.
Если вы сделали, это должно сказать
root@127.0.0.1 | root@127.0.0.1Было бы странно, если бы вывод
root@127.0.0.1 | root@localhostСуществует два этапа управления клиентским доступом:
На первом этапе клиент пытается подключиться, и сервер либо принимает, либо отклоняет подключение. Чтобы попытка увенчалась успехом, некоторые записи в пользовательской таблице должны соответствовать хосту, с которого соединяется клиент, имени пользователя и паролю.
На втором этапе (который происходит только в том случае, если клиент уже успешно подключился) сервер проверяет каждый запрос, который он получает от клиента, чтобы увидеть, имеет ли клиент достаточные привилегии для его выполнения.
Сервер сопоставляет клиента с записями в таблицах предоставления на основе хоста, с которого клиент соединяется, и пользователя, которого предоставляет клиент. Однако возможно совпадение нескольких записей:
Installing and Starting MySQL
Linux.
The easiest way to install MySQL is to use the
MySQL
repositories:For Linux distributions that do not support the
MySQL
repositories or the installation packages mentioned
above, you can install MySQL using generic binaries:Detailed instructions, as well as other methods for
installation, can be found in
Installing MySQL on Linux.Microsoft Windows.
The recommended way to install MySQL on Microsoft Windows is
to use the MySQL Installer; see
MySQL Installer Method on how to
download and run the MySQL Installer. For a detailed
explanation for each step of the installation wizard, see
MySQL Installer for Windows.If you have chosen to configure MySQL as a Windows service
during the installation process, which is the default option
(see Windows Service for details),
the MySQL server will start automatically after the
installation process is completed.Detailed information regarding Windows installation, including
alternative installation methods and instructions for
troubleshooting, can be found in
Installing MySQL on Microsoft Windows.macOS.
The recommended way for installing MySQL on macOS is to use
the macOS installer package. See
Installing MySQL on macOS Using Native Packages on how to download
and run the installer package, and how to start the MySQL
server afterward.Detailed information regarding installation on macOS can be
found in Installing MySQL on macOS.Other platforms.
For installations on other platforms (for example, FreeBSD
and Solaris), as well as installation methods not covered
above, see Installing and Upgrading MySQL.
1) Install MariaDB
sudo apt-get -y install mariadb-server mariadb-client
sudo mysql_secure_installation (answer to some interactive questions): Enter current password for root (enter for none): <enter> Set root password: n Remove anonymous users: n Disallow root login remotely: n Remove test database and access to it: n Reload privilege tables now: Y
If you want to uninstall mariaDB:
sudo apt-get purge mysql-server mysql-client mysql-common mysql-server-core-5.5 mysql-client-core-5.5
sudo rm -rf /etc/mysql /var/lib/mysql
sudo apt-get autoremove
sudo apt-get autoclean
sudo apt-get -y install phpmyadmin (and answer some interactive questions) Configuring phpmyadmin: Web server to reconfigure automatically: apache2 Configure database for phpmyadmin with dbconfig-common: Yes MySQL application password for phpmyadmin: <blank>sudo ln -s /etc/phpmyadmin/apache.conf /etc/apache2/conf-available/phpmyadmin.conf
sudo a2enconf phpmyadmin.conf
sudo service apache2 restartsudo dpkg-reconfigure phpmyadmin
<Ok>
Reinstall database for phpmyadmin: <Yes>
Connection method for MySQL database server for phpmyadmin: TCP/IP
Host name of the MySQL database server for phpmyadmin: localhost
Port number for the MySQL service: 3306
MySQL database name for phpmyadmin: phpmyadmin
<Ok>
MySQL username for phpmyadmin: root
MySQL application password for phpmyadmin: pass # OR ANY PASSWORD YOU WANT
Password confirmation: pass
Name of the database's administrative user: root
Web server to reconfigure automatically: apache2
An error occurred while installing the database: ignoreusername: root
password: passyou’ll be able to create databases.
Steps to change plugin and password
open terminal and run
sudo mysql -u root. You should see a greeting message andmysql>prompt. This is the MySQL shell, which is different from your command-line shell, so only SQL statements are accepted here.mysql> use mysql Reading table information for completion of table and column names You can turn off this feature to get a quicker startup with -A Database changed mysql> flush privileges; Query OK, 0 rows affected (0.00 sec) mysql> UPDATE user SET plugin='mysql_native_password',authentication_string=PASSWORD('newpassword') WHERE user = 'root'; Query OK, 1 row affected, 1 warning (0.00 sec) Rows matched: 1 Changed: 1 Warnings: 1Exit and attempt to sign in:
mysql> exit
Bye
$ sudo systemctl restart mysql
$ sudo mysql -u root -p
Enter password:
Welcome to the MySQL monitor. Commands end with ; or \g.
Your MySQL connection id is 5
Server version: 5.7.21-1 (Debian)
Copyright (c) 2000, 2018, Oracle and/or its affiliates. All rights reserved.
Oracle is a registered trademark of Oracle Corporation and/or its
affiliates. Other names may be trademarks of their respective
owners.
Type 'help;' or '\h' for help. Type '\c' to clear the current input statement.
mysql>
Recover your MySQL password
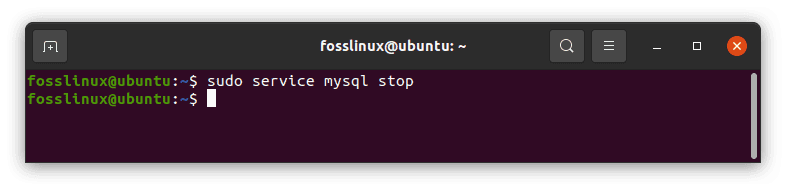
1. Stop the MySQL server process using the command:
sudo service mysql stop
service stop MySQL
sudo mysqld_safe --skip-grant-tables --skip-networking &
mysql -u root
mysql> use mysql;
mysql> update user set authentication_string=password('NEWPASSWORD') where user='root';
mysql> flush privileges;
mysql> quit
Once you are done running all the commands mentioned above, proceed and restart the MySQL daemon using this command:
sudo service mysql restart

restart MySQL service
By now, you should be able to log into MySQL using the newly set password.
That’s all. We believe you are now in a position to set, reset, and recover your MySQL root password.
How To Solve The MySQL Error: Access denied for user root@localhost
mysql -u root -p
sudo mysql
Then, input your passcode at the prompt. A MySQL shell will load.
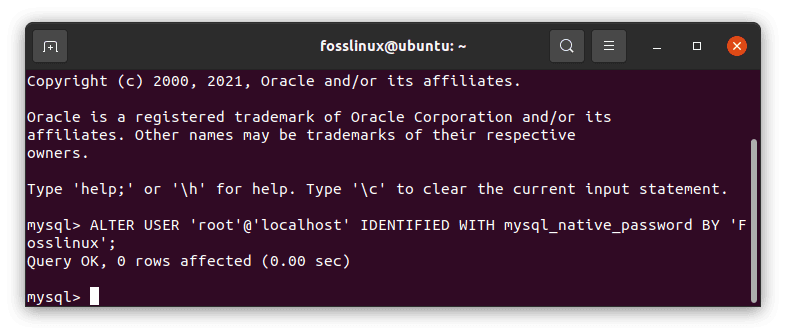
ALTER USER 'root'@'localhost' IDENTIFIED WITH mysql_native_password BY 'insert_password';
For the sake of the tutorial, I will change the password to ‘Fosslinux as shown in the command line and output below:
ALTER USER 'root'@'localhost' IDENTIFIED WITH mysql_native_password BY 'Fosslinux';
open MySQL shell
After running the commands listed above, exit the MySQL shell by clicking CTRL + D on your keyboard or key in “exit” on the MySQL shell and click enter. You do not have to restart the MySQL service for you to log in using the command below:
sudo service mysql restart 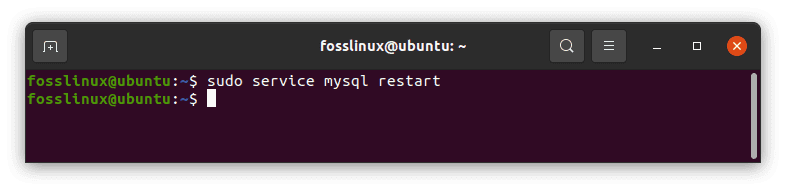
restart MySQL service
At this point, you can now attempt to access MySQL with root again. In the terminal, key in:
mysql -u root -p

login to MySQL as root
ПРИМЕЧАНИЕ
Пожалуйста, убедитесь, что в ОС определено 127.0.0.1 . Запустите это:
cat /etc/hosts | grep -c "127\.0\.0\.1"Если вы получаете 0 , то ОС не знает об этом. Вам нужно добавить 127.0.0.1 в /etc/hosts и перезапустить сеть, а затем mysql.
ОБНОВЛЕНИЕ 2014-04-26 20
То, что я собираюсь сказать, может показаться глупым, но в документации используется TCP вместо TCP
shell> mysql --host=127.0.0.1
shell> mysql --protocol=TCP
Опция —protocol позволяет вам установить определенный тип соединения, даже если другие опции обычно по умолчанию используют какой-либо другой протокол.
Попробуйте использовать протокол = TCP, как это
mysql -u root -h 127.0.0.1 --protocol=TCP -ANe"SELECT USER(),CURRENT_USER()"
mysql -u root -h localhost --protocol=TCP -ANe"SELECT USER(),CURRENT_USER()"
чтобы увидеть, если это имеет значение.
Connecting to the MySQL Server with the mysql Client
$> mysql -u root -pC:\> mysql -u root -p
You are then asked for the root password, which
was assigned in different manners according to the way you
installed MySQL. The installation and initialization instructions
given above already explain the root password,
but here is a quick summary:
$> sudo grep 'temporary password' /var/log/mysqld.logFor installations using the MySQL APT repository or Debian
packages directly downloaded from Oracle, you should have
already assigned therootpassword
yourself; if you have not done that for some reason, see the
«Important» note
here
or How to Reset the Root Password.[Warning] A temporary password is generated for root@localhost: iTag*AfrH5ejDepending on the configuration you used to initialize the
MySQL server, the error output might have been directed to
the MySQL error log; go
there and check for the password if you do not see the
above message on your screen. The error log is a file with
a.errextension, usually found under
the server’s data directory (the location of which depends
on the server’s configuration, but is likely to be the
datafolder under the base directory
of your MySQL installation, or the
/var/lib/mysqlfolder).If you have initialized the data directory with
mysqld --initialize-insecureinstead, the
rootpassword is empty.For installations on Windows using the MySQL Installer and OS
X using the installer package, you should have assigned a
rootpassword yourself.
If you have forgotten the root password you
have chosen or have problems finding the temporary
root password generated for you, see
How to Reset the Root Password.
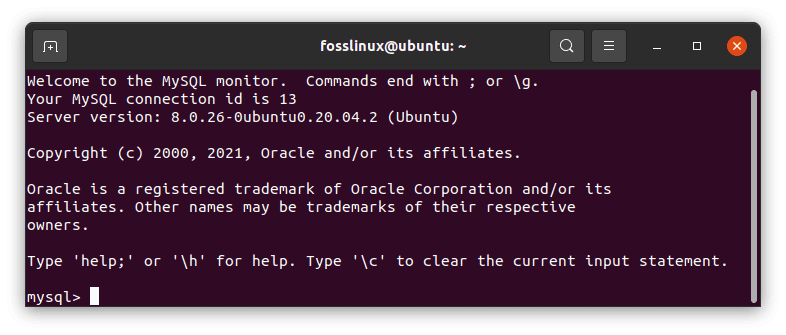
Once you are connected to the MySQL server, a welcome message is
displayed and the mysql> prompt appears, which
looks like this:
Welcome to the MySQL monitor. Commands end with ; or \g.
Your MySQL connection id is 4
Server version: 5.7.32 MySQL Community Server (GPL)
Copyright (c) 2000, 2020, Oracle and/or its affiliates.
Oracle is a registered trademark of Oracle Corporation and/or its
affiliates. Other names may be trademarks of their respective
owners.
Type 'help;' or '\h' for help. Type '\c' to clear the current input statement.
mysql>
mysql> ALTER USER 'root'@'localhost' IDENTIFIED BY 'new_password'; Here are a few useful things to remember when using the
client:
Client commands (for example,
help,
quit, andclear) and
keywords in SQL statements (for example,
SELECT,
CREATE TABLE, and
INSERT) are not case-sensitive.Column names are case-sensitive. Table names are
case-sensitive on most Unix-like platforms, but not
case-sensitive on Windows platforms. Case-sensitivity during
string comparison depends on the character collation you use.
In general, it is a good idea to treat all identifiers
(database names, table names, column names, etc.) and strings
as case-sensitive. See
Identifier Case Sensitivity and
Case Sensitivity in String Searches for details.
To disconnect from the MySQL server, type QUIT
or \q at the client:
mysql> QUITLegal Notices
This software and related documentation are provided under a license
agreement containing restrictions on use and disclosure and are
protected by intellectual property laws. Except as expressly
permitted in your license agreement or allowed by law, you may not
use, copy, reproduce, translate, broadcast, modify, license,
transmit, distribute, exhibit, perform, publish, or display any
part, in any form, or by any means. Reverse engineering,
disassembly, or decompilation of this software, unless required by
law for interoperability, is prohibited.
The information contained herein is subject to change without notice
and is not warranted to be error-free. If you find any errors,
please report them to us in writing.
This software or hardware is developed for general use in a variety
of information management applications. It is not developed or
intended for use in any inherently dangerous applications, including
applications that may create a risk of personal injury. If you use
this software or hardware in dangerous applications, then you shall
be responsible to take all appropriate fail-safe, backup,
redundancy, and other measures to ensure its safe use. Oracle
Corporation and its affiliates disclaim any liability for any
damages caused by use of this software or hardware in dangerous
applications.
Oracle, Java, and MySQL are registered trademarks of Oracle and/or its
affiliates. Other names may be trademarks of their respective
owners.
Intel and Intel Inside are trademarks or registered trademarks of
Intel Corporation. All SPARC trademarks are used under license and
are trademarks or registered trademarks of SPARC International, Inc.
AMD, Epyc, and the AMD logo are trademarks or registered trademarks
of Advanced Micro Devices. UNIX is a registered trademark of The
Open Group.
This software or hardware and documentation may provide access to or
information about content, products, and services from third
parties. Oracle Corporation and its affiliates are not responsible
for and expressly disclaim all warranties of any kind with respect
to third-party content, products, and services unless otherwise set
forth in an applicable agreement between you and Oracle. Oracle
Corporation and its affiliates will not be responsible for any loss,
costs, or damages incurred due to your access to or use of
third-party content, products, or services, except as set forth in
an applicable agreement between you and Oracle.
You may create a printed copy of this documentation solely for your
own personal use. Conversion to other formats is allowed as long as
the actual content is not altered or edited in any way. You shall
not publish or distribute this documentation in any form or on any
media, except if you distribute the documentation in a manner
similar to how Oracle disseminates it (that is, electronically for
download on a Web site with the software) or on a CD-ROM or similar
medium, provided however that the documentation is disseminated
together with the software on the same medium. Any other use, such
as any dissemination of printed copies or use of this documentation,
in whole or in part, in another publication, requires the prior
written consent from an authorized representative of Oracle. Oracle
and/or its affiliates reserve any and all rights to this
documentation not expressly granted above.
Other Helpful Resources
Some Basic Operations with MySQL
Here are some basic operations with the MySQL server.
SQL Statements explains in detail the rich
syntax and functionality of the SQL statements that are
illustrated below.
Showing existing databases.
Use a SHOW DATABASES
statement:
mysql> SHOW DATABASES;
+--------------------+
| Database |
+--------------------+
| information_schema |
| mysql |
| performance_schema |
| sys |
+--------------------+
4 rows in set (0.00 sec)
Creating a new database.
Use a CREATE DATABASE
statement:
mysql> CREATE DATABASE pets;
Query OK, 1 row affected (0.01 sec)
Check if the database has been created:
mysql> SHOW DATABASES;
+--------------------+
| Database |
+--------------------+
| information_schema |
| mysql |
| performance_schema |
| pets |
| sys |
+--------------------+
5 rows in set (0.00 sec)
Creating a table inside a database.
First, pick the database in which you want to create the table
with a USE statement:
mysql> USE pets
Database changed
The USE statement tells MySQL to use
pets as the default database for subsequent
statements. Next, create a table with a
CREATE TABLE statement:
CREATE TABLE cats
( id INT unsigned NOT NULL AUTO_INCREMENT, # Unique ID for the record name VARCHAR(150) NOT NULL, # Name of the cat owner VARCHAR(150) NOT NULL, # Owner of the cat birth DATE NOT NULL, # Birthday of the cat PRIMARY KEY (id) # Make the id the primary key
);
Check if the table has been created with a
SHOW TABLES statement:
mysql> SHOW TABLES;
+----------------+
| Tables_in_pets |
+----------------+
| cats |
+----------------+
1 row in set (0.00 sec)
DESCRIBE shows information on all
columns of a table:
mysql> DESCRIBE cats;
+-------+------------------+------+-----+---------+----------------+
| Field | Type | Null | Key | Default | Extra |
+-------+------------------+------+-----+---------+----------------+
| id | int(10) unsigned | NO | PRI | NULL | auto_increment |
| name | varchar(150) | NO | | NULL | |
| owner | varchar(150) | NO | | NULL | |
| birth | date | NO | | NULL | |
+-------+------------------+------+-----+---------+----------------+
4 rows in set (0.00 sec)
INSERT INTO cats ( name, owner, birth) VALUES ( 'Sandy', 'Lennon', '2015-01-03' ), ( 'Cookie', 'Casey', '2013-11-13' ), ( 'Charlie', 'River', '2016-05-21' ); See Literal Values for how to write string, date, and
other kinds of literals in MySQL.
Retrieving records from a table.
Use a SELECT statement, and
to match all columns:
mysql> SELECT * FROM cats;
+----+---------+--------+------------+
| id | name | owner | birth |
+----+---------+--------+------------+
| 1 | Sandy | Lennon | 2015-01-03 |
| 2 | Cookie | Casey | 2013-11-13 |
| 3 | Charlie | River | 2016-05-21 |
+----+---------+--------+------------+
3 rows in set (0.00 sec)
To select specific columns and rows by a certain condition using
the WHERE clause:
mysql> SELECT name FROM cats WHERE owner = 'Casey';
+--------+
| name |
+--------+
| Cookie |
+--------+
1 row in set (0.00 sec)
Deleting a record from a table.
Use a DELETE statement to delete a
record from a table, specifying the criterion for deletion with
the WHERE clause:
mysql> DELETE FROM cats WHERE name='Cookie';
Query OK, 1 row affected (0.05 sec)
mysql> SELECT * FROM cats;
+----+---------+--------+------------+
| id | name | owner | birth |
+----+---------+--------+------------+
| 1 | Sandy | Lennon | 2015-01-03 |
| 3 | Charlie | River | 2016-05-21 |
+----+---------+--------+------------+
2 rows in set (0.00 sec)
mysql> ALTER TABLE cats ADD gender CHAR(1) AFTER name;
Query OK, 0 rows affected (0.24 sec)
Records: 0 Duplicates: 0 Warnings: 0Use DESCRIBE to check the result:
mysql> DESCRIBE cats;
+--------+------------------+------+-----+---------+----------------+
| Field | Type | Null | Key | Default | Extra |
+--------+------------------+------+-----+---------+----------------+
| id | int(10) unsigned | NO | PRI | NULL | auto_increment |
| name | varchar(150) | NO | | NULL | |
| gender | char(1) | YES | | NULL | |
| owner | varchar(150) | NO | | NULL | |
| birth | date | NO | | NULL | |
+--------+------------------+------+-----+---------+----------------+
5 rows in set (0.00 sec)
SHOW CREATE TABLE shows a
CREATE TABLE statement, which
provides even more details on the table:
mysql> SHOW CREATE TABLE cats\G
*************************** 1. row *************************** Table: cats
Create Table: CREATE TABLE `cats` ( `id` int(10) unsigned NOT NULL AUTO_INCREMENT, `name` varchar(150) NOT NULL, `gender` char(1) DEFAULT NULL, `owner` varchar(150) NOT NULL, `birth` date NOT NULL, PRIMARY KEY (`id`)
) ENGINE=InnoDB AUTO_INCREMENT=4 DEFAULT CHARSET=latin1
1 row in set (0.00 sec)
mysql> ALTER TABLE cats DROP gender;
Query OK, 0 rows affected (0.19 sec)
Records: 0 Duplicates: 0 Warnings: 0
mysql> DESCRIBE cats;
+-------+------------------+------+-----+---------+----------------+
| Field | Type | Null | Key | Default | Extra |
+-------+------------------+------+-----+---------+----------------+
| id | int(10) unsigned | NO | PRI | NULL | auto_increment |
| name | varchar(150) | NO | | NULL | |
| owner | varchar(150) | NO | | NULL | |
| birth | date | NO | | NULL | |
+-------+------------------+------+-----+---------+----------------+
4 rows in set (0.00 sec)Cause of the issue
mysql> select user,authentication_string,plugin from user where user='root';
+------+-----------------------+-------------+
| user | authentication_string | plugin |
+------+-----------------------+-------------+
| root | | auth_socket |
+------+-----------------------+-------------+
1 row in set (0.00 sec)
From the documentation:
How to set up, change, and recover a MySQL root password
Please note: there have been many attacks across the IT landscape, thus necessitating very strong passwords, which I highly recommend for your databases. You can try out an unsystematic password generator, then save the password via the aid of a password manager.
Let’s carry on.
Setting the password for the first time
Typically, during the installation of MySQL, you are required to set an initial password. However, if this was not done while installing and setting up MySQL, you will first have to set up a password. Here is how to do that:
- First, open up a terminal window.
- After launching the terminal, paste and execute this command:
mysqladmin -u root password Fosslinux
Where Fosslinux is the password that you will be using from now on, this means that every time you log into MySQL using the command mysql -u root -p, you will have to key in the password we have just configured.
mysql_secure_installation
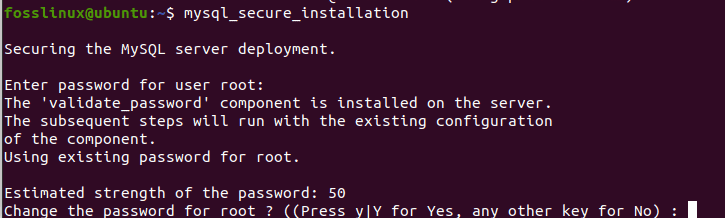
MySQL secure installation
After setting up the MySQL root password for the first time, it is time to learn how to change it.
Changing the MySQL root user password
- First, create a new file using the command below:
ALTER USER 'root'@'localhost' IDENTIFIED BY 'Fosslinux$11';
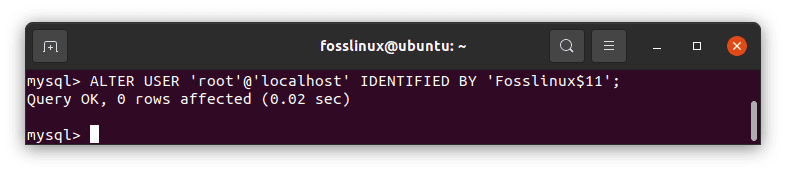
create new password
Where Fosslinux$11 is the new password that will be used. Remember to satisfy the current password policy by combining uppercase, lowercase, numeric and special characters.
Save the file as ~/mysql-pwd
- Next, stop the MySQL daemon using the following command:
sudo systemctl stop mysql
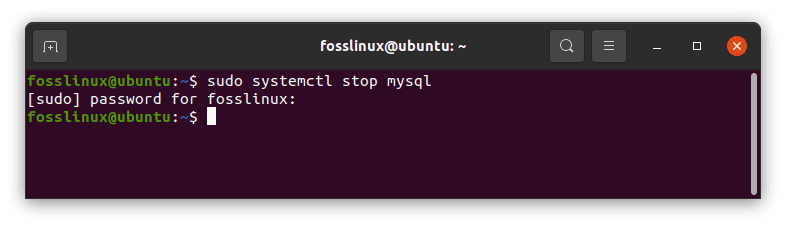
stop MySQL service
- Now that the daemon is stopped, issue and execute the following command on your terminal:
sudo mysqld -init-file=~/mysql-pwd
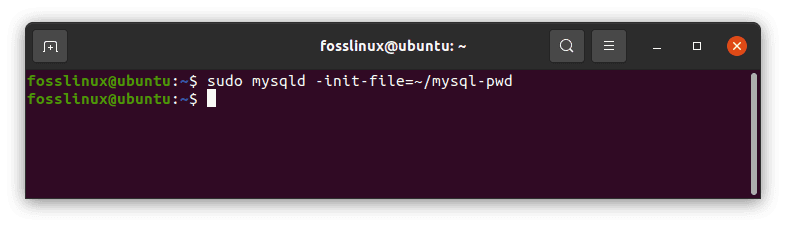
save MySQL password
- As soon as the command prompt completes executing the above command, proceed and restart the MySQL daemon using the following command:
sudo systemctl start mysql
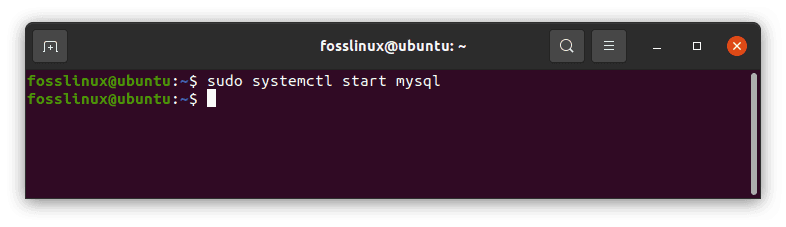
start MySQL service
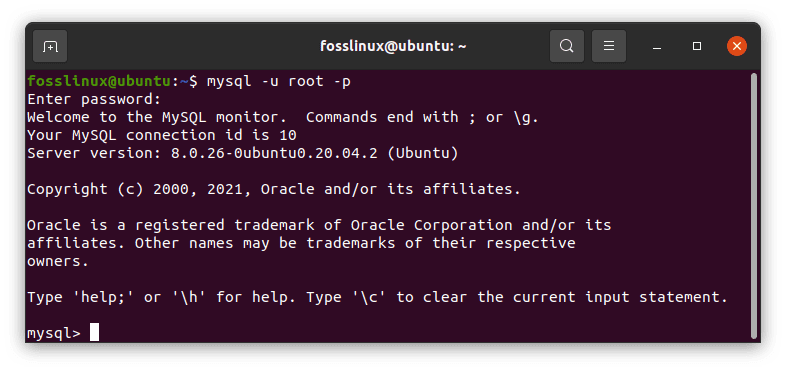
- At this point, you should be able to log into the MySQL command prompt using the newly set admin passcode by executing the command below:
mysql -u root -p
Now that we have fruitfully learned how to change the newly created MySQL root password, it is time to learn how to recover a forgotten or lost MySQL root password.
Other Important Tasks to Perform
Configure MySQL to be managed with systemd.
If you have installed MySQL on a systemd platform using generic
binaries and want it to be managed with systemd, see
Managing MySQL Server with systemd.
ОБНОВЛЕНИЕ 2014-05-09 16
Вам нужно внимательно просмотреть /etc/hosts
Если вы видите это в /etc/hosts
127.0.0.1 localhost localhost.localdomain localhost4 localhost4.localdomain4
::1 localhost localhost.localdomain localhost6 localhost6.localdomain6
Если вы видите это в /etc/hosts
127.0.0.1 localhostConclusion
The article further breaks down the steps to set up, change and recover a MySQL root password and set up the root password for the first time. Ensure to stick to all the processes provided in this article to avoid security breaches by using strong password combinations. We hope the article will be helpful. If yes, give a thumbs up via the comments section.
")


")