

The Galaxy S4 came to Verizon later that other network providers in the US but the development activity around this device so active that now we have a great number of mods and custom ROMs available for it. Rooting a Galaxy device from Verizon is always a little complicated that one from other carriers as they come with tighter security and locked bootloaders.
Besides rooting the phone, the All-in-One Root Toolkit for the Verizon Galaxy S4 SCH-I545 is also capable of installing your favorite custom recovery like ClockworkMod Recovery or TWRP. So, if you are willing to hack your device, it’s high time to do it.
- Update: Root Vzw S4 on I545VRUAME7 or MK2 firmware
- Using Root ToolKit:
- Got a Rooted Galaxy S4? See This!
- Reader Interactions
- Functions
- Compatibility
- Downloads
- Screenshots
- How to install Tool All In One
- How to unlock bootloader, install TWRP, flash stock images, etc.
- All In One Tool Overview: Android One
- How to Install All in One Tool
- How to Root Android device using Kingo ROOT
- How to Root Android using Kingo PC App
- How to Root Android device using CF-Auto Root
- How to Root Android device using iRoot
- How to Root using Root Genius
- How to Root Android device using VRoot
- Скачать All-In-One Toolbox (Pro) v8.3.0 бесплатно на андроид
Update: Root Vzw S4 on I545VRUAME7 or MK2 firmware
If your Verizon Galaxy S4 is running the I545VRUAME7 or MK2 firmware , use this tutorial to root it.
Using Root ToolKit:
- Download the All-in-One Root Toolkit and extract the zip on your Windows desktop: I545_ALL_IN_ONE_TOOL_7_8
- Download and install either latest Samsung Kies or USB Drivers on your computer: Download
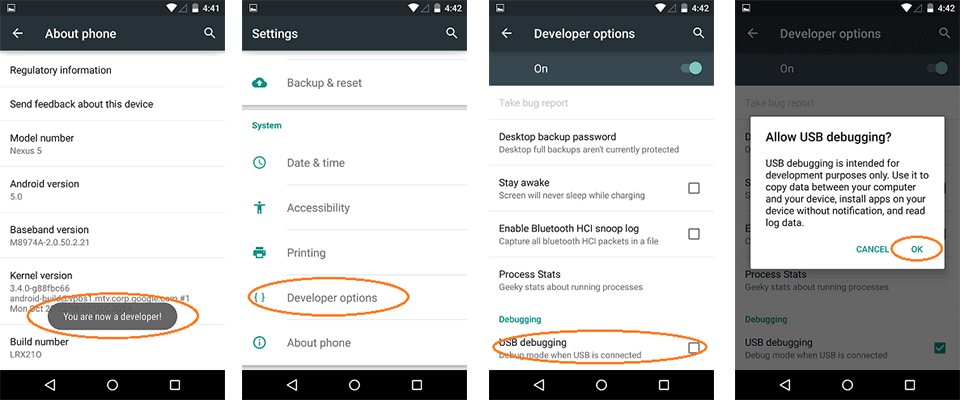
- USB Debugging on your phone. To do this, enable Developer Options on your Verizon SCH-I545 first. Open Settings> More> About and tap the “Build Number” for 7 times. Then go back and you’ll see “Developer Options” under Settings> More. Tap on it and select USB Debugging.
- Now hook up your device to computer using USB cable.
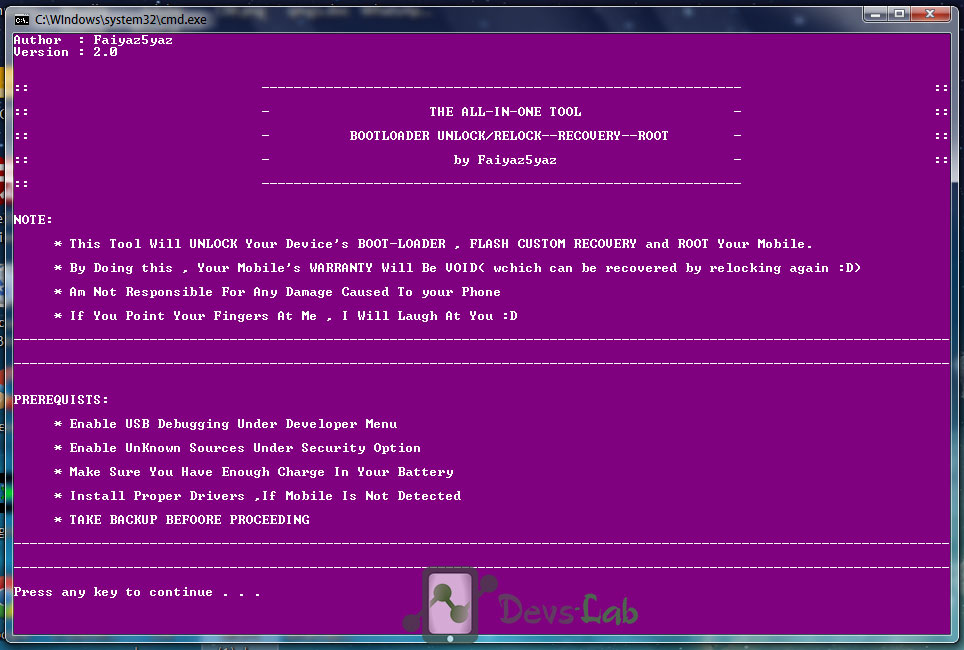
- Open the Toolkit folder and double click the RUN_ME.bat
- Doing this will launch a command window as shown below.
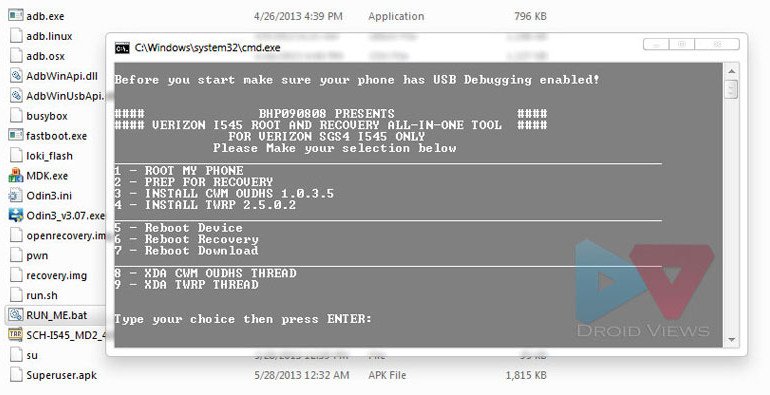
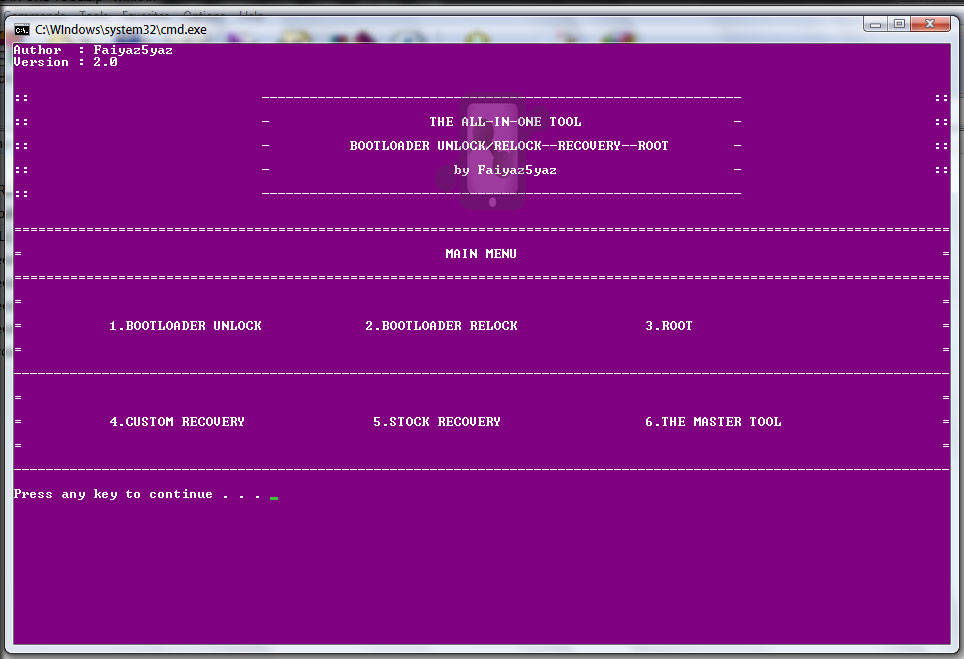
- As you can see, there is numbering before each option in the cmd window. Wahat you have to do it to enter the corresponding number and hit the Enter key. For example, if you have to root your phone, enter “1”.
- When the phone is rooted, enter “2” to prepare the device for installing a recovery. You can then enter “3” or “4” to install CWM or TWRP” recovery on the device.
- In case, your SCH-I545 is already rooted an yo wish to install a custom recovery only, enter “2” first and then continue with “3” or “4”.
Wasn’t it easy! At the end of the procedure, your Verizon Galaxy S4 should be rooted and have your favorite custom reocvery installed on it. Congrats! If you get into any problem while doing the steps above, or have a question, feel free to drop a comment below.
Got a Rooted Galaxy S4? See This!
Best Custom ROMs for Verizon Galaxy S3 SCH-I545
Things to Do Before and After Installing a ROM
How to Unroot Galaxy S4 and Reclaim Warranty
Reader Interactions
Functions
There have been several attempts before to unify certain aspects of third-party development for Android devices. There are many third-party tools that allow you to do different things like root devices and unlock bootloaders. Most of the times it is only the OEM specific tools that really work across a large number of devices. Tools like Odin for Samsung Devices, Flashtool for Sony devices, etc. don’t work across OEMs, but they work most of the times when it comes to Samsung or Sony devices respectively.
Tool All In One looks to solve that problem. It has been tested and confirmed to work across 27 different devices from different OEMs. This does not make it a generic tool, however, not for these 27 devices. The developer claims that “all the controls have been tailored to each device.”
That said, there is a “Generic Phone” option which can be used on unsupported devices as long as they can work via adb and fastboot. The functionality will, of course, be quite limited compared to the 27 devices that the tool is currently compatible with. Below is a list of all the functions as provided by the developer on the tool’s development page.
Compatibility
Downloads
- Tool All In One (Mega) | Mirror (AndroidFileHost) | Mirror (GoogleDrive)
- All Available Fastboot ROMs
Screenshots
How to install Tool All In One
- Download the zip file from the downloads section above and right-click on it.
- Select Properties.
- Check the box next to Unblock at the bottom. You don’t necessarily have to do this but on some PCs, you might need to.
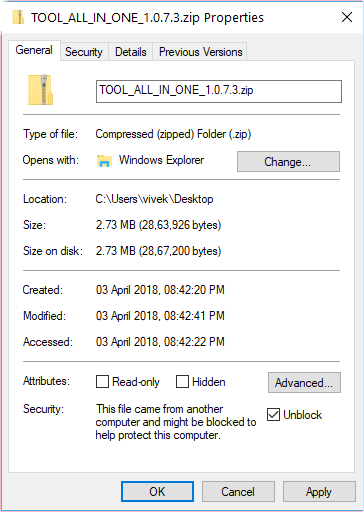
- Extract the zip file now and double-click on setup.exe or TOOL_ALL_IN_ONE.application to install. You may be asked to confirm the installation again. Installation doesn’t take long and you will soon have a desktop shortcut and a start menu shortcut to launch the application. After installation is complete the tool launches itself anyway.
How to unlock bootloader, install TWRP, flash stock images, etc.

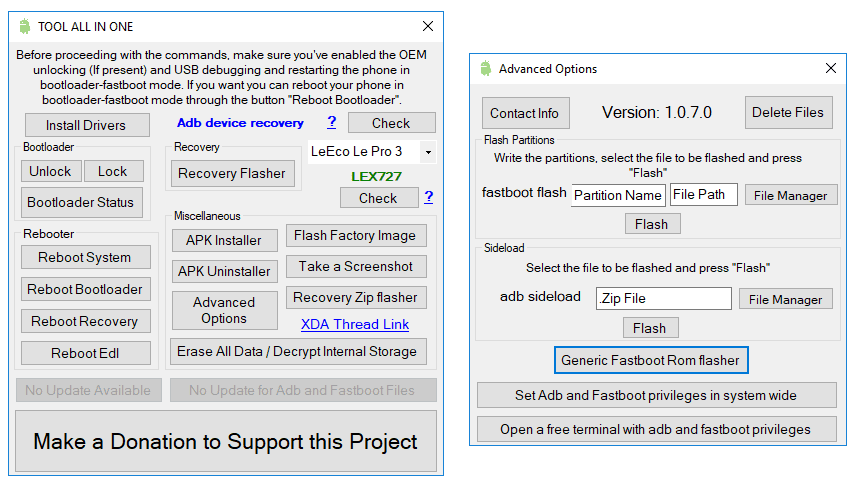
All in One Tool, as the name implies, is a reliable one-stop Windows-based application that is designed for performing various operations on Android smartphones ranging from unlocking the bootloader, installing TWRP Recovery, Rooting to flashing back the factory image.
The tool is specifically aimed for the Android One devices that will help you Installing a custom ROM and much more without any hassle.
It’s a noob-friendly application that makes it an extensively used choice among other available software. One doesn’t necessarily need to be a tech-savvy for making use of this tool. All thanks to the XDA’s senior member mauronofrio, the man behind the development of All in One Tool.
All In One Tool Overview: Android One
Despite having a plethora of third-party tools available for rooting and stuff, the function of All in One Tool is what makes it stand out. Unlike the OEM specific tools, it’s designed to be work across 27 different devices from different OEMs.
Furthermore, according to the developer’s claim, along with supporting devices of different companies, all the controls have been tailored to each device.
Since the app consists of many controls, testing all of them wasn’t practically possible for the developer; therefore, a “Delete File” option has incorporated on the tool that allows you to delete the corrupted files directly from the tool itself if you get any errors while downloading the files.
Below are all functions of All in One Tool:
- Unlock Bootloader
- Lock Bootloader (use carefully)
- Bootloader Status
- Recovery Flasher and Device Rooter
- Recovery Zip Flasher
- Reboot System
- Reboot Recovery
- Reboot Bootloader
- Reboot EDL
- Install Drivers
- Flash TWRP Recovery, stock Recovery, and Sideload stock Factory Images
- APK Installer & Uninstaller
- Take a Screenshot
- Erase All Data/ Decrypt Internal Storage
- Video Recorder
- Open ToolFolder
- Flash Partitions
- Update ADB and Fastboot to the latest version
- Set ADB and Fastboot privileges in system-wide
- Install Zip directly from PC (Required TWRP on the phone)
- Flash Fastboot ROM
- Delete downloaded files
Moreover, for the unsupported devices, the tool has an advanced feature called “Generic Phone” that too can only be used if the device is compatible working with ADB and Fastboot. Understandably, you may not get the full functionalities if your device hasn’t made it to the above table because the tool doesn’t support it yet.
How to Install All in One Tool
- Firstly, download the .zip file by clicking here
- Extract the downloaded file and click on setup.exe
- Now while installing the tool, you may promptly get a security warning addressing that the publisher is unknown and cannot be verified. Ignore it and click on the Install button.
- It would take a few seconds for the complete installation of the application, and once it gets done, you will see the Android icon on the taskbar.
- You may get asked for updating the application; comply with the instructions.
Upon completion, you will see the tool’s homepage appeared on your screen, which means now it’s ready to play with.
Note: If you are facing any issues while installation, then try to update the Microsoft .Net Framework to the latest version.
Before you start with the steps given below, here’s a quick cautionary measure cum disclaimer:
- Enable OEM unlocking by navigating to the Settings >> System >> About phone >> scroll to the bottom and tap Build number for the seven times and you will get an instant short pop up displaying that you’re now a developer. Now go back to the System >> Advanced >> Developer options and toggle ON both OEM unlocking and USB debugging.
- Download ADB Drivers
- Check unknown Sources in Settings>Security.
- PC and USB cable
Unlock Bootloader, Install Recovery & Root Android One 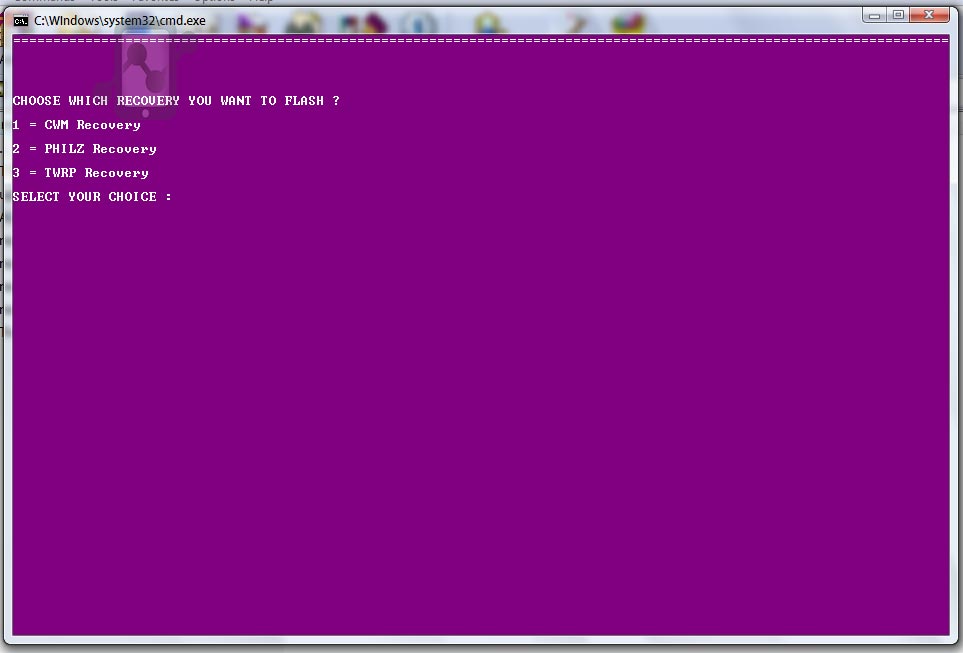
Install Custom Recovery in Android One
- Launch the application (All-in-one-tool.bat), connect your phone with the USB cable and plug in your computer.
- Rest you can make use of the functions as per your wish. As long as you follow the onscreen instructions, you may not hit any snag.
I hope this guide helped you understand the All in One Tool and its tidbits. For any queries and doubts, feel free to reach us out with the help of the comment box given below.
![]()
Ajinkya has close to a decade of experience covering consumer technology and previously worked with Android Authority, Android Headlines, Anandtech and lot more. Ajinkya loves all things technology and is also an avid DIYer at heart. Ajinkya has a background in IT and Deep Passion for Everything Android and Google. His specialties lay in Smartphones of all budgets, Accessories, Home Automation and more.
You might have read some difficult definitions of Android Rooting. So, first of all, let me tell you what is rooting & its impressive features. Google provides stock Android which has some limitations like, you cannot kill System apps even if you use any Ram booster or task killer, the app starts up the very next moment. Also, you cannot customize your system; you cannot improve your device’s battery consumption, etc.
- Boost your Phone speed & Battery Life.
- Remove Pre installed crapware like System Apps.
- Remove Bloatwares apps like Facebook, Chrome Keep sucking your Ram & battery by running in background. So, among the smartphone geek crowd, applications like these are referred to as “bloatware” they do nothing but bloat the software by existing as unnecessary applications.
- Tweak your phone like : Increase Video streaming speed, Increase Wifi Speed, Increase SIM detecting Speed, Increase SD read/write speed.
- Most Important & Best part, Install Custom Kernel & Custom ROMS (I will explain about it in Installing Custom ROM section)
- Finally, Truly Own your Device, Make it appear in the way you want.
- No data loss process: Your Android phone data like contacts, pictures, video etc will not be affected. (For safer side, I recommend you to backup all your data in your PC using Flashfire method.)
- Warranty Void: Your Android Device warranty may get void after rooting.
- How to unroot Android device: To unroot your device, Open Kinguser on your device > Settings > Remove Root permission.
- Before rooting your phone, you need to unlock the bootloader of your Smartphone. Check our guide to unlock the bootloader.
How to Root Android device using Kingo ROOT
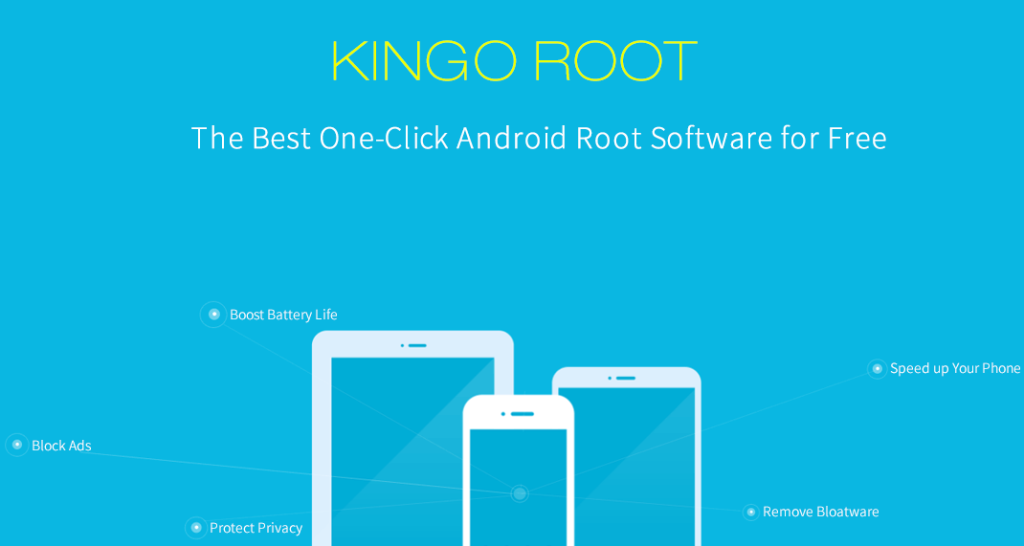
Kingo ROOT is One Click Root app designed to work on Windows Computer. It helps to root any Android Smartphones in simgle click which has a success rate of approximately 90%.
This is the best Android rooting software through PC available in the market.
It’s the only one click root app which has many developers working on it to bring improvements and to increase the device limit in every update which is frequently released.
How to Root Android using Kingo PC App
Step 1: Enable USB Debugging Mode on your Android smartphone. (To enable USB debugging, Go to Settings > About phone > Build Number ( Tap on it 7 times until it shows you are now a Developer.) Return to settings & Go to Developer options > USB Debugging)
Step 2: Download Kingo Root Windows Application and install it normally in your Windows PC.
Step 3: After connecting your Android smartphone, If your device driver is not installed on your Computer, Kingo Root will install it for you automatically.
Step 4: Now, Click on ‘Root’ Button to begin the rooting process.
Step 5: Now Kingo Root will Automatically Root your phone and install SuperSU.

Now your Android Device is rooted, To confirm Check for an App named ‘SuperSU’ on your phone.
Congratulations, you have successfully Rooted your Android Smartphone. I hope this guide helped in rooting your phone. If Kingo Root was unable to detect or ROOT your device, you could use other One-click Root Apps mentioned below.
How to Root Android device using CF-Auto Root
CF Auto Root is one of the most successful method of rooting Samsung, Nexus & Motorola devices only. As each device has different rooting procedures, Chainfire has made CF Auto Root zip for each devices.
This method might seem complicated but it’s very easy. You will require Samsung Odin in this method.
Step 1. Goto CF Auto Root page, Press Ctrl+F & type in your device name. (Please match exact device code too)
Step 2. Download the CF Auto Root file next to the device name.
Step 3. Turn off your Android device & boot into download mode. (For Samsung device: Vol down+Home+Power).
Step 4. Launch Odin & check “Auto Reboot” & “F:Reset Time”. Click on PDA & locate the CF Auto Root downloaded file.
Step 5. Click on Start to begin the rooting procedure.
Step 6. Now you can check Root access using any Root checker app.
How to Root Android device using iRoot

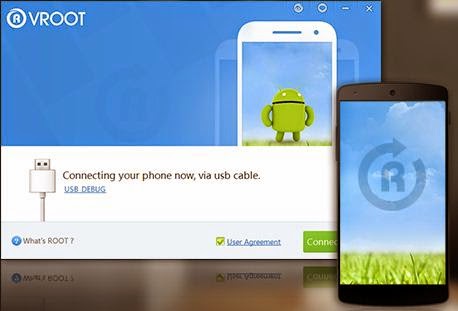
iRoot App was previously known as vRoot. iRoot provides rooting for almost all Android devices with different Android versions. After the full preparation, you are able to root the Android devices in 3 handy steps: Install and launch iRoot -> Enable USB Debugging -> Begin “Root”. Continuous updates and improvements of root scripts ensure the success of your Android devices rooting rate, which makes iRoot powerful.
The rooting procedure is same as other one click rooting Apps. Just enable USB debugging & click on root button. iRoot will find the exploit procedure from its servers & root your device in 4-5mins.
How to Root using Root Genius
Root genius is the best & easy-to-use rooting software with a high success rate with Mediatek devices. Root Genius is a Windows Application.

Step 1: Download and Install Root genius for Windows: Root Genius 3.1.3
Step 4: Click ROOT to begin the rooting process. It could take 2 up to 3 minutes for the
rooting process to be completed. (Don’t unplug the USB cable).
Step 5: When done, click Finish and it will reboot your phone.
Step 7: Done.
How to Root Android device using VRoot
It is more effective, easier and faster than you can imagine.
Step 1: VRoot Rooting App for PC: Download.
Step 2: Install it. Just click Next and Launch it.
Step 3: Connect your android device and make sure that USB Debugging mode is enabled from Settings – Developer Options.
Step 4: From VRoot on your PC, click Root.
Step 5: Wait for the result. If it’s a success, your device will reboot and you can now disconnect your android device from your PC.
Step 6: Check if you are successfully rooted by downloading and installing Root Checker app from Play Store.
Step 7: Done.
Обновлено до версии 8.3.0

All-In-One Toolbox (Pro) — Набор полезных для системы утилит в одном приложении. Инструменты позволят очистить кэш и прочий мусор приложений, очистить RAM память устройства, остановить приложения, удалить приложения из автозагрузки и т.д. Приложение может заменить несколько крупных отдельных программ. All-In-One Toolbox (Premium) объединяет в себе множество системных утилит, что позволит добиться максимально быстрой и эффективной работы вашего устройства и обезопасить его от вредоносных файлов.
- Очистка памяти устройства от ненужных файлов;
- Оптимизация хранения файлов;
- Мгновенное сканирование и очистка от ненужного мусора;
- Очистка кэша приложений;
- Проверка температуры, предотвращение перегрева;
- Лёгкий доступ ко всем хранящимся на устройстве файлам;
- Удаление, перемещение и копирование приложений;
- Шифрование личных файлов.
Информация
Запросить обновление (необходима авторизация)
Скачать All-In-One Toolbox (Pro) v8.3.0 бесплатно на андроид
Оценка 10 из 10
голосов: / история
версия: v8.3.0
Последнее обновление программы в шапке: 30.03.2023

Краткое описание:
Оптимизация устройства для работы на оптимальной скорости.
Программа включает в себя целый комплекс методов, которые помогут вам добиться максимальной производительности.
Простой и интерактивный пользовательский интерфейс.
Особенности:
*Удаляет APK приложения
*Резервное копирование и восстановление
*Иконка на домашнем экране
*Предоставляет доклад о состоянии памяти (RAM, ROM, SD карты и CPU)
*Системная информация в подробностях
*Диспетчер задач
*Очистка кэша
*Очистка истории (буфер обмена, браузер и т.д)
*Быстрая очистка журнала вызовов и сообщений
*Удаление временных файлов на карте памяти
*Возможность устанавливать приложения пакетами
*Возможность удалять приложения пакетами
*Менеджер автозагрузки
*Виджеты
Русский интерфейс: Да
Разработчик: IMOBLIFE INC.
Домашняя страница: http://www.aiotoolbox.com/
Google Play: https://play.google.com/store/apps/details?id=imoblife.toolbox.full
All-In-One Toolbox (Пост SurvivalHorror #91936147)
версия: 2.2  All_In_One_Toolbox_17_Tools_2_2.apk ( 1.91 МБ )
Версия: 8.1.6.1.3 Mod arm (CMAPTOC)
Версия: 8.1.5.9.2 ARM (CMAPTOC)
Сообщение отредактировал iMiKED — 20.06.23, 16:20
Причина редактирования: Чистка
менеджер автозагрузк-проверил,не останавливает ничего,отметил такие как скайп,вибер,радио,танго.после загрузки посмотрел-всё запущено.
Неплохо было бы включить альбомный режим
Пользуюсь планшетом, чаще в альбомном сижу
Обновление!
All-In-One Toolbox (17 Tools) v2.4.1
— Solve force close after restart issue
— Optimize Startup Manager Tool
— Optimize running & reacting speed
— Fix blue tooth bug for File Manager
— Add notice for Whitelist
— Fix Youtube crash issue
— Add history clean function for Youtube
— Other minor improvement
all-in-one_toolbox_2.4.1.apk ( 1.25 МБ )
А кнопки выход не планируется? Программа нравится своей простотой и не захламленностью.
 All-In-One Toolbox (17 Tools)
What’s in this version:
— Fix crash issue on SD Card/Apk Cleaner & Batch Installer scanning
— Add App2SD notification in app Settings
— Categorize cleaning items in System Cleaner
— French language improved for better understanding
— Add Quick Boost shortcut (beta)
— Fix minor bugs on Startup Manager
— Other improvements
 Устан. файл: All-In-One.Toolbox.v.2.5.b.13.crk.apk ( 1.39 МБ )
Да,русский интерфейс не помешал бы. И еще чтобы кто-нибудь из знающих объяснил бы вкратце как продуктивно и правильно использовать программу. :blush:
Да,русский интерфейс не помешал бы. И еще чтобы кто-нибудь из знающих объяснил бы вкратце как продуктивно и правильно использовать программу. :blush:
All-In-One Toolbox (17 Tools) v2.5
Спойлер (+/-) (What’s in this version:)
— Fix crash issue on SD Card/Apk Cleaner & Batch Installer scanning- Add App2SD notification in app Settings- Categorize cleaning items in System Cleaner- French language improved for better understanding- Add Quick Boost shortcut (beta)- Fix minor bugs on Startup Manager- Other improvements
Устан. файл: All-In-One.Toolbox.v.2.5.b.13.crk.apk ( 1.39 МБ )
хотелось бы русский перевод. Заранее спасибо.
 All-In-One Toolbox(17 Tools)
What’s in this version :
— Quick Boost shortcut triggers quick boost instead of starting the whole app
— Improve SD card read accuracy
— Optimize UI
— Add Last Modified Date to folders in File Manager.
— Add basic Network Information to System Info
— Add Indonesian support (Many thanks to Andre SG Samosir)
— Other source code enhancement
 Устан. файл: All-In-One Toolbox(17 Tools) v2.6.apk ( 1.33 МБ )
Список изменений :
— Fix SD cleaning issue
— Further optimize SD card read accuracy
— Other minor enhancement
All-In-One_Toolbox_17_Tools__2.7.apk ( 1.33 МБ )
All-In-One Toolbox (17 Tools) v2.8 Mod (Ad-Free) от 27 апреля 2013 г. Сразу мод — версия без рекламы.
«Что нового в этой версии:
— Add Quick Settings plugin
— Add Volume Settings plugin
— Accelerate SD card cleaning speed
— Add send APK via Bluetooth feature in File Manager
— App2SD feature modification (Notify devices that do not support App2SD feature)
— Fix reported force close issues.»
All-In-One_Toolbox_v.2.8_AdFree_Mod.apk ( 1.42 МБ )
Сообщение отредактировал Anatoliy — 30.04.13, 13:20
Ещё бы в это мод русский язык.
All-In-One Toolbox (19 Tools) v2.9 (Ad-Free) от 16 мая 2013 г. Мод — версия без рекламы.
«Что нового в этой версии:
— Release All-In-One Toolbox Pro (Ad-free) version: Please activate via «Toolbox Pro Key Manager» on Plugins page
— Add Network Information to first page and System Info page
— Add FAQs to Settings page
— Fix Mac Address inaccurate issue
— Optimize CPU feature, add CPU frequency
— Other minor enhancements.»
All-In-One_Toolbox_19_Tools_v2.9_AdFree.apk ( 1.62 МБ )
All-In-One Toolbox(19 Tools) PRO v2.9. На всякий случай — другой вариант (в предыдущем посте выложена бесплатная версия, вылеченная от рекламы). ИМХО, данный вариант — корректней. 😉
All-In-One_Toolbox_19_Tools_PRO_v2.9.apk ( 1.62 МБ )
")


")