

Для того чтобы пользователь root (или любой другой пользователь) мог подключиться с СУБД MySQL с удалённого хоста, необходимо выполнение двух условий:
1) в свойствах пользователя должно быть разрешено подключаться с удалённых хостов
2) СУБД должна прослушивать входящие соединения не только с localhost/127.0.0.1, но и на интерфейсах с внешними IP адресами.
В этой инструкции мы включим доступ root к MySQL и MariaDB с удалённых хостов.
Этот процесс состоит из двух этапов:
а) Настройка привилегии. Выполните как пользователь root, заменив ‘ПАРОЛЬ’ текущим паролем root:
GRANT ALL PRIVILEGES ON *.* TO 'root'@'%' IDENTIFIED BY 'ПАРОЛЬ';
б) Разрешить MySQL прослушивать все сетевых интерфейсы для возможности подключения с внешних IP:
Самый простой способ — закомментировать строку в файле my.cnf, чтобы получилось так:
#bind-address = 127.0.0.1
Файл mysql.cnf может быть расположен по следующим путям:
- /etc/mysql/conf.d/mysql.cnf
- /etc/mysql/mariadb.cnf
- /etc/mysql/mysql.conf.d/mysqld.cnf
Чтобы изменения вступили в силу, перезапустите службу mysql:
sudo systemctl restart mysql
По умолчанию прослушивается только соединения с localhost, но если вы закомментируете строку, MySQL откроет порты для входящих соединений на всех интерфейсах. Комментирование строки эквивалентно bind-address=*.
Чтобы проверить, какие порты прослушивает служба mysql:
ss -tulpn | grep -E 'mysql|mariadb'
If you want to make a connection between two MySQL or MariaDB servers then you have to remote connections MySQL or MariaDB
To establish a connection, you have to allow the port of MySQL or MariaDB from both the source server and destination server. Otherwise, the server will not able to make a connection.
For Ubuntu or Debian
sudo ufw allow 3306/tcp
For CentOS or Red hat or Fedora
iptables -I INPUT -i eth0 -p tcp --destination-port 3306 -j ACCEPT
- To Allow Remote Access to Root User
- To Allow Remote Access to New User
- Revoke Remote Access for Root User
- Revoke Remote Access for New User
- Conclusions
- Introduction
- For MariaDB
- To Enable Authentication Plugin again
- For MariaDB
- Conclusion
- Before You Begin
- Editing Your MySQL Configuration File
- Setting a Safe Bind-Address IP Range
- Configuring Your Firewalls
- Configure Linux Firewalls
- Configure Windows Firewalls
- Connecting to a Remote Server Using MySQL
- Connecting to MySQL on Linux or Mac
- Connecting to MySQL on Windows
- Allowing Remote User Access to a MySQL Database
- Securing Your Database Data
- Know the context
- For root user
- Create an user if doesn’t exist
- Existing user:
- For all
To Allow Remote Access to Root User
- Login into the MySQL.
mysql -u root -p
It will ask for a password, Enter the Root password of the MySQL server.
- We can’t directly make changes in MySQL Root User, so we have to create a new Root User for Remote Access.
CREATE USER 'root'@'%' IDENTIFIED BY 'root_password';
- Allow remote access privileges.
GRANT ALL ON *.* TO root@'%';
- Save the changes in MySQL or MariaDB server.
flush privileges;
To Allow Remote Access to New User
- Create a new user in MySQL or MariaDB server for the remote access.
CREATE USER 'remote_user'@'%' IDENTIFIED BY 'strong_password';
- Allow the new user to access all the databases in the MySQL or MariaDB server.
GRANT ALL PRIVILEGES ON *.* TO 'remote_user'@'%';
- Save the change made on the MySQL or MariaDB server.
flush privileges;
Revoke Remote Access for Root User
- From this command you will revoke the privileges of Newly created Root User from accessing the databases.
REVOKE ALL PRIVILEGES ON *.* FROM 'remote_user'@'%';
- Or If the Remote access is not longer needed then you can just delete the new Root User which was created for Remote access.
drop user 'remote_user'@'%';
- Save the changes done in the MySQL server.
flush privileges;
Revoke Remote Access for New User
- Through the below command, we will revoke the privileges to access the databases.
REVOKE ALL PRIVILEGES ON *.* FROM 'root'@'%';
- Or you can directly remove the user.
drop user 'root'@'%';
- Save the changes done in the MySQL server.
flush privileges;
Read Also: How to Start, Stop, or Restart Apache
Conclusions
In this tutorial, we have learned how we can allow remote connections to MySQL or MariaDB servers. With the help of remote access, we can transfer dump files from one MySQL server to another MySQL server. We can easily access the database and can modify them with the help of remote access.
Introduction
mysql
If the Authentication Plugin is Enable then it will directly enter in MySQL server.
- Check the current status of Authentication Plugin:
select user,authentication_string,plugin,host FROM mysql.user;

- Disable the Authentication Plugin for MySQL Root User:
alter user 'root'@'localhost' IDENTIFIED WITH mysql_native_password BY '[email protected]';
For MariaDB
- If you are using the MariaDB then the command will be different. Run the following command to disable the Authentication plugin in MariaDB.
ALTER USER [email protected] IDENTIFIED VIA mysql_native_password;ALTER USER 'root'@'localhost' IDENTIFIED BY 'strong_password';
- Save the changes done in MySQL Server:
flush privileges;

Exit from the MySQL Server by Pressing CTRL + D. Now the Authentication Plugin is Disable. Now on you need to use password to access MySQL server.
To Enable Authentication Plugin again
Let’s understand how to enable auth_socket again if we need it later to enable.
- Check the Status of Authentication Plugin:
select user,authentication_string,plugin,host FROM mysql.user;

- Enable the Authentication Plugin for MySQL Root User:
alter user 'root'@'localhost' IDENTIFIED WITH auth_socket BY '[email protected]';
- Save the changes done on the MySQL Server:
flush privileges;

- Exit from the MySQL Server by Pressing CTRL + D. Now the Authentication Plugin is successfully enabled.
For MariaDB
- Login to the MariaDB server.
mysql -u root -p
- First, check the Status of Authentication Plugin.
select user,authentication_string,plugin,host FROM mysql.user;
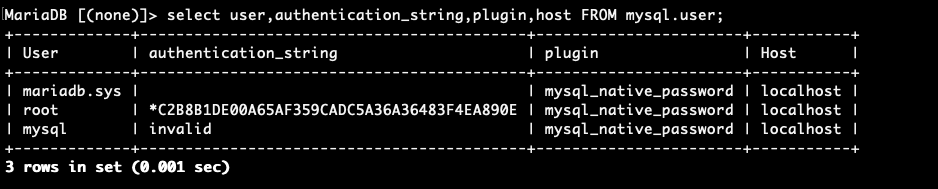
- Run the following command to enable the Authentication plugin in MariaDB database server.
ALTER USER [email protected] IDENTIFIED VIA unix_socket;- Save the changes done in MySQL Server:
flush privileges;

Exit from the MariaDB Server by Pressing CTRL + D. Now the Authentication Plugin is enabled. Now you can access MariaDB database server without password.
Conclusion
In this Change Authentication Plugin Method in MySQL tutorial, we have learned about auth_socket, how we can enable and disable the Authentication Plugin in MySQL and MariaDB database server. MySQL has a variety of Plugins used in the MySQL server for different purposes. So, we have learned how to enable or disable the auth_socket plugin on MySQL.
If you guys have any queries related to this tutorial, Let me know in the comments.
If you’re working with a MySQL database, then you’re already aware of the challenges you face in keeping your database secure. From database hacking attempts using SQL injections to brute force attacks, it’s difficult to keep your data safe, especially if you’re working with a database remotely.
There are ways to configure an SQL server to allow remote connections, but you need to be careful, as allowing remote connections on a MySQL server can make your database an easy target for hackers. If you want to allow secure, remote connections to a MySQL database, here’s what you’ll need to know.
Before You Begin
Before you make any changes to your MySQL database, it’s important that you backup your database, especially if you’re working on a production server (a server in active use). Any changes you make to your database, or the server hosting it, could result in serious data loss if something goes wrong.
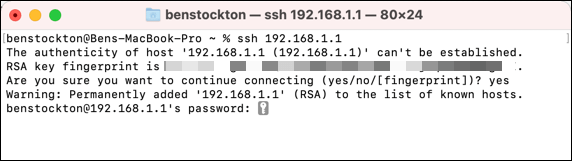
It’s also likely that if you’re making changes to a remote server, you’ll need a safe way to connect and make changes. SSH (Secure Shell) is often the best way to do this, as it allows you to connect to your remote server. You can also use SSH to connect to servers on your local network, such as those hosted on a Raspberry Pi.
This guide will lead you through the steps to configuring MySQL to allow remote connections, but you’ll need to ensure you have direct or remote access to the server hosting your MySQL server first.
Suppose you don’t have remote access to your server via SSH (for example). In that case, you won’t be able to configure your MySQL database to allow remote connections directly unless your root mySQL account already allows remote connections. So, you will need to establish this connection first before you can proceed.
Editing Your MySQL Configuration File
The first step in configuring MySQL to allow remote connections is to edit your MySQL configuration file. By this stage, this guide will assume you have already connected to the server, PC, or Mac hosting your mySQL database remotely and have console access.
Alternatively, you can configure a local MySQL server using an open terminal on Mac or Linux or a text editor on Windows.
- To start, use your preferred console text editor to edit your MySQL database file. On Linux, type sudo nano /etc/mysql/mysql.conf.d/mysqld.cnf into a terminal or SSH window to edit this file using the nano editor (assuming your MySQL database is in the default location).

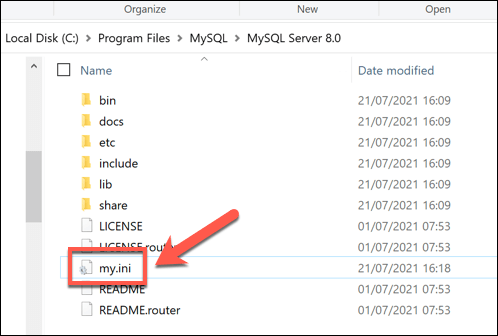
- If you’re running Windows, open File Explorer and access the folder containing your MySQL installation (eg. C:/Program Files/MySQL/MySQL Server 8.0). Open the my.ini file using your default text editor (eg. Notepad) by double-clicking the entry. If it isn’t there, create the file first.
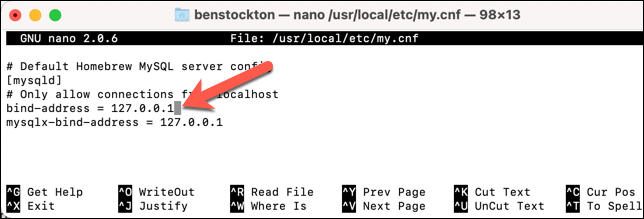
- On Mac, open a terminal window and type sudo nano /usr/local/etc/my.cnf. This is the default configuration file for MySQL if you’ve installed MySQL using homebrew.

The locations referenced above are the default locations for MySQL configuration files. If these commands don’t work, you’ll need to search for the relevant files (my.cnf, mysqld.cnf, or my.ini) manually to locate the relevant file path.
Setting a Safe Bind-Address IP Range
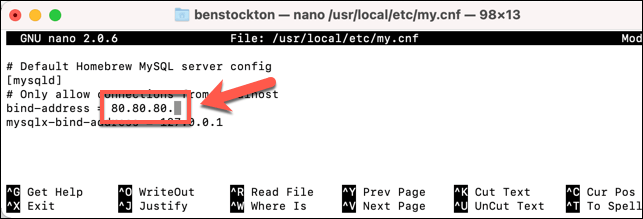
- Once you’ve opened the MySQL configuration file for your server, use your keyboard’s arrow key to reach the bind-address section of the file. This IP range limits the connections to your database, which is typically set to only allow connections from the local machine or server using 127.0.0.1.
- If you want to configure your MySQL database to allow connections from devices using your current internet connection, find your public IP address first, then replace 127.0.0.1 with that IP address. Alternatively, replace it with an IP address for the device or server you wish to allow connections from.
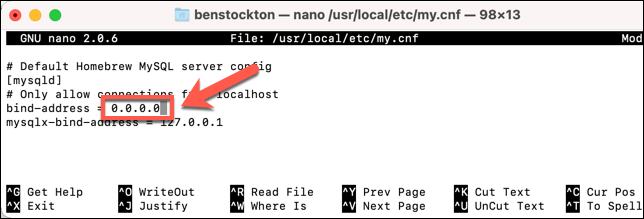
- In some circumstances, you may wish to allow all remote connections to a MySQL database. This carries extreme risk and shouldn’t be used on a production server. If you want to allow this, however, replace 127.0.0.1 with 0.0.0.0.
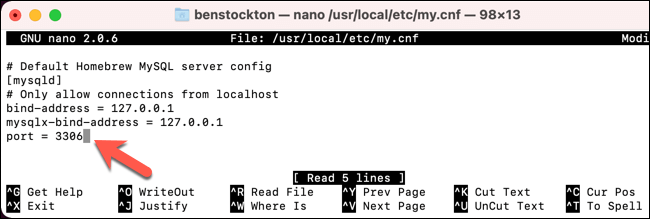
- Make note of the port value in the Basic Settings section. This will be required in the next section. If it isn’t visible, the default value will be used, which is port 3306. You can add your own port by typing port = xxxx on a new line, replacing xxxx with a suitable port value.
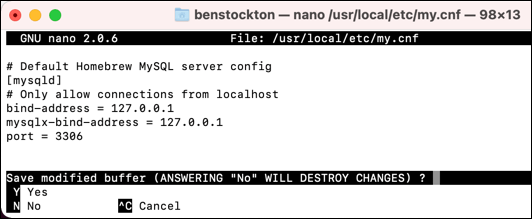
- Once you’ve configured the bind-address in your MySQL configuration file, save the file. If you’re on Linux, select Ctrl + O and Ctrl + X to do this. On Mac, select Command + O and Command + X. Windows users can save by selecting File > Save.
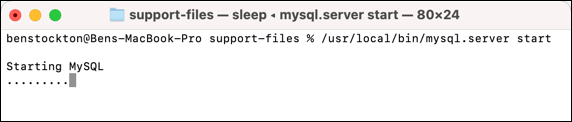
- Next, Linux and Mac users can restart MySQL by typing mysql.server stop && mysql.server start or mysql.server restart. You may need to elevate the command using sudo (eg. sudo mysql.server restart) and use the appropriate path to the mysql.server file (eg. /usr/local/bin/mysql.server).
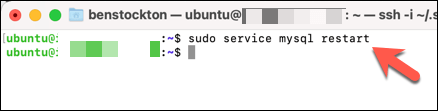
- If the above command doesn’t work, try sudo service mysql restart instead.
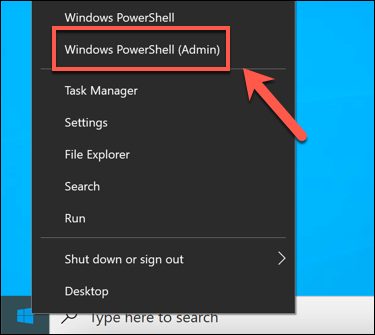
- To restart MySQL on Windows, open a new PowerShell window by right-clicking the Start menu and selecting Windows PowerShell (Admin). In the PowerShell window, type net stop mysql80 followed by net start mysql80, replacing mysql80 with the correct service name on your PC.
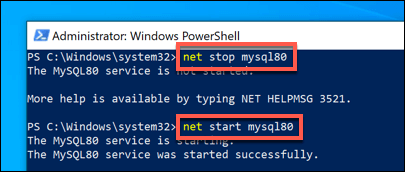
If you’re unsure of the correct service name on Windows, type net start to find it. If you can’t reload your configuration, restart your server and reload MySQL manually (if necessary) instead.
Configuring Your Firewalls
Configure Linux Firewalls
- Open a terminal or SSH connection and type sudo iptables -A INPUT -p tcp -s X.X.X.X –dport YYYY -j ACCEPT. Replace X.X.X.X with the IP address for the device you wish to allow MySQL connections from, and replace YYYY with the matching port value from your MySQL configuration file (eg. 3306).

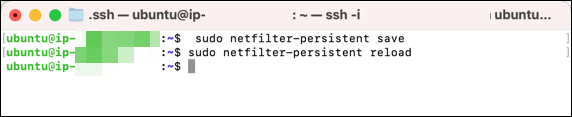
- This will configure the firewall temporarily. If you’re using a Debian or Ubuntu-based Linux server, make this change permanent by typing sudo netfilter-persistent save and sudo netfilter-persistent reload into the terminal or SSH window.
Configure Windows Firewalls
If you’re using a Windows PC or server to host your database, you can configure your firewall using these steps:
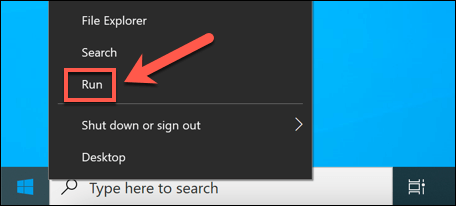
- Right-click the Start menu and select Run.
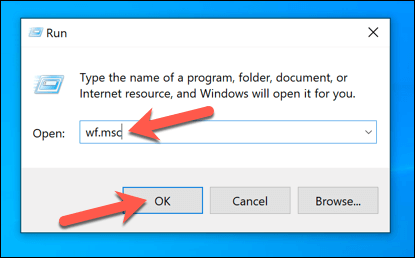
- In the Run box, type wf.msc and select OK.
- In the Windows Defender window, select Inbound Rules > New Rule.

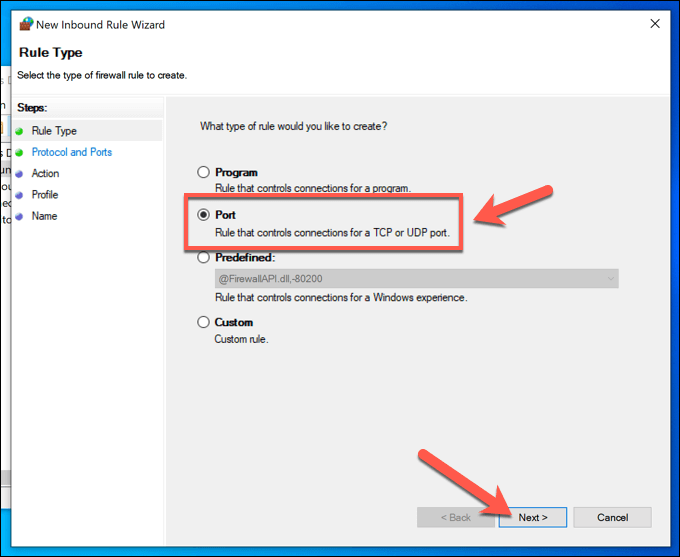
- In the New Inbound Rule Wizard window, select Port > Next.
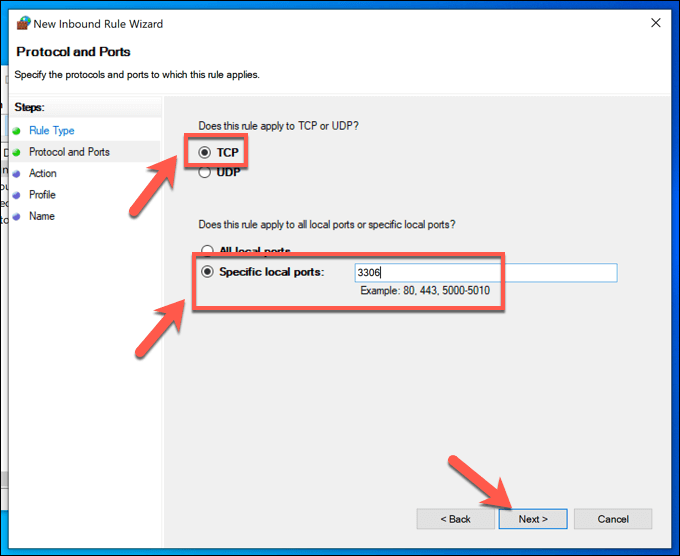
- At the next menu, select TCP from the options, type 3306 (or whichever port value is listed in your MySQL configuration file), then select Next.
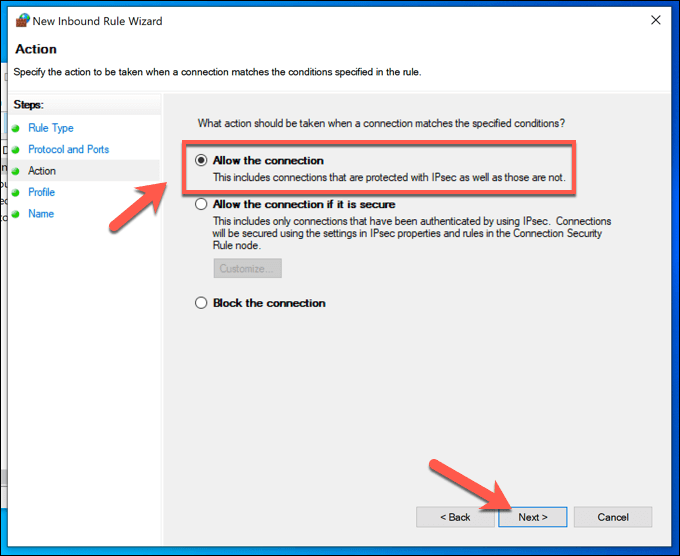
- At the Action menu, leave the default option to Allow the connection enabled, then select Next.
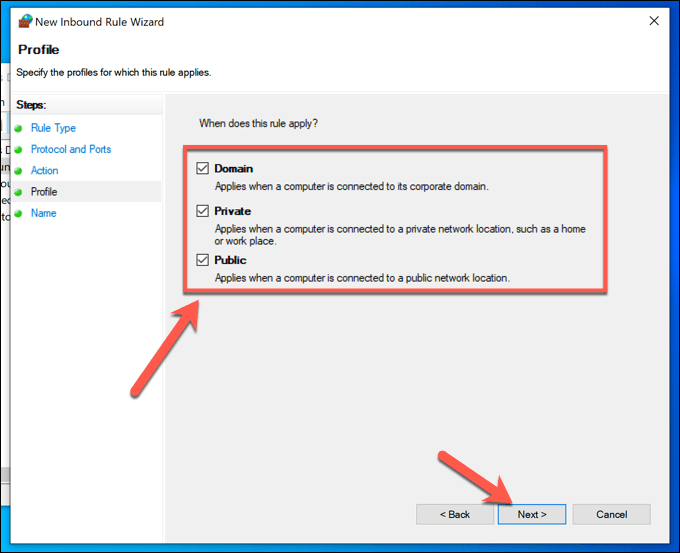
- Confirm that you want the rule to apply to all network types, then select Next.
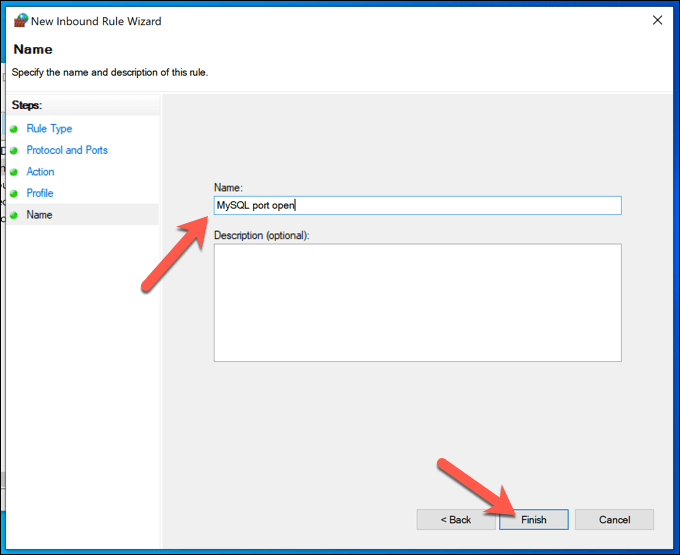
- Type a descriptive name for the rule (eg. MySQL) in the port provided, then select Finish to add it to your list of firewall rules.
Connecting to a Remote Server Using MySQL
After configuring your MySQL database to allow remote connections, you’ll need to actually establish a connection to it. You can do this using the mysql command (mysql.exe on Windows) from a terminal or PowerShell window.
Connecting to MySQL on Linux or Mac
- To connect to your remote MySQL server on Mac or Linux, open a new terminal window and type mysql -u username -h X.X.X.X:XXXX -p. Replace X.X.X.X:XXXX with your remote server IP address and port number (eg. 100.200.100.200:3306) and username with your MySQL username.

- When prompted, confirm your password. If the connection is successful, a success message will appear in the terminal.
Connecting to MySQL on Windows
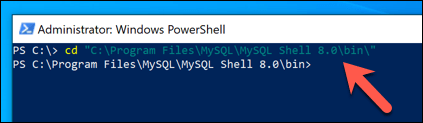
- To connect to a remote MySQL server on Windows, open a new PowerShell window by right-clicking the Start menu and selecting Windows PowerShell (Admin).
- In the new PowerShell window, type cd “C:\Program Files\MySQL\MySQL Workbench 8.0\” to enter the correct folder, replacing this directory with the correct installation directory on your PC. For example, if your version of MySQL is 8.0.1, use the MySQL Workbench 8.0.1 folder instead.
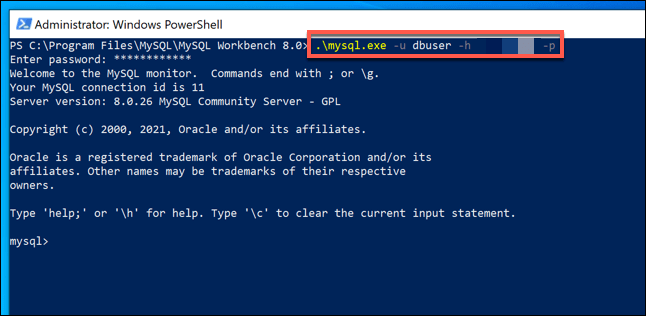
- From there, type .\mysql.exe -u username -h X.X.X.X:XXXX -p. Replace X.X.X.X:XXXX with your remote server IP address and port number (eg. 100.200.100.200:3306) and username with a MySQL username that allows remote access (such as root). Follow any additional on-screen instructions.
- Provide your password, when prompted, to complete the sign-in process and access your MySQL database remotely.
Allowing Remote User Access to a MySQL Database
You’ll need to have the ability to sign into your MySQL server remotely. If you can’t use your root account remotely, you’ll need to access your server’s shell using the mysql command via a remote SSH connection or by directly accessing the PC or server hosting the server.
- In your remote MySQL shell (using the mysql tool), type CREATE USER “username”@”x.x.x.x” IDENTIFIED BY “password”; and select Enter. Replace username with the username you wish to create, x.x.x.x with the IP address you wish to connect from, and password with a suitable password.

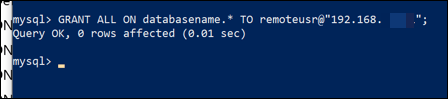
- You’ll need to grant your new account with the necessary permissions. To do this, type GRANT ALL ON databasename.* TO username@”x.x.x.x”; and replace databasename, username, and x.x.x.x with the correct details. If you wish to, replace databasename with * to grant it access to all databases.
Securing Your Database Data
Whether you’re working with MySQL or another type of SQL database, it’s important to keep your connections secure to maintain your data security. A good way to do this is to generate SSH keys for remote access to your server, rather than relying on outdated (and easily guessable) passwords.
If you’re worried about data loss, you can easily back up your database online. Most databases are run using Linux servers—you can automate a Linux file backup easily. If you’re running MySQL on Windows, you can set up a similar automatic backup system for Windows, allowing you to restore your data in an emergency.
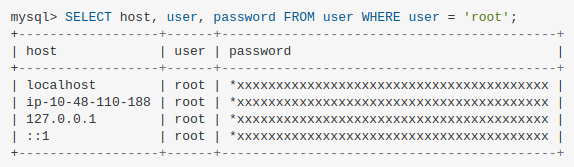
Know the context
mysql> select * from mysql.user;
mysql> select * from mysql.db;
For root user
Log in root locally first:
mysql -u root -pReplace the host value.
mysql> GRANT ALL PRIVILEGES ON *.* TO 'root'@'%' IDENTIFIED BY 'password';
mysql> UPDATE mysql.user SET host='%' WHERE user='root';
Finally restart service:
sudo systemctl restart mysql.serviceCreate an user if doesn’t exist
Sign in MySQL first:
sudo mysql -u root -pCreate the new database with the command:
CREATE DATABASE nextcloud;CREATE USER 'nextcloud'@'localhost' IDENTIFIED BY 'YOUR_STRONG_PASSWORD';
CREATE USER 'nextcloud'@'%' IDENTIFIED BY 'YOUR_STRONG_PASSWORD';Where YOUR_STRONG_PASSWORD is a unique and strong password.
GRANT ALL PRIVILEGES ON nextcloud.* TO 'nextcloud'@'localhost';
GRANT ALL PRIVILEGES ON nextcloud.* TO 'nextcloud'@'%';
Flush the privileges and exit the console with the commands:
FLUSH PRIVILEGES;
exit;
Existing user:
mysql> update user set Host='%' where user='user1';For all
Ensure firewall allows 3306 port:
sudo ufw allow 3306Allow MySQL to bind to all ports:
sudo vim /etc/mysql/mysql.conf.d/mysqld.cnfThen set bind-address to 0.0.0.0.
bind-address = 0.0.0.0")


")