
How to allow remote connection to mysql
- Method 2 — Update or change password
- Changing Password using SET:
- Changing Password using UPDATE:
- About the author
- To log in as a root user in Linux:
- Introduction to MySQL Root Password
- Login using Root User
- Setting up the Password for Root User
- 1. Using mysqladmin command
- 2. Using mysql_secure_connection command
- 3. Using ALTER command to change the password of the user
- Conclusion
- Recommended Articles
- Метод 1. Установка пароля root в первый раз.
- Изменения пароля MySQL для других пользователей.
- Метод 2 — Обновление или изменение пароля.
- Восстановление пароля root в MySQL.
- Definition of MySQL User Password
- How does Password Work in MySQL?
- How to Create a Password for the User in MySQL?
- 1. with UPDATE Query
- 2. with SET PASSWORD Query
- 3. Change with ALTER USER Query
- How to Delete a Password for the User?
- Conclusion
- Recommended Articles
- Setting, Changing and Resetting MySQL and MariaDB Root Passwords
- On this page
- Use the mysqladmin Command to Change the Root Password
- Method 1 — Set up a root password for the first time
- Change MySQL password for other users
- Method 2 — Update or change password
- Recover lost MySQL root password
- Step 1: Check MySQL version
- Step 2: Stop MySQL service
- Step 3: Check MySQL status
- Step 4: Skipping Networking and Grant Tables
- Step 5: Start MySQL service
- Step 6: Check MySQL status
- Step 7: Log in to MySQL
- Step 8: Flush privileges
- Step 9: Choose MySQL database
- Step 10: Change MySQL root password
- Step 11: Exit MySQL
- Step 12: Reverting Database to its normal settings
- Step 13: Kill MySQL processes
- Step 14: Restart MySQL service
- Step 15: Log in to MySQL
- Conclusion
- About the author
- Step 1: Check the version of MySQL on Ubuntu 20.04
- Step 2: Stop the MySQL server
- Step 3: Skip Grant Tables & Networking
- Step 4: Start the MySQL service
- Step 5: Confirm the status of the MySQL Server
- Step 6: Sign In to the MySQL shell
- Step 7: Alter the root password
- Step 8: Revert Database Server to Normal settings
- Step 9: Kill all MySQL processes & Restart the MySQL service
- Step 10: Log in with the newly set Password
- Wrap Up
- About the author
- How to Reset/Change MySQL Password
- Other Basic MySQL Commands
- Prerequisites
- Setting Up a Project Directory
- Installing MySQL and Setting Up Root Password on CentOS/RHEL 8
- Installing MySQL and Setting Up root Password on Ubuntu 20.04 LTS
- Conclusion
- About the author
- Mysqladmin Command To Change Root Password
- Recover MySQL root password
- Recover your MySQL password
- How To Solve The MySQL Error: Access denied for user root@localhost
- Change MySQL password for other users
- 43 Comment(s)
- Comments
- Resetting MySQL root password
- Prerequisites
- 1. How to reset MySQL root password in Linux
- Step 1: Log in to MySQL
- Step 2: Finding the .pid file used by the MySQL service
- Step 3: Killing the mysqld / .pid process
- Step 4: Creating a new root password file
- Step 5: Restarting the MySQL Server and Applying the Newly created Password
- How to reset MySQL root password in Windows
- Step 1: Stopping the MySQL server.
- Step 2: Open your favorite text editor
- Step 3: Creating a new Password text file using the password command
- Step 4: Launch CMD (Command Prompt)
- Step 5: Restarting MySQL Server and Applying the new Config file
- Generic instructions for resetting MySQL root password
- How to set up, change, and recover a MySQL root password
- Setting the password for the first time
- Changing the MySQL root user password
- Conclusion
- Conclusion
Method 2 — Update or change password
- Login to the MySQL server, type the following command at the shell prompt:
- Use the mysql database (type commands at the mysql> prompt):
- Change password for a user:
- Reload privileges:
This method you need to use while using PHP or Perl scripting.
While setting up MySQL, it is recommended that you set up a root password for your database for security-related concerns. However, this does not mean that you cannot use MySQL without a root password. It is upon you to think about the task at hand and decide whether to set up a root password or not.

Changing Password using SET:


Now, run the command with correct root password which is set in previous step. If you provide the correct password then it will be able to connect successfully with the server.
Changing Password using UPDATE:

Again, exit from the server and restart the database server before testing the new password.
$ sudo service mysql restart

About the author
Note: Empty/blank password means there is no password; hence anyone can log in as long as MySQL privileges have been granted.
To log in as a root user in Linux:
- Select start menu > Log Out on the top right corner. This allows you to log out of the user account that you are using at the moment.
- You will now see a login window, and here is where you log in using the username “root” and the password you set up for the root user. If there are several users in the login window, select others and log in.
If the password is not set up or you forgot or need to change your MySQL password, below is a guide on how to do set up/recover the password.
Updated May 15, 2023

Introduction to MySQL Root Password
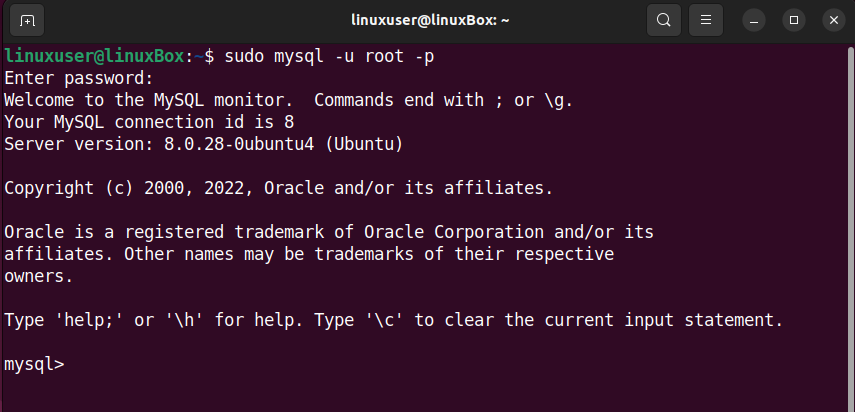
Login using Root User
sudo mysql -u root -p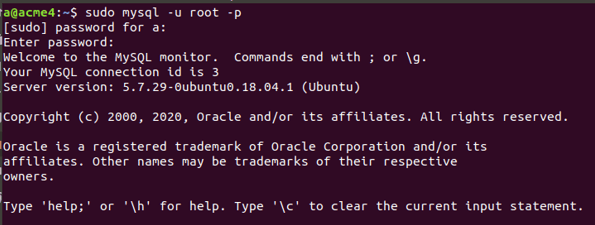
show databases;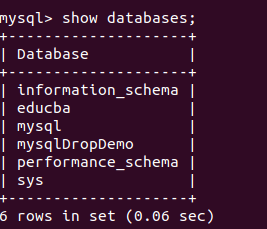
use mysql;
select user, authentication_string, plugin, password_lifetime, password_last_changed, password_expired from user;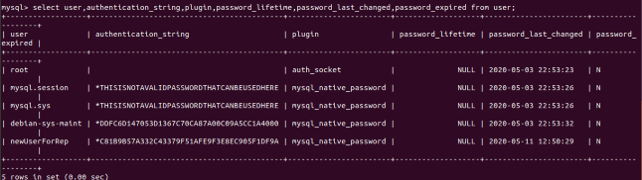
desc user;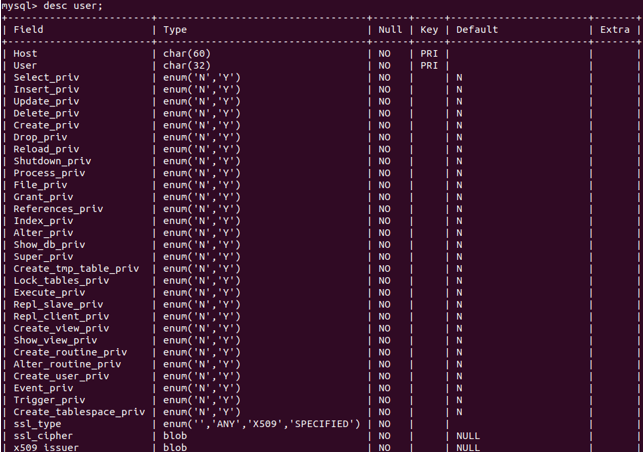
sudo -i mysql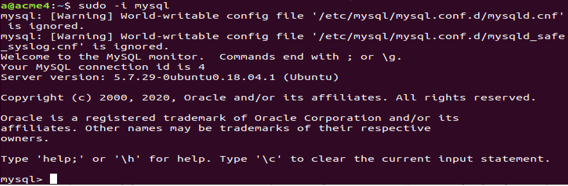
Setting up the Password for Root User
1. Using mysqladmin command
sudo mysqladmin -u root password myPassWhichIWant
2. Using mysql_secure_connection command
mysql_secure_connectionthat asks you multiple questions whose answers will set all the properties you wish to assign.
3. Using ALTER command to change the password of the user
ALTER USER 'root'@'localhost' IDENTIFIED BY 'a';
Save that file for further reference as ~/mysql-password.
sudo systemctl stop mysql
Now, fire the command for initializing the process of setting the password
sudo mysqld -init-file=~/mysql-passwordsudo systemctl start mysql
Further, you can use mysql -u root -p command to log in with the changed password.
Conclusion
Recommended Articles
Это руководство объясняет, каким образом можно установить, измененить или сбросить (если вы забыли пароль) рутовый пароль в MySQL. Снова и снова я наблюдаю одну и ту же картину:
Поэтому я нашёл время, чтобы напомнить вам как решить связанную с этим проблему в MySQL. Если вы ищете быстрое решение проблемы по сбросу пароля root, можете найте его в конце данного руководства.
Метод 1. Установка пароля root в первый раз.
где newpass будет пароль который вы устанавливаете.
Для изменения (обновления) пароля root воспользуйтесь следующей командой:
где oldpassword — ваш старый пароль, а newpassword соотвественно новый. Если же вы в ответ получили следующее сообщение:
то это означает, что пароль вы попросту забыли, либо его сменил кто-то другой. Воспользуйтесь следующей инструкцией для восстановления пароля к вашему MySQL.
Изменения пароля MySQL для других пользователей.
Для изменения пароля обычного пользователя введите следующую команду:
Метод 2 — Обновление или изменение пароля.
MySQL хранит имена пользователей и пароли в таблице пользователей внутри базы данных. Вы можете обновить пароль используя следующий метод:
mysql -u root -p
2. Начните работу с базой данных. В качестве приглашения для ввода команд вначале строки у вас должно быть mysql>
mysql> use mysql;
3. Смените пароль пользователя
mysql> flush privileges;
mysql> quit
Этот метод применим в случае использования на вашем сервере PHP и скриптов Perl.
Восстановление пароля root в MySQL.
Вы можете восстановить пароль от баз данных MySQL если повторите следующие 5 шагов:
- Остановите демон MySQL.
- Запустите демон MySQL (mysqld) с опцией —skip-grant-tables, т.к. в этом случае пароль не запрашивается.
- Подключитесь к серверу MySQL c root-привелегиями
- Введите новый пароль.
- Выйдите и перегрузите демон MySQL.
Далее приводятся команды, которые необходимо использовать для каждого шага, при условии, что вы вошли в систему с root-привелегиями.
1. Останавливаем службу MySQL:
/etc/init.d/mysql stop
Stopping MySQL database server: mysqld.
2. Запускаем службу с опцией —skip-grant-tables
mysqld_safe —skip-grant-tables &
Должен быть следующий вывод:
3. Подключаемся с серверу MySQL при помощи клиента mysql:
mysql -u root
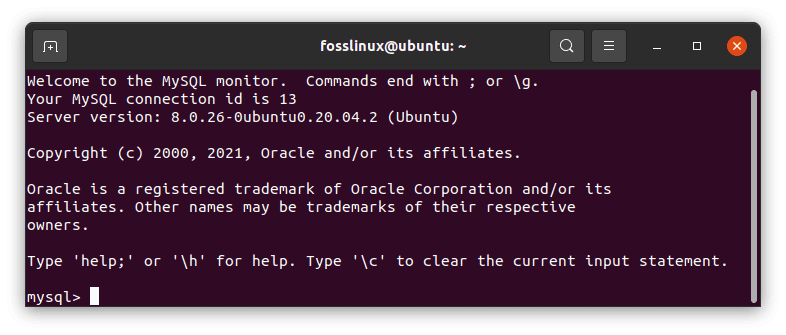
Welcome to the MySQL monitor. Commands end with ; or \g.
Your MySQL connection id is 1 to server version: 4.1.15-Debian_1-log
Type ‘help;’ or ‘\h’ for help. Type ‘\c’ to clear the buffer.
mysql>
4. Вводим новый пароль для root:
5. Останавливаем сервер MySQL:
/etc/init.d/mysql start
mysql -u root -p
Оригинал статьи youisbee.ru
Updated June 6, 2023
Definition of MySQL User Password
How does Password Work in MySQL?
- MySQL database is open-source server software that is essential for managing data records in the form of tables. Users can easily organize, insert, update, delete, store, and retrieve data later. A user must have specific access and privileges to make changes in the database and its associated tables. To make our server restricted for others, we use passwords during login mode to protect our data records.
- We use this query whenever we forget or want to change the previous password or even when we have never set the password for the root user in our database. In this case, MySQL will run anywhere else in the data center. We can follow some steps to ensure that we never lose the password for the database root user.
- Suppose when the user is checking for any security game, and we do not remember the password for root because the original password might be something complex or far than simple.
- By default, MySQL provides the username “root” without applying any password. The password field is left empty, allowing access to the database server. If in the process of installation, you have added a password unintentionally and cannot find now, then we need to change or reset the password.
- We can use many commands to modify user passwords based on MariaDB or MySQL server version running on your system. You can log in to the MySQL shell command console as root. If you have not provided a password, then leave it empty by default; if you have a password, then login in with it.
How to Create a Password for the User in MySQL?
1. with UPDATE Query
We must know that PASSWORD() calculates the hash value from a natural text value.
2. with SET PASSWORD Query
3. Change with ALTER USER Query
How to Delete a Password for the User?
- If the user needs to reset or delete the password related to the MySQL user root account, then the user must force the database MYSQL server to discontinue. Without applying the grant table authentication, you need to restart localhost.
- If you log in to your user account using SSH(command prompt), stop MySQL using the proper command and restart the server by skipping the grant table options.
- Afterward, you can set your user account password for the MySQL database host using the UPDATE command statement.
Conclusion
- It provides support for implementing various query commands on the server to execute changes to user passwords. These commands include MySQL statements like SET PASSWORD, UPDATE, or GRANT USAGE.
- This helps in server security implementation and maintenance processes to keep our databases secure, updated, and store the backups. Also, for user privileges safety, it may be necessary to apply this User password command to a user account in an application.
Recommended Articles
Setting, Changing and Resetting MySQL and MariaDB Root Passwords
On this page
- Use the mysqladmin Command to Change the Root Password
- Recover lost MySQL root password
Use the mysqladmin Command to Change the Root Password
Method 1 — Set up a root password for the first time
mysqladmin -u root password newpass
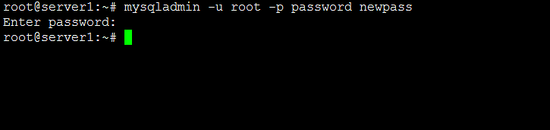
mysqladmin -u root -p password newpass
Enter password:
mysqladmin: connect to server at 'localhost' failed
error: 'Access denied for user 'root'@'localhost' (using password: YES)'
The word ‘password‘ in the above example is part of the command, do not replace that with your password. The word ‘newpass‘ is the new password.
Here is how to use that command:
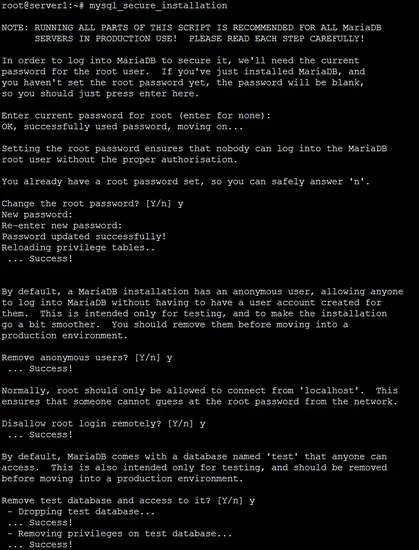
mysql_secure_installation
Answer the questions as shown below:
<-- Enter a new MySQL root password
Re-enter new password: <-- Repeat the MySQL root password
Change MySQL password for other users
mysqladmin -u user-name -p password newpass
The variables in this example are:
- user-name: The username of the user that you want to change the password for.
- newpass: The new password
The word ‘password’ is not a variable, so do not replace it. The command will ask for the old password.

Method 2 — Update or change password
mysql -u root -p
2) Use the database (type commands at the prompt):
mysql> use mysql;
MySQL 5.7.5 and earlier
mysql> update user set password=PASSWORD("newpass") where User='ENTER-USER-NAME-HERE';MySQL 5.7.6 and newer
4) Reload privileges:
mysql> flush privileges;
mysql> quit
This method you need to use while using PHP or Perl scripting.
Recover lost MySQL root password
Step # 1: Stop the MySQL server process.
Step # 2: Start the MySQL (mysqld) server/daemon process with the option so that it will not prompt for a password.
Step # 4: Set a new root password.
Step # 5: Exit and restart the MySQL server.
Step # 1: Stop the MySQL service:
service mysql stop
Stopping MySQL database server: mysqld.
Step # 2: Start the MySQL server w/o password:
mysqld_safe --skip-grant-tables &
[1] 5988
Starting mysqld daemon with databases from /var/lib/mysql
mysqld_safe[6025]: started
Step # 3: Connect to the MySQL server using the MySQL client:
mysql -u root
Welcome to the MySQL monitor. Commands end with ; or \g.
Your MySQL connection id is 56299
Server version: 5.6.34-1 (Debian)
Copyright (c) 2000, 2016, Oracle and/or its affiliates. All rights reserved.
Oracle is a registered trademark of Oracle Corporation and/or its
affiliates. Other names may be trademarks of their respective
owners.
Type 'help;' or '\h' for help. Type '\c' to clear the current input statement.
mysql>
MySQL 5.7.5 and earlier
mysql> use mysql;
mysql> update user set password=PASSWORD("NEW-ROOT-PASSWORD") where User='root';
mysql> flush privileges;
mysql> quit
MySQL 5.7.6 and newer
;
mysql> flush privileges;
Step # 5: Stop the MySQL server:
service mysql stop
Stopping MySQL database server: mysqld
STOPPING server from pid file /var/run/mysqld/mysqld.pid
mysqld_safe[6186]: ended
Or use this command to stop MySQL if the command above fails to stop it (which command works depends on the MySQL version):
The output might differ based on the Linux distribution. Don’t worry unless it reports an error. Start the MySQL server and test it:
service mysql start
mysql -u root -p
Not everybody is good at remembering passwords. Do not panic in case you cannot remember the password of your MySQL account. You can still access the MySQL server and change the root password even if you have misplaced or forgotten the root password. But how is a beginner going to perform this operation?
This blog will demonstrate the method for changing the MySQL root password in Ubuntu 22.04. Let’s get started.
Note: The given method for changing password only implies for MySQL version greater or equal to “8”.
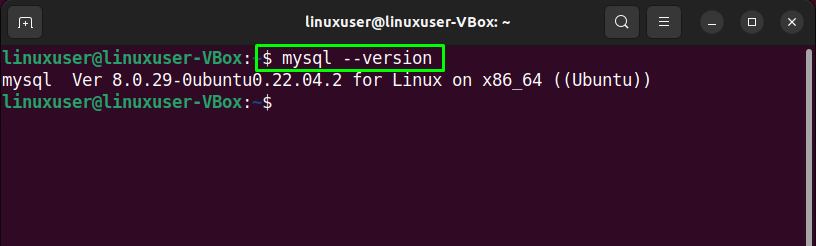
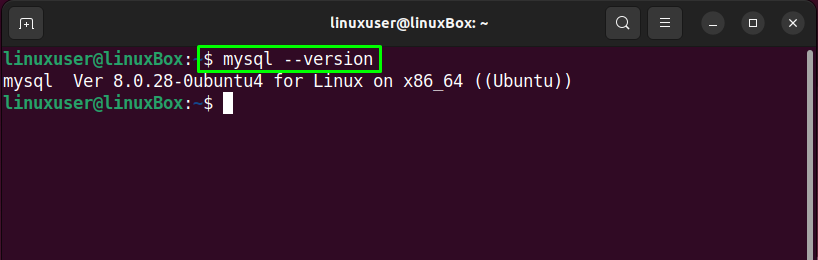
Step 1: Check MySQL version
First thing you need to do is check the version of installed MySQL on your system:
As you can see, we have installed MySQL version “8.0.29”:
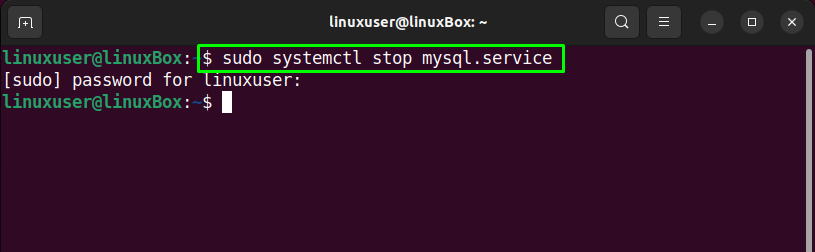
Step 2: Stop MySQL service
In the next step, utilize the below-given command for stopping the MySQL service:
systemctl stop mysql.service
Now, the MQL service is stopped:

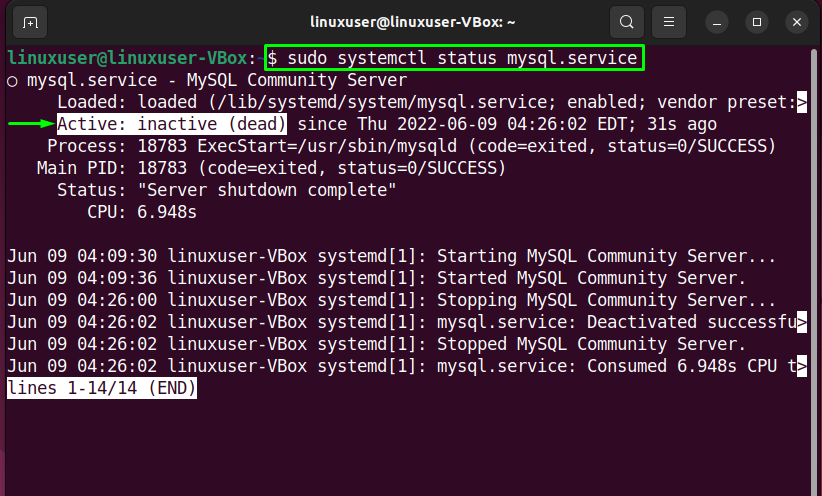
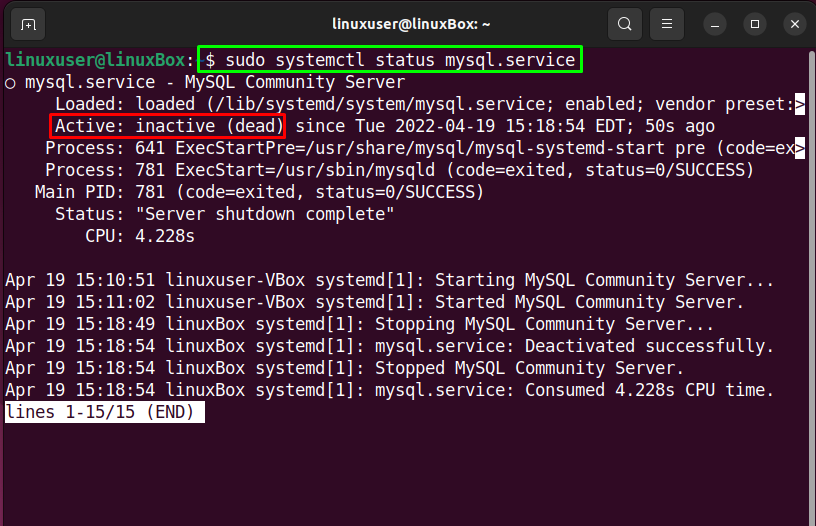
Step 3: Check MySQL status
After stopping the MySQL service, verify its status with the help of the provided command:
systemctl status mysql.service
The given output indicates that MySQL is currently inactive on our system:
Step 4: Skipping Networking and Grant Tables
MYSQL server should start without networking checks and granting tables. To do so, set the value of “MYSQLD_OPTS”:
systemctl set-environment =

Then head towards the next step.
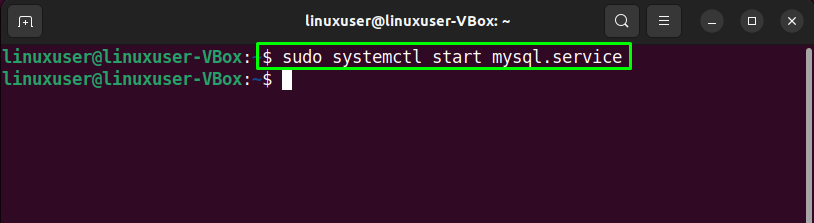
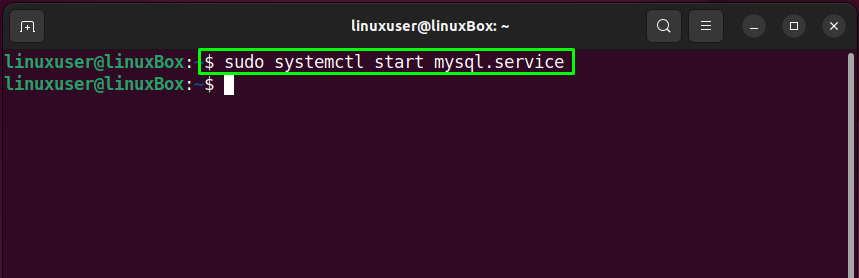
Step 5: Start MySQL service
systemctl start mysql.service
MySQL service is now started:
Step 6: Check MySQL status
Again, check the status of the MySQL service to ensure that it is currently active and running on the Ubuntu 22.04 system:
systemctl status mysql.service
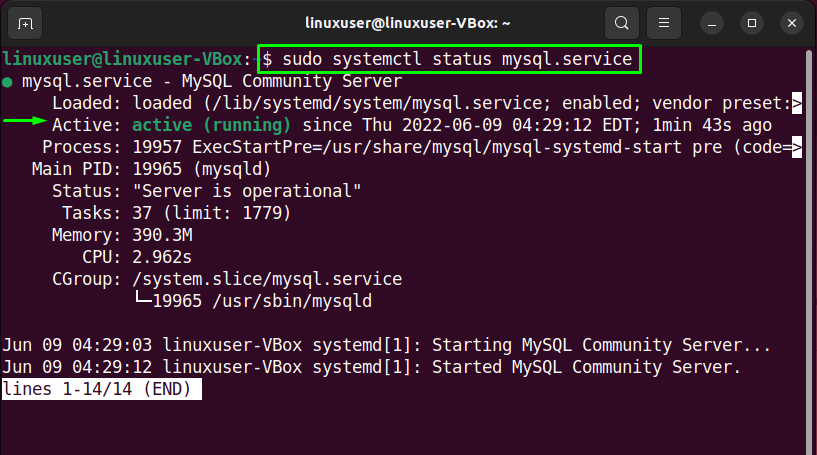
Now head towards the next step.
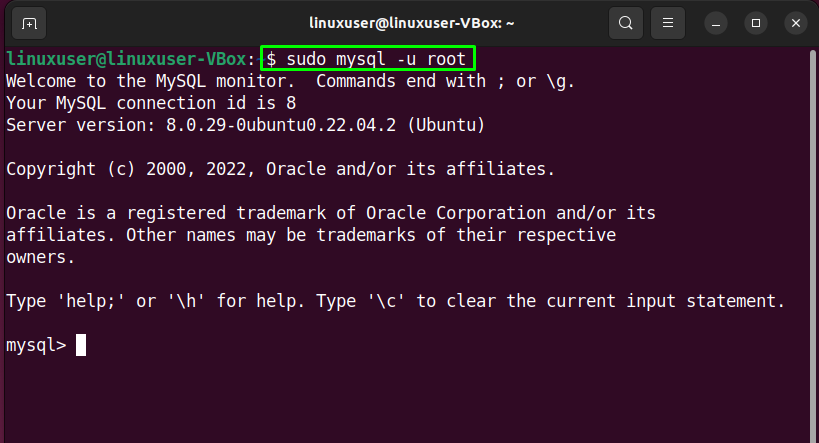
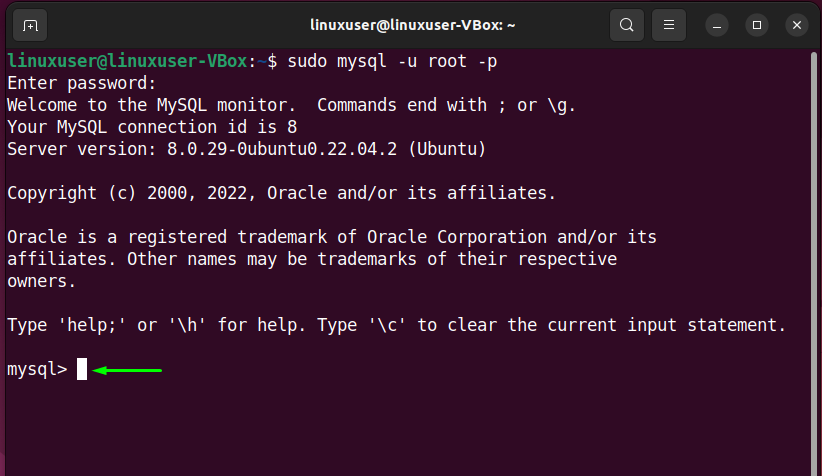
Step 7: Log in to MySQL
Write out the provided command in terminal for loging in to MySQL account:
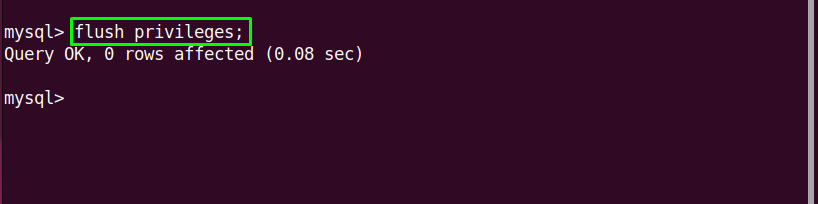
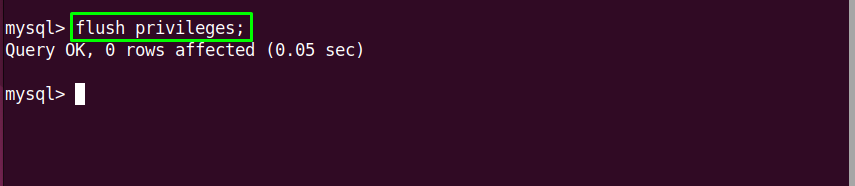
Step 8: Flush privileges
To change the MySQL root password, firstly, it is required to flush all privileges:
Step 9: Choose MySQL database
Then choose the MySQL database:

Step 10: Change MySQL root password
After doing so, utilize the “ALTER” command and specify the new password:

Step 11: Exit MySQL
Lastly, type “quit” to logout from the active MySQL shell:

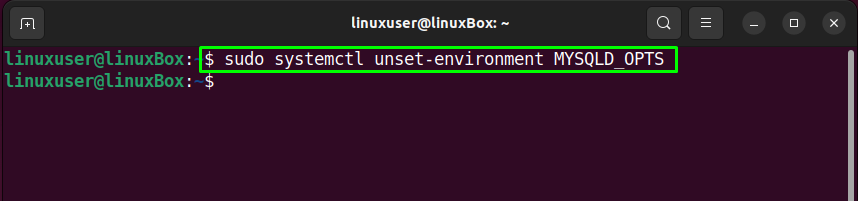
Step 12: Reverting Database to its normal settings
In order to restart MySQL database back in “normal” mode, first of all, “revert” the added changes by unsetting the value of environment variable:
systemctl unset-environment MYSQLD_OPTS

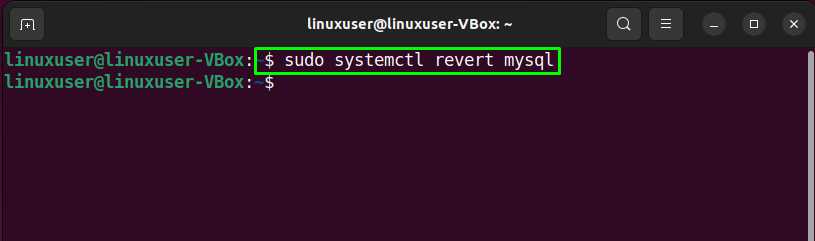
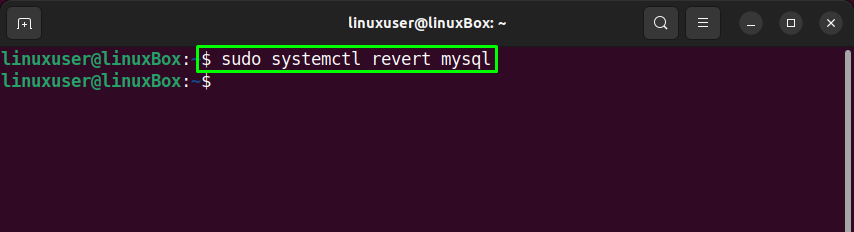
Next, revert “MySQL” for removing the set system configuration:
systemctl revert mysql
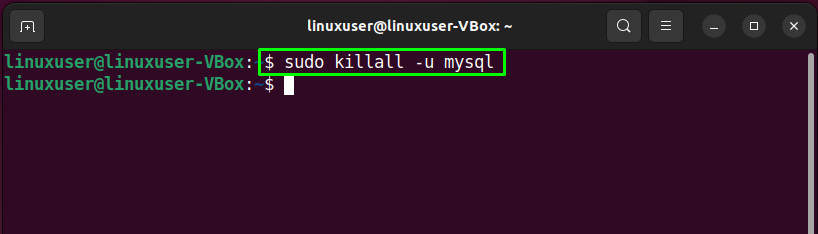
Step 13: Kill MySQL processes
Step 14: Restart MySQL service
In the final step, restart the MySQL service so that it can take changes from the configured settings:
systemctl restart mysql.service

Now, move to the next step.
Step 15: Log in to MySQL
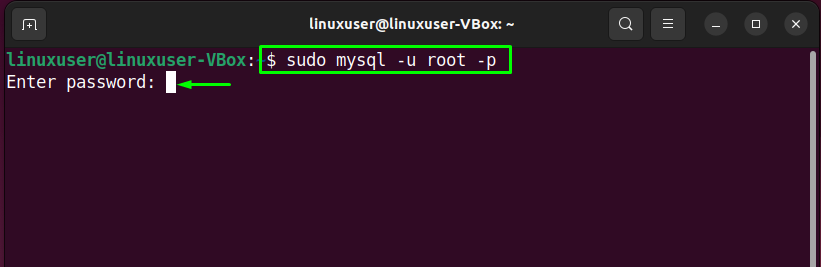
That’s it. You have successfully changed the password of MySQL:
We have compiled the easiest method for changing the MySQL root password in Ubuntu 22.04.
Conclusion
To change the MySQL root password in Ubuntu 22.04, firstly, stop the MySQL service and unset the value of the environment variable. After doing so, start the MySQL service, log in to the MySQL root account, flush all privileges, choose a database, and use the “ALTER” command to specify the new password. Lastly, revert the database back to the normal mode, restart the MySQL service, and log in with the new password. This blog demonstrated the method for changing the MySQL root password in Ubuntu 22.04.
About the author
I am a Linux enthusiast, I love to read Every Linux blog on the internet. I hold masters degree in computer science and am passionate about learning and teaching.
Passwords are hard to remember, so if you have forgotten the MySQL root password, luckily, there is a way to change it. This post has been written for you, and by the end of this post, you will have successfully changed the password of MySQL.
Before getting straight to the solution, it is assumed that you are using the latest version of the MySQL database on Ubuntu 20.04 LTS system. This post will provide a step-by-step guide on how to change the MySQL root password in Ubuntu 20.04. So, without wasting any time, let’s start.
Step 1: Check the version of MySQL on Ubuntu 20.04
First of all, check the version of your MySQL because this post contains the solution of changing the root password on version 8 or higher. If the version of your MySQL is lower than 8, then the solution will be different. The command for checking the version of MySQL is given below:
Step 2: Stop the MySQL server
To change the MySQL root password, you first need to shut down the MySQL server, and you can do so using the command:
$ sudo systemctl stop mysql.service
Check the status of the MySQL server to verify using the command:
$ sudo systemctl status mysql.service
Step 3: Skip Grant Tables & Networking
To start the MySQL server without granting the tables and networking check, set the environment variable “MYSQLD_OPTS” which MySQL uses on startup:
$ sudo systemctl set-environment MYSQLD_OPTS=»—skip-networking —skip-grant-tables»
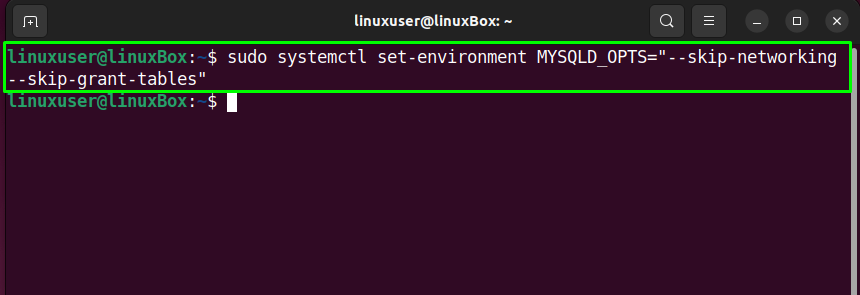
Alright, the environment variable is set, and we can log in to the MySQL shell without providing any password.
Step 4: Start the MySQL service
After setting the environment variable “MYSQLD_OPTS”, start the MySQL service now using the command:
$ sudo systemctl start mysql.service
Step 5: Confirm the status of the MySQL Server
Confirm the status of the MySQL service, whether it is running or not:
$ sudo systemctl status mysql.service

Step 6: Sign In to the MySQL shell

Without providing any password, you will log in to the MySQL shell.
Step 7: Alter the root password
Now, flush the privileges first:
Select the MySQL database:

At the place of “the-new-password” provide your new password. After successfully changing the MySQL root password, log out from the MySQL shell:

Step 8: Revert Database Server to Normal settings
For restarting the database server in “normal” mode, it is required to “revert” the changes we have made so that the networking is enabled and grant tables are loaded.
To do so, firstly unset the “MYSQLD_OPTS” environment variable which you have set previously:
$ sudo systemctl unset-environment MYSQLD_OPTS
After doing so, remove the modified system configuration by reverting “MySQL”:
$ sudo systemctl revert mysql
Step 9: Kill all MySQL processes & Restart the MySQL service
Now, kill all the processes of MySQL before restarting the MySQL server:
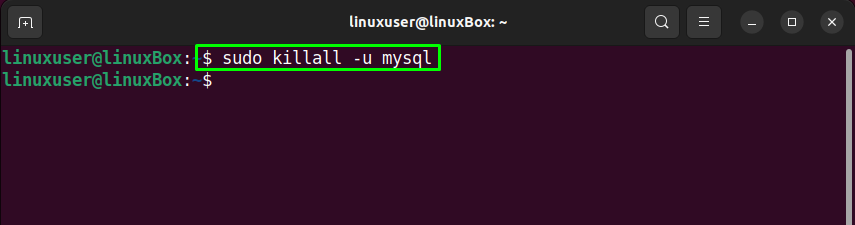
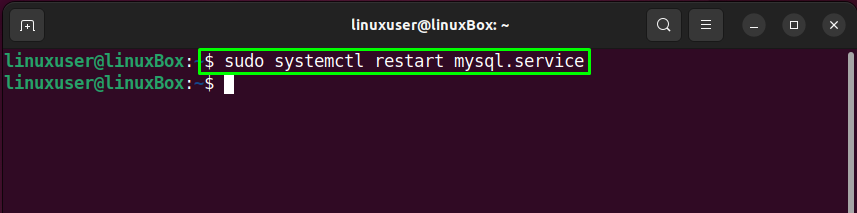
After having the output as shown in the picture, hit “Enter” and restart the MySQL server using the command given below:
$ sudo systemctl restart mysql.service
Step 10: Log in with the newly set Password
Log in to the MySQL shell with the newly set password:
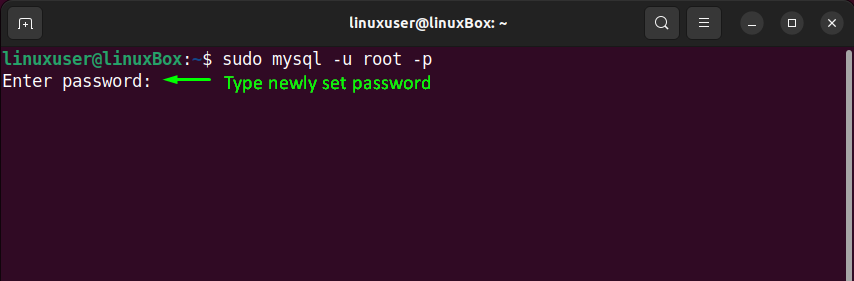
Provide the recently set password in the ALTER command:
This is it. MySQL’s root password is successfully changed, and you are logged back into the MySQL shell.
Wrap Up
In this step-by-step guide, you have learned to change the MySQL root password on the Ubuntu 20.04 LTS system. This post contains a profound and easy-to-understand solution on resetting the root password of MySQL on Ubuntu 20.04.
About the author
A Javascript Developer & Linux enthusiast with 4 years of industrial experience and proven know-how to combine creative and usability viewpoints resulting in world-class web applications. I have experience working with Vue, React & Node.js & currently working on article writing and video creation.
Ever forgotten or just wanted to change your MySQL password? You’ve come to the right place – in this guide, we’ll walk you through how to set, change and recover your MySQL root password as well as other useful MySQL commands.
RunCloud uses MariaDB, an enhanced drop-in replacement for MySQL, as a database. MariaDB is a community-driven package by the original developers of MySQL, with the promise of future compatibility, hence, terminal commands and software tools for MySQL database can be used for MariaDB as well.
However, if you want to avoid any of these risks then SSH is the way to go. If you have no prior experience managing MySQL, don’t worry, with RunCloud, it is as easy as ABC.
First, you need a terminal to work on. On a Windows machine, you can download the PuTTY software. If you are on a Mac or Linux, there is already a built-in Terminal app installed.
The MySQL root password that is displayed on your terminal screen at the end of the RunCloud agent installation on your server (example below is installation on DigitalOcean) is meant to be kept for safekeeping elsewhere, but if you forgot to copy it down, you can still retrieve it.
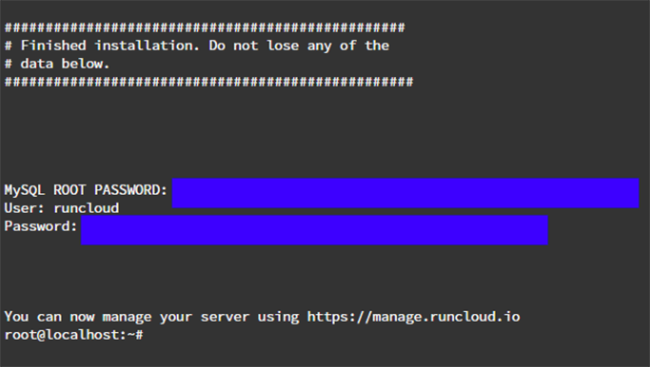
Pic1: Keep the MySQL password somewhere safe!
- Log in as root into your server through SSH (eg: puTTY/terminal/bash). Alternatively, run the commands that follow as
suorsudoas root user. This method is safer. - Navigate to /etc/mysql
/cd /etc/mysql
- View the file my.cnf either using the command cat or use any text editing software (vi/vim/nano).
cat my.cnf
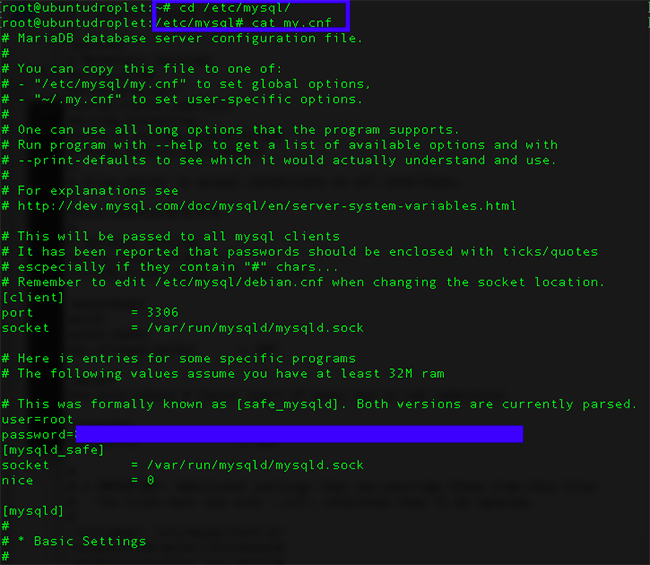
Pic 2: Viewing the MySQL root password
How to Reset/Change MySQL Password
- Login to your server using SSH.These commands must be run with root user privileges. Although you can login to your server as root user, it is highly recommended not to. If you can, log in to your server as a system user with root privileges and run these commands as su or sudo commands using those administrative privileges. You can also close the incoming traffic for MySQL port (default port is 3306 unless you changed it to something else) temporarily at the firewall if you want to be extra careful.
- Stop the MySQL service.
service mysql stop
- Restart MySQL service in single-user mode and bypassing password authorization, by running the command below. Since the command
--skip-grant-tablesenables anyone to connect without a password, it is considered highly insecure, hence, all commands that follow must be done within a brief period. The ampersand (symbol &) at the end is required as it ensures that the command is being run parallel with the commands that follow afterwards.mysqld_safe --skip-grant-tables &
- Login into MySQL to connect.
mysql
- At the MariaDB> prompt, change the root password by running the commands below. Replace the NEWSTRONGPASSWORD with your chosen new strong password.
UPDATE mysql.user SET Password=password('NEWSTRONGPASSWORD') WHERE User='root'; - At the MariaDB> prompt, run the following commands.
FLUSH PRIVILEGES;
exit;
- Stop the MySQL server using the following command. Before the MySQL server shuts down, you will be prompted to key in the root password. Key in your new root password.
mysqladmin -u root -p shutdown
- Start the MySQL server in normal mode.
service mysql start
- Verify that you are able to connect to MySQL by running the command mysql again. If you disable incoming traffic for the mysql port, please remember to enable it again.
- Lastly, you need to update the MySQL root password in the file /etc/mysql/my.cnf (as shown in Pic2) or you might not be able to add new database or user. You can use vi, vim or nano to edit the file.
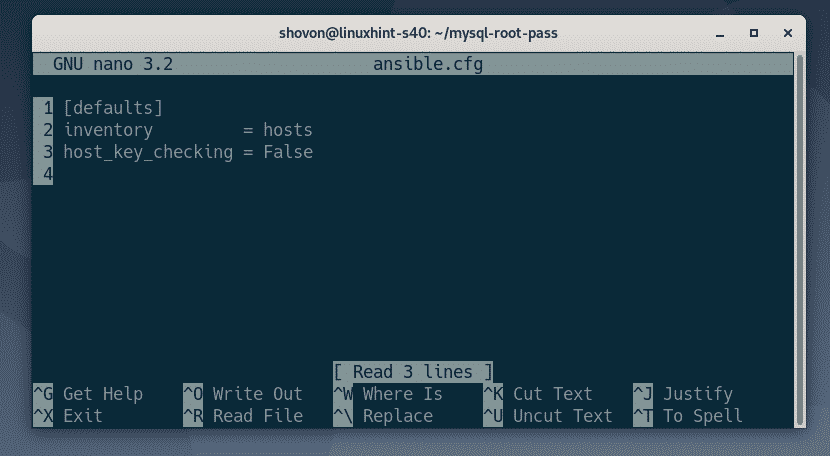
nano /root/.my.cnf

Pic 3: Resetting the MySQL root password
Other Basic MySQL Commands
Even though you can run some basic MySQL commands in the RunCloud control panel, it would not hurt to know how to do the same tasks in command line. Below are some of the basic commands that should get you going.
When you run the commands below, replace the database name of your choice at the DatabaseNameHere.
To show the available databases.
SHOW DATABASES;
Creating a database.
CREATE DATABASE DatabaseNameHere;
DROP DATABASE DatabaseNameHere;
To use or operate on a particular database. The MySQL prompt will change to reflect the database name that you have specified.
USE DatabaseNameHere;
SELECT database();
CREATE USER 'UsernameHere'@'localhost' IDENTIFIED BY 'PasswordHere';
GRANT ALL PRIVILEGES ON *.* TO 'UsernameHere'@'localhost'
->     WITH GRANT OPTION;
Categories: Tutorials, Server Management, Tips & Tricks
Most Linux distributions, including CentOS/RHEL and Ubuntu/Debian, do not set the MySQL root password automatically. As the MySQL root password is not automatically set, one can log in to the MySQL console as the root without any password. This is not very good for security.
This article will show you how to set up a MySQL root password on CentOS 8 and Ubuntu 20.04 LTS Linux distributions using Ansible modules.
Prerequisites
If you want to try out the examples included in this article,
1) You must have Ansible installed on your computer.
2) You must have at least a CentOS/RHEL 8 host or an Ubuntu 20.04 LTS host configured for Ansible automation.
There are many articles on LinuxHint dedicated to installing Ansible and configuring hosts for Ansible automation. You may check these out if needed.
Setting Up a Project Directory
Before we move on any further, we will set up a new Ansible project directory, just to keep things a bit organized.


Add the host IP or DNS names of your CentOS/RHEL 8 or Ubuntu 20.04 LTS hosts in the inventory file (one host per line), as shown in the screenshot below.

Here, I have created two groups, centos8, and ubuntu20. The centos8 group has the DNS name of my CentOS 8 host, vm3.nodekite.com; and the ubuntu20 group has the DNS name of my Ubuntu 20.04 LTS host, vm7.nodekite.com.


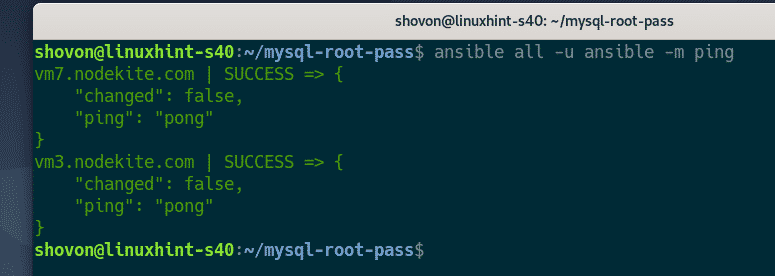
ansible all ansible

As you can see, the my CentOS 8 host (vm3.nodekite.com) and Ubuntu 20.04 LTS host (vm7.nodekite.com) are accessible.
Installing MySQL and Setting Up Root Password on CentOS/RHEL 8
This section will show you how to install the MySQL database server and set up a root password on CentOS 8 using Ansible. The same procedure should work on RHEL 8.
$ nano playbooks/install_mysql_centos8.yaml

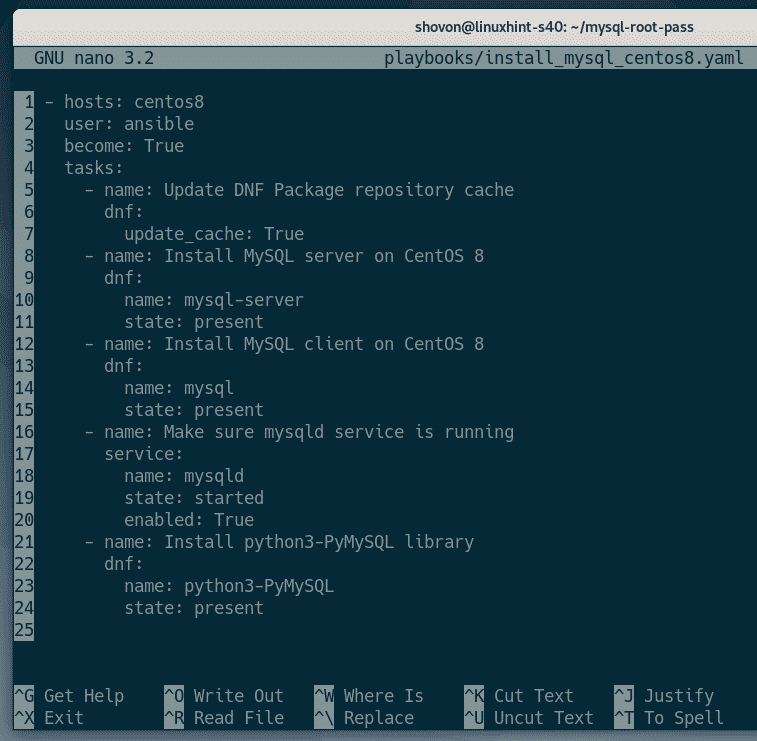
The line below tells Ansible to run the playbook install_mysql_centos8.yaml on every host in the centos8 group.

Here, I have defined 5 tasks.

The first task updates the DNF package repository cache of CentOS 8 using the Ansible dnf module.

The second task installs the MySQL server package mysql-server using the Ansible dnf module.

The third task installs the MySQL client package mysql using the Ansible dnf module.

The fourth task ensures that the mysqld service is running and that it has been added to the system startup so that it automatically starts on boot.

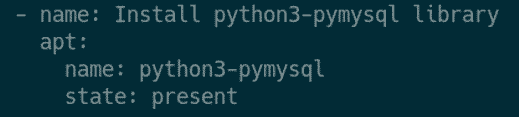
The fifth task installs the Python 3 MySQL library pymysql. This is required for accessing MySQL from Ansible.

$ ansible-playbook playbooks/install_mysql_centos8.yaml

As you can see, the playbook install_mysql_centos8.yaml ran successfully.


Now that the MySQL server is installed, it is time to set up a root password for the MySQL server.
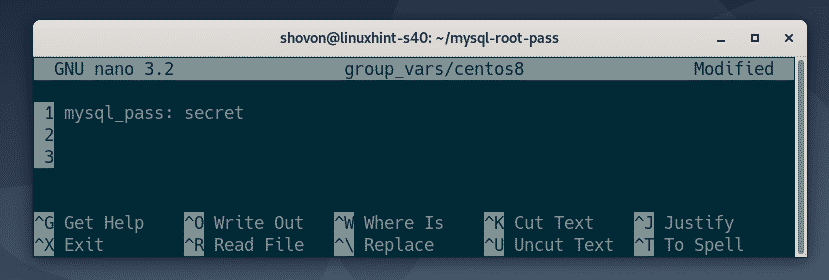
$ nano group_vars/centos8

Add a new variable mysql_pass with the root password (in my case, secret) you would like to set, as shown in the screenshot below.
$ nano playbooks/set_root_pass_centos8.yaml

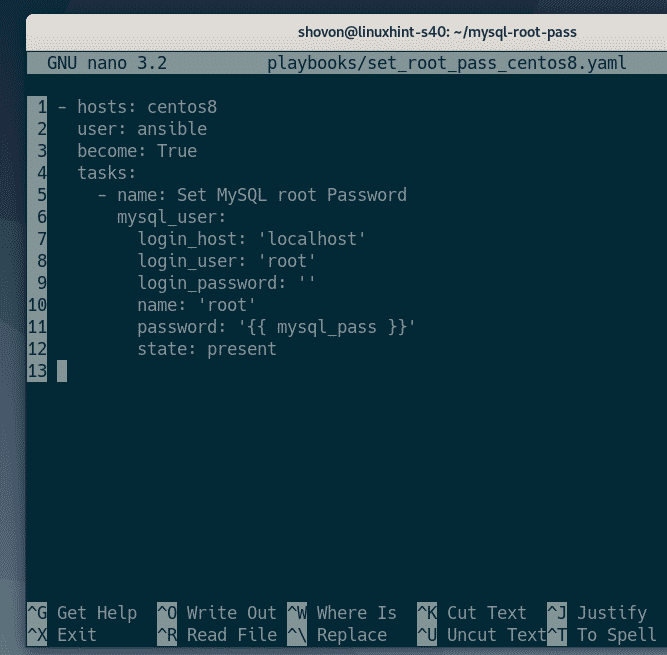


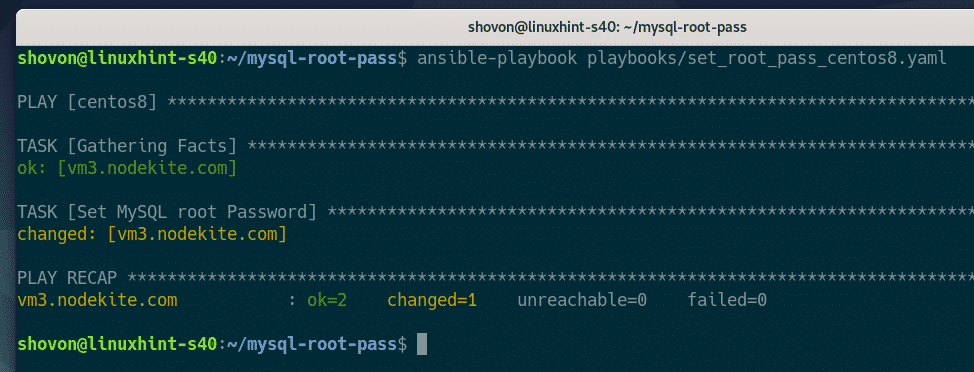
$ ansible-playbook playbooks/set_root_pass_centos8.yaml

The playbook ran successfully, as seen in the screenshot below:
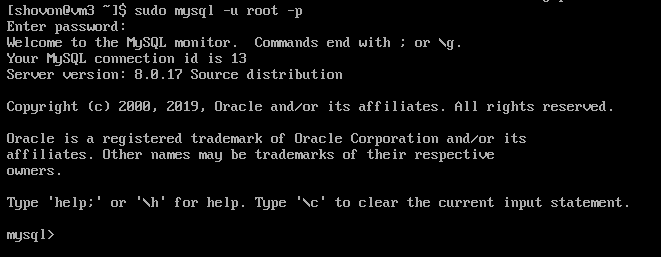
As you can see, I can no longer log in to the MySQL server without a root password.


Type in the root password you have set using Ansible, and press <Enter>.

Installing MySQL and Setting Up root Password on Ubuntu 20.04 LTS
This section will show you how to install the MySQL database server and set up a root password on Ubuntu 20.04 LTS using Ansible.
$ nano playbooks/install_mysql_ubuntu20.yaml

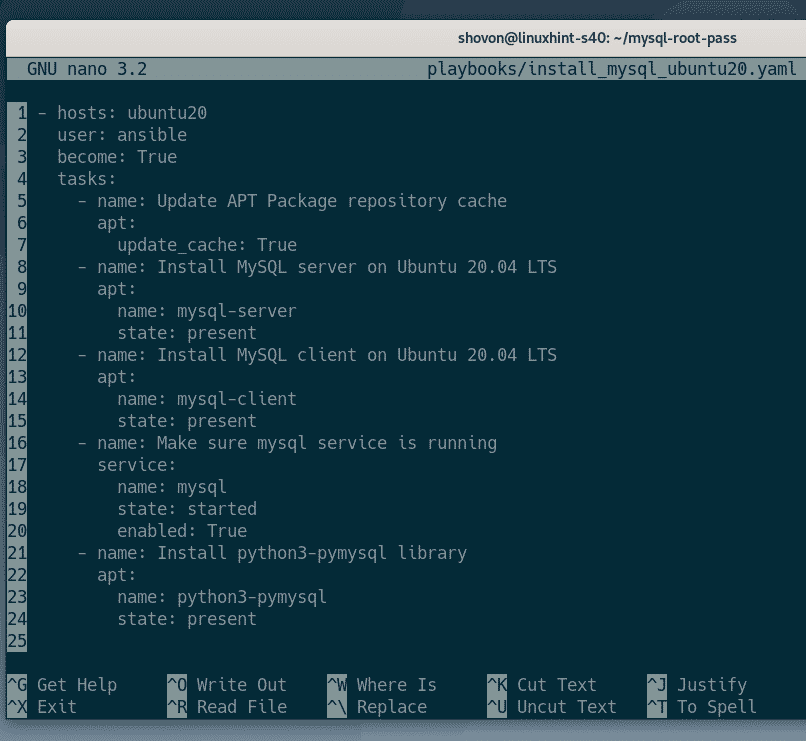

Here, I have defined 5 tasks.
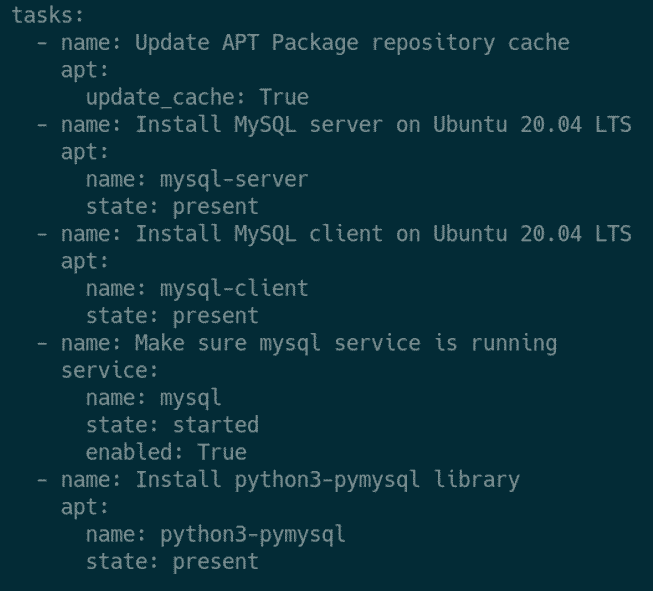
The first task updates the APT package repository cache of Ubuntu 20.04 LTS using the Ansible apt module.

The second task installs the MySQL server package mysql-server using the Ansible apt module.

The third task installs the MySQL client package mysql using the Ansible apt module.

The fourth task makes sure that the mysql service is running and that it has been added to the system startup so that it automatically starts on boot.

The fifth task installs the Python 3 MySQL library pymysql. This is required to access MySQL from Ansible.
$ ansible-playbook playbooks/install_mysql_ubuntu20.yaml

As you can see, the playbook install_mysql_ubuntu20.yaml ran successfully.


Now that the MySQL server is installed, it is time to set up a root password for the MySQL server.
$ nano group_vars/ubuntu20

Add a new variable, mysql_pass, with the root password (in my case, verysecret) that you would like to set, as shown in the screenshot below.

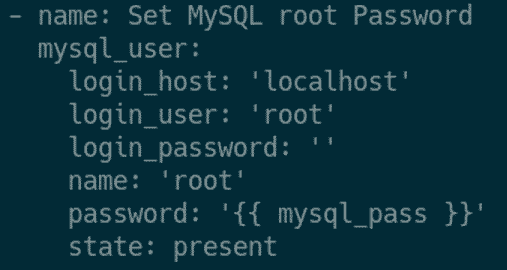
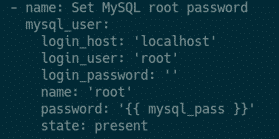
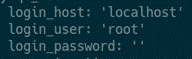
$ nano playbooks/set_root_pass_ubuntu20.yaml


Here, I have defined three tasks.


The second task reloads all the privileges.


$ ansible-playbook playbooks/set_root_pass_ubuntu20.yaml

The playbook ran successfully, as you can see in the screenshot below:
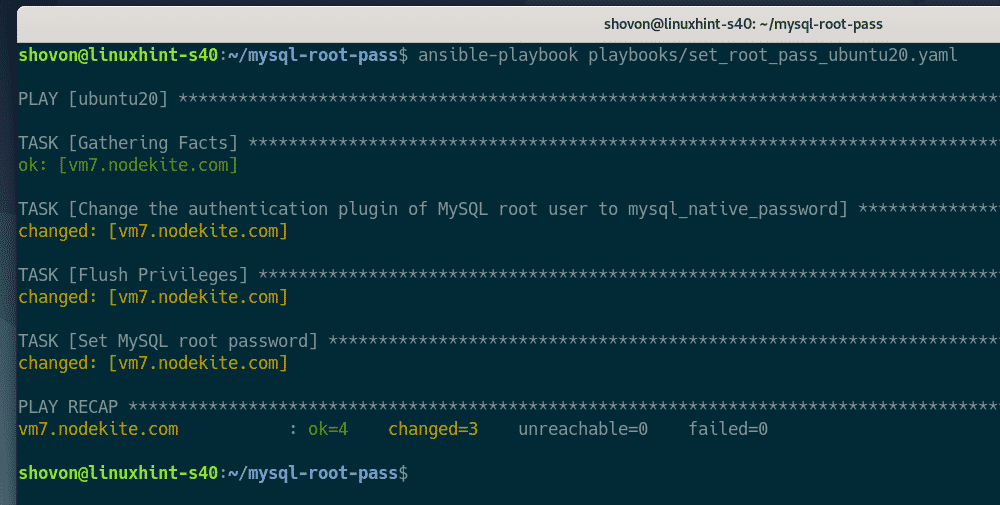
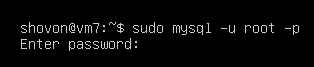
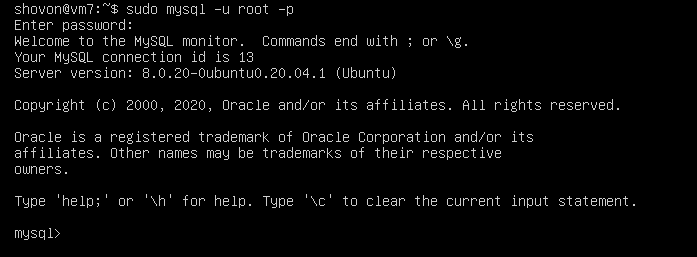
As you can see, I can no longer log in to the MySQL server without a root password.


Type in the root password you have set using Ansible and press <Enter>.
Conclusion
About the author
Mysqladmin Command To Change Root Password
Recover MySQL root password
Step # 1 : Stop the MySQL server process.
Step # 2 : Start the MySQL (mysqld) server/daemon process with the —skip-grant-tables option so that it will not prompt for a password.
Step # 4 : Set a new root password.
Step # 5 : Exit and restart the MySQL server.
Step # 1 : Stop the MySQL service:
Step # 2 : Start the MySQL server w/o password:
Step # 3 : Connect to the MySQL server using the MySQL client:
Step # 5 : Stop the MySQL server:
Start the MySQL server and test it:
Recover your MySQL password
1. Stop the MySQL server process using the command:
sudo service mysql stop
service stop MySQL
sudo mysqld_safe --skip-grant-tables --skip-networking &
mysql -u root
mysql> use mysql;
mysql> update user set authentication_string=password('NEWPASSWORD') where user='root';
mysql> flush privileges;
mysql> quit
Once you are done running all the commands mentioned above, proceed and restart the MySQL daemon using this command:
sudo service mysql restart

restart MySQL service
By now, you should be able to log into MySQL using the newly set password.
That’s all. We believe you are now in a position to set, reset, and recover your MySQL root password.
How To Solve The MySQL Error: Access denied for user root@localhost
mysql -u root -p
sudo mysql
Then, input your passcode at the prompt. A MySQL shell will load.
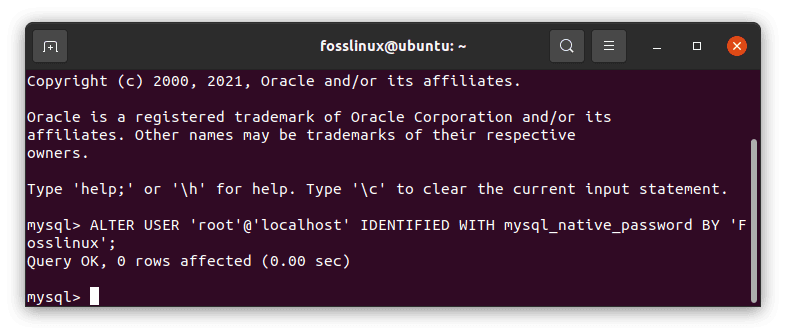
ALTER USER 'root'@'localhost' IDENTIFIED WITH mysql_native_password BY 'insert_password';
For the sake of the tutorial, I will change the password to ‘Fosslinux as shown in the command line and output below:
ALTER USER 'root'@'localhost' IDENTIFIED WITH mysql_native_password BY 'Fosslinux';
open MySQL shell
After running the commands listed above, exit the MySQL shell by clicking CTRL + D on your keyboard or key in “exit” on the MySQL shell and click enter. You do not have to restart the MySQL service for you to log in using the command below:
sudo service mysql restart 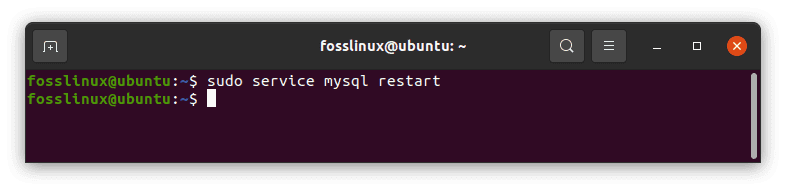
restart MySQL service
At this point, you can now attempt to access MySQL with root again. In the terminal, key in:
mysql -u root -p

login to MySQL as root
Change MySQL password for other users
43 Comment(s)
Comments
This feature is only available to subscribers. Get your subscription here.
Resetting MySQL root password
Prerequisites
- Existing MySQL database
- Admin privileges on the PC hosting the MySQL database
- Access to Windows or Linux server running MySQL
- Command-line interface or terminal access
- A text editor. (Don’t worry since Windows users have Notepad installed by default on their computers while Linux users have vim pre-installed).
Once you have all the mentioned prerequisites, let’s roll on and learn how to reset or change the MySQL root password.
We shall do this process on two fronts:
- How to reset MySQL root password in Linux
- How to reset MySQL root password in Windows
1. How to reset MySQL root password in Linux
Step 1: Log in to MySQL
user=fosslinux

Step 2: Finding the .pid file used by the MySQL service
The next step is locating the .pid file. In most Linux systems, they are stored in this location:
/var/lib/mysql or /var/run/mysqld/ or /usr/local/mysql/data/.
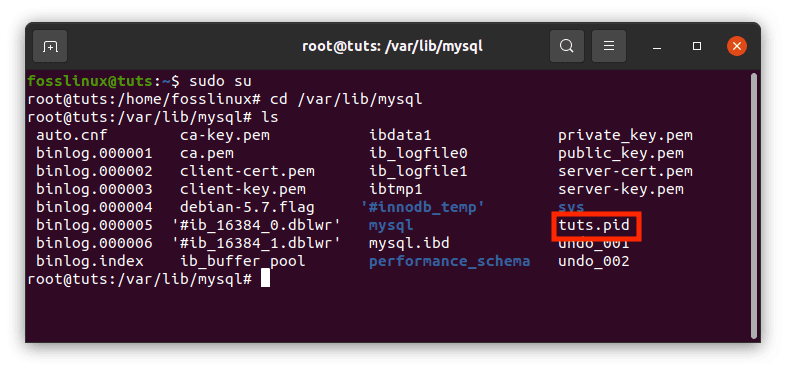
Find the .pid file
Since not all Linux systems are the same, you can try out any of the paths mentioned above and see if you can locate the file. To quickly find the file, you can narrow your search to files starting with mysqld (or your hostname) and ending with .pid.
Note: Searching the file will simplify the process; hence we recommend you try it out.
Once you find the file, now proceed to the next step
Step 3: Killing the mysqld / .pid process
Before resetting or creating a new root password, we first have to stop the MySQL server. This can be done by opening the terminal and executing the command line below:
kill `cat /mysql-data-directory/host_name.pid`
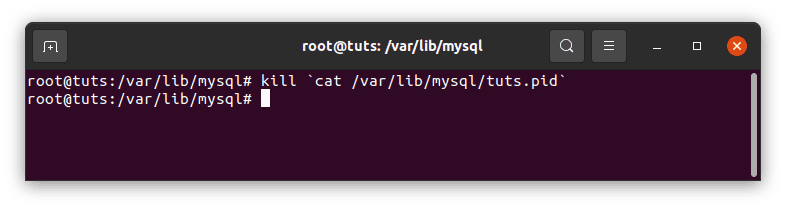
kill the .pid process
Note: Replace the mysql-data-directory/host_name.pid with the filename we found in step 2. Also, it is vital to specify the entire file path to avoid getting errors.
Additional tip: Always ensure you use the back-tick key instead of a single-quote mark key. The back-tick key is located above the tab-key on most computers and before the one numkey.
Step 4: Creating a new root password file
Now it is time to open your favorite text editor. For our case, we shall use the Vim text editor. Open terminal using the shortcut CTRL + ALT + T, then run the command below:
sudo vim mysql-init
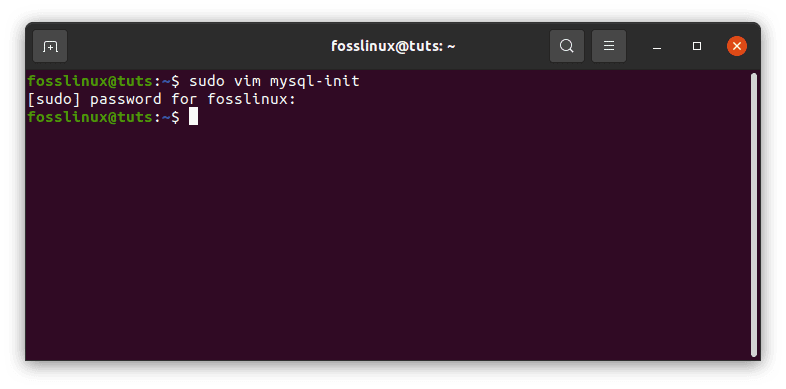
sudo vim mysql-init
Note: if you get an error after running the command above, execute this command to proceed with the other processes:
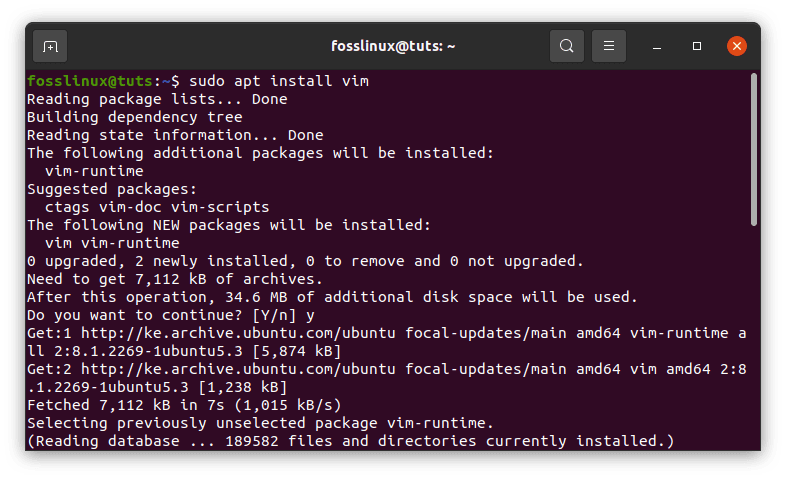
sudo apt install vim
Now add the line below in the file:
ALTER USER 'root'@'localhost' IDENTIFIED BY 'NewPassword';
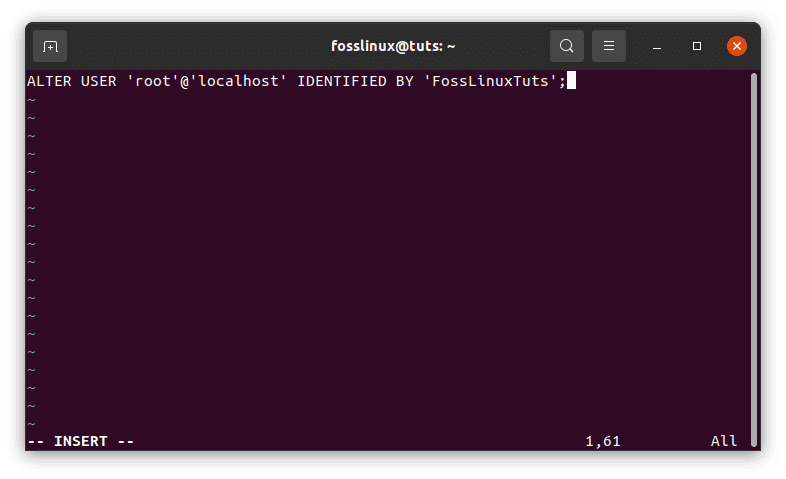
Sudo vim and create the new password file by adding the command into the vim editor
Note: When manually typing the line above into the terminal, remember to include all the semicolons and single-quote marks. Also, replace the “NewPassword” phrase with the new password you want to use. Finally, ensure you use a strong and secure password or refer here to learn how to generate a strong random password on Linux.
The above command will only work on the host machine you are using when running the command. However, if you plan to connect to a different system, replacing the localhost with the relevant or rather appropriate hostname is recommended for the command to work. If you fail to do so, you will encounter errors.
Once you have added the new file to your text editor, save it to:
home/mysql-init.
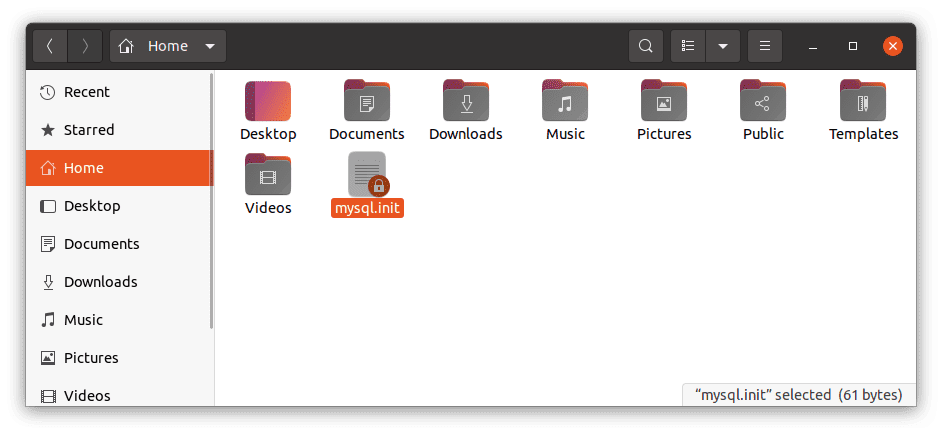
Mysql.init file in the home directory
Step 5: Restarting the MySQL Server and Applying the Newly created Password
It is time to apply the changes we made to our newly created password. First, we shall restart the MySQL server by executing the command below in the terminal:
mysqld --init-file=/home/mysql-init &
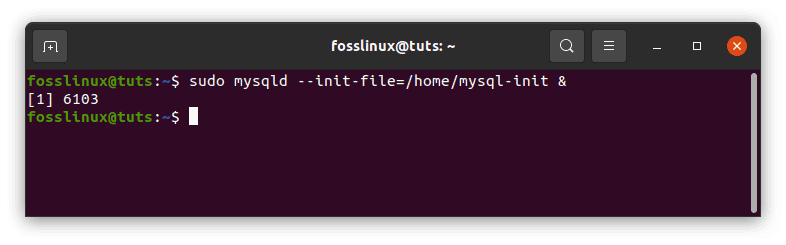
Restart MySQL server and apply the newly created password
This command will launch MySQL and apply the text-file password we created in the previous step. Depending on the method you use to start your server, you might be required to add other options such as –defaults-file before the init command.
How to reset MySQL root password in Windows
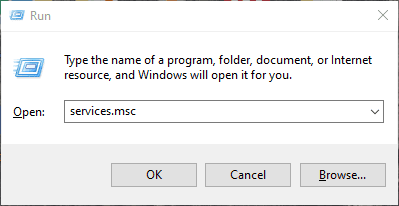
Step 1: Stopping the MySQL server.
- Press the Win + R keys on windows to launch the Run dialogue box the type:
services.msc
- Next click OK.
Run dialogue box
- Scroll down through the list of services and locate the MySQL service. Right-click on it and then select the Stop option as shown in the image below:
Step 2: Open your favorite text editor
For illustration purposes, we shall be using the default Notepad text editor. However, don’t freak out if you have a different text editor since the processes are similar.
- Now click on the Start menu and search for Notepad. Click on it to launch.
Alternatively, use this path to find Notepad: menu>Windows Accessories>Notepad.
Step 3: Creating a new Password text file using the password command
Copy and paste the syntax below into the text editor to avoid errors while manually typing:
ALTER USER 'root'@'localhost' IDENTIFIED BY 'NewPassword';
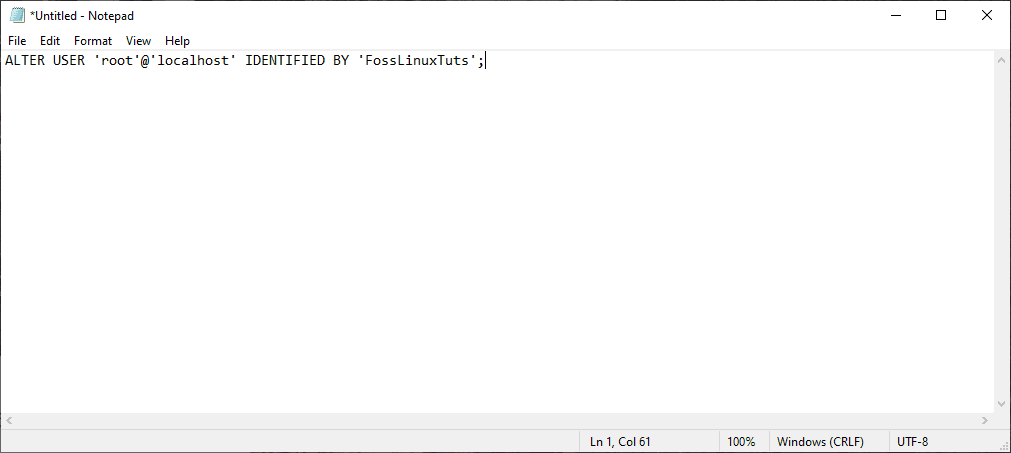
Create a new text file
Like we did for Linux, ensure to keep the semicolon and the single quote marks and replace the NewPassword phrase with the new password you intend to use on your MySQL.
Click on the File option, then Save As to save the text file password onto the root of your hard drive. Save the file as mysql-init.txt.
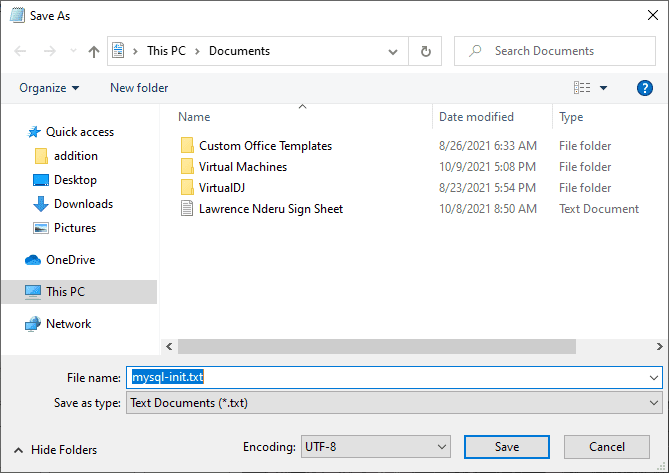
Save the file as mysql-init.txt.
Consequently, the localhost command can only make password changes on your system. Therefore, if you intend on changing the password on a different system like over the network, then substitute the localhost with the appropriate hostname for the different system.
Step 4: Launch CMD (Command Prompt)
- Click on the Ctrl + Shift + Esc keys on your keyboard
- Select file menu, then Run a new task
- Type cmd.exe and select the Run as administrator checkbox
- Click OK to launch a command prompt with administrator privileges.
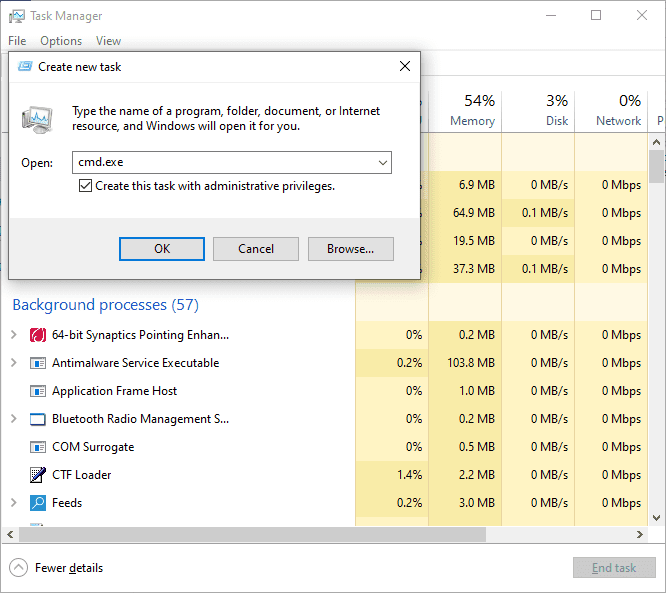
Create a new task and run cmd
Step 5: Restarting MySQL Server and Applying the new Config file
- Using the command prompt, navigate to the MySQL directory:
cd C:\Program Files\MySQL\MySQL Server 8.0\bin
- Next, input the following command:
mysqld --init-file=C:\\mysql-init.txt

Navigate to MySQL server directory, restart MySQL server, and apply the new config file
Note: You should take into consideration that there are two backslashes before the mysql-init prompt. Besides, if you used a different name to the one we used for illustration in step 2 above, then you should use that name immediately after the two backslashes without spacing.
Ensure you double-check to ascertain that the new password works flawlessly. After confirmation, proceed and do away with the mysql-init.txt file we stored in our C:\ directory.
Generic instructions for resetting MySQL root password
The preceding sections have provided in-depth instructions on resetting MySQL root passwords for Linux and Windows. Alternatively, when using any platform, you can use the MySQL client to reset the password. However, it is vital to note that this method is less secure compared to the preceding methods.
1. The first step is to stop the MySQL server. After stopping, restart it with the option below:
--skip-grant-tables
This option is deemed insecure since if the server starts with the –skip-grant-tables option, skip-networking is enabled by disabling remote connections.
2. Now connect to the MySQL server by running the command below:
mysql
Note: no password is required while restarting the MySQL server using MySQL client since the server started with the –skip-grant-tables.
3. Now, in the MySQL client, run the command below to tell the server to reload the grant tables. This will enable the account management statements that had been stopped earlier to work again:
mysql> FLUSH PRIVILEGES;
mysql> ALTER USER 'root'@'localhost' IDENTIFIED BY 'MyNewPass';
Note: To change the root password for a different system, ensure to alter the localhost with the system’s hostname.
That’s all you have successfully reset your MySQL root password.
How to set up, change, and recover a MySQL root password
Please note: there have been many attacks across the IT landscape, thus necessitating very strong passwords, which I highly recommend for your databases. You can try out an unsystematic password generator, then save the password via the aid of a password manager.
Let’s carry on.
Setting the password for the first time
Typically, during the installation of MySQL, you are required to set an initial password. However, if this was not done while installing and setting up MySQL, you will first have to set up a password. Here is how to do that:
- First, open up a terminal window.
- After launching the terminal, paste and execute this command:
mysqladmin -u root password Fosslinux
Where Fosslinux is the password that you will be using from now on, this means that every time you log into MySQL using the command mysql -u root -p, you will have to key in the password we have just configured.
mysql_secure_installation
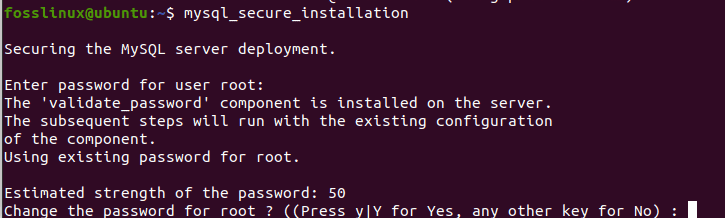
MySQL secure installation
After setting up the MySQL root password for the first time, it is time to learn how to change it.
Changing the MySQL root user password
- First, create a new file using the command below:
ALTER USER 'root'@'localhost' IDENTIFIED BY 'Fosslinux$11';
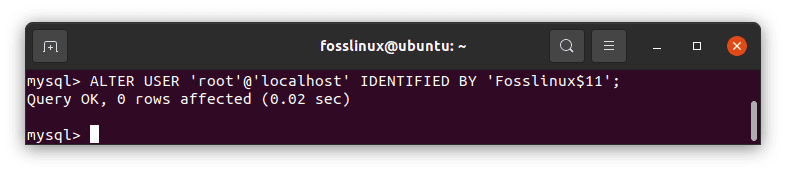
create new password
Where Fosslinux$11 is the new password that will be used. Remember to satisfy the current password policy by combining uppercase, lowercase, numeric and special characters.
Save the file as ~/mysql-pwd
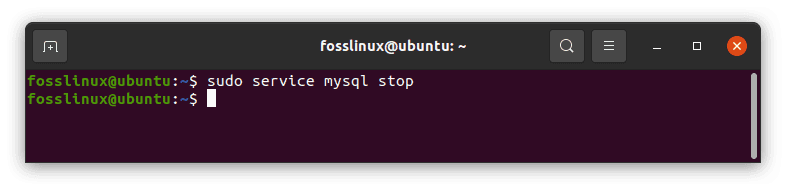
- Next, stop the MySQL daemon using the following command:
sudo systemctl stop mysql
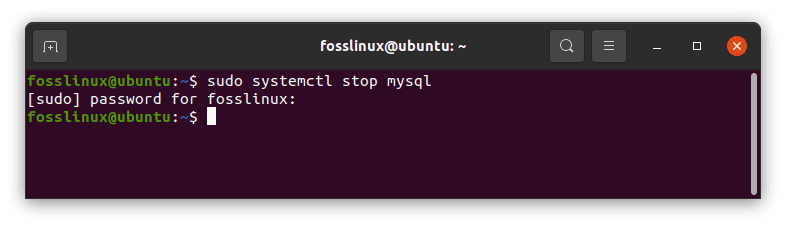
stop MySQL service
- Now that the daemon is stopped, issue and execute the following command on your terminal:
sudo mysqld -init-file=~/mysql-pwd
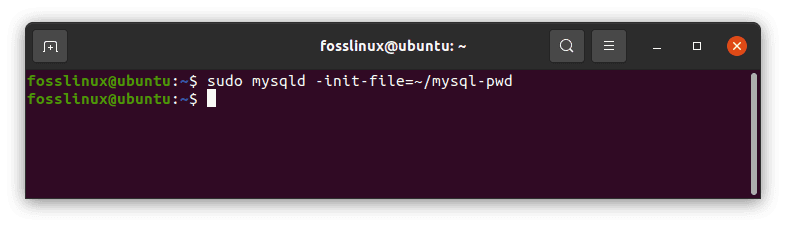
save MySQL password
- As soon as the command prompt completes executing the above command, proceed and restart the MySQL daemon using the following command:
sudo systemctl start mysql
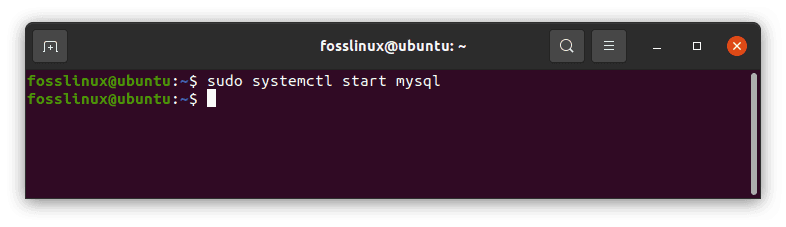
start MySQL service
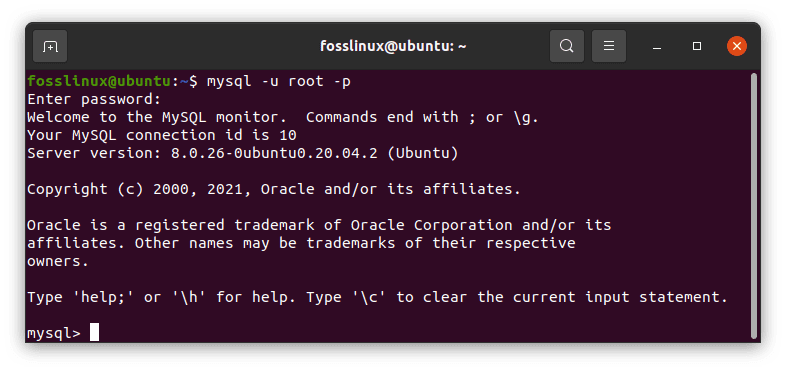
- At this point, you should be able to log into the MySQL command prompt using the newly set admin passcode by executing the command below:
mysql -u root -p
Now that we have fruitfully learned how to change the newly created MySQL root password, it is time to learn how to recover a forgotten or lost MySQL root password.
Conclusion
The article further breaks down the steps to set up, change and recover a MySQL root password and set up the root password for the first time. Ensure to stick to all the processes provided in this article to avoid security breaches by using strong password combinations. We hope the article will be helpful. If yes, give a thumbs up via the comments section.
Conclusion
If you had previously assigned a root password to MySQL but forgot it, you can reset it by assigning a new password to your MySQL, as shown in this article.
")


")