

- Введение
- Recover MySQL or MariaDB root Password
- Step 1: Log in as the MySQL User
- Step 2: Find the .pid File for the MySQL Service
- Step 3: Kill the mysqld Process
- Step 4: Create the Password File
- Step 5: Restart the MySQL Server and Apply the New Password
- Step 6: Cleaning Up
- Reset MySQL Root Password Using –init-file
- Reset MySQL Root Password Using –skip-grant-tables
- Шаг 3 – Изменение пароля root
- Меняем пароль root для MariaDB
- Меняем пароль root для MySQL
- Шаг 1 – Определяем версию и останавливаем сервер базы данных.
- Облачные серверы с Ubuntu
- Шаг 4 – Запускаем сервер базы данных в штатном режиме.
- How to Reset MySQL Root Password in Windows
- Step 1: Stop the MySQL server
- Step 2: Launch a Text Editor
- Step 3: Create a New Text File with the Password Command
- Step 4: Open a Command Prompt
- Step 5: Restart the MySQL Server with Your New Config File
- Step 6: Clean up
- Как сбросить root-пароль MySQL
- Шаг 2 – Перезапускаем сервер базы данных в режиме –skip-grant-tables
- Настройка режима –skip-grant-tables для MariaDB
- Настройка режима –skip-grant-tables для MySQL
Введение

В этой статье мы расскажем, как можно решить проблему, когда вы забыли или потеряли пароль root от MySQL или MariaDB. Отчаиваться не стоит, так как его можно сбросить, если иметь доступ к серверу и учетную запись пользователя операционной системы с привилегиями root. Данное руководство было протестировано в операционной системе Ubuntu 20.04 на двух популярных СУБД – MySQL и MariaDB.
Важно: В версии Ubuntu 20.04 дефолтная конфигурация MySQL или MariaDB позволяет получить доступ к базе данных (с правами администратора) без ввода пароля, если мы устанавливаем соединение с сервером БД под пользователем root . В этом случае нам нет необходимости сбрасывать пароль. Чтобы проверить была ли конфигурация аутентификации по умолчанию изменена, вводим команду sudo mysql. Если получаем ошибку access denied, то прибегаем к действиям, указанным с статье.
If you are setting up a MySQL or MariaDB database server for the first time, chances are you will be running mysql_secure_installation soon afterwards to implement basic security settings.
Suggested Read: Change MySQL or MariaDB Root Password
This article will come in handy. We will explain how to reset or recover forgottent MySQL or MariaDB root password in Linux.
Although we will use a MariaDB server in this article, the instructions should work for MySQL as well.
Recover MySQL or MariaDB root Password
To begin, stop the database service and check the service status, we should see the environment variable we set previously:
------------- SystemD -------------
# systemctl stop mariadb------------- SysVinit -------------# /etc/init.d/mysqld stop
Next, start the service with --skip-grant-tables:
------------- SystemD -------------
# systemctl set-environment MYSQLD_OPTS="--skip-grant-tables"
# systemctl start mariadb
# systemctl status mariadb------------- SysVinit -------------# mysqld_safe --skip-grant-tables &

This will allow you to connect to the database server as root without a password (you may need to switch to a different terminal to do so):
# mysql -u root
MariaDB [(none)]> USE mysql;MariaDB [(none)]> UPDATE user SET password=PASSWORD('YourNewPasswordHere') WHERE User='root' AND Host = 'localhost';MariaDB [(none)]> FLUSH PRIVILEGES;Finally, stop the service, unset the environment variable and start the service once again:
------------- SystemD -------------
# systemctl stop mariadb
# systemctl unset-environment MYSQLD_OPTS
# systemctl start mariadb------------- SysVinit -------------# /etc/init.d/mysql stop
# /etc/init.d/mysql start
This will cause the previous changes to take effect, allowing you to connect to the database server using the new password.
Summary
In this article we have discussed how to reset the MariaDB / MySQL root password. As always, feel free to use the comment form below to drop us a note if you have any questions or feedback. We look forward to hearing from you!
If you read this far, tweet to the author to show them you care. Tweet a thanks

If you’ve never set a root password on your MySQL database, you should be able to connect to it. However, this is not a good security practice as anyone can access your database.
If your database has a root password, but you lost track of it, this guide will help you reset a MySQL Root password on Linux and Windows.
- An existing MySQL database
- Access to a Linux or Windows server running MySQL
- Administrator privileges on the computer that hosts the MySQL database
- A text editor. Notepad is included by default in Window. Vim is installed by default in Linux.
- Access to a command-line interface (or terminal)
Step 1: Log in as the MySQL User
Step 2: Find the .pid File for the MySQL Service
The next step is to find the .pid file for the MySQL service.
Most systems store them in /var/lib/mysql/, /var/run/mysqld/, or /usr/local/mysql/data/ path. The filename usually starts with mysqld (or your system’s hostname) and ends with the .pid extension.
Step 3: Kill the mysqld Process
kill `cat /mysql-data-directory/host_name.pid`Replace mysql-data-directory/host_name.pid with the filename you found in the previous step. Ensure to specify the whole path to the file. Also, make sure to use the back-tick key (usually above the tab key) and not a single-quote mark in the beginning of the command.
Step 4: Create the Password File
1. Open your favorite text editor. In this example, we use vim:
sudo vimALTER USER 'root'@'localhost' IDENTIFIED BY 'NewPassword';
Bear in mind to include the single-quote marks and the semicolon. Replace NewPassword with the password you want to use. Finally, make sure to use a strong secure password, like these examples.
The command will work for the machine you’re currently using. If you’re connecting to a different system, replace localhost with the appropriate hostname.
3. Save the file to home/me/mysql-init.
Step 5: Restart the MySQL Server and Apply the New Password
mysqld --init-file=/home/me/mysql-init &This launches MySQL, and apply the text-file password change. Depending on how you start your server, you may need to add other options (such as --defaults-file before the init command.)
Step 6: Cleaning Up
Lastly, log into your MySQL server using the root account, and verify the new password works. Then, delete the file you created in Step 4.
There might arise a situation where you need to reset the root password for your MySQL database. It can be because you forgot your password or you need to change the password for security reasons.
Step 1: Stop the MySQL server
- Begin by checking if you’re logged in as an administrator.
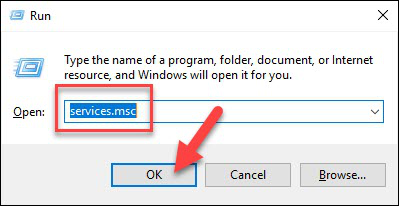
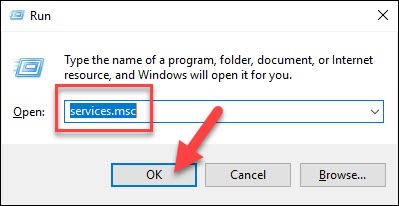
- Press Win+R (hold the Windows/Super key, and press “r”.) Once the “Run” box appears type:
services.msc
- Click OK.
- Scroll down the list of services to find the MySQL service. Right-click that entry then left-clicks Stop.
Step 2: Launch a Text Editor
- Click on the menu and search for Notepad.
- Alternatively, you can use the path: Menu > Windows Accessories > Notepad.
Step 3: Create a New Text File with the Password Command
- Enter the following line into the text editor:
ALTER USER 'root'@'localhost' IDENTIFIED BY 'NewPassword';
- Make sure you keep the quote marks and semicolon. Replace NewPassword with the password of your choice.

- Use the File > Save As menu to save the file to the root of your hard drive (C:\ ). Choose a filename that makes sense, such as mysql-init.txt.
Consequently, the localhost command will make the password change on your local system. If you’re trying to change the password on a system over the network, substitute the hostname for localhost.
Step 4: Open a Command Prompt
- Press Ctrl+Shift+Esc.
- Then, click on the File menu > Run new task.
- Type cmd.exe, and check the box to run as administrator.
- Click OK.
Step 5: Restart the MySQL Server with Your New Config File
- Navigate to the MySQL directory using the command prompt:
cd "C:\Program Files\MySQL\MySQL Server 8.0\bin"
Accordingly, the command line will show that you’re working in this folder.
- Enter the following:
mysqld --init-file=C:\\mysql-init.txt
Note that there are two slashes after the C: prompt.
Also, if you choose a different name in Step 2, use the same name after the double slash.
Step 6: Clean up
Now, you can log into your MySQL server as root using the new password.
- Double-check to make sure it works. If you have unique configuration options (such as launching MySQL with a -defaults-file option), go ahead and do so.
Once MySQL launches, and you’ve confirmed the password change, delete the C:\myswl-init.txt file.
At this stage, you have successfully reset the root password for your MySQL database.
Если вы забыли пароль root для базы данных MySQL или хотите его поменять в целях безопасности, нужно выполнить сброс пароля. В статье расскажем, как это сделать с помощью командной строки Windows.
1.Остановите сервер MySQL
- Проверьте, вошли ли вы в систему как администратор.
- Нажмите Win + R. Когда откроется окно «Выполнить», введите:
- Нажмите ОК.
- В списке служб найдите MySQL. Кликните правой кнопкой мыши по ней, после чего левой кликните Stop.

2. Измените пароль в текстовом редакторе
- В меню найдите «Блокнот», либо используйте путь: Меню > Стандартные Windows > Блокнот.
- Создайте новый текстовый документ с помощью команды пароля
- В текстовом редакторе введите строку:
- Проверьте, на месте ли кавычки и точка с запятой. Замените NewPassword своим новым паролем. «Файл» > «Сохранить как», чтобы сохранить файл в корень жесткого диска (C:\). Придумайте осмысленное имя файлу.
Команда localhost изменит пароль в вашей локальной системе. Если вы пытаетесь изменить пароль по сети, замените текущее имя хоста на localhost.
3. Запустите cmd
- Откройте командную строку и нажмите Ctrl+Shift+Esc.
- В меню выберите «Файл» > «Запустить новую задачу».
- Введите cmd.exe и установите флажок для запуска от имени администратора.
- Нажмите ОК.
Бесплатный тестовый доступ к облаку на 30 днейПолучить
4. Перезапустите сервер MySQL с обновлённым файлом конфигурации.
Чтобы перейти в каталог MySQL используйте командную строку:
cd «C:\Program Files\MySQL\MySQL Server 8.0\bin»
Вместо ИМЯ_ФАЙЛА вы вводите своё название, которое использовали в пункте 2.
5. Теперь можете зайти на свой сервер MySQL как root, введя новый пароль.
- Повторите вход с новым паролем, чтобы убедиться, что всё работает. Если у вас есть уникальные параметры конфигурации (например, запуск MySQL с параметром -defaults-file ), делайте всё, что нужно.
- После запуска MySQL и подтверждения смены пароля удалите файл C:\ИМЯ_ФАЙЛА.txt .
Вот и всё, вы благополучно сбросили пароль root для базы данных MySQL.
Luckily there is an easy to achieve and this tutorial will guide you through the process of recovering or resetting root password in MySQL 8.0 version.
As per MySQL documentation there are two ways to reset the root MySQL password. We will review both.
Reset MySQL Root Password Using –init-file
One of the ways to reset the root password is to create a local file and then start the MySQL service using --init-file option as shown.
# vim /home/user/init-file.txt
ALTER USER 'root'@'localhost' IDENTIFIED BY 'new_password';
In the above change “new_password” with the password that you wish to use.

# systemctl stop mysqld.service # for distros using systemd
# /etc/init.d/mysqld stop # for distros using init
# mysqld --user=mysql --init-file=/home/user/init-file.txt --console

Make sure to stop the server and start it normally after that.
# systemctl stop mysqld.service # for distros using systemd
# systemctl restart mysqld.service # for distros using systemd
# /etc/init.d/mysqld stop # for distros using init
# /etc/init.d/mysqld restart # for distros using init
You should now be able to connect to the MySQL server as root using the new password.
# mysql -u root -p
Reset MySQL Root Password Using –skip-grant-tables
If the server is started --skip-grant-tables, the option for --skip-networking is automatically activated so remote connections will not be available.
First make sure that the MySQL service is stopped.
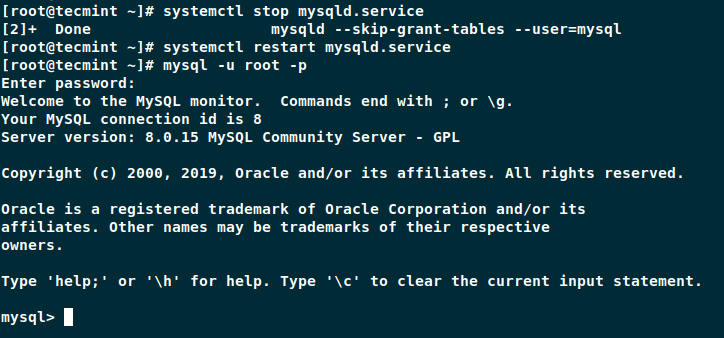
# systemctl stop mysqld.service # for distros using systemd
# /etc/init.d/mysqld stop # for distros using init
# mysqld --skip-grant-tables --user=mysql &
Then, you can connect to the mysql server by simply running.
# mysql
Since account-management is disabled when the service is started with --skip-grant-tables option, we will have to reload the grants. That way we will be able to change the password later:
# FLUSH PRIVILEGES;
# ALTER USER 'root'@'localhost' IDENTIFIED BY 'new_passowrd';

Now stop the MySQL server and start it normally.
# systemctl stop mysqld.service # for distros using systemd
# systemctl restart mysqld.service # for distros using systemd
# /etc/init.d/mysqld stop # for distros using init
# /etc/init.d/mysqld restart # for distros using init
You should be able to connect with your new password.
# mysql -u root -p
Conclusion
In this article you learned how to reset lost root password for the MySQL 8.0 server. I hope the process was easy.
Шаг 3 – Изменение пароля root
Поскольку СУБД запущена в режиме –skip-grant-tables, мы имеем возможность получить доступ к серверу баз данных без пароля, но не можем выполнять запросы на изменением данных. Чтобы установить пароль root , нам необходимо перезагрузить таблицы предоставления привилегий, выполнив инструкцию:
FLUSH PRIVILEGES;
Теперь сброс пароля root в MySQL или MariaDB возможен .
Меняем пароль root для MariaDB
ALTER USER 'root'@'localhost' IDENTIFIED BY 'new_password';
В строке ‘new_password’ указываем свой пароль.
Output
Query OK, 0 rows affected (0.001 sec)
Далее установим механизм аутентификации по умолчанию:
UPDATE mysql.user SET authentication_string = '' WHERE user = 'root';
UPDATE mysql.user SET plugin = '' WHERE user = 'root';
Пароль изменен. Выходим из консоли MariaDB и смотрим Шаг 4 для перезапуска сервера базы данных в штатном режиме.
Меняем пароль root для MySQL
Для MySQL выполняем следующий запрос, заменив new_password на свой пароль. MySQL позволяет использовать настраиваемые механизмы аутентификации, поэтому добавляем инструкцию, указывающую MySQL использовать механизм аутентификации по умолчанию:
ALTER USER 'root'@'localhost' IDENTIFIED WITH caching_sha2_password BY 'new_password';
Output
Query OK, 0 rows affected (0.01 sec)
Выходим из консоли MySQL и запускаем базу данных в нормальном режиме.
Шаг 1 – Определяем версию и останавливаем сервер базы данных.
Необходимы различные действия для сброса root пароля в зависимости от того, какая СУБД у нас установлена – MySQL или MariaDB. Для того, чтобы определить, какой сервер базы данных установлен в системе вводим:
mysql --version
Если используется MariaDB, то в выводе получим следующее: (разумеется, версия БД может меняться)
MariaDB output
mysql Ver 15.1 Distrib 10.3.25-MariaDB, for debian-linux-gnu (x86_64) using readline 5.2
MySQL output
mysql Ver 8.0.22-0ubuntu0.20.04.3 for Linux on x86_64 ((Ubuntu))
Чтобы произвести сброс root-пароля в MySQL или MariaDB, нам необходимо остановить сервер базы данных.
sudo systemctl stop mariadb
sudo systemctl stop mysql
После остановки базы данных производим ее перезапуск в безопасном режиме для сброса пароля root.
Облачные серверы с Ubuntu
Заказывайте Облачный сервер с чистой ОС или стеком LAMP/LEMP. Почасовая оплата, первый платёж — 100 рублей.

Если вы забыли или потеряли пароль от сервера баз данных, его можно сбросить. Для этого вам понадобится root-доступ к серверу по SSH. Инструкция подойдёт для следующих версий ПО:
- MySQL 8.0 и более ранние версии;
- Ubuntu 16.04, 18.04, 20.04.
В статье мы расскажем, как в MySQL сбросить пароль root.
В более поздних дистрибутивах к MySQL можно подключиться без ввода пароля. Такую возможность даёт плагин auth_socket. Доступ без пароля зависит от того, какой пользователь ОС подключается к MySQL. По умолчанию доступ имеет только root-пользователь.
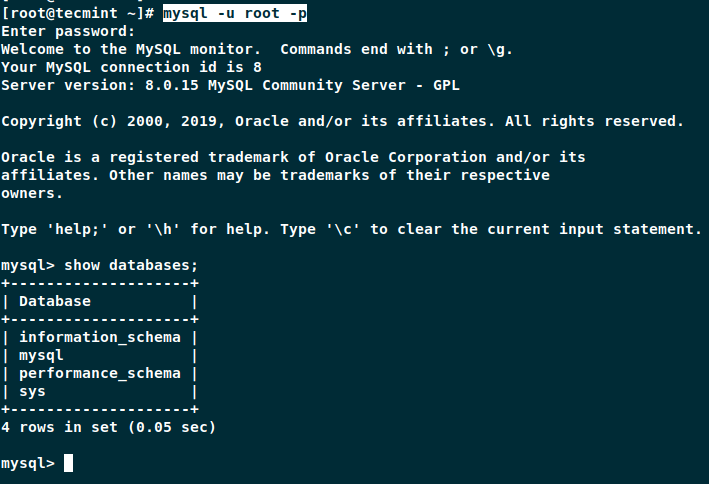
Чтобы проверить, какой у вас доступ, подключитесь к серверу и выполните команду:
Если настроен доступ без пароля, на экране вы увидите примерно следующее:
Если на MySQL настроен доступ по паролю, вы столкнётесь с ошибкой:
Доступ для пользователя root без использования пароля запрещён
Если доступ без пароля не настроен, а пароль утерян, воспользуйтесь нашей инструкцией.
Шаг 4 – Запускаем сервер базы данных в штатном режиме.
Чтобы перезапустить сервер базы данных в штатном режиме, выполним следующие действия:
Удаляем переменную окружения MYSQLD_OPTS:
sudo systemctl unset-environment MYSQLD_OPTS
и перезапускаем сервер MariaDB:
sudo systemctl restart mariadb
Удаляем все изменения конфигурации демона systemd для MySQL:
sudo systemctl revert mysql
Вывод должен быть примерно таким:
Output
Removed /etc/systemd/system/mysql.service.d/override.conf.
emoved /etc/systemd/system/mysql.service.d.
Затем перезагружаем демон systemd:
sudo systemctl daemon-reload
и сервер MySQL:
sudo systemctl restart mysql
После этого база данных должна перейти в нормальное состояние. Пробуем подключится к серверу базы данных пользователем root с новым паролем:
mysql -u root -p
Успех! Не забывайте пароли=)
How to Reset MySQL Root Password in Windows
Step 1: Stop the MySQL server
2. Press Win+R (hold the Windows/Super key, and press “r”.) Once the “Run” box appears type:
services.msc3. Click OK.
4. Scroll down the list of services to find the MySQL service. Right-click that entry, then left-click Stop.
Step 2: Launch a Text Editor
Click on the menu and search for Notepad.
Alternatively, you can use the path: menu > Windows Accessories > Notepad.
Step 3: Create a New Text File with the Password Command
ALTER USER 'root'@'localhost' IDENTIFIED BY 'NewPassword';Make sure you keep the quote marks and semicolon. Replace NewPassword with the password of your choice.

2. Use the File > Save As menu to save the file to the root of your hard drive (C: ). Choose a filename, such as mysql-init.txt.
Consequently, the localhost command makes the password change on your local system. If you’re changing the password on a system over the network, substitute the hostname for localhost.
Step 4: Open a Command Prompt
1. Press Ctrl+Shift+Esc.
2. Then, click on the File menu > Run new task.
4. Click OK.
Step 5: Restart the MySQL Server with Your New Config File
1. Navigate to the MySQL directory using the command prompt:
cd "C:\Program Files\MySQL\MySQL Server 8.0\bin"mysqld --init-file=C:\\mysql-init.txtNote that there are two slashes after the C: prompt.
Also, if you chose a different filename in Step 2, use that name after the double slash.
Step 6: Clean up
Now, you can log into your MySQL server as root using the new password.
Double-check to make sure it works. If you have unique configuration options (such as launching MySQL with a --defaults-file option), go ahead and do so.
Once MySQL launches, and you’ve confirmed the password change, delete the C:\mysql-init.txt file.
After reading this guide, you should be ready to reset the root password on MySQL in Linux and Windows. Granted, it is not too challenging, yet it is a secure way to change a sensitive password.
Как сбросить root-пароль MySQL
Чтобы выполнить сброс пароля MySQL, подключитесь к вашему серверу по SSH и следуйте инструкции:
Откройте файл параметров MySQL командой:
Добавьте в конец файла три параметра:
[mysqld]
skip-grant-tables
skip-networking
MySQL reset root password
- skip-grant-tables — параметр, который пропускает проверку прав. Это позволит подключиться к MySQL без пароля любому пользователю.
- skip-networking — параметр, который запретит удалённые подключения к серверу БД на время сброса пароля.
Чтобы сохранить изменения, нажмите CTRL+S. Затем закройте редактор сочетанием клавиш CTRL+X.
Чтобы запустить MySQL с нужными параметрами, перезапустите сервер БД командой:
systemctl restart mysql.serviceПодключитесь к серверу баз данных при помощи команды:
Поменяйте пароль при помощи команды:
ALTER USER 'root'@'localhost' IDENTIFIED BY 'password';Вместо password введите свой новый пароль.
Если при выполнении команды возникнет ошибка неправильного синтаксиса, попробуйте другую команду:
SET PASSWORD FOR 'root'@'localhost' = PASSWORD('password');Если возникнет ошибка «ERROR 1290 (HY000): The MySQL server is running with the —skip-grant-tables option so it cannot execute this statement», выполните команду из 6 шага.
Откройте конфигурационный файл:
Удалите из файла текст, который добавили во втором шаге:
[mysqld]
skip-grant-tables
skip-networking
Если на 2 шаге вы добавили только параметры skip-grant-tables и skip-networking, удалите только их.
Обязательно удалите опцию skip-grant-tables из конфигурационного файла после смены пароля. Если не удалить параметр, после перезапуска сервера баз данных подключаться к MySQL можно будет без пароля от имени любого пользователя.
Чтобы сохранить изменения, нажмите CTRL+S. Затем закройте редактор сочетанием клавиш CTRL+X.
Подключитесь к серверу баз данных:
mysql -uroot -p'password'Вместо password напишите ваш новый пароль.
Готово, вы сбросили пароль от root-пользователя MySQL.
Шаг 2 – Перезапускаем сервер базы данных в режиме –skip-grant-tables
Запуск MySQL и MariaDB в режиме –skip-grant-tables позволяет подключиться к базе данных с правами root без пароля. Поскольку это уязвимый режим работы СУБД, рекомендуется запуск сервера БД в однопользовательском режиме .
Настройка режима –skip-grant-tables для MariaDB
Зададим переменную окружения MYSQLD_OPTS, используемую в MariaDB при запуске:
sudo systemctl set-environment MYSQLD_OPTS="--skip-grant-tables --skip-networking"
Запустим сервер БД:
sudo systemctl start mariadb
Корректность запуска сервера смотрим командой:
sudo systemctl status mariadb
Теперь подключаемся к базе данных пользователем root без пароля:
sudo mysql -u root
Подключившись к консоли MariaDB, меняем пароль root, как показано в Шаге 3 далее.
Настройка режима –skip-grant-tables для MySQL
Чтобы запустить сервер MySQL в этом режиме, изменим конфигурацию systemd для MySQL, чтобы при запуске сервер запустился с дополнительными параметрами.
sudo systemctl edit mysql
После выполнения команды будет открыт новый файл в nano-редакторе, где мы будем внесем необходимые параметры запуска сервера MySQL. Изначально файл будет пустым. Добавим следующие строки:
[Service]
ExecStart=
ExecStart=/usr/sbin/mysqld --skip-grant-tables --skip-networking
Нажимаем CTRL-X, чтобы выйти из файла, затем – Y, чтобы сохранить внесенные изменения. Перезагружаем systemd, чтобы перечитать изменения:
sudo systemctl daemon-reload
Запускаем сервер MySQL:
sudo systemctl start mysql
и подключаемся пользователем root:
sudo mysql -u root
Далее переходим к Шагу 3.
")


")