
Read this guide carefully and make the final decision to installing Magisk and rooting your Google Emulator Android SDK built for x86 64 generic x86 64.

Read this guide carefully and make the final decision to installing Magisk and rooting your Emulator Android SDK built for x86 64 generic x86 64.
In Google Emulator Android SDK built for x86 64 generic x86 64, the root is the process of allowing privileged control to the Android system.
In this article, we tell you how to install Magisk on Google Emulator Android SDK built for x86 64 generic x86 64, what exactly it means, and what steps you need to take to do it.
TWRP recovery opens the doors to gain custom rom access on your Google Emulator Android SDK built for x86 generic x86 and more.

In this article, we tell you how to install TWRP custom recovery in your Google Emulator Android SDK built for x86 generic x86, what exactly it means, and what steps you need to take to do it.
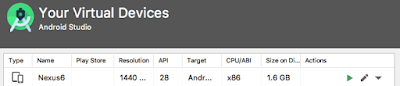
1. Create a new AVD. (named here)
In my case, «-qemu -enable-kvm» didn’t work on MacOS, so I skipped those args.
3. If the device is booted, restart adbd as root and remount system.
$ git clone https://github.com/0xFireball/root_avd.git
$ cd root_avd
5. Pick the corresponding architecture and save it as variable $ARCH.
Then push su, update permissions, and set SELinux peprmissive.
$ adb shell setenforce 0
6. Install SuperSU’s su to system and run as daemon.
shell su —install
shell su —daemon&
7. Open SuperSU app on the device and update su binary. Use normal installation.

8. You can ignore the message «Installation will fail».

Android and iOS are among the most widely used operating systems worldwide, as it is the default operating system on most smartphone and tablet models.
These two Unix-like systems are radically different in terms of performance, although they have some basic similarities.
- Uninstall Magisk Manager in your Google Emulator Android SDK built for x86 64 generic x86 64
- Steps to root Google Emulator Android SDK built for x86 generic x86 with PC
- One-Click Root
- Dr Fone
- Install TWRP custom recovery on Google Emulator Android SDK built for x86 generic x86.
- The function of TWRP Custom recovery
- WIPE
- BACKUP
- RESTORE
- MOUNT
- SETTINGS
- ADVANCED
- REBOOT
- Best Apps For Rooted Phone
- Greenify
- Flashify
- System App Remover
- MacroDroid – Automation
- Prerequisites
- Benefits of rooting Google Emulator Android SDK built for x86 generic x86
- What is Magisk?
- Leave a Reply
- KingRoot
- Kingo Root
- IRoot
- Установка Android 6
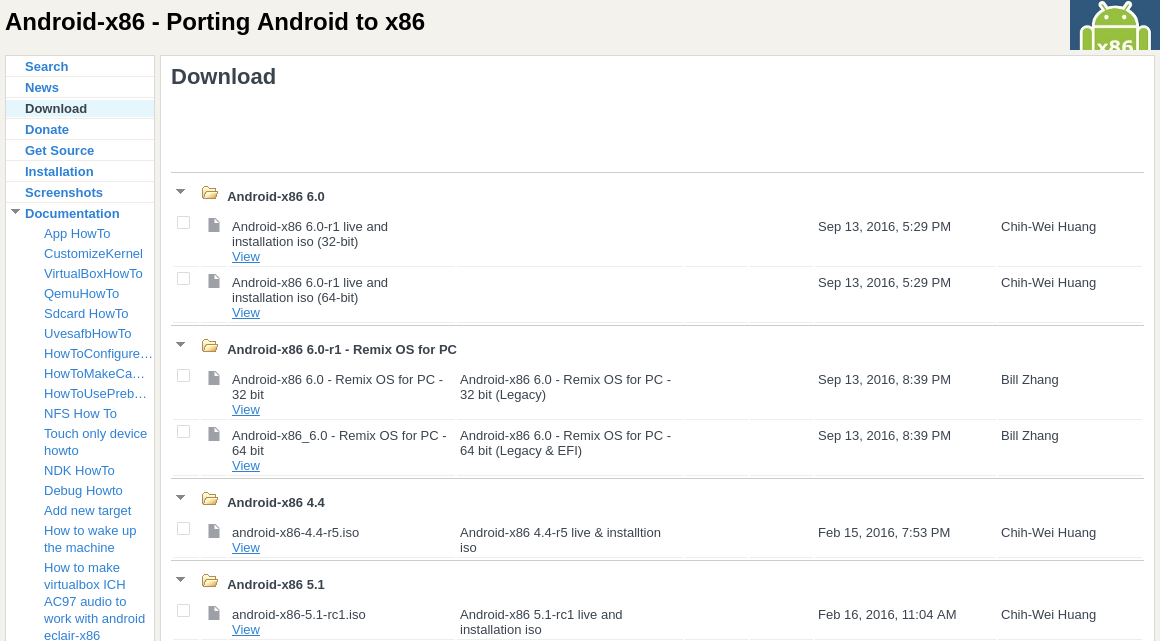
- Шаг 2. Загрузка установщика
- Шаг 3. Выбор диска
- Шаг 4. Таблица разделов
- Шаг 5. Создание раздела
- Шаг 6. Выбор раздела
- Шаг 7. Файловая система
- Шаг 8. Форматирование
- Шаг 9. Загрузчик
- Шаг 10. EFI Загрузчик
- Шаг 11. Режим доступа
- Шаг 12. Завершение установки
- Шаг 13. Перезагрузка
- Шаг 14. Загрузчик
- Шаг 15. Запуск системы
- Шаг 16. Готово
- Подготовка к установке
- Шаг 2. Запись на носитель
- Шаг 3. Настройка BIOS
- Benefits of Insalling Magisk On Google Emulator Android SDK built for x86 64 generic x86 64
- Features of TWRP recovery
- Magisk Manager – What & Why?
- Check if Google Emulator Android SDK built for x86 64 generic x86 64 is rooted?
- Instructions to root Google Emulator Android SDK built for x86 generic x86 without problems
- How to prepare Google Emulator Android SDK built for x86 64 generic x86 64 to make a successful Magisk Installation?
- Steps to Install Magisk using TWRP in Google Emulator Android SDK built for x86 64 generic x86 64
- What is TWRP Custom Recovery?
- What are the risks of rooting Google Emulator Android SDK built for x86 generic x86?
- Risks of Installing Magisk on Google Emulator Android SDK built for x86 64 generic x86 64?
- Is it worth rooting Google Emulator Android SDK built for x86 generic x86?
- Why high-priority For Magisk?
- Dolby Atmos
- Pixel 2 Experience
- Выводы
- Conclusion of Google Emulator Android SDK built for x86 64 generic x86 64 – Magisk Installation Guide
- Conclusion of Google Emulator Android SDK built for x86 generic x86 Rooting Guide
KEY TAKEAWAYS
Rooting should be tried at your own risk since Google do not welcome this modification of the operating system.
In this article, we tell you about the advantages and disadvantages of rooting the Google Emulator Android SDK built for x86 generic x86, what exactly it means and what steps you need to take to do it.
Table of Contents
Все знают, что операционная система Android разрабатывается компанией Google для смартфонов и планшетов. На данный момент, это самая популярная платформа для этих устройств. Официальная версия Android может работать только на поддерживаемых устройствах с архитектурой ARM. Но поскольку Android — это проект с открытым исходным кодом, силами сообщества был создан порт Android для x86 компьютеров, который будет работать почти на любом современном компьютере.
Официальная версия Android 6.0 от Google вышла достаточно давно, но только несколько дней назад разработчики выпустили стабильную версию порта Android x86 для версии 6.0 В этой статье мы будет рассмотрена установка Android x86 6.0 на компьютер или ноутбук. Возможно, платформа еще недостаточно стабильна, но ее уже можно использовать и вы в этом убедитесь.
Android x86 достаточно требователен к оборудованию. В идеале он должен работать на любом компьютере с процессором x86. Но на самом деле не все так просто. Разработчики протестировали систему на нескольких устройствах, например, ноутбуках от ASUS, EeePC и Dell полный список поддерживаемых устройств и их уровень поддержки вы можете найти на официальном сайте.
Что касается оборудования и характеристик, то рекомендуются такие параметры:
How to root Android x86 4.3 Jelly Bean on Computer
In previous post i talked about installation of Android 4.3 JellyBean on Computers. And Now, This is a How To Guide for How to Root Android x86 4.3 Jellybean installed on Any Laptop, Computer or Netbook. As we all know, Android 4.3 brought with it some extra security features which caused some small issues with root. These have been solved by the likes of Chainfire and other developers, meaning we have root once more. This is their work, I’ve just botched it together to work on the Android x86 4.3 system, which works slightly differently.
You will need:
On Android x86:
On a linux boot:


Changelog:
v2:
Included version for Android x86 boot, through the Alt+F1 terminal
Made it a bit simpler
Download Android-x86 4.3 Root Script.zip
Thanks To XDA Developers
Command Examples:
./rootAVD.sh
./rootAVD.sh ListAllAVDs
./rootAVD.sh InstallApps
./rootAVD.sh system-images/android-33/google_apis_playstore/x86_64/ramdisk.img
./rootAVD.sh system-images/android-33/google_apis_playstore/x86_64/ramdisk.img FAKEBOOTIMG
./rootAVD.sh system-images/android-33/google_apis_playstore/x86_64/ramdisk.img DEBUG PATCHFSTAB GetUSBHPmodZ
./rootAVD.sh system-images/android-33/google_apis_playstore/x86_64/ramdisk.img restore
./rootAVD.sh system-images/android-33/google_apis_playstore/x86_64/ramdisk.img InstallKernelModules
./rootAVD.sh system-images/android-33/google_apis_playstore/x86_64/ramdisk.img InstallPrebuiltKernelModules
./rootAVD.sh system-images/android-33/google_apis_playstore/x86_64/ramdisk.img InstallPrebuiltKernelModules GetUSBHPmodZ PATCHFSTAB DEBUG
./rootAVD.sh system-images/android-33/google_apis_playstore/x86_64/ramdisk.img AddRCscripts
Command Examples:
rootAVD.bat
rootAVD.bat ListAllAVDs
rootAVD.bat InstallApps
rootAVD.bat system-imagesandroid-33google_apis_playstore_64
amdisk.img
rootAVD.bat system-imagesandroid-33google_apis_playstore_64
amdisk.img FAKEBOOTIMG
rootAVD.bat system-imagesandroid-33google_apis_playstore_64
amdisk.img DEBUG PATCHFSTAB GetUSBHPmodZ
rootAVD.bat system-imagesandroid-33google_apis_playstore_64
amdisk.img restore
rootAVD.bat system-imagesandroid-33google_apis_playstore_64
amdisk.img InstallKernelModules
rootAVD.bat system-imagesandroid-33google_apis_playstore_64
amdisk.img InstallPrebuiltKernelModules
rootAVD.bat system-imagesandroid-33google_apis_playstore_64
amdisk.img InstallPrebuiltKernelModules GetUSBHPmodZ PATCHFSTAB DEBUG
Uninstall Magisk Manager in your Google Emulator Android SDK built for x86 64 generic x86 64
Here is the most straight way to uninstall Magisk on your Google Emulator Android SDK built for x86 64.
The Magisk is uninstalled without any other procedure. The application will automatically download the uninstall.zip uninstall the package, uninstall itself, and restart automatically.
If you cannot enter the system, you can manually flash uninstall.zip to uninstall the package in TWRP.
Steps to root Google Emulator Android SDK built for x86 generic x86 with PC
If none of the three previous applications has affected when rooting your Android smartphone or tablet,
you should move to a more aggressive method, connect the device to a Windows computer via USB.
One-Click Root
One-Click RootThis is the second option. You have to make rooting easy and fast. As its name implies,
with it, you can easily carry out the process with a single click, thus saving you many problems.
The best thing is that with it, you can unlock devices with Android 8.0 or lower
systems, being one of the most powerful in that regard.
However, it is only compatible with a shortlist of equipment such as Xiaomi, Samsung, Motorola, HTC,
SONY, and other very commercial brands, so if you have a model from a little-known manufacturer,
you may not be able to use it. If by chance you can do it, the steps are straightforward:
Download Software Here
Dr Fone
Dr.fone root process interface
Install TWRP custom recovery on Google Emulator Android SDK built for x86 generic x86.
Download Required Files Below
The function of TWRP Custom recovery
The TWRP is a “custom recovery” method to offer so many more functions than a stock recovery. The main feature of TWRP is to be totally “touch” (It also has a keyboard), and therefore the operations to be carried out are extremely easy and intuitive. Furthermore, it avoids stressing the few physical buttons on our terminal, helping to increase life expectancy.
Some of the functions are below:
Here we could flash (install) any ROM, MOD, or Kernel in your Google Emulator Android SDK built for x86.Note that it is possible to select a sequence of files to flash, so we can decide to flash in succession (ordered) ROM, Kernel, and MOD in one shot, which is a great convenience.
WIPE
Here we can perform the various wipes of the memory to prepare the Emulator Android SDK built for x86 generic x86 for a ROM flash or clean.
Here we will find:– Wipe Data, which allows you to delete all application data in your Google Emulator Android SDK built for x86 device– Wipe system, which allows you to delete the currently installed ROM on your Emulator Android SDK built for x86 generic x86 device.– Wipe Cache, which allows you to clear the device cache.– Wipe Dalvik cache, which allows you to clear the Dalvik virtual machine cache.– Wipe internal storage, deletes all internal memory (all files, photos, videos, etc.)
BACKUP
Typically also called Nandroid Backup, it is the section that an expert modder must know and use often. It allows us to make a TOTAL Backup of the ROM currently installed in your Google Emulator Android SDK built for x86 device (excluding the files in the internal memory).
We can backup:System, which contains the operating system– Data, which contains the application data– Cache, which contains the device cache– Boot, which contains the boot partition of the device– EFS, contains all the network settings files of the device, including the IMEI, so I recommend making a backup at least once. It happens that sometimes you can delete this partition losing all connectivity, even cellular.
RESTORE
To restore a backup, You can choose this function on your Emulator Android SDK built for x86 generic x86. It can only be used if we have previously made a backup present on the redmi device or external device.
It allows us to restore the ROM completely. When the device restarts, we will restart from the point where the ROM situation occurs at the backup time.
MOUNT
Here we can mount the partitions present in the Emulator Android SDK built for x86 device to be able to perform operations through the ADB sideload
SETTINGS
Here we can set different recovery settings.I advise you to set:– Zip signature verification, which adds a level of security when installing zip files on your Emulator Android SDK built for x86 generic x86.– Enable MD5 verification of backup files prevents you from flashing corrupt (and therefore not working) backups.– Timezone, usually wrong, then it will mark the wrong time.
Restore default must be used at each recovery update to avoid problems during the flash of the new version.
ADVANCED
Here we find a wide variety of additional functions that allow us to perform more complex operations, including:– Fix permission to be used in case we have several apps that have frequent crash problems– ADB sideload us to connect the device to our PC to perform operations on apps with which sideloading is possible. Typically it is used to replace the current system with a modified version.– File Manager allows us to access the files stored on the device
REBOOT
Allows us to restart the device in various ways:– System will restart the Emulator Android SDK built for x86 generic x86 device.– Power off, turn off the Emulator Android SDK built for x86 device.– Recovery, restart the Google Emulator Android SDK built for x86 device in recovery.– Bootloader, restart the device in the bootloader.
Best Apps For Rooted Phone
On the above section, I have mentioned about the various use of
rooted Google Emulator Android SDK built for x86 generic x86. Here listing the most popular and useful android apps that might
help you.
Greenify
It is no secret to anyone that, in many cases, the performance of mobile phones can be affected and
deteriorate day after day due to applications that generally run in the background without Android
customers being aware of it.
Flashify
If you are an Android client who is using to installing custom ROMs, this app is ideal for you,
which has a free and a paid version. About the free version, it has a limit of three flashes daily, and
because of that, if you need to do more, you will need to purchase its premium version.
In short, it refers to an app that facilitates flushing processes, and its most significant advantage is
that it has the option to schedule flashes without the requirement to restart your phone. Thus, it is
basing on ROMs, zips, mods, kernels, recovery images, and much more.
System App Remover
This System App Remover means that it is an excellent tool that simplifies the removal of
“bloatware,” which is the term by which this type of pre-installed program is identifying on
the systems.
MacroDroid – Automation
Once you have completed all the previous procedures that we have just taught you, you have to know that
you will have the possibility then to check all the details about it, in a fast and straightforward way.
It is Nothing more or less than using an application such as Root Checker.which is specially designed for
it and that once you have installed and executed on your terminal, it will tell you in just a second if
it is rooted successfully or not. Nothing more than that.
Download Root Checker
App
Prerequisites

Benefits of rooting Google Emulator Android SDK built for x86 generic x86
It is necessary to note that just obtaining the Root will not instantly resolve all your problems on your Google Emulator Android SDK built for x86 generic x86. Rooting will only provide you with the capability to do it. Here are all
the clear benefits of using a rooted Xiaomi Mi.
Remove Bloatware: With rooting, you can remove the Manufactures’ apps and Bloatware on your Google Emulator Android SDK built for x86 generic x86 which are unnecessary. Removing Bloatware helps you to save storage space
and also helps to improve device performance.
Check the guide for removing Bloatware on Google Emulator Android SDK built for x86 generic x86
Better backups: You can
individual backup apps, including your app data on your Xiaomi Mi 10i gauguin. Don’t Miss Your Data. With these backup apps, you can create the backup of your needed apps and the data.
Here are some of the backup apps:
We have a detailed article on How to Backup apps and their data using backup apps.
Read and find out more.
Reading further through the post will allow you to back up your whole operating system with only a touch
CUSTOM ROMs: From the name itself, you can guess what Custom ROMs exactly means.
Custom ROM is the modified version of another ROM. Developers mostly work with AOSP (Android Open Source
Project) code and come with a revised version.
In the case of your Google Emulator Android SDK built for x86 generic x86, the manufacturers of it develop the ROM with
many apps and utilities. They add their services, applications, and layers to have a different design,
and much more software overload, which makes the final set too heavy. To overcome this, the CUSTOM ROM
was developed to create a solution for your Google Emulator Android SDK built for x86 generic x86. As the
developers are more concerned about performance by removing unwanted apps or Bloatware and doing many
other modifications, they come out with cleaner ROMs than manufacturers.
Additional Applications and Features: You will be able to run applications that are not
available in the Play Store. Also, you will be able to modify not only the software but also the
hardware (through CPU overclocking and sub-cycling).
What is Magisk?
Magisk is a MOD released by topjohnwu in XDA. It mainly provides a common interface to allow developers to easily develop and maintain the functional modules of the Systemless architecture. Among them, the use of SafetyNet API for Android Pay makes it impossible to be rooted. The operating situation on the mobile phone of Pokemon also unexpectedly solved Pokemon GO’s use of SafetyNet API to prevent players from playing Pokémon on rooted mobile phones, which made Magisk a lot of attention.
Leave a Reply
Once you have made all the preparations, it is time to start rooting your Google Emulator Android SDK built for x86 generic x86 easily
and
quickly. Currently, there are dozens of applications that make this process an effortless task, but
before choosing one, you must take into account the version of your operating system.
Some of the methods that we present below are available for versions of Android 5.0 or
lower, while with others if you can root until version 8.0 of the OS. Android 9 and
higher currently cannot be rooted because no app can.
KingRoot
Root process of Google Emulator Android SDK built for x86 generic x86 with KingRoot
Download App Here
Kingo Root
Root Google Emulator Android SDK built for x86 generic x86 by Kingo Root
IRoot
Root Google Emulator Android SDK built for x86 generic x86 using iRoot
Установка Android 6

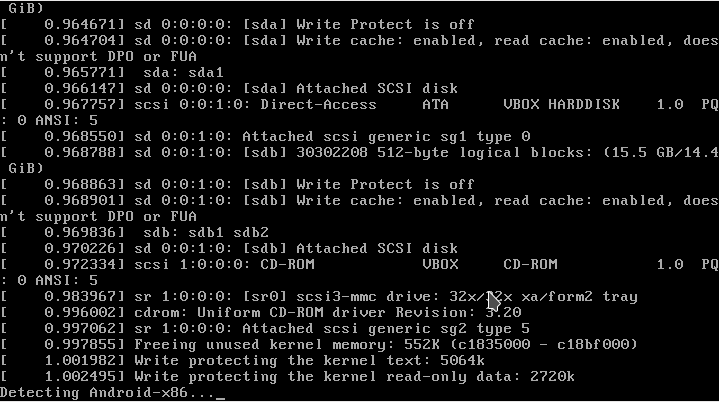
Шаг 2. Загрузка установщика
Установщик запуститься очень быстро:
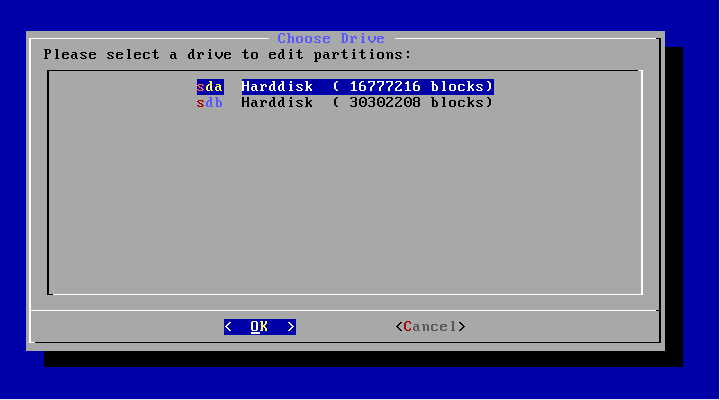
Шаг 3. Выбор диска
На первом шаге вам предстоит выбрать диск, на который будете выполнять установку:
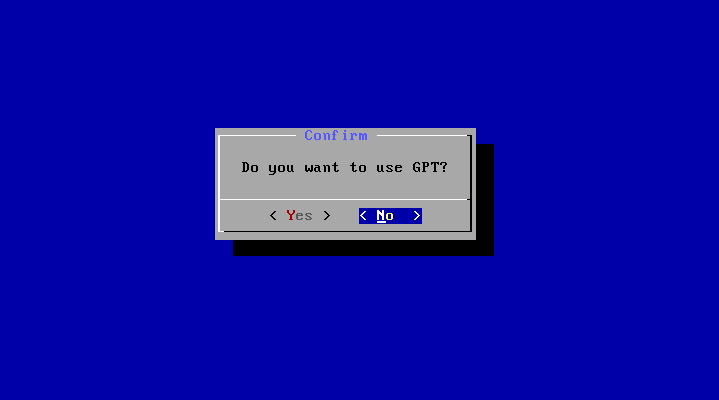
Шаг 4. Таблица разделов
Дальше, если этот диск еще не размечен необходимо выбрать таблицу разделов. Можно использовать GPT, но я не рекомендую это делать, поскольку большая вероятность того, что установка просто зависнет. Поэтому на этом шаге выбираем No. В таком случае будет использована MBR:
Шаг 5. Создание раздела
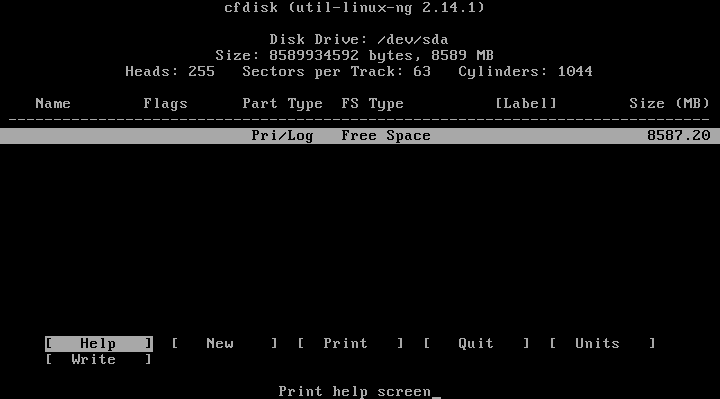
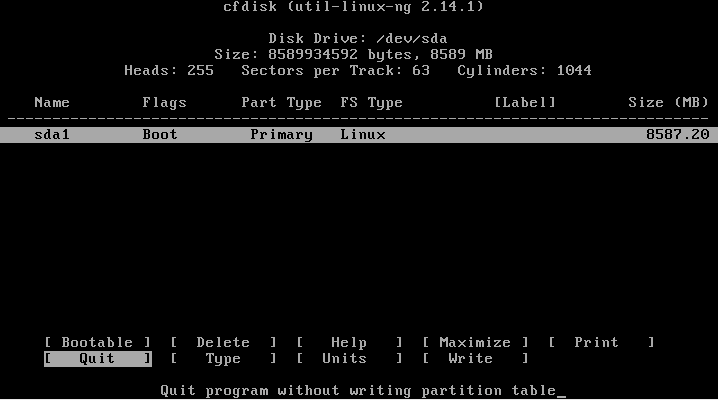
Установка Android x86 6.0 выполняется только на один раздел. И на этом шаге нам предстоит его создать. Для этого будет использоваться утилита cfdisk. Сначала нажмите New, чтобы создать новый раздел. Перемещаться по кнопкам можно стрелками влево/вправо, а нажимать с помощью Enter:
Выберите тип primary, первичный:

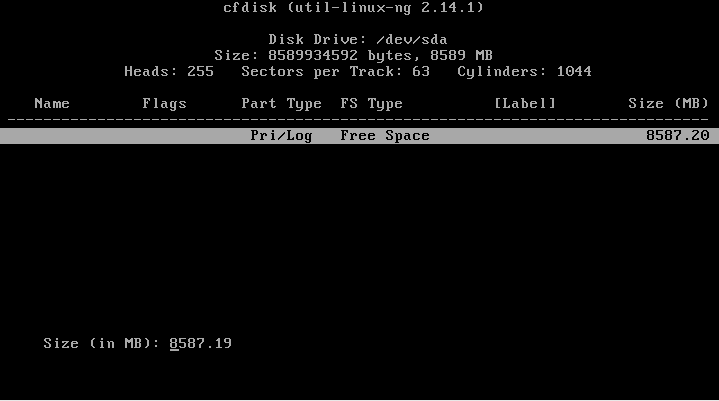
Дальше укажите размер, вернее, согласитесь с тем, что указала программа нажатием Enter:
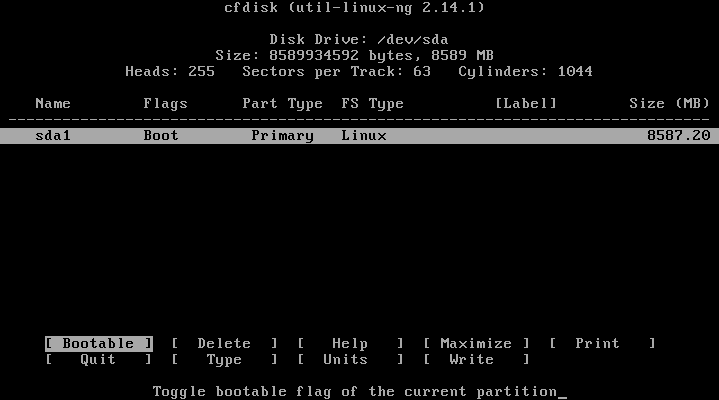
Найдите кнопку Bootable и нажмите Enter, чтобы сделать этот раздел загрузочным:
Найдите и нажмите кнопку Write, чтобы записать изменения на диск. Для подтверждения наберите yes:
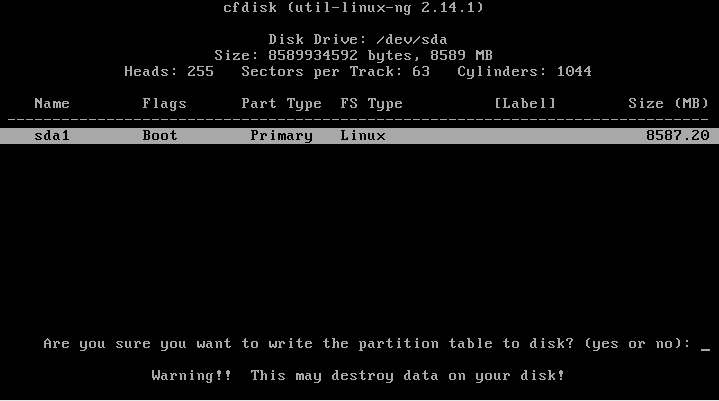
Осталось нажать кнопку quit для выхода из программы:
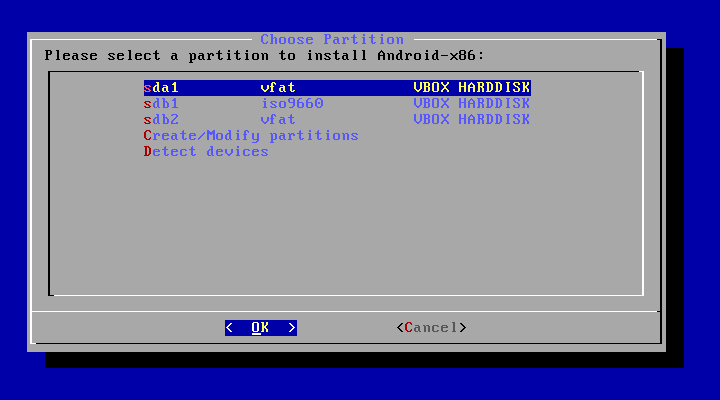
Шаг 6. Выбор раздела
После завершения разметки вам нужно выбрать только что созданный раздел:
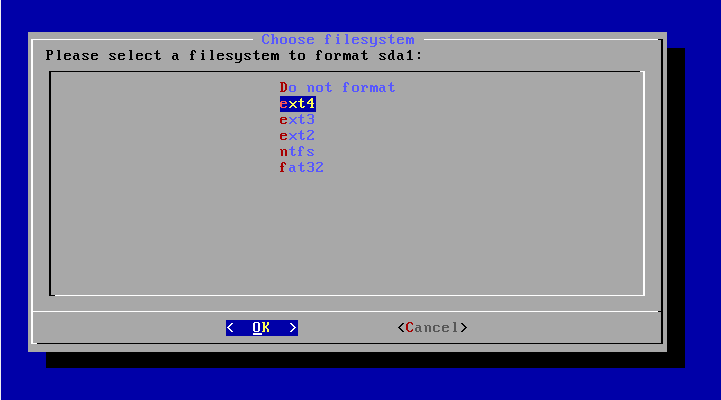
Шаг 7. Файловая система
Выберите файловую систему, например, ext4
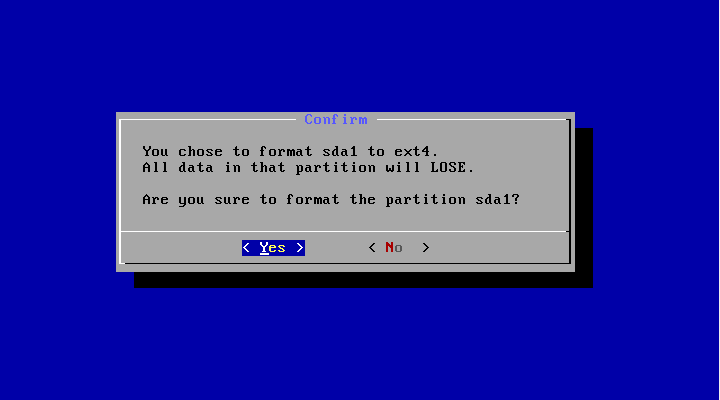
Шаг 8. Форматирование
Поскольку нам нужен чистый раздел, соглашаемся с тем, что он будет отформатирован:
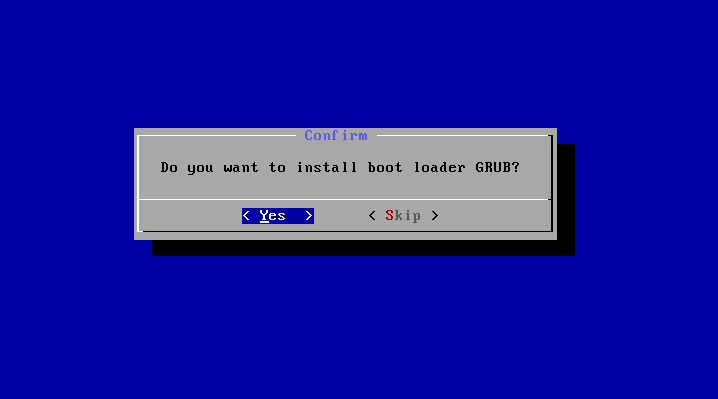
Шаг 9. Загрузчик
Загрузчик нам понадобится, поэтому выберите Yes:
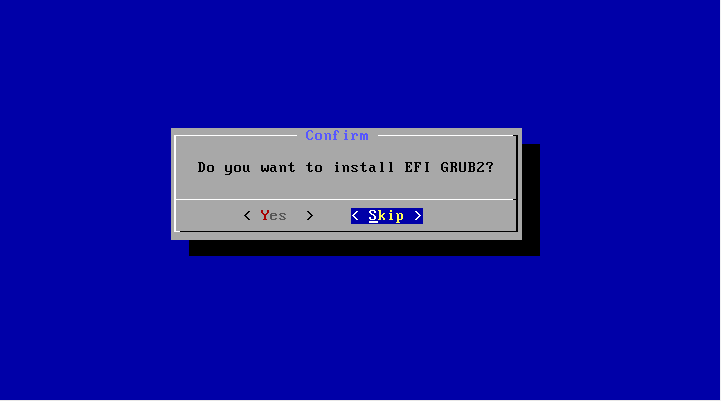
Шаг 10. EFI Загрузчик
А вот EFI загрузчик нам не нужен, учитывая, что мы использовали MBR. Выберите Skip:
Шаг 11. Режим доступа
В этом окне нужно выбрать нужно ли монтировать системный раздел /system в режиме чтения и записи. Это будет полезно для установки новых программ, поэтому выберите Yes:

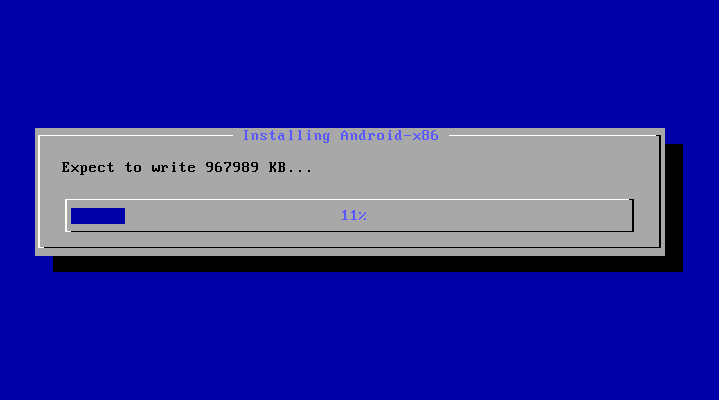
Шаг 12. Завершение установки
Дождитесь распаковки всех файлов:
Шаг 13. Перезагрузка

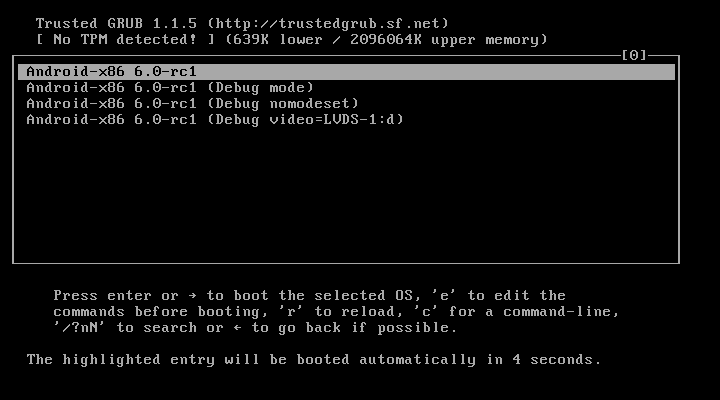
Шаг 14. Загрузчик
Выберите первый пункт загрузчика:
Шаг 15. Запуск системы
Дождитесь окончания загрузки системы.
Шаг 16. Готово
Вот и все, установка Android x86 на компьютер завершена. Теперь вы можете использовать Android прямо на своем компьютере. Вы можете устанавливать и запускать Android-приложения, играть игры:
Подготовка к установке
Занимает образ немного, всего 400 с лишним мегабайт, поэтому загрузиться быстро.
Шаг 2. Запись на носитель
Для установки Android нужно использовать либо флешку, либо диск с возможностью перезаписи. Но лучше все-таки флешку. Я не советую использовать различные утилиты для записи образа, сделайте это с помощью такой команды:
dd if=~/android-x86-6.0.iso of=/dev/sdc bs=5M
Здесь ~/android-x86-6.0.iso — это только что скачанный образ, а /dev/sdc — ваша флешка.
Шаг 3. Настройка BIOS
Тут все стандартно. Перезагрузите компьютер и во время заставки BIOS нажмите F2, F8, Shift+F2 или Del для входа в настройку BIOS, дальше перейдите на вкладку Boot и выберите в 1st Boot Device вашу флешку.
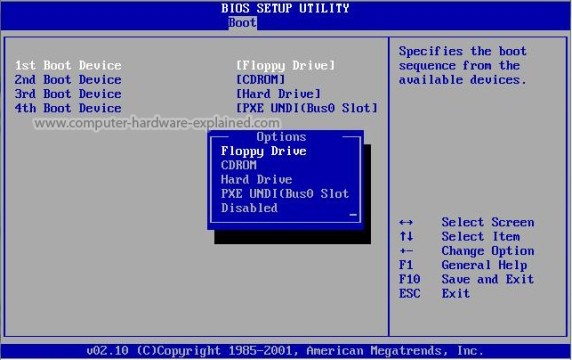
Осталось перейти на вкладку Exit и нажать Exit & Save Changes.
Benefits of Insalling Magisk On Google Emulator Android SDK built for x86 64 generic x86 64
It is necessary to note that just obtaining the Magisk Root will not instantly resolve all your problems on your Google Emulator Android SDK built for x86 64 generic x86 64. Magisk Rooting will only provide you with the capability to do it.
Here are all the clear benefits of using a Magisk rooted Google Emulator Android SDK built for x86 64 generic x86 64:
Systemless Root Permissions: Magisk provides an interface to change the contents of the system or vendor partition without modifying the system files on Google Emulator Android SDK built for x86 64 generic x86 64.
Magisk Manager: Magisk Manager app can help you manage root status and all Magisk modules. The developers can beautify the system such as “changing fonts” or modify software functions like “Advertisements” etc.
Magisk modules: You can install modules to your Google Emulator Android SDK built for x86 64 generic x86 64 by using this feature.
: With rooting, you can Remove the Manufactures apps and Bloatware on your Google Emulator Android SDK built for x86 64 generic x86 64 which are unnecessary . Removing Bloatware helps you to save storage space and also helps to improve device performance.
Additional Applications and Features: You will be able to run applications that are not available in the Play Store. Also, you will be able to modify not only the software but also the hardware (through CPU overclocking and sub-cycling).
Features of TWRP recovery
In TWRP recovery, the interface of it is so advanced for all kinds of people. All the options in are button featured, so very easy to handle instead of others.Some more features are listed below:
TweakDroid team or the author of this guide is not responsible for any failure during the process. If you wish to go forward, please do it your own risk. As a precaution, read this entire file at least once before you start!
Magisk Manager – What & Why?
Magisk Manager is an app that can help you manage root status and manage all Magisk modules (module management functions are still under development), just like Xposed modules.
However, magisk is flashing zip, so you can flash very easily. In magisk manager you can control all of the app rooting permission and installing modules. When your phone doesn’t work TWRP Recovery, then you can use Magisk zip file and magisk manager which provides the root access on your device.
In this Magisk manager app, you can grant or deny other app permissions for accessing root permission on that specific application in your Google Emulator Android SDK built for x86 64 generic x86 64.
Check if Google Emulator Android SDK built for x86 64 generic x86 64 is rooted?
Once you have completed all the previous procedures that we have just mentioned, you have to know that you will have the possibility then to check all the details about it, in a fast and straightforward way.
It is Nothing more or less than using an application such as Root Checker, which is specially designed for it and that once you have installed and executed on your android, it will tell you in just a second if it is rooted successfully or not. Nothing more than that.
Instructions to root Google Emulator Android SDK built for x86 generic x86 without problems
This brings us to the question: is it worth it?
How to prepare Google Emulator Android SDK built for x86 64 generic x86 64 to make a successful Magisk Installation?
The reality is that Magisk installation and rooting our Google Emulator Android SDK built for x86 64 generic x86 64 is currently one of the most natural things to do. Installation of magisk is very easy and smoothy. There are two methods for installing magisk on your Emulator Android SDK built for x86 64.
If you have TWRP Recovery you, can use it and flash the magisk.zip file. Download the latest version of the magisk and enjoy the all features of magisk manager.
Another way to install magisk is dependent on your Emulator Android SDK built for x86 64. If your Emulator Android SDK built for x86 64 is not installed TWRP, you can use the patching the stock boot image method and flash the modified boot on your Emulator Android SDK built for x86 64
However, there are some pre-processes that we must perform before starting rooting:
Steps to Install Magisk using TWRP in Google Emulator Android SDK built for x86 64 generic x86 64
Once you have made all the preparations, it is time to start installing Magisk on your Google Emulator Android SDK built for x86 64 generic x86 64 easily and quickly.
Now, Magisk.zip has been successfully installed on your Emulator Android SDK built for x86 64. Open Magisk manager and enjoy all the features.
What is TWRP Custom Recovery?
In addition to the clockwork mod developer solution, there are other modified recovery environments. One of the most functional solutions of this type is TeamWin Recovery Project (TWRP).
Now you can install TWRP recovery in your Google Emulator Android SDK built for x86 with this Guide.
What are the risks of rooting Google Emulator Android SDK built for x86 generic x86?

If rooting is so beautiful, why doesn’t everyone root their
Google Emulator Android SDK built for x86 generic x86?
That may be the question you are asking yourself right now.
The reality is that this decision also has its disadvantages and are usually as high as the
benefits:
Risks of Installing Magisk on Google Emulator Android SDK built for x86 64 generic x86 64?

If rooting is so beautiful, why doesn’t everyone root their Google Emulator Android SDK built for x86 64 generic x86 64 with Magisk? That may be the question you are asking yourself right now.
The reality is that this decision also has its disadvantages and are usually as high as the benefits:
Is it worth rooting Google Emulator Android SDK built for x86 generic x86?
The benefits of your Google Emulator Android SDK built for x86 generic x86 are an essential factor here because basically,
these will determine the quality jump that you will give after rooting.
Why high-priority For Magisk?
Magisk hide root from any apps you selected like pokemon Go, any financial apps.
In the above section, I have mentioned the Magisk modules. Here listing the most popular and useful Magisk Modules.
Dolby Atmos
This module will help you to enable Dolby Atmos sound mod on your Google Emulator. When you install this mod, the necessary changes will be made to the system files and the Dolby Atmos app will also be installed on your automatically.
Pixel 2 Experience
There are many Google apps available on the Play Store like Google Phone app, Google contacts, Google Camera, etc. However, non-Google / non-Pixel devices could not download them directly from Play Store. When you install this Magisk Module, it injects Google Framework on your device and allows you to download Google Apps directly from the google play store.
Know more about Install & uninstall magisk modules and add useful modules lets check it.
Выводы
Как вы убедились, установка android x86 на пк не так уж сильно отличается от других операционных систем. Если вам повезет и система будет полностью поддерживать ваше оборудование, то вы сможете очень просто получить полноценную систему Android на свой компьютер. Если у вас остались вопросы, пишите в комментариях!
На завершение видео с процессом установки Android от американского видео блогера:
https://youtube.com/watch?v=xX5aMWHAlPo%3Ffeature%3Doembed
Обнаружили ошибку в тексте? Сообщите мне об этом. Выделите текст с ошибкой и нажмите Ctrl+Enter.
Conclusion of Google Emulator Android SDK built for x86 64 generic x86 64 – Magisk Installation Guide
Finally, we have explained how to install Magisk root for your Google Emulator Android SDK built for x86 64 generic x86 64 with TWRP and without TWRP. We recommend you try with TWRP as it has a higher success rate. Also, note that we are not responsible for any damage caused during the rooting attempt
Yet not able to root with Magisk? Root Google Emulator Android SDK built for x86 64 generic x86 64 without PC
Conclusion of Google Emulator Android SDK built for x86 generic x86 Rooting Guide
Finally, we have explained how to root your Google Emulator Android SDK built for x86 generic x86 with pc and without PC. We recommend
you to try
with PC as it has a higher success rate. Also, note that we are not responsible for any damage
caused during the rooting attempt
")


")